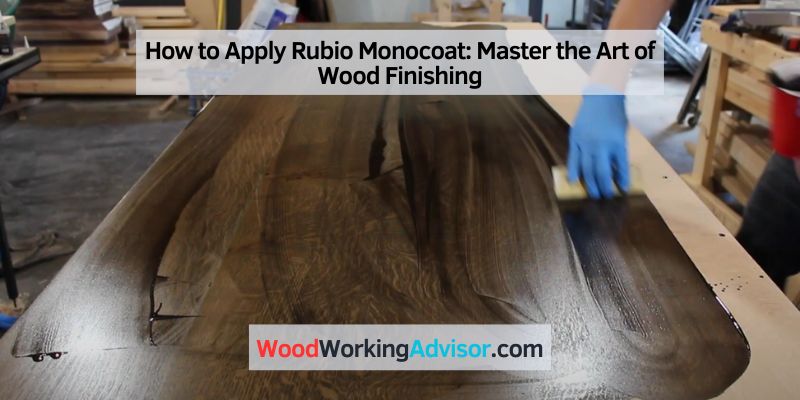
How to Apply Rubio Monocoat Oil Plus 2C: Step-by-Step Instructions
Rubio Monocoat Oil Plus 2C is a plant-based hardwax oil that forms a molecular bond with wood fibers in one coat — not a surface film that can peel or crack. To apply it: sand to exactly 120-grit (not higher, or the grain closes and the oil cannot penetrate), mix Part A and Part B at 3:1, apply liberally, and wipe all excess off within 10–15 minutes. This guide covers surface prep, mix ratios, application tools, drying times, and common mistakes.
Quick Answer
How to apply Rubio Monocoat: Sand to 120-grit maximum. Mix Part A (oil) and Part B (accelerator) at a 3:1 ratio. Apply liberally with a white Scotch-Brite pad or brush, working with the grain. Wipe all excess off within 10–15 minutes using a clean cloth. Allow 24 hours before light use, 7 days for full cure.

What Is Rubio Monocoat?
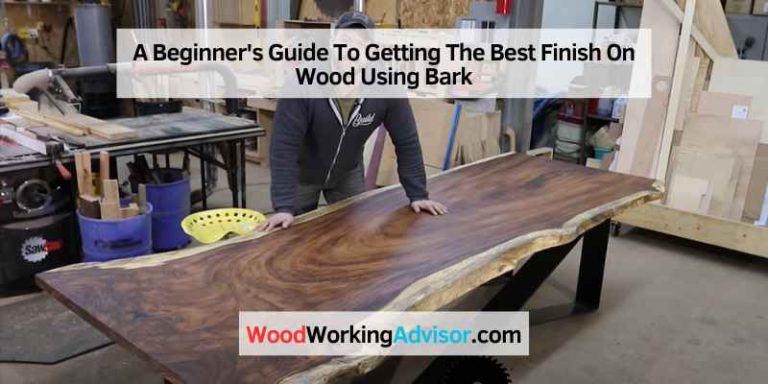
Rubio Monocoat Oil Plus 2C is a plant-based, 0% VOC hardwax oil finish for interior wood surfaces. Unlike polyurethane or lacquer, it does not form a film on the wood surface — instead, the oil penetrates the top layer of wood fibers and forms a molecular bond with the cellulose, hardening inside the wood. The result is a finish that looks and feels like natural wood, is fully repairable spot-by-spot, and never peels or cracks because there is no surface film to fail.
“2C” means two-component: Part A is the linseed-based oil with color, and Part B is an accelerator and hardener that speeds the curing process from weeks to 7 days. The system covers approximately 175 sq ft per 350ml kit. One coat is sufficient on most species — porous woods like pine, fir, American walnut, and cherry may require a second light coat applied 24–36 hours after the first.
Benefits Of Rubio Monocoat
Enhanced Wood Durability
The molecular bond means Rubio Monocoat cannot delaminate or peel at edges like a film finish. Scratches affect only the area of damage — they can be spot-repaired with a small amount of the same product without having to refinish the entire surface. The hardwax component adds surface hardness and water resistance appropriate for flooring, countertops, and furniture.
Vibrant And Natural-looking Finish
Because no film sits on the wood surface, the texture and grain of the wood remain fully tactile. Colors available (over 50 options) enhance wood tone without the plastic sheen of polyurethane. The Pure (colorless) option gives a natural, zero-sheen matte look that is particularly popular on white oak, walnut, and ash.
Easy Application And Maintenance
One coat covers the full surface with no blending required between coats. Maintenance is a light application of Rubio Universal Maintenance Oil — no sanding down and no stripping. Because the finish lives inside the wood, maintenance coats bond with the existing finish at the molecular level rather than building up layers on top.
Preparation For Application
Selecting The Right Rubio Monocoat Product
For most furniture and flooring projects, use Oil Plus 2C. For exterior wood, use Rubio Monocoat Exterior Oil. For countertops with direct food contact, use Oil Plus 2C in Pure (colorless) — it is food-safe once fully cured (7 days). For pre-grayed or weathered wood, use Rubio Pre-Aging before the oil to add depth. Match the product to the substrate and end use before purchasing.
Preparing The Wood Surface
The wood must be bare, clean, and dry before applying Rubio Monocoat. Remove all existing finishes (stain, varnish, oil) completely — Rubio Monocoat cannot bond through a previous film finish. Remove dust, grease, and wax contamination. If the wood has silicone contamination (from spray lubricants or silicone-based products), clean with Rubio Monocoat Surface Care Soap before proceeding.
Sanding And Cleaning The Wood Surface
Sand to 120-grit as the final pass. Do not go higher than 150-grit — finer grits close the wood grain and prevent the oil from penetrating to the depth needed for a proper molecular bond. Do not use steel wool. After sanding, vacuum thoroughly, then clean with Rubio Monocoat Raw Wood Cleaner (or a clean, dry white cloth) to remove all fine dust. Allow 15–60 minutes for the surface to dry before applying oil. On how to sand wood, always sand with the grain on the final pass.

Step-by-step Application Process
Follow these steps exactly for a consistent Rubio Monocoat result. The critical window is wiping off excess within 10–15 minutes — do not apply more product than you can work and wipe in that time.
- Mix the components: Combine Part A (oil) and Part B (accelerator) at a 3:1 ratio by volume in a clean container. Stir for 30 seconds. Mixed product must be used within the same working session — do not store mixed product.
- Apply liberally: Using a white Scotch-Brite pad, brush, or roller, apply the mixed oil generously to a manageable section (approximately 10–20 sq ft at a time). Work with the grain. The surface should appear uniformly saturated — no dry spots.
- Work the oil in: Use the applicator pad to work the oil into the grain with moderate pressure. This forces the oil into the wood fiber pores. The oil will start to look “draggy” as it bonds — this is the molecular bonding beginning.
- Wipe off ALL excess within 10–15 minutes: Using a clean cotton cloth, wipe off all remaining oil on the surface, following the grain. Any excess left on the surface will dry sticky or form uneven gloss spots. Keep wiping until the cloth comes away clean. This step cannot be skipped or shortened.
- Allow to cure: 24 hours for light use; 3–5 days for normal use; 7 days for full cure and maximum hardness.
Applying The First Coat
Apply the mixed oil to the bare sanded surface using a white Scotch-Brite pad or a natural-bristle brush. Work in sections of 10–20 sq ft — never apply to the entire surface at once on large pieces. Apply generously enough that the surface appears uniformly wet. If applying to flooring, work in one direction across the boards and maintain a wet edge at all times to avoid visible lap marks at section joins.
Rubbing In The Monocoat
After applying the oil, use moderate pressure with the Scotch-Brite pad to work the oil into the grain for 30–60 seconds per section. This step is particularly important on open-grain species (oak, ash, walnut) where the pores need positive pressure to fill. The oil will begin to feel thicker and more resistant as the bonding process begins — this confirms that the oil has been worked in sufficiently before wiping.
Drying And Curing Process
After wiping, the surface is dry to the touch within 2–4 hours at 65–75°F (18–24°C) and 50–65% relative humidity. Light use: 24 hours. Normal use: 3–5 days. Full cure: 7 days. Do not cover the surface with rugs, runners, or furniture pads during the 7-day cure period — trapped moisture prevents proper curing and can cause the finish to remain tacky.
Post-application Care
1. Cleaning The Finished Wood
After full cure (7 days), clean Rubio Monocoat surfaces with Rubio Monocoat Surface Care Soap diluted in water — avoid ammonia-based cleaners, silicone sprays, and wax polishes, which interfere with the finish. For routine cleaning, a slightly damp cloth is sufficient. Do not use steam cleaners or wet mops on Rubio Monocoat flooring.
2. Repairing Damages Or Scratches
Rubio Monocoat surfaces are spot-repairable. Clean the damaged area, lightly abrade with a Scotch-Brite pad, apply a small amount of the matching oil color, work in, and wipe off. The repair bonds at the molecular level — there is no visible edge or patch line when done correctly. This is the primary advantage over film finishes, which show repair patches clearly. See also: how to hide wood filler after staining for filling deeper gouges before the oil application.
Tips And Tricks For A Professional Finish
Working In Small Sections
Work 10–20 sq ft at a time. On large floor areas, have one person applying while a second person wipes. The 10–15-minute wipe window is the critical constraint that defines your working area. In hot or dry conditions (above 75°F or below 40% RH), the window shortens — work in even smaller sections.
Using The Right Tools And Techniques
Use white Scotch-Brite pads for application — not green (too abrasive) or blue/yellow pads. Use lint-free cotton cloths for wiping (old T-shirt material works well). Avoid foam rollers on furniture — they can leave a texture in the finish. For intricate carving or raised panel details, use a natural-bristle brush to apply and a brush to work the oil in before wiping with a cloth.
Achieving Desired Sheen And Color
Rubio Monocoat produces a matte to satin sheen depending on species and amount of buffing during wipe-off. More aggressive buffing during the wipe-off step burnishes the surface slightly and increases sheen. Test the color and sheen on a scrap piece of the same species before applying to the finished piece — color looks different on different wood species and the difference between wet and fully dried can be significant.
★ Recommended Product
Rubio Monocoat Oil Plus 2C — Pure (350ml Kit)
- Includes Part A oil + Part B accelerator at proper pre-measured ratio
- Covers ~175 sq ft (one full application) per kit
- 0% VOC, plant-based — safe for food-contact surfaces once cured
- Available in Pure (natural) and 50+ color options
As an Amazon Associate we earn from qualifying purchases.
Frequently Asked Questions Of How To Apply Rubio Monocoat
How Long Do I Let Rubio Monocoat Sit Before Wiping Off?
Wipe off all excess Rubio Monocoat within 10–15 minutes of application. The molecular bond forms in the first 3–5 minutes — any oil still on the surface after 15 minutes will dry sticky and must be removed with a Scotch-Brite pad before it fully cures. Do not let it sit longer — faster and more thorough wipe-off produces a better result than a slower, incomplete wipe.
What Do I Use To Apply Rubio Monocoat?
Use a white Scotch-Brite pad for both application and working the oil into the grain. For intricate areas (moldings, carvings, turnings), use a natural-bristle brush to apply. Wipe off excess with lint-free cotton cloths. Do not use green Scotch-Brite pads (too abrasive) or synthetic foam pads (leave texture). On flooring, a lambswool applicator pad on a long handle keeps the application fast and even.
What Grit Do You Sand To For Rubio Monocoat?
Sand to 120-grit as the final pass. According to Rubio Monocoat’s official instructions, sanding above 150-grit closes the wood grain and prevents the oil from penetrating. 120-grit leaves enough open grain for the oil to bond with the wood fibers. For hand-finishing or using a random orbital sander, 120-grit is the recommended final abrasive. For flooring, a drum sander finishing at 100–120-grit is standard.
How Do You Smooth Rubio Monocoat?
For extra smoothness after curing, lightly buff the surface with a white Scotch-Brite pad or a fine synthetic steel wool pad (0000 grade equivalent). This removes any slight grain raise from the oil application and increases surface smoothness without adding more product. Then apply Rubio Monocoat Universal Maintenance Oil for a refreshed finish if needed.
Can you apply Rubio Monocoat over existing finish?
No. Rubio Monocoat cannot bond through any existing finish — polyurethane, lacquer, varnish, stain, or wax. The wood must be stripped to bare wood before application. If the existing finish is a previous Rubio Monocoat application, clean and lightly abrade the surface — maintenance coats of Rubio can bond with existing Rubio finish at the molecular level.
How many coats of Rubio Monocoat do you need?
One coat is sufficient for most species. Porous woods — including pine, fir, American walnut, American cherry, and softwoods — may absorb the first coat fully and benefit from a second light coat applied 24–36 hours later using a reduced amount of product (approximately 50% of the first coat volume). On dense hardwoods (maple, hard oak, hickory), a single coat is always sufficient.
Conclusion
To apply Rubio Monocoat correctly: sand to 120-grit (no higher), mix at 3:1, apply liberally in small sections, and wipe all excess within 10–15 minutes. The entire quality of the finish depends on thorough wipe-off — any oil left on the surface dries sticky. One coat is sufficient on most hardwoods. Allow 7 days for full cure before placing rugs or furniture. Rubio Monocoat is spot-repairable forever, making it one of the lowest long-term maintenance finishes available for interior wood.