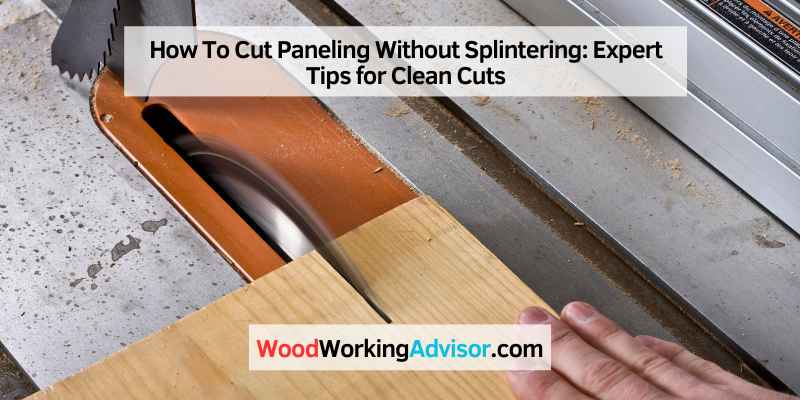
How To Cut Paneling Without Splintering: Expert Tips for Clean Cuts
To cut paneling without splintering, use a sharp blade and cut at a slow, steady pace. When working with paneling, it is important to achieve clean, splinter-free cuts.
This can be challenging, but with the right techniques, you can easily achieve the desired result. One crucial factor is using a sharp blade, as a dull blade is more likely to cause splintering. Additionally, cutting at a slow and steady pace will help to minimize the chances of splintering.
By adhering to these guidelines, you can ensure that your paneling cutting process is smooth and splinter-free. We will explore in more detail how to cut paneling without splintering, providing you with practical tips and techniques. So, let’s dive in and learn how to achieve precise and clean cuts in paneling without any splintering.
Choosing The Right Tools
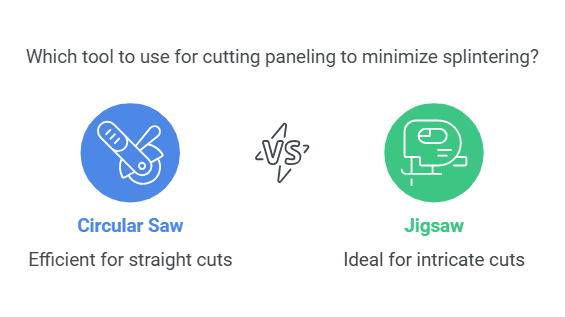
When it comes to cutting paneling without splintering, choosing the right tools plays a crucial role. The tools you use will determine the quality and precision of your cuts, ultimately affecting the final result of your paneling installation. Two popular options for cutting paneling are a circular saw and a jigsaw. Let’s explore these tools in more detail and understand their advantages and best applications.
Using A Circular Saw
A circular saw is a power tool that features a circular blade, typically with teeth designed for cutting various materials, including paneling. This makes it an excellent choice for large-scale paneling projects, such as wall installations or flooring. The circular saw offers several benefits:
- A fast and efficient cutting process
- Precision cutting with straight lines
- The ability to make beveled cuts for different design preferences
To cut paneling with a circular saw:
- Measure and mark the desired cut line on the paneling
- Secure the paneling in place to prevent any movement during the cutting process
- Adjust the blade depth on the circular saw according to the paneling’s thickness
- Align the saw’s guide with the marked cut line
- Start the saw and carefully guide it along the marked line, maintaining a steady pace
- Once you reach the end of the cut, release the saw’s trigger and let the blade stop spinning before moving the paneling
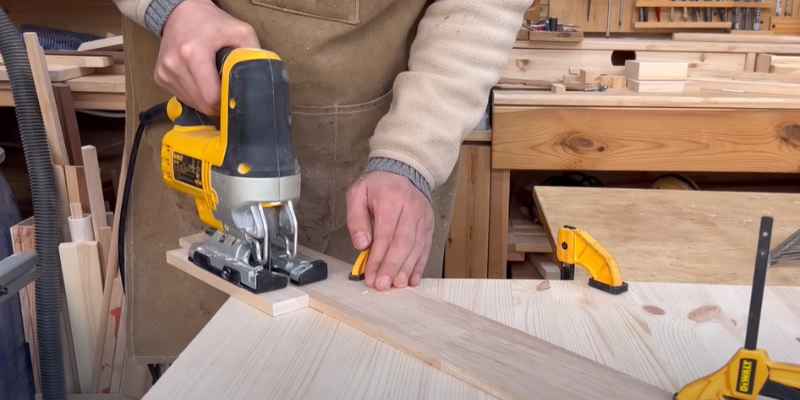
Opting For A Jigsaw
A jigsaw is a versatile power tool that uses a reciprocating blade to cut through various materials. While it may take more time compared to a circular saw, a jigsaw is ideal for detailed cuts and curved shapes. Here are the advantages of using a jigsaw for cutting paneling:
- Precise cutting around corners, curves, and openings
- The ability to create unique designs and patterns
- Maneuverability in tight spaces due to its compact size
To cut paneling with a jigsaw:
- Mark the desired cut line on the paneling
- Secure the paneling in place to prevent any movement during the cutting process
- Insert the appropriate blade for cutting through the paneling material
- Align the jigsaw’s base plate with the marked cut line
- Start the jigsaw and guide it along the marked line, applying gentle pressure
- For curves or corners, pivot the jigsaw smoothly while maintaining control
- Once you complete the cut, release the trigger and let the blade stop moving before removing the paneling
Choosing between a circular saw and a jigsaw depends on the nature of your paneling project. Consider the type of cuts you need to make, the design intricacy, and the available workspace. By selecting the right tool for the job, you can confidently cut paneling without worry of splintering and achieve professional-looking results.
Preparing The Paneling
Preparing the paneling is an essential step to ensure a smooth and seamless cutting process. By taking the time to measure and mark the cuts accurately and securing the paneling properly, you can minimize the risk of splintering. In this section, we will guide you through each step, starting with measuring and marking the cuts.
Measuring And Marking The Cuts
Before you begin cutting the paneling, it’s crucial to measure and mark the precise locations to avoid any errors. Follow these simple steps:
- Measure your paneling: Use a tape measure to determine the desired dimensions for your cuts. Measure twice to ensure accuracy.
- Mark the measurements: Use a pencil or a marker to mark the measurements directly on the surface of the paneling. Make clear and visible marks to guide your cutting process.
- Double-check your marks: Take a moment to review and double-check your markings. Confirm that the measurements are precise and align with your desired cuts.
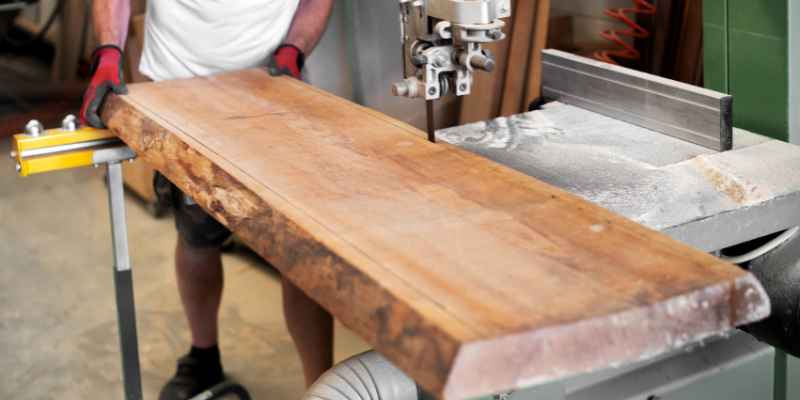
Securing The Paneling
Securing the paneling before cutting is crucial to prevent it from shifting or moving around, which can result in splintering. Follow these steps to ensure a secure setup:
- Prepare a work surface: Place the paneling on a stable and even work surface. If needed, use clamps or other tools to secure the paneling to the surface firmly.
- Use supportive backing: To further prevent splintering, place a supportive backing material, such as a scrap piece of wood or plywood, beneath the cutting line. This will provide stability and help minimize the chances of splintering.
- Secure the top layer: If your paneling consists of multiple layers, ensure to firmly secure the top layer to prevent it from lifting or splintering during the cutting process.
By following these steps and taking the time to properly prepare the paneling, you can greatly reduce the risk of splintering when cutting. This preparation will result in clean, precise cuts and ultimately a more professional-looking finished project.
Techniques For Clean Cuts
Learn effective techniques for achieving clean cuts while cutting paneling. Say goodbye to splintering and achieve professional results with these handy tips and tricks.
When it comes to cutting paneling, one of the biggest challenges is avoiding splintering. However, with the right techniques, you can achieve clean cuts that give your paneling a professional look. In this section, we will discuss two effective methods for achieving clean cuts:
Using A Fine-tooth Blade
If you want to minimize splintering when cutting paneling, using a fine-tooth blade is a must. The fine teeth on this type of blade help reduce the chances of the paneling fibers tearing, resulting in cleaner cuts. When choosing a fine-tooth blade, opt for one with at least 80 teeth per inch (TPI) for better control and precision.
When using a fine-tooth blade, it’s important to ensure that the paneling is held securely in place. Before making the cut, clamp the paneling down to a stable work surface or use a sawhorse to keep it steady. This will minimize vibrations and prevent the paneling from shifting during the cutting process.
Cutting With A Reverse Motion
Another technique to achieve clean cuts in paneling is cutting with a reverse motion. This method involves positioning the paneling with the finished side facing down and cutting from the backside. By doing so, you allow the saw teeth to cut through the paneling in the opposite direction, reducing splintering on the visible side.
To cut with a reverse motion, mark the desired cut line on the backside of the paneling, making sure it aligns with your project’s measurements. Then, carefully guide the saw along the marked line, ensuring a steady and controlled motion. Remember to wear safety goggles and gloves to protect yourself during the cutting process.
By using a fine-tooth blade and employing the reverse motion technique, you can achieve clean cuts in paneling without splintering. These methods ensure that your paneling looks professional and enhances the overall appearance of your project.
Tips For Minimizing Splintering
Learn how to cut paneling without splintering with these helpful tips. Follow these guidelines to minimize splintering and achieve clean, precise cuts every time.
To achieve a clean and precise cut while paneling, it’s essential to minimize splintering. Splintering can not only spoil the appearance of the paneling but also make it difficult to install. Luckily, with a few simple tips and techniques, you can minimize splintering and achieve a smooth and professional-looking finish.
Applying Masking Tape
One effective way to minimize splintering when cutting paneling is to apply masking tape along the line you intend to cut. This can act as a barrier, preventing the paneling from splintering as the saw blade moves through the material.
To apply masking tape, follow these steps:
- Clean the surface of the paneling to ensure the tape adheres well.
- Measure and mark the cutting line using a pencil.
- Tear off a strip of masking tape slightly longer than the cutting line.
- Place one end of the tape on the marked line, ensuring it sticks firmly to the paneling.
- Pull the tape taut along the cutting line, sticking it down firmly as you go.
- Press down on the tape to ensure it adheres well and covers the entire cutting line.
Once the tape is in place, use a sharp saw to cut along the marked line. The tape will help minimize splintering, resulting in a cleaner cut.
Cutting From The Backside
Another technique that can significantly reduce splintering when cutting paneling is to cut from the backside of the material. By placing the paneling face down and cutting from the opposite side, splintering is less likely to occur on the visible side.
To cut from the backside, follow these steps:
- Measure and mark the cutting line on the backside of the paneling.
- Place the paneling on a supportive surface, ensuring it is secure and won’t move during cutting.
- Use a sharp saw to cut along the marked line, applying gentle pressure to maintain control.
- Take care to follow the marked line precisely, ensuring a clean and accurate cut.
Cutting from the backside not only minimizes splintering but also allows you to have better visibility of the cutting line, resulting in a more precise cut.
Finishing And Sanding
Learn how to cut paneling without splintering by using these easy finishing and sanding techniques. Achieve clean and smooth edges for a professional and polished look.
Removing Splinters With Sandpaper
Splintering can be a common issue when cutting paneling. But don’t worry, there’s a simple solution – sandpaper. Sandpaper can help to smooth out any rough edges and remove those pesky splinters for a finished look.
When sanding, start with a low grit sandpaper, such as 80 or 120, to effectively remove the splinters. Use gentle pressure and sand in the direction of the wood grain to prevent further damage. Be sure to wear protective goggles and a mask to avoid inhaling any fine particles. Once you have removed the splinters, switch to a higher grit sandpaper, such as 220, for a smoother finish.
Applying A Finish
After you have successfully cut paneling without splintering and sanded down any rough edges, it’s time to apply a finish. A finish not only enhances the appearance of the paneling but also provides protection against moisture and wear.
There are various finishes available, such as varnish, polyurethane, or paint. Choose a finish that suits your desired aesthetic and the paneling material. Before applying the finish, make sure the surface is clean and free from dust or debris. You can use a tack cloth or a soft brush to remove any remaining particles.
Apply the finish using a brush, roller, or sprayer according to the manufacturer’s instructions. Follow the recommended drying time between each coat, and lightly sand the surface with a high grit sandpaper, such as 320, between coats to ensure a smooth and even finish.
| Quick Tips: |
|---|
| • Use low grit sandpaper to remove splinters and high grit sandpaper for a smoother finish. |
| • Sand in the direction of the wood grain to avoid further damage. |
| • Wear protective goggles and a mask when sanding to avoid inhaling fine particles. |
| • Choose a finish that complements the paneling material and desired aesthetic. |
| • Clean the surface thoroughly before applying the finish to ensure a smooth result. |
| • Follow the manufacturer’s instructions for applying and drying the finish. |
| • Sand between coats to achieve a professional-looking finish. |
Frequently Asked Questions On How To Cut Paneling Without Splintering
What Is The Best Tool To Cut Paneling With?
The best tool for cutting paneling is a circular saw. It offers precision and ease of use when working with paneling materials. The sharp blade ensures clean and accurate cuts for a professional finish.
What Is The Best Way To Cut Wall Paneling?
The best way to cut wall paneling is to use a circular saw or a jigsaw. Measure and mark the desired cut line, then carefully cut along the marked line using the appropriate saw. Be sure to wear safety goggles and take necessary precautions to avoid any injuries.
What Is The Best Blade For Cutting Wood Paneling?
The best blade for cutting wood paneling is a fine-toothed circular saw blade. It is designed to make clean and smooth cuts, reducing splintering and tear-out on the wood surface.
How Do You Keep Boards From Splintering When Cutting?
To prevent boards from splintering when cutting, follow these steps:
1. Use a sharp saw blade.
2. Apply masking tape along the cutting line.
3. Score the cut line with a utility knife before cutting.
4. Support the board with clamps or a sacrificial backing board.
5. Cut slowly and steadily with minimal force.
Conclusion
To sum up, cutting paneling without splintering is not only achievable but also essential for a flawless finish. By following the proper techniques, such as using the right tools, going slow and steady, and having a firm grip, you can ensure a clean and professional result.
Remember, patience and precision are the keys to success when it comes to paneling projects. So, get started with confidence and enjoy the seamless results!