How to Install Engineered Wood Flooring: Expert Tips for Easy & Flawless Installation
To install engineered wood flooring, start by ensuring the subfloor is clean, dry, and level. Lay down an underlayment before clicking the flooring planks into place.
Engineered wood flooring adds a touch of elegance and warmth to any space. With its durability and easy installation process, it is a popular choice for many homeowners. Before attempting installation, understanding the steps involved will help you achieve professional results.
Embrace the beauty and functionality of engineered wood flooring in your home with these simple installation guidelines. Whether you are a seasoned DIY enthusiast or a first-time renovator, installing engineered wood flooring can be a rewarding project.
Selecting The Right Materials
When it comes to installing engineered wood flooring, choosing the right materials is crucial for a successful project. Selecting the right materials involves picking the appropriate type of engineered wood as well as considering underlayment options.
Choose The Right Type Of Engineered Wood
- Opt for quality engineered wood with a thick wear layer
- Consider the wood species and finish that best suits your decor
- Ensure it has a tongue-and-groove system for easy installation
Consider Underlayment Options
- Choose an underlayment suitable for your subfloor type
- Moisture barrier underlayment is essential for areas prone to moisture
- Soundproof underlayment can reduce noise transmission
Credit: precisionflooringservices.com
Preparing The Subfloor
Checking For Flatness And Moisture Levels
Use a level to ensure floor is flat. Check moisture level to prevent damage.
Addressing Subfloor Imperfections
Fill gaps and cracks in the subfloor to ensure even surface for installation.
Acclimating The Flooring
Acclimating the flooring is a crucial step in the installation of engineered wood flooring. This process allows the flooring to adjust to the temperature and humidity of its new environment, preventing issues such as warping or buckling. Understanding the acclimation process and properly storing the engineered wood are essential for a successful installation.
Understanding The Acclimation Process
Acclimating the engineered wood flooring involves allowing the material to sit in the installation area for a specified period before the actual installation begins. This is to ensure that the flooring reaches an equilibrium moisture content (EMC) with the site conditions. Failure to acclimate the flooring properly can lead to costly issues down the line.
Proper Storage Of Engineered Wood
Before acclimating the flooring, it’s crucial to ensure that the material is stored correctly. Engineered wood should be stored in the designated installation area, allowing it to acclimate in the same conditions it will experience once installed. This means keeping the boxes of flooring off the ground and away from exterior walls, to prevent exposure to moisture or extreme temperature fluctuations.
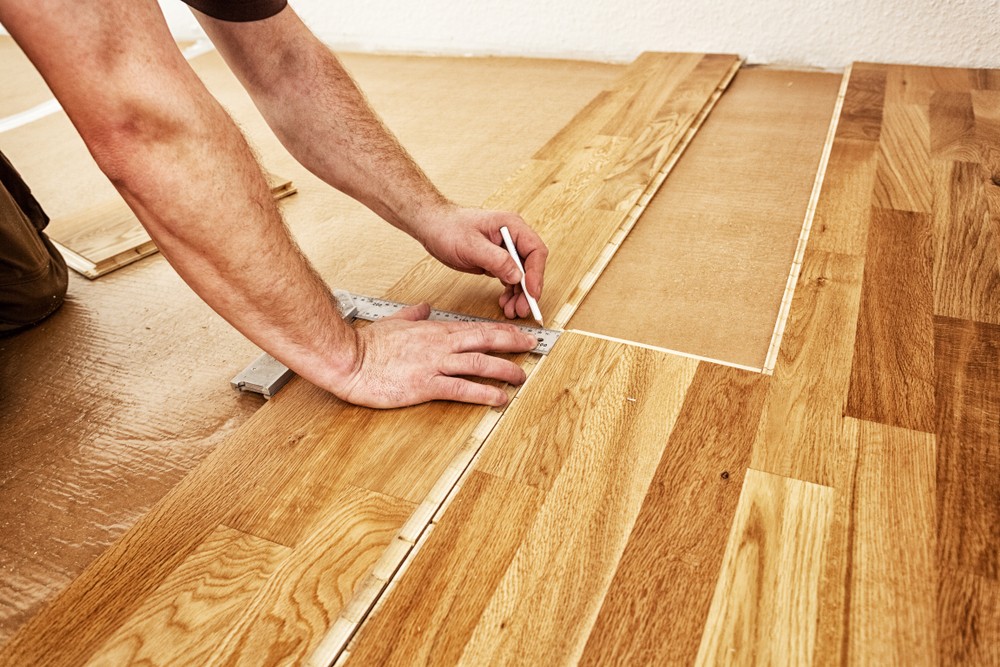
Installation Process
When it comes to installing engineered wood flooring, following the correct installation process is crucial to ensure a durable and visually appealing result. This post will guide you through the step-by-step process, focusing on planning the layout and direction, as well as exploring the different methods of installation: floating, gluing, and nailing.
Planning The Layout And Direction
Before diving into the installation, it’s essential to plan the layout and determine the direction in which the engineered wood flooring will be installed. This step helps create a harmonious flow throughout the space while minimizing unnecessary cuts and waste.
To plan the layout, start by measuring the dimensions of the room accurately. Take note of any distinctive features, such as entryways, staircases, or focal points, as they may affect the flooring’s direction. Consider the natural light sources as well, as they can impact the perception of the space.
When deciding on the direction, there are a few general guidelines to keep in mind. Installing the planks parallel to the longest wall tends to create an expansive feel, while perpendicular installation can add interest and visual depth. However, always consider the specific characteristics and layout of the room for the best result.
Methods For Installation: Floating, Gluing, Nailing
Once the layout and direction are determined, it’s time to choose the method of installation. Engineered wood flooring offers various installation options, each with its own advantages and considerations.
| Method | Advantages | Considerations |
|---|---|---|
| Floating |
|
|
| Gluing |
|
|
| Nailing |
|
|
Consider your specific needs, preferences, and the recommendations of the flooring manufacturer when choosing the installation method that suits your project best.
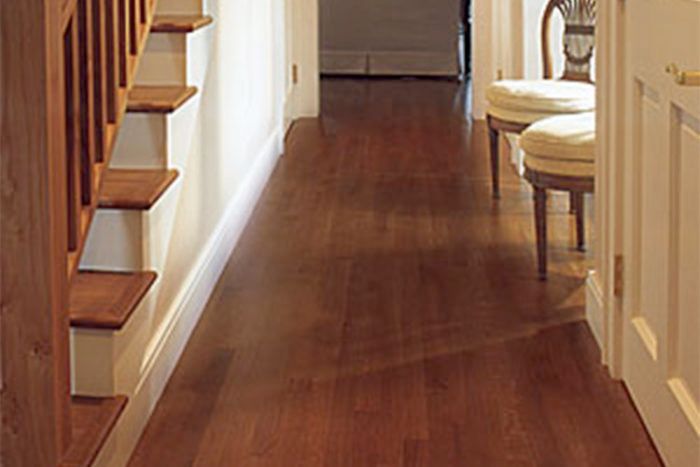
Finishing Touches
Congratulations! You’re almost done with the installation of your engineered wood flooring. Now it’s time to add those finishing touches that will truly enhance the overall appearance and longevity of your new floor. In this section, we will cover trim and molding installation as well as post-installation cleaning and maintenance tips that will help your beautiful floor stand the test of time.
Trim And Molding Installation
Trim and molding installation provides the perfect way to complete the look of your engineered wood flooring. It not only adds a polished and professional touch, but it also serves a practical purpose by covering the expansion gaps between the flooring and the walls or any other vertical surfaces. Here are a few steps to guide you through the process:
- First, measure the length of each wall where you plan to install trim or molding.
- Cut the trim or molding at a 45-degree angle using a miter saw for corners and a straight cut for the straight sections.
- Attach the trim or molding to the wall using a pneumatic nail gun or construction adhesive, ensuring a secure and flush fit.
- Once installed, fill any nail holes with wood filler to create a seamless finish.
- Sand down any rough edges and apply paint or stain to match the color of your flooring for a cohesive look.
By following these simple steps, you can achieve a professional and seamless look that enhances the beauty of your engineered wood floors.
Post-installation Cleaning And Maintenance Tips
Now that your engineered wood flooring is installed and your trim and molding are in place, it’s essential to take proper care of your new investment. Here are some post-installation cleaning and maintenance tips to keep your floors looking their best for years to come:
- Dust and sweep your floors regularly using a microfiber mop or a soft-bristle broom to prevent the accumulation of dirt and debris.
- Wipe up any spills or stains immediately with a damp cloth or mop to prevent permanent damage.
- Use a specialized wood floor cleaner recommended by the manufacturer to remove stubborn stains or dirt build-up.
- Protect your floors from scratches by placing felt pads on the bottom of furniture legs and using area rugs or mats in high-traffic areas.
- Avoid excessive moisture on your floors by using a humidifier or dehumidifier to maintain ideal humidity levels.
Implementing these cleaning and maintenance tips will help preserve the beauty and longevity of your engineered wood floors, ensuring they continue to impress for years to come.
Credit: www.finehomebuilding.com
Frequently Asked Questions On How To Install Engineered Wood Flooring
Is It Better To Glue Or Float An Engineered Wood Floor?
For an engineered wood floor, it’s better to float rather than glue to allow for expansion. Floating also makes installation quicker and easier.
Do You Need To Put Anything Under Engineered Wood Flooring?
No, it is not necessary to put anything under engineered wood flooring as it can be installed directly on a level subfloor.
Can I Install Engineered Hardwood Myself?
Yes, you can install engineered hardwood yourself with proper tools and following manufacturer guidelines.
Is It Better To Glue Or Nail An Engineered Wood Floor?
Nailing is better for engineered wood floors. It provides greater stability and reduces the risk of floor movement. Gluing can work too, but nailing is more commonly recommended.
Conclusion
To wrap up, installing engineered wood flooring is a time-consuming but rewarding process. By following the proper steps and considering essential factors, you can ensure a smooth installation and a durable, attractive flooring solution for your space. With patience and attention to detail, you can enjoy the beauty and longevity of engineered wood flooring for years to come.