How to Laminate Wood Floor: Easy DIY Guide for Stunning Results
To laminate a wood floor, first prepare the subfloor by ensuring it’s clean and level. Then, lay down an underlayment before installing the laminate planks, starting from one corner of the room.
Laminating wood floors is a cost-effective way to enhance your living space. This DIY project allows homeowners to achieve a stylish look without the expense of traditional hardwood. Laminate flooring is durable, easy to maintain, and comes in various designs to match any interior style.
The installation process is straightforward, making it accessible even for beginners. With the right tools and preparation, you can transform your home’s appearance in just a few hours. This guide will walk you through each step, ensuring a successful laminate flooring installation. Embrace the challenge and enjoy your newly refreshed space!
Introduction To Laminate Flooring
Laminate flooring offers many advantages for homeowners. It is affordable, making it a popular choice. This type of flooring is easy to install, often requiring no special tools. It can mimic the look of hardwood or stone without the high cost.
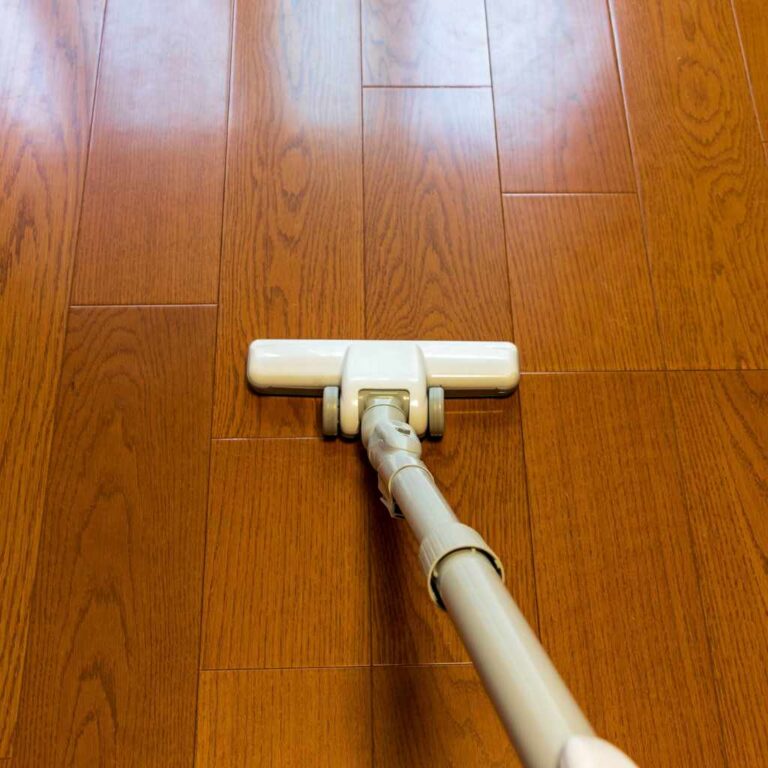
Another benefit is its durability. Laminate floors resist scratches and stains, making them ideal for busy homes. They are also easy to clean, requiring just regular sweeping and occasional mopping.
For installation, gather essential tools and materials. You will need a measuring tape, saw, and underlayment. These items ensure a smooth and effective installation process. Always check your flooring’s manufacturer instructions for specific requirements.
Choosing Your Laminate Flooring
Choosing the right laminate flooring involves understanding different types and their qualities. Common types include high gloss, textured, and water-resistant laminate. Each type has unique features suitable for various environments.
Thickness is crucial for durability. Laminate flooring usually comes in 8mm, 10mm, or 12mm thickness. Thicker laminate can withstand more wear and tear. An AC rating indicates durability. Higher AC ratings, like AC3 or AC4, are best for high-traffic areas.
| Type | Thickness | AC Rating |
|---|---|---|
| Standard Laminate | 8mm | AC2 |
| Water-Resistant | 10mm | AC3 |
| High-End Laminate | 12mm | AC4 |
Preparing Your Space
Begin by clearing the room. Move all furniture and items out of the space. This ensures a smooth installation process. Make sure to remove any rugs or decorations as well.
Next, focus on leveling and cleaning the subfloor. Check for any uneven areas and fix them. Use a wood planer or hand sander to even out high spots. Ensure the floor is clean and dry before starting. Any debris can affect the laminate’s fit and stability.
Taking these steps makes your laminate flooring project more successful. Proper preparation is key to a lasting finish.
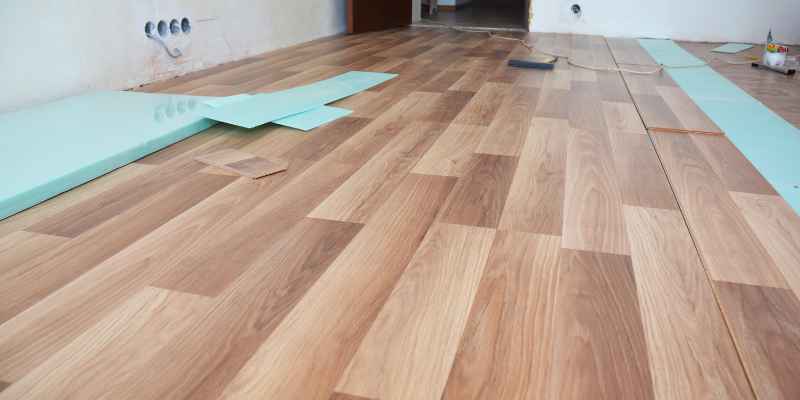
Installing The Underlayment
The underlayment is crucial for laminate flooring. It provides a soft cushion underfoot and helps absorb sound. Proper underlayment also protects the flooring from moisture. It creates a smooth surface for better installation. Without it, laminate can warp or buckle over time.
To lay underlayment, start by cleaning the floor. Ensure it is dry and level. Roll out the underlayment across the area. Make sure the edges are butted together, but do not overlap. Trim any excess material using a utility knife. Secure the underlayment with tape if needed.
This process ensures a stable foundation for your new laminate flooring. Proper installation of underlayment leads to a more comfortable and durable floor.
Laying The First Row Of Planks
Start by placing the first row of planks with the tongue side against the wall. Ensure that the planks are straight and aligned. Use spacers to maintain a gap between the wall and the planks. This gap allows for expansion and contraction of the wood.
For the second plank, align the tongue with the groove of the first plank. Press down firmly until you hear a click. This indicates that the planks are snapped together securely.
If you need to cut planks, measure carefully. Use a hand saw or a circular saw for cutting. Ensure that the last plank fits snugly against the wall. Always remember to leave a small gap for expansion.
Completing The Installation
To ensure a strong and aesthetic finish, stagger the planks. This method reduces seams and adds stability. Aim for a stagger of at least 12 inches between rows. This technique also enhances the visual appeal of your floor.
Installing around doors and vents requires careful measurement. Use a jigsaw to cut the planks for a snug fit. Ensure there is enough space for expansion near doors. For vents, cut the planks to fit around them without blocking airflow.
| Task | Tips |
|---|---|
| Staggering Planks | Maintain a minimum of 12 inches between joints. |
| Cutting for Doors | Use a jigsaw for precise cuts. |
| Installing Around Vents | Ensure airflow is not blocked. |
Finishing Touches
Installing trim and transitions adds a clean look to your laminate floor. Use quarter-round or baseboard to cover gaps. Make sure to measure carefully for a perfect fit. Use a miter saw for clean cuts. Nail the trim securely into place.
Sealing and cleaning the floor is essential for longevity. Use a laminate floor cleaner to avoid damaging the surface. Mop the floor gently, ensuring no excess water remains. Allow it to dry completely before walking on it. Regular cleaning keeps your laminate looking new and shiny.
Maintenance And Care
Daily cleaning helps maintain your laminate wood floor. Use a soft broom or a vacuum to remove dirt and dust. Avoid using a wet mop, as moisture can damage the flooring.
For deeper cleaning, a damp cloth with a mild detergent works well. Always dry the area immediately to prevent water damage. Use a microfiber mop for a gentle clean.
To prevent scratches and damage, place felt pads under furniture legs. Avoid dragging heavy items across the floor. Use area rugs in high-traffic areas for extra protection.
Regular maintenance keeps your laminate floors looking new and beautiful. A little care goes a long way in preserving their shine and luster.
Frequently Asked Questions
Can I Do Laminate Flooring Myself?
Yes, you can install laminate flooring yourself. It features a simple tongue-and-groove system for easy assembly. Basic tools like a saw and measuring tape are all you need. Ensure proper preparation of the subfloor for best results. Follow installation guides for a successful DIY project.
How Do You Prepare Wood Floors For Laminate?
To prepare wood floors for laminate, follow these steps:
1. Clean the surface thoroughly to remove dust and debris.
2. Level any uneven areas using a wood planer or sander.
3. Ensure the wood floor is dry and free from moisture.
4. Install an appropriate underlayment for cushioning and insulation.
5. Check for any loose boards and secure them before installation.
Do You Have To Put Anything Under Laminate Wood Flooring?
Yes, you should use an underlayment beneath laminate wood flooring. This layer provides cushioning, reduces noise, and prevents moisture damage. Skipping it can lead to wear and tear on your flooring over time. Proper installation ensures longevity and enhances comfort.
Can You Put Laminate Over Wood Floors?
Yes, you can install laminate over wood floors. Ensure the wood is in good condition and level. Use underlayment for added cushioning and moisture protection. This method enhances aesthetics without the cost of refinishing hardwood. Proper installation will yield a durable and appealing floor.
Conclusion
Successfully laminating wood floors can transform your space. Following the right steps ensures a beautiful finish. Remember to prepare your subfloor properly and choose quality materials for durability. With the right tools and techniques, even beginners can achieve professional-looking results.
Start your project today and enjoy the benefits of stunning laminate flooring.