
How to Make a Template for Woodworking: A DIY Guide
To make a template for woodworking, trace the design onto paper, transfer it to a piece of hardboard, and cut it out carefully. Creating a template is essential for precise woodworking projects, ensuring consistency and accuracy in your cuts.
Templates can be reused multiple times, saving you time and effort in the long run. By following these steps, you can easily produce high-quality woodworking templates that will streamline your crafting process and help you achieve professional results. Remember, a well-made template is a valuable tool in any woodworker’s arsenal, enhancing efficiency and precision in their projects.
Introduction To Woodworking Templates
Woodworking templates are essential tools for creating accurate and consistent designs. Whether you are a seasoned woodworker or just starting out, understanding the importance of templates is crucial for achieving precision and efficiency in your projects.
Benefits Of Using Templates
Using templates in woodworking offers several advantages. They provide a standardized outline for your project, ensuring uniformity and saving time on repetitive measurements. Templates also help in minimizing material waste and reducing errors, ultimately leading to a more cost-effective and efficient woodworking process.
Types Of Templates In Woodworking
Woodworking templates come in various forms, catering to different needs and purposes. Some common types include:
- Shape Templates: These are used for creating consistent shapes such as curves, circles, and angles.
- Joinery Templates: Specifically designed to assist in creating precise and accurate joints, such as dovetails and mortise-and-tenon joints.
- Routing Templates: Used for guiding routers to create repeated patterns or designs on wood surfaces.
Essential Tools And Materials
Create your own woodworking template with essential tools and materials. Craft precise and accurate designs by following these steps for successful woodworking projects.
Choosing The Right Wood
To make a woodworking template, you’ll need to start with the right wood. The type of wood you choose will depend on the project you’re working on. For most templates, a strong and durable hardwood like maple or oak is a good choice. These woods are easy to work with, and they will hold up well over time. Avoid softwoods like pine, as they are more likely to warp or split.
Tools For Template Creation
In addition to the right wood, you’ll need a few essential tools to create your woodworking template. These tools include:
- Saw: A saw is essential for cutting the wood to the right size. A handsaw or a circular saw will work well.
- Drill: You’ll need a drill to make holes in the wood for screws or dowels.
- Clamps: Clamps will help you hold the wood in place while you work on it.
- Sandpaper: Sandpaper is necessary for smoothing out rough edges and surfaces.
- Ruler and pencil: You’ll need these tools to measure and mark your wood accurately.
Creating a template for woodworking is a fun and rewarding project that can help you create precise and accurate pieces. By choosing the right wood and using essential tools like a saw, drill, and clamps, you can create a template that will last for years to come. Whether you’re a beginner or an experienced woodworker, making a template is a great way to improve your skills and create beautiful pieces.
Designing Your Template

Designing a template is a crucial step in woodworking as it lays the foundation for your project. Whether you are a beginner or an experienced woodworker, having a well-designed template ensures accuracy and consistency throughout your work. In this article, we will explore the process of designing your template, from sketching the design to transferring it to software for further refinement.
Sketching The Design
Sketching the design is the first step in creating your woodworking template. It allows you to visualize your project and make necessary adjustments before moving forward. Grab a pencil and paper, and let your creativity flow. Sketch out the shape, dimensions, and details of your template. Focus on accuracy and clarity, as these sketches will serve as a reference throughout the woodworking process.
Consider using a ruler or drafting tools to ensure precise measurements. Pay attention to angles, curves, and any intricate details that may be part of your design. Take your time with this step, as a well-executed sketch will save you time and effort in the later stages.
Transferring To Software
Once you have a detailed sketch of your template, it’s time to transfer it to software for further refinement. This step allows you to digitize your design and make modifications easily. There are various software options available, ranging from free programs to professional CAD (Computer-Aided Design) software.
Start by scanning or taking a clear photo of your sketch. You can then import it into the software of your choice. Use the software tools to trace and refine your template design, adjusting dimensions and adding any additional elements. This digital version of your template provides a more accurate representation of your final product and allows for easy replication or modification in the future.
Remember to save your progress regularly and experiment with different software features to enhance your design. Once you are satisfied with the digital version of your template, you can proceed to the next step: creating a physical template.
By following these steps and investing time in designing your template, you are setting yourself up for success in your woodworking projects. A well-designed template not only ensures accuracy but also allows for creativity and customization. So grab your sketching tools and software of choice, and bring your woodworking vision to life!
Creating The Template Pattern
When it comes to woodworking, having a template pattern can make your projects more accurate and efficient. A template pattern serves as a guide for cutting and shaping the wood, ensuring that each piece is uniform and precise. In this article, we will discuss the process of creating a template pattern for woodworking, focusing on cutting the initial outline and refining the edges.
Cutting The Initial Outline
Before you can start cutting the wood, you need to create a template with the desired shape and size. Start by selecting a suitable material for your template, such as plywood or MDF (medium-density fiberboard).
Here’s a step-by-step guide on cutting the initial outline:
- Measure and mark the dimensions of your desired shape on the template material.
- Using a ruler or straight edge, draw straight lines connecting the marked points to create the outline of the shape.
- Next, use a jigsaw or a coping saw to carefully cut along the drawn outline. Take your time and make smooth, steady cuts.
- Once the initial outline is cut, sand the edges to remove any roughness or splinters. This will ensure a clean and polished template pattern.
Refining The Edges
After cutting the initial outline, it’s time to refine the edges of your template pattern. This step is crucial to ensure that the template fits perfectly and provides accurate measurements.
Follow these steps to refine the edges of your template:
- Use a file or sandpaper to smooth out any rough edges left from the cutting process. Pay attention to details and aim for a precise and clean finish.
- Check the template against your desired shape to ensure a proper fit. Make any necessary adjustments by carefully trimming or shaping the edges.
- Once you are satisfied with the template pattern, it is ready to be used for your woodworking project. Simply position it on the wood and trace around the template to transfer the shape.
Creating a template pattern for woodworking can greatly improve the accuracy and efficiency of your projects. By following these steps to cut the initial outline and refine the edges, you can ensure that your templates are reliable guides for your woodworking endeavors.
Transferring The Template
Once you have created your woodworking template, the next step is to transfer it onto the wood for cutting. This crucial process ensures that your final product matches the design of your template accurately. Here are the steps to transfer the template onto the wood:
Securing The Template To Wood
Start by placing the template on top of the wood, ensuring that it is aligned correctly with the grain and any other design considerations. Use clamps or double-sided tape to secure the template firmly in place, preventing any movement during the transfer process.
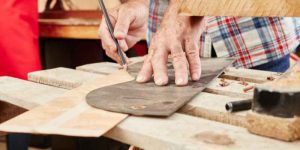
Marking The Cut Lines
With the template securely in place, use a sharp pencil or utility knife to trace the outline of the template onto the wood. Ensure that the lines are clearly visible and accurately represent the design of the template. Double-check the markings to avoid errors during the cutting process.
The Cutting Process
When making a woodworking template, the cutting process is crucial. This is where precision and accuracy come into play to ensure your template fits perfectly. Let’s delve into the key aspects of this stage.
Using The Right Saw
- Choose a circular saw for straight cuts.
- Opt for a jigsaw for curved or intricate cuts.
- Band saws are great for resawing and detailed work.
Tips For Precision Cutting
- Measure twice, cut once to avoid errors.
- Secure wood with clamps for stability.
- Use a sharp blade for clean cuts.
Finishing Touches
When your woodworking project is taking shape, it’s time to add the finishing touches that will make it stand out. The final steps of sanding for smoothness and applying a finish are crucial to achieving a professional look.
Sanding For Smoothness
Start sanding with a coarse grit sandpaper to remove any rough spots.
Gradually move to finer grits for a smooth finish.
Always sand in the direction of the grain for best results.
Applying A Finish
Choose a finish that complements your wood and project type.
Apply the finish in thin, even coats to prevent drips and streaks.
Allow each coat to dry completely before applying the next.
Using Your Template
Once you have your woodworking template, it’s time to put it to use.
Reusing Templates
Save time by reusing templates for future woodworking projects.
- Ensure the template is durable to withstand multiple uses.
- Label templates for easy identification and organization.
- Store templates in a safe place to prevent damage.
Storing Your Templates
Proper storage is key to maintaining the quality of your woodworking templates.
- Keep templates in a dry and cool environment.
- Protect templates from dust and moisture.
- Consider using plastic sleeves or containers for added protection.
Advanced Template Techniques
Mastering advanced template techniques opens up a world of possibilities in woodworking. Learn how to elevate your projects with precision and creativity.
Incorporating Jigs Into Templates
Enhance your woodworking templates by utilizing jigs for increased accuracy and efficiency.
Creating Complex Curves And Shapes
Unlock the potential of your templates by mastering the art of crafting intricate curves and shapes.
Safety Tips And Best Practices
When working with woodworking templates, safety should always be a top priority. Observing safety tips and best practices can prevent accidents and ensure a smooth woodworking experience. Here are some essential guidelines to keep in mind:
Personal Protective Equipment
Wearing the right personal protective equipment (PPE) is crucial for safeguarding yourself during woodworking projects. Always wear safety goggles, hearing protection, and a dust mask to shield yourself from potential hazards. When working with power tools, ensure that you have sturdy gloves to protect your hands.
Maintaining A Safe Workspace
It’s important to maintain a safe and organized workspace to minimize the risk of accidents. Keep your work area well-lit and free from clutter. Secure your workpiece with clamps or a vice to prevent it from moving unexpectedly. Regularly inspect and maintain your tools and equipment to ensure they are in good working condition.
Frequently Asked Questions
Q: What Materials Do I Need To Make A Woodworking Template?
A: To make a woodworking template, you’ll need a few materials such as plywood, a jigsaw, sandpaper, drill, and screws. Plywood is the most common material for making templates because it’s easy to work with and holds up well.
Q: What Are The Benefits Of Using A Woodworking Template?
A: Using a woodworking template ensures accuracy and consistency in your work. It saves time and reduces waste by eliminating the need for trial and error. Templates also make it easy to reproduce the same shape or design multiple times.
Q: How Do I Make A Template For Curved Or Irregular Shapes?
A: To make a template for curved or irregular shapes, you can use a flexible material like cardboard or thin plastic. Cut out the shape you want, then use sandpaper to refine the edges. You can also use a router to create more complex shapes.
Q: Can I Reuse A Woodworking Template?
A: Yes, you can reuse a woodworking template as many times as you want. Templates are durable and can last a long time if stored properly. You can also make multiple copies of the same template to speed up your work.
Conclusion
Creating a woodworking template can greatly enhance your woodworking projects. By following the steps outlined in this guide, you can tailor your templates to fit your specific needs, leading to more efficient and precise woodworking. Embracing these techniques will allow you to unleash your creativity and produce high-quality woodwork.