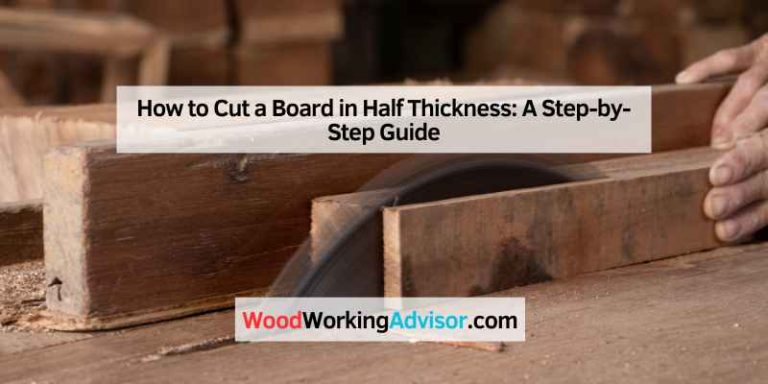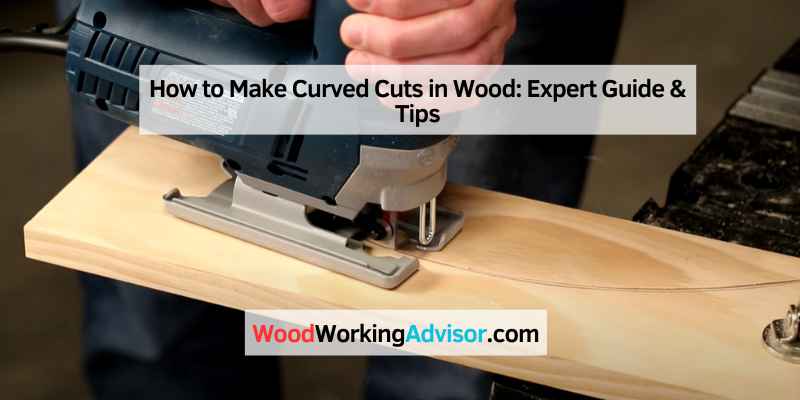
How to Make Curved Cuts in Wood: Expert Guide & Tips
To make curved cuts in wood, use a jigsaw or bandsaw for precision and control. Secure the wood firmly before cutting.
Curved cuts add a unique touch to woodworking projects, enhancing their aesthetic appeal. Whether creating intricate designs or smooth edges, knowing how to make curved cuts in wood is essential for any woodworker. By following proper techniques and using the right tools, you can achieve professional-looking results.
In this guide, we will explore the step-by-step process of making curved cuts in wood, providing you with the knowledge and confidence to tackle curved cutting tasks with ease. Let’s delve into the world of woodworking and master the art of crafting beautifully curved wood pieces.
Introduction To Curved Cuts
Curved cuts in wood can add a touch of elegance and creativity to your woodworking projects. Whether you’re crafting a decorative piece or working on a functional item, mastering the art of making curved cuts is essential for any woodworker.
Importance In Woodworking
Curved cuts are crucial in woodworking as they allow for the creation of intricate designs and unique shapes that straight cuts cannot achieve. They are often used in creating furniture, decorative moldings, and artistic woodwork. Mastering the skill of making curved cuts opens up a world of design possibilities and elevates the quality of your woodworking projects.
Types Of Curved Cuts
When it comes to woodworking, there are several types of curved cuts that woodworkers commonly use. These include circular cuts, concave cuts, and compound cuts. Each type serves a different purpose and requires specific techniques and tools to achieve the desired results.
Essential Tools For Curving Wood
When working with wood, the ability to create curved cuts is an essential skill. To achieve this, it’s crucial to have the right tools at your disposal. Here are the essential tools for curving wood:
Jigsaws And Their Blades
Jigsaws are versatile power tools that can be equipped with different types of blades to make curved cuts in wood. T-shaped and scroll-cutting blades are ideal for creating intricate curved designs, while fine-tooth blades are suitable for smoother cuts in hardwoods.
Band Saws For Precision
Band saws are highly effective for cutting intricate curves in wood. Their continuous blade allows for precision and control when shaping wood, making them ideal for creating smooth, detailed curved cuts.
Using A Router
When equipped with a flush-trim or spiral up-cut bit, a router can be used to create curved cuts in wood. This tool allows for precise and controlled shaping, making it an essential tool for achieving smooth and accurate curved edges.
Preparing The Wood
To make curved cuts in wood, start by preparing the wood. Mark the desired curve, then use a jigsaw for cutting. Sand the edges for a smooth finish.
Woodworking is an art form that requires patience, precision, and skill. When it comes to making curved cuts in wood, the process can be intimidating for even the most experienced woodworkers. However, with the right tools and techniques, anyone can master the art of making curved cuts in wood. In this article, we will discuss how to prepare the wood for curved cuts, including selecting the right wood and creating a template.
Selecting The Right Wood
The first step in preparing the wood for curved cuts is selecting the right type of wood. Not all woods are created equal, and some are better suited for curved cuts than others. When selecting wood, it is important to consider the wood’s grain, density, and flexibility. Here are some tips for selecting the right wood for curved cuts:
- Choose woods with a tight and consistent grain pattern, such as maple or birch.
- Avoid woods with an open or inconsistent grain pattern, such as oak or pine.
- Choose woods with a dense and hard texture, such as walnut or cherry.
- Avoid woods with a soft texture, such as cedar or spruce.
- Choose woods with a natural flexibility, such as ash or hickory.
Creating A Template
Once you have selected the right wood, the next step is to create a template. A template is a pattern that you can use to guide your cuts and ensure that they are precise and consistent. Here are some tips for creating a template:
- Draw your design onto a piece of paper or cardboard.
- Cut out the design using a pair of scissors or a utility knife.
- Trace the design onto your wood using a pencil or a marker.
- Cut along the traced lines using a jigsaw or a bandsaw.
By following these simple steps, you can prepare your wood for curved cuts and create precise and consistent cuts every time. Remember to always take your time and practice your technique before attempting more complicated cuts. With patience and practice, you can master the art of making curved cuts in wood and take your woodworking skills to the next level.
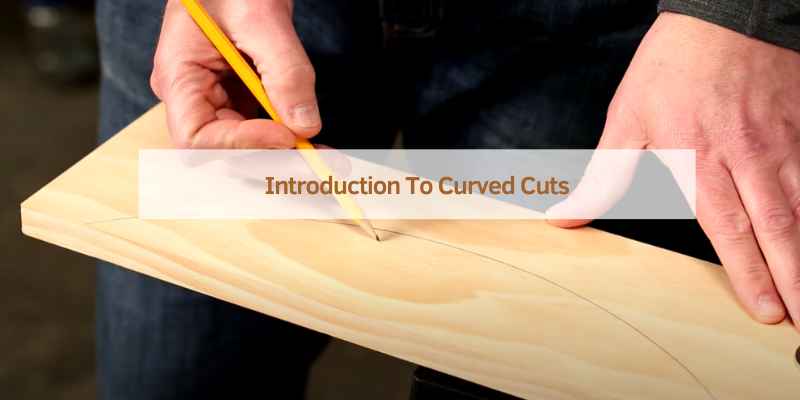
Marking And Measuring Techniques
To make curved cuts in wood, marking and measuring techniques are essential. Firstly, draw the shape of the curve onto the wood using a flexible curve ruler. Then, use a jigsaw to cut along the marked line. Finally, sand the edges to smooth out any roughness.
Tracing The Cut Line
Use a flexible strip of wood for tracing curved lines on the wood.
Secure the strip at the starting point and end of the curve.
Trace along the strip to create a smooth guideline for cutting.
Setting Up For Complex Curves
Break down the curve into smaller segments for accuracy.
Use a compass or template to mark consistent curves.
Measure and mark key points along the curve to guide cutting.
Safety Measures And Best Practices
When it comes to working with wood and making curved cuts, safety should always be your top priority. By following these safety measures and best practices, you can ensure a safe and enjoyable woodworking experience.
Protective Gear
Before you start cutting wood, it is crucial to wear the appropriate protective gear to minimize the risk of injury. Here are the essential items you should have:
- Safety goggles: Protect your eyes from flying wood chips or debris.
- Dust mask: Prevent inhalation of harmful dust particles.
- Hearing protection: Guard your ears against loud noise produced by power tools.
- Work gloves: Provide a firm grip and protect your hands from cuts or splinters.
- Appropriate clothing: Avoid loose-fitting clothes that can get caught in machinery.
Safe Operation Of Tools
Using the right tools and operating them safely is crucial for making curved cuts in wood. Here are some key points to keep in mind:
- Choose the right saw: Depending on the project, you may need a jigsaw, bandsaw, or scroll saw.
- Ensure the blade is sharp: A dull blade can cause kickback and result in accidents.
- Secure the workpiece: Use clamps or a vice to hold the wood firmly in place.
- Plan your cuts: Mark the desired curve on the wood and plan your cutting path accordingly.
- Start with small cuts: Gradually work your way through the curve, making small, controlled cuts.
- Maintain a steady pace: Avoid rushing and maintain a consistent speed to ensure accuracy.
- Keep your hands away from the blade: Always keep your hands clear of the cutting area.
- Use a push stick: When necessary, use a push stick to guide the wood through the saw.
- Disconnect power when not in use: Always unplug the tool when making adjustments or taking breaks.
- Keep your workspace clean: Remove debris and clutter to prevent accidents.
By following these safety measures and best practices, you can minimize the risk of accidents and injuries while making curved cuts in wood. Remember, safety should never be compromised when working with power tools.
Cutting Techniques For Different Curves
When it comes to making curved cuts in wood, mastering the right cutting techniques is crucial. Different curves require different methods to achieve precision and smooth results. Let’s explore some key strategies for cutting techniques for different curves.
Straight Vs. Serrated Blades
Using a straight blade is ideal for gentle curves, while a serrated blade works best for tighter curves.
Managing Wood Grain And Thickness
Consider the wood grain and thickness when selecting the cutting technique to avoid splintering or uneven cuts.
Sanding And Finishing Curved Edges
To make curved cuts in wood, use a jigsaw or band saw for precision. Once the cuts are made, sand the edges with a flexible sanding block to smooth and finish the curved edges. This will ensure a professional and polished look for your woodworking projects.
Sanding Tools And Grit Selection
When it comes to sanding curved wood edges, having the right tools and grit selection is crucial. The first tool you’ll need is a sanding block that conforms to the curve you’re working on. If you don’t have a sanding block, you can easily make one by wrapping sandpaper around a piece of foam or cork.
Next, you’ll need to choose the right grit of sandpaper. Start with a coarse grit, such as 80 or 100, to remove any rough spots or imperfections in the wood. As you progress, switch to a finer grit, such as 120 or 150, to smooth out the surface of the wood.
Applying Finish To Curves
Once you’ve sanded your curved wood edges to your desired smoothness, it’s time to apply a finish. The finish you choose will depend on the type of wood you’re working with and the look you’re going for. Some popular finishes for curved wood edges include:
- Oil-based finishes
- Water-based finishes
- Lacquer finishes
- Wax finishes
When applying finish to curved wood edges, use a small brush or a sponge brush to ensure even coverage. Apply the finish in thin, even coats and allow each coat to dry completely before applying the next. Depending on the type of finish you choose, you may need to sand between coats to ensure a smooth finish.
Remember to wear gloves and work in a well-ventilated area when applying finishes. And always follow the manufacturer’s instructions for best results.
Advanced Tips For Mastering Curves
Discover advanced tips for mastering curves in woodwork. Learn how to make curved cuts in wood with precision and ease, unlocking new possibilities for your woodworking projects. Explore techniques and tools to enhance your skills and create stunning curved designs.
Cutting curves in wood can be a challenging task, especially if you’re a beginner. However, with the right tools and techniques, you can create beautiful curved cuts in no time. In this section, we will discuss some advanced tips for mastering curves that can take your woodworking skills to the next level.
Dealing With Challenging Materials
When it comes to cutting curves in wood, not all materials are created equal. Some woods, such as oak and maple, are harder than others, making them more difficult to cut through. Here are some tips for dealing with challenging materials:
- Use a sharp blade: A dull blade can make it harder to cut through the wood. Make sure your blade is sharp before you start cutting.
- Slow and steady: Take your time when cutting through hard woods. Rushing can cause the blade to bend or break.
- Consider using a jigsaw: If you’re struggling to cut through a particularly hard piece of wood, a jigsaw may be a better option than a handsaw.
Innovative Curving Techniques
There are many innovative techniques you can use to create unique and interesting curves in your woodworking projects. Here are some examples:
| Technique | Description |
|---|---|
| Kerf Bending | This technique involves cutting slots into the wood to allow it to bend more easily. |
| Stacked Lamination | By gluing multiple thin layers of wood together, you can create complex curves that would be difficult to achieve with a single piece of wood. |
| Steam Bending | Heating the wood with steam can make it more pliable, allowing you to bend it into the desired shape. |
By incorporating these innovative techniques into your woodworking projects, you can create stunning curves that are sure to impress.
Remember, practice makes perfect when it comes to mastering curves in woodworking. Don’t be afraid to experiment with different techniques and materials until you find what works best for you. With patience and perseverance, you can become a master at cutting curves in wood.
Troubleshooting Common Issues
To make curved cuts in wood, troubleshoot common issues by using the right blade for your jigsaw and adjusting the speed to prevent splintering. Ensure the wood is firmly secured and practice on a scrap piece first to perfect your technique.
Fixing Imperfections
Fill gaps with wood filler and sand smooth.
Use a wood putty to conceal small errors.
Adjusting For Material Warp
Moisten the concave side of the wood.
Apply weight to the convex side for balance.
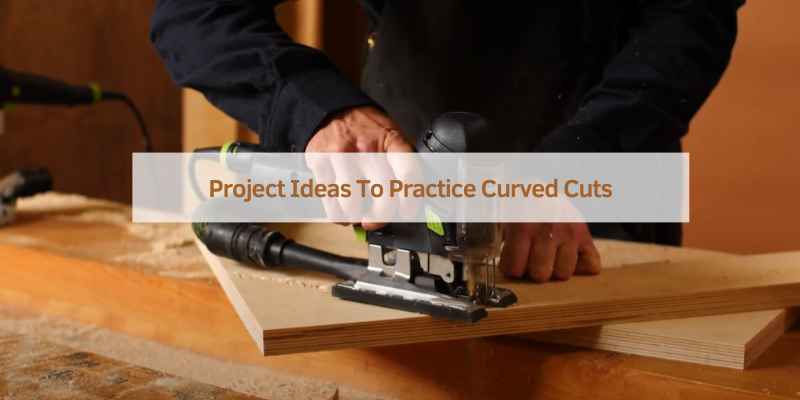
Project Ideas To Practice Curved Cuts
Curved cuts in wood can add an artistic and unique touch to your woodworking projects. Whether you are a beginner or an experienced woodworker, practicing curved cuts can help enhance your skills and create stunning pieces. Here are some project ideas to get you started:
Simple Projects For Beginners
If you’re new to woodworking or just starting to explore curved cuts, these simple projects are perfect for you:
- Curved Cutting Board: Create a one-of-a-kind cutting board with a curved handle for added style and functionality.
- Curved Picture Frame: Craft a unique picture frame with curved edges to showcase your favorite memories in an elegant way.
- Curved Bookends: Design and carve bookends with curved shapes to add a touch of sophistication to your bookshelf.
- Curved Wall Shelf: Build a decorative wall shelf with curved brackets to display small plants or decorative items.
Complex Designs For Experienced Woodworkers
If you have mastered the basics of curved cuts and are looking for a challenge, these complex designs will test your skills:
- Curved Chair Back: Construct a chair with a beautifully curved backrest to create an eye-catching focal point in any room.
- Curved Jewelry Box: Craft an intricate jewelry box with curved drawers and compartments to store precious accessories.
- Curved Console Table: Build a stunning console table with curved legs and intricate detailing for a statement piece in your home.
- Curved Headboard: Create a luxurious headboard with curved edges and intricate woodworking patterns to transform your bedroom.
These project ideas will provide you with ample opportunities to practice and refine your curved cutting skills. Remember to start with simpler projects if you are a beginner and gradually progress to more complex designs as you gain confidence. Happy woodworking!
Frequently Asked Questions
How Can I Make Curved Cuts In Wood Without A Bandsaw?
You can make curved cuts in wood without a bandsaw by using a jigsaw with a narrow blade or a coping saw. Ensure to mark the curve accurately and proceed with slow, steady cutting motions to achieve the desired shape.
What Are The Best Tools For Making Curved Cuts In Wood?
The best tools for making curved cuts in wood include a jigsaw with a narrow blade, a coping saw, or a scroll saw. These tools offer precision and control, allowing you to create smooth and accurate curved cuts in various wood materials.
What Are Some Tips For Achieving Smooth Curved Cuts In Wood?
To achieve smooth curved cuts in wood, ensure to use a sharp blade on your cutting tool, mark the curve accurately, and proceed with slow and steady cutting motions. Additionally, securing the wood firmly and using the appropriate blade for the specific wood type can enhance the cutting process.
Conclusion
Mastering the art of making curved cuts in wood opens up a world of possibilities for DIY enthusiasts and craftsmen alike. With the right tools and techniques, you can create intricate designs and add a touch of elegance to your woodworking projects.
Remember to choose the appropriate saw, mark your curves accurately, and proceed with patience and precision. With practice, you’ll be able to achieve smooth and professional-looking curved cuts that will impress anyone who sees your finished creations. Happy woodworking!