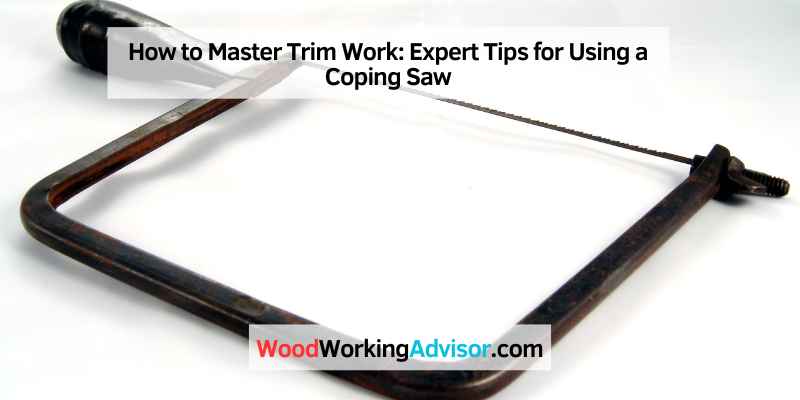
How to Use a Coping Saw for Trim (Coped Joint Method)
A coping saw cuts inside-corner trim joints by following the profile of the adjoining piece: cut the first board square, miter the second at 45 degrees, then back-cut the exposed profile 5-10 degrees past 90 with the coping saw. Skip that back-bevel and the joint opens up as walls settle or humidity moves the wood. This guide covers blade choice (15 TPI for wood), the full coping technique, and why coped corners outlast mitered ones.
Insert your Affiliate Disclosure reusable block here.
What You’ll Need
Best Coping Saw Pick
IRWIN Tools ProTouch Coping Saw
A budget-friendly, well-tensioned frame that’s a solid first coping saw for trim work.
- Best for: beginners coping their first baseboard or crown joints
- Why we picked it: comfortable grip and easy blade tensioning for the back-bevel cuts this guide covers
- Main drawback: stock blade is general-purpose — swap in a 15 TPI wood blade for cleaner trim cuts
Compare more coping saw options
 Option 1 KAKURI Coping Saw Frame + 5 Blades
|
 Option 2 Taytools Coping Saw Frame + 20 Blades
|
 Option 3 Bahco Coping Saw, Wooden Handle
|
As an Amazon Associate we earn from qualifying purchases.
Gather these before you start so you’re not stopping mid-cut to hunt for supplies:
- Coping saw — a 6-1/2 inch frame with a deep throat handles most baseboard and crown profiles.
- Wood-cutting blade, 15 TPI — fine enough to leave a clean edge without tearing softwood trim.
- Miter saw or miter box — for the initial 45-degree bevel cut on the piece you’ll cope.
- Pencil — to trace the profile line you’ll follow with the coping saw.
- Bench vise or clamps — to hold the trim steady while you saw.
- Round file and sandpaper — to clean up the coped edge and fine-tune the fit.
How To Cope An Inside Corner Trim Joint
Coping is how trim carpenters join inside corners without relying on the wall actually being square — which most walls aren’t. Instead of mitering both pieces at 45 degrees, you cut one piece square and shape the other to fit the exact profile of the first.
- Cut the first piece square: Run this piece into the corner with a plain 90-degree cut so its face sits flush against the wall.
- Miter the second piece at 45 degrees: Cut the mating piece the same way you’d cut a normal outside corner. This exposes the full face profile you’ll be cutting along.
- Mark the profile line: Trace the exposed edge of the profile with a pencil so the cut line is easy to see and follow.
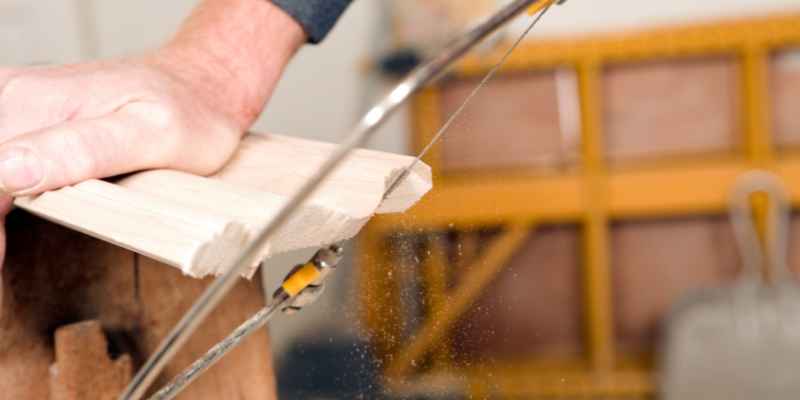
- Back-cut with the coping saw at 5-10 degrees past 90: Follow the pencil line, angling the blade so you remove extra material from the hidden back of the piece — only the thin front edge should touch the adjoining board.
- Test-fit against scrap: Hold the coped piece against an offcut of the same profile before installing it, and check for daylight at the face.
- File and sand the high points: Use a round file for tight curves and sandpaper for flatter sections until the joint closes tight.
- Install and nail: Once the fit is tight against the mating profile, set the piece and nail it in place.
📊 Back-cut the coped profile 5 to 10 degrees past 90° — enough to remove extra material from the hidden back face so only the thin front edge of the profile touches the adjoining piece. Cutting square instead of back-beveled is the single most common reason a coped joint won’t sit tight. — Source: trim-carpentry technique guides (Family Handyman, One Project Closer)
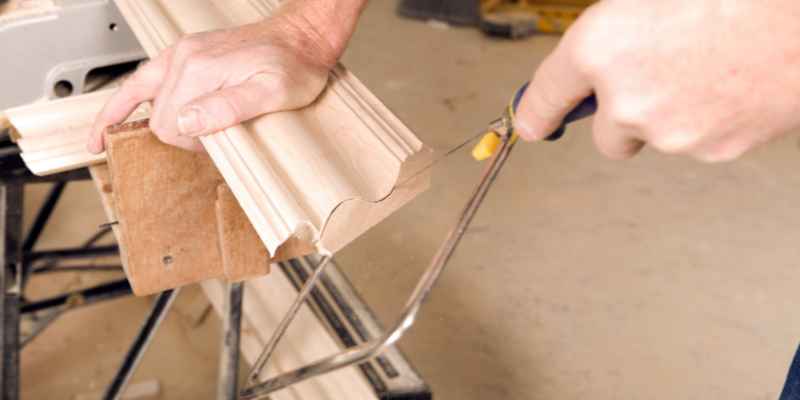
If the wall you’re coping into is closer to 92 or 93 degrees than a true 90, that’s fine — the profile cut absorbs small variations that a mitered joint can’t. For a first cut on baseboard, see our guide to cutting baseboard inside corners with a miter saw, which covers the initial 45-degree bevel in more detail before you switch to the coping saw.
Choosing The Right Coping Saw Blade
Blade choice matters more for trim work than for rough cutting — the wrong blade tears softwood profiles instead of slicing them cleanly.
- Use a 15 TPI (teeth per inch) blade for wood trim. Finer blades (18-24 TPI) are for metal and plastic; they clog quickly and cut slowly in wood.
- Install the blade with teeth facing the handle. A coping saw cuts on the pull stroke, not the push stroke, so the teeth need to point back toward you.
- Tension the blade until it’s taut. A loose blade wanders off the profile line on the back-cut and is far more likely to snap mid-cut.
- Match the blade to your profile’s tightest curve. Deep coves and tight radii need a narrower blade than a simple ogee profile.
“Tension the blade until it makes a clean, high-pitched ping when you flick it with a finger. A loose blade wanders on the back-cut, and on a profile that thin you won’t notice until the joint doesn’t sit tight.”
Need finer control than a coping saw offers, for jewelry-scale inlay work rather than trim? Our jeweler’s saw vs. coping saw comparison breaks down when each tool is the better choice.
Mastering The Cutting Technique
Once the blade is tensioned and the profile is marked, technique is what separates a clean cope from a chewed-up one.
Grip And Hand Position
Hold the handle firmly with your dominant hand while your other hand steadies the trim piece in the vise. Keep the saw roughly vertical to the cut line and let the blade’s own thinness do the turning — forcing the frame sideways is what snaps blades.
Cutting Curves And Tight Corners
On tight inside curves, take short pull strokes and rotate the blade in the frame as you go rather than twisting the whole saw. Coping saw blades mount on pins that spin independently of the frame on most models, so you can follow a curve without changing your grip.
Coped Joint Vs. Mitered Inside Corner
Both methods close an inside corner. They don’t perform the same once the house moves.
| Method | How It’s Cut | Best For |
|---|---|---|
| Mitered inside corner | Both pieces cut at 45 degrees on a miter saw | Speed, on new-construction walls that are actually square |
| Coped inside corner | One piece square, one back-cut to the profile with a coping saw | Older homes, out-of-square walls, and joints that need to stay tight as wood moves seasonally |
A mitered inside corner only looks good if both walls meet at exactly 90 degrees and stay that way. A coped joint’s profile-matched edge keeps contact with its mate even as humidity swells or shrinks the wood, which is why trim carpenters cope inside corners as the default and reserve miters for outside corners.
Common Mistakes That Ruin A Coped Cut
Most coping problems trace back to one of three causes: the wrong blade, a rushed cut, or a saw that’s out of tension. Here’s how to fix each.
- Wood splitting at the cut: switch to a finer 15 TPI blade, mark the line clearly, and let the blade cut instead of pushing it through the wood.
- Blades snapping mid-cut: re-check tension (it should be taut enough to “sing” when plucked), and use slow, steady strokes instead of forcing the pace.
- The blade wanders or angles off the line: confirm the blade is aligned straight in the frame, keep your grip steady, and avoid side pressure — let the teeth do the cutting, not your arm.
- The joint gaps at the face after installing: you likely cut square instead of back-beveling 5-10 degrees — recut the profile with the extra back-angle and test-fit again before nailing.
Frequently Asked Questions
Why cope a trim joint instead of just mitering both pieces?
Mitering both pieces only produces a tight seam if the wall corner is exactly 90 degrees. Real walls rarely are. A coped joint’s profile-matched edge keeps full contact with the adjoining piece even on an out-of-square corner, and it stays tighter as the wood expands and contracts with the seasons.
What angle do you cut when coping trim?
Back-cut the profile 5 to 10 degrees past 90 degrees. This removes extra material from the hidden back of the piece so only the thin front edge of the profile makes contact with the mating board — a tighter, more forgiving fit than a square cut.
What TPI blade should I use for coping wood trim?
Use a 15 TPI blade for wood. Blades in the 18-24 TPI range are made for metal and plastic and will clog and cut slowly in wood trim.
Can you cope baseboard that’s already installed?
Yes, but it’s harder than coping before installation — you’re cutting in place with less room to maneuver the frame. It’s usually faster to pull the piece, cope it on a bench or in a vise, then reinstall and nail it back.
Why does my coped joint keep gapping at the seam?
The most common cause is cutting the profile square instead of back-beveling it 5-10 degrees. A square-cut cope leaves the back edge of the profile touching first, which holds the face open. Recut with the back-bevel and test-fit against scrap before nailing.
A coping saw earns its place in a trim carpenter’s kit on the very first out-of-square corner it saves you from re-cutting. Master the 45-degree bevel, the 5-10 degree back-cut, and a properly tensioned 15 TPI blade, and coped joints stop being the intimidating part of trim work — they become the fastest way to a seam that disappears. For related profile cuts, see our guide to cutting quarter round molding, or browse our full woodworking tools & saws guide for choosing between hand and power saws.
Sponsored / affiliate links. As an Amazon Associate I earn from qualifying purchases. I may earn additional commission from eligible campaigns.