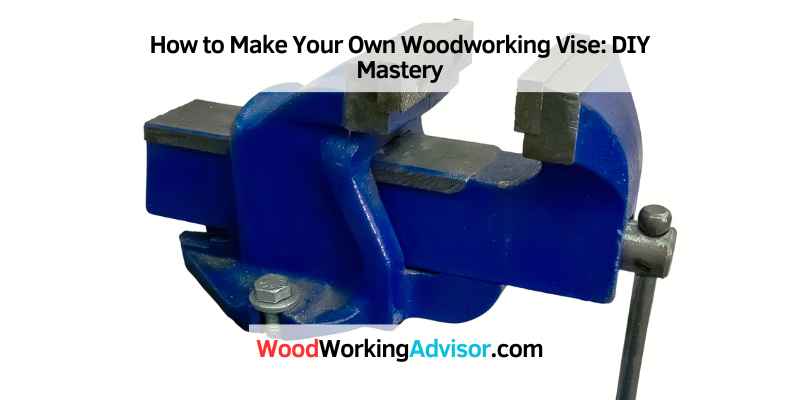
How to Make Your Own Woodworking Vise: DIY Mastery
To make your own woodworking vise, gather materials like wood, screws, and metal rods. Construct the vise by assembling the components securely.
Crafting a woodworking vise allows for customization to fit your needs, making your woodworking projects more efficient and enjoyable. By following these steps, you can create a functional and cost-effective vise tailored to your workspace and requirements. Customizing your woodworking tools enhances your craftsmanship and allows for greater precision and control in your projects.
Building your woodworking vise is a rewarding DIY project that adds a personal touch to your workshop and elevates your woodworking experience.
Introduction To DIY Woodworking Vis
Are you a woodworking enthusiast looking to enhance your woodworking projects? Building your own woodworking vise can be a rewarding and cost-effective solution. In this blog post, we’ll explore the essential role of a vise in woodworking and the numerous benefits of creating your own. Whether you’re a seasoned woodworker or a DIY hobbyist, this guide will walk you through the process of crafting your very own woodworking vise, empowering you to take your woodworking skills to the next level.
The Role Of A Vise In Woodworking
A woodworking vise plays a pivotal role in securely holding wood in place during various woodworking tasks such as sawing, chiseling, planning, and carving. It provides stability and precision, allowing woodworkers to work with greater accuracy and safety. The vise serves as an indispensable tool in ensuring the success and quality of woodworking projects, making it a fundamental component of any workshop or workspace.
Benefits Of Building Your Own
- Cost-effective solution
- Customization to suit your specific needs
- Opportunity for skill development
- Enhanced satisfaction from using a self-crafted tool
Essential Tools And Materials
Before starting the process of making your own woodworking vise, it’s crucial to gather all the necessary tools and materials. This will ensure a smooth and efficient workflow, allowing you to focus on the construction process without interruptions. Below are the essential tools and materials you will need to create your woodworking vise.
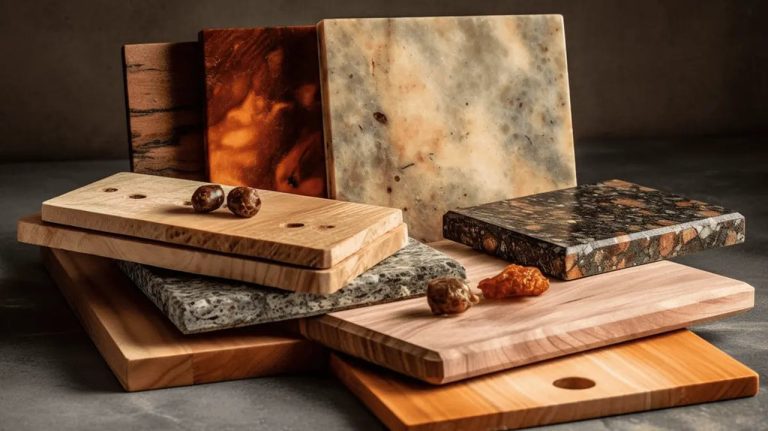
Choosing The Right Wood
When selecting the wood for your woodworking vise, choose a sturdy and durable hardwood such as maple, oak, or beech. These types of wood are known for their strength and ability to withstand heavy usage. Additionally, ensure that the wood is free from knots and defects, as these can weaken the vise’s overall structure.
Metal Components Needed
The metal components required for constructing a woodworking vise include a sturdy steel or iron screw, durable steel guide rods, and heavy-duty steel or iron handles. These components will provide the necessary strength and stability to the vise, ensuring its longevity and reliability during use.
Tool Checklist
| Tools | Materials |
|---|---|
| Clamps | Hardwood (e.g., maple, oak, beech) |
| Chisels | Steel or iron screw |
| Hand saw | Steel guide rods |
| Drill | Heavy-duty steel or iron handles |
| Woodworking vise hardware kit | Wood glue |
Design Considerations
When designing your own woodworking vise, there are several important considerations to keep in mind to ensure the vise meets your specific needs and functions effectively. By carefully considering the size, capacity, types, and custom features, you can create a vise that enhances your woodworking projects and provides the necessary support and stability.
Determining Size And Capacity
When determining the size and capacity of your woodworking vise, consider the dimensions of the materials you typically work with. Choosing a vise with a jaw opening that accommodates your largest workpieces is crucial for versatility and practicality. Additionally, ensure that the vise’s overall dimensions align with your workbench space for seamless integration.
Types Of Vises And Their Uses
Understanding the various types of woodworking vises and their specific uses is essential for selecting the most suitable option for your projects. Whether it’s a front vise, tail vise, or shoulder vise, each type offers distinct advantages. Evaluating the nature of your woodworking tasks will guide you in choosing the most appropriate vise type for your needs.
Custom Features For Enhanced Functionality
Customizing your woodworking vise with additional features can significantly enhance its functionality. Incorporating features such as quick-release mechanisms, bench dog holes, and integrated clamping accessories can streamline your workflow and increase efficiency. Implementing these custom features can tailor the vise to your specific woodworking techniques and preferences.
Step-by-step Construction Guide
This step-by-step construction guide will teach you how to make your own woodworking vise. You’ll need to gather the necessary materials and follow the detailed instructions carefully to complete this DIY project. With some patience and effort, you can have a functional and customized vise for your woodworking needs.
Cutting The Wood To Size
Begin by cutting the wood to the required size, using a table saw or a circular saw. You will need two pieces of wood for the jaw structure, two for the end caps and two for the guide rails. The jaw structure should be around 2 inches thick, while the end caps and guide rails should be around 1 inch thick.
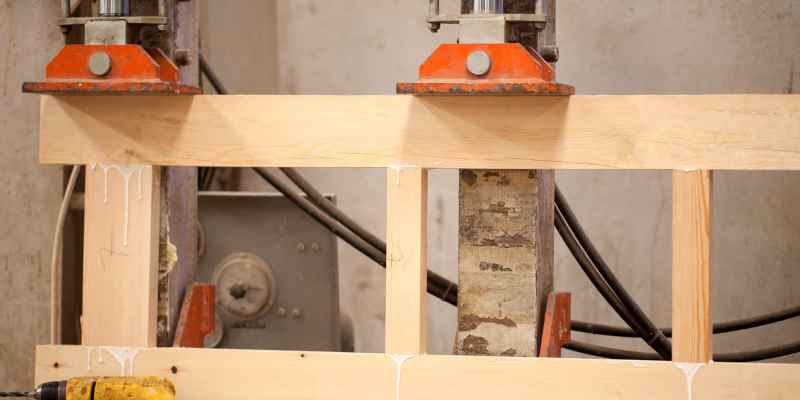
Assembling The Jaw Structure
Next, assemble the jaw structure by gluing the two pieces of wood together. Clamp the glued wood pieces and wait for the glue to dry completely. After drying, use a hand plane to smooth the surface of the jaw structure. Once the jaw structure is ready, attach the guide rails to both sides of the jaw structure using screws.
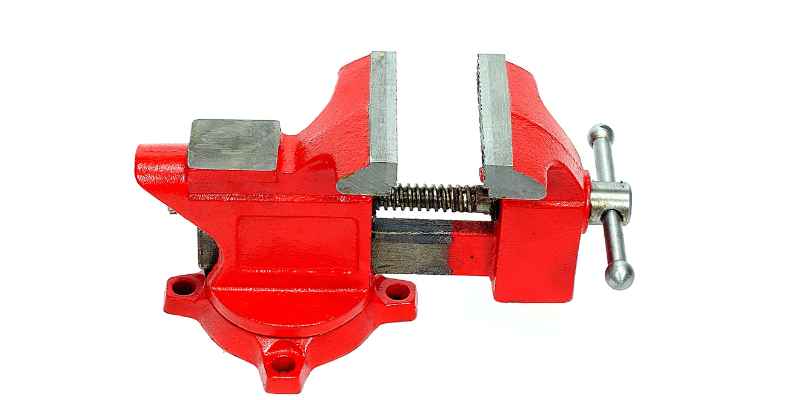
Installing The Screw Mechanism
The next step is to install the screw mechanism. Begin by drilling a hole in the center of the jaw structure, where the screw will go. Then, attach the end caps to both ends of the jaw structure using screws. Afterward, attach the screw mechanism to one of the end caps by drilling a hole and screwing it in. Finally, attach the handle to the end of the screw mechanism.
By following these simple steps, you can create your own woodworking vise. With a little patience and skill, you can build a vise that will help you with all your woodworking projects. So go ahead and give it a try!
Mounting Your Woodworking Vise
Making sure your woodworking vise is securely mounted is crucial for efficient and safe woodworking projects.
Selecting The Optimal Location
Choose a location on your workbench that provides ample space around the vise for maneuvering large pieces of wood.
Securing The Vise To The Workbench
- Position the vise on the workbench where it will be most comfortable to work with.
- Use sturdy screws or bolts to attach the vise to the workbench firmly.
- Ensure the vise is level and securely fastened to prevent any wobbling during use.
Finishing Touches
Crafting your own woodworking vise adds a personalized touch to your projects. With a few simple materials and careful assembly, you can create a sturdy and functional vise that enhances your woodworking experience. Embrace the satisfaction of completing your projects with a custom-made woodworking vise.
Sanding And Smoothing
After assembling your woodworking vise, sanding and smoothing the surface is essential to ensure a polished look. Start with rough sandpaper and gradually work your way up to fine-grit sandpaper to achieve a smooth surface. Use a sanding block to keep the surface even, and be sure to sand in the direction of the wood grain.
Applying Protective Coatings
To protect the surface of your woodworking vise, applying a protective coating is recommended. You can use varnish, lacquer, or even a coat of wax to keep your vise in good condition for years to come. Before applying a protective coating, ensure that the surface is clean and free of any dust or debris.
Finishing touches are crucial for the overall appearance and longevity of your woodworking vise. Sanding and smoothing the surface, followed by applying a protective coating, will help ensure that your vise remains in excellent condition and can be used for years to come. With these simple steps, you can create a custom woodworking vise that is both functional and aesthetically pleasing.
Maintenance And Care Tips
Regularly wipe down your woodworking vise with a clean cloth.
Remove any sawdust or debris that may have accumulated.
Inspect for any signs of damage or wear and tear.
Apply a small amount of grease to the moving parts of the vise.
Check the alignment and adjust as needed for smooth operation.
Ensure all screws and bolts are tightened properly.
If the vise is sticking, check for any debris or obstructions.
Adjust the alignment of the vise to prevent uneven clamping.
If the vise jaws are not parallel, readjust them for proper alignment.
Advanced Modifications
When it comes to woodworking vise, advanced modifications can enhance functionality. Let’s explore two key enhancements: Quick Release Mechanisms and Swivel Bases.
Incorporating Quick Release Mechanisms
Quick release mechanisms allow for rapid adjustment, saving time and effort during woodworking projects.
- Simple lever design for easy operation
- Improves efficiency and workflow
- Enhances overall user experience
Adding Swivel Bases For Versatility
Swivel bases offer increased flexibility, enabling the vise to rotate for better access to various angles.
- 360-degree rotation for enhanced maneuverability
- Perfect for intricate woodworking tasks
- Provides versatility in clamping positions
Projects To Test Your New Vise
Looking to test out your new vise? Why not try making your own woodworking vise? This project is a great way to put your vise to the test and enhance your woodworking skills.
Congratulations on making your own woodworking vise! Now that you have this essential tool, it’s time to put it to use with some fun and challenging projects. Whether you’re a beginner or an expert, there are plenty of woodworking projects that can help you hone your skills and create something beautiful. Here are some project ideas to help you get started:
Simple Starter Projects
If you’re new to woodworking or just starting out with your new vise, these simple projects are a great way to get your feet wet:
- A picture frame
- A birdhouse
- A cutting board
- A wooden spoon
- A small jewelry box
These projects require basic woodworking skills and can be completed in a weekend. They’re also a great way to practice using your vise and perfecting your techniques.
Complex Builds To Challenge Your Skills
If you’re an experienced woodworker looking for a challenge, these complex builds will put your skills to the test:
| Project | Description |
|---|---|
| Adirondack Chair | A classic outdoor chair with wide armrests and a high back |
| Workbench | A sturdy, functional workbench with built-in storage |
| Chessboard | A beautiful chessboard with intricate inlay |
| Rocking Horse | A classic children’s toy that requires precision cutting and shaping |
| Jewelry Armoire | A large, multi-drawer jewelry box with intricate joinery |
These projects require advanced woodworking skills and may take several weeks or months to complete. However, the end result is a stunning piece of furniture or decor that you can be proud of.
No matter what project you choose, remember to take your time and enjoy the process. With your new woodworking vise, you have the tools you need to create something truly beautiful.
Conclusion And Next Steps
Frequently Asked Questions
How Do I Make My Own Woodworking Vise?
To make your own woodworking vise, you will need some basic materials such as a wooden block, metal screws, and a drill. Start by measuring and cutting the wooden block to the desired size. Then, drill holes into the block for the screws to go in.
Attach the screws to the block, leaving enough space for the jaw to open and close. Finally, secure the vise to your workbench, and you’re ready to start woodworking!
What Are The Advantages Of Making My Own Woodworking Vise?
Making your own woodworking vise has several advantages. Firstly, it allows you to customize the vise to meet your specific needs and preferences. Secondly, it can be a cost-effective option compared to buying a pre-made vise. Additionally, building your own vise can be a rewarding and satisfying woodworking project in itself.
Finally, you’ll have the satisfaction of using a tool that you created with your own hands.
Can I Use Any Type Of Wood For My Woodworking Vise?
While you can use various types of wood for your woodworking vise, it is important to choose a hardwood that is sturdy and durable. Woods like maple, beech, and oak are popular choices due to their strength and resistance to wear and tear.
Avoid using softwoods or plywood, as they may not provide enough support and stability for your vise.
Conclusion
To sum up, creating your own woodworking vise can be a rewarding and cost-effective project for any woodworking enthusiast. By following the step-by-step instructions provided in this blog post, you can build a sturdy and functional vise that meets your specific needs.
Remember to choose high-quality materials and take your time during the construction process. With a little effort and patience, you’ll soon have a reliable vise that will greatly enhance your woodworking projects. Happy woodworking!