How To Remove A Screw With No Head: Easy Hacks Revealed
To remove a screw with no head, use a pair of pliers or a screw extractor tool. Gently grip the exposed shaft of the screw with the pliers and rotate anticlockwise until the screw is loosened and can be removed.
Alternatively, insert the screw extractor tool into the screw shaft, apply counterclockwise pressure, and turn until the screw is extracted. This method works for screws with damaged or stripped heads, allowing you to remove them easily and efficiently. Whether using pliers or a screw extractor tool, these steps will help you remove a screw with no head hassle-free.
Now, let’s dive deeper into the process of removing a screw with no head.
1. Types Of Screws With No Head
When working on DIY projects or repairs, you may encounter screws that have no head. This can be frustrating and may leave you wondering how to remove them. In this article, we will discuss the different types of screws with no head and provide you with practical tips on how to handle each case.
Id=”screw-stripped-head”1.1 Screw With Stripped Head
One common problem you may face is a screw with a stripped head. This happens when the grooves on the screw head become worn down or damaged, making it difficult to get a grip with a screwdriver or other tools. Fortunately, there are a few methods you can try to remove a screw with a stripped head:
- Use a rubber band: Place a rubber band over the stripped head and apply gentle pressure while turning the screwdriver. The rubber band can create enough friction to grip the screw and turn it out.
- Try using pliers or locking pliers: If the rubber band method doesn’t work, use pliers or locking pliers to grip and turn the screw counterclockwise.
- Use a screw extractor: Screw extractors are specifically designed to remove stripped screws. These tools have a reverse-threaded tip that digs into the stripped head and allows you to turn it out.
Id=”screw-broken-head”1.2 Screw With Broken Head
Another situation you may encounter is a screw with a broken head. This can occur when excessive force is applied or if the screw is old and corroded. Removing a screw with a broken head can be challenging, but here are a few techniques that may help:
- Use a screw extractor: As mentioned earlier, a screw extractor can be useful for removing screws with broken heads as well. Follow the same steps, using the extractor to dig into the broken screw head and turn it counterclockwise.
- Use a rotary tool: A rotary tool with a cutting or grinding accessory can be used to create a new groove on the broken screw head. Once the groove is made, use pliers or a screwdriver to turn the screw out.
- Drill a pilot hole: In some cases, you may need to drill a pilot hole next to the broken screw head. This will allow you to insert a screw extractor or pliers to grip and turn the screw counterclockwise.
Dealing with screws that have no head can be a frustrating experience, but with the right tools and techniques, you can successfully remove them. Whether you’re faced with a stripped head or a broken head, the methods outlined above can help you overcome the challenge effortlessly. Remember to take your time, be patient, and use the appropriate tools for the task at hand.
2. Necessary Tools
When it comes to removing a screw with no head, having the right tools is crucial. The following tools will make the process much easier and save you time and frustration.
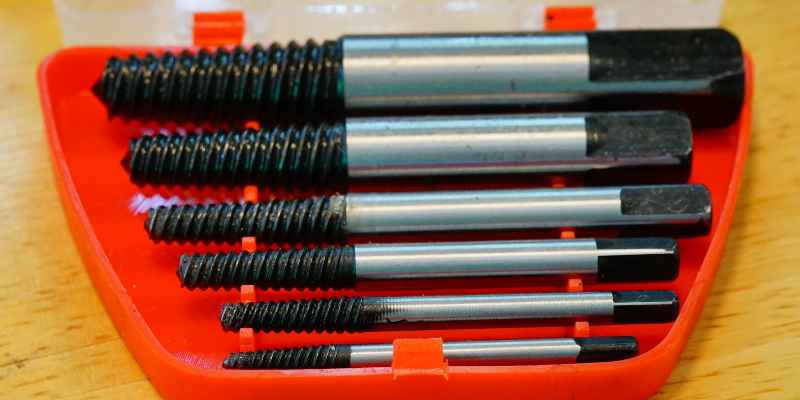
2.1 Screw Extractor
If you’re dealing with a stubborn screw with no head, a screw extractor should be your go-to tool. This small but mighty device is specifically designed to remove damaged or stripped screws. Its spiral-shaped end digs into the screw, allowing you to rotate it counterclockwise and pull it out. Keep in mind that screw extractors come in different sizes, so choose one that fits your screw snugly to ensure the best results.
2.2 Rubber Band
Believe it or not, a simple rubber band can be incredibly helpful in removing a screw with no head. Before attempting any other method, try this simple trick. Place a wide rubber band over the damaged screw, ensuring that it covers the entire surface. Then, press down firmly and twist counterclockwise. The rubber band’s grip can provide enough traction to loosen the screw, allowing you to remove it with ease.
2.3 Pliers Or Vice Grips
If the screw extractor or rubber band method doesn’t work, it’s time to bring in some extra muscle. Pliers or vice grips are ideal for gripping onto the screw shaft and providing the necessary torque to turn it counterclockwise. Choose a pair of pliers or vice grips that are comfortable to hold and have serrated jaws for a better grip. With a firm grip and steady hand, slowly rotate the screw counterclockwise until it comes loose.
3. Step-by-step Guide To Remove A Screw With No Head
This step-by-step guide provides you with easy-to-follow instructions on removing a screw with no head. Learn how to tackle this common DIY problem efficiently and effectively.
Having a stubborn screw with no head can be quite frustrating, but fear not! With the right techniques and tools, you can easily remove it. In this step-by-step guide, we will go through four different methods to help you successfully extract the screw in no time. Whether you choose to assess the situation, utilize a screw extractor, employ a rubber band, or opt for pliers or vice grips, rest assured that you’ll be able to tackle this challenge effectively.
3.1 Assessing The Situation
Before diving into any method, it’s essential to assess the situation and get a clear understanding of the screw’s condition. Here’s how you can do it:
- Inspect the damaged screw and determine its size and type.
- Check if any part of the screw is visible, such as a few threads or a small edge.
- Identify the material the screw is embedded in; this will help you choose the appropriate technique.
- Ensure that you have the necessary tools for the chosen method.
3.2 Using A Screw Extractor
One of the most effective ways to remove a screw with no head is by using a screw extractor. This tool is specifically designed to grip onto the screw and rotate it counterclockwise. Here’s how you can use a screw extractor:
- Select a screw extractor that matches the size and type of the screw.
- Drill a small hole into the center of the screw using a power drill.
- Attach the screw extractor to the power drill and insert it into the drilled hole.
- Apply steady pressure while turning the screw extractor counterclockwise.
- The screw should start loosening and eventually come out.
- Remove any debris and clean the area once the screw is successfully extracted.
3.3 Using A Rubber Band
If you don’t have a screw extractor on hand, don’t worry! You can try using a simple rubber band to remove the screw. The elasticity of the rubber band helps create enough friction to grip onto the damaged screw. Here’s how you can do it:
- Place a wide rubber band over the top of the screw.
- Press the rubber band firmly against the screw and apply downward pressure.
- Turn the screw counterclockwise with a screwdriver or pair of pliers.
- The rubber band should increase grip and gradually loosen the screw.
- Continue turning until the screw is completely extracted.
3.4 Using Pliers Or Vice Grips
Another handy method to remove a screw with no head is by using pliers or vice grips. These tools provide a firm grip and allow you to apply torque to the screw. Follow these steps to remove the stubborn screw:
- Select a pair of pliers or vice grips that fit the screw size.
- Position the pliers or vice grips near the screw, ensuring a secure grip.
- Apply strong and steady pressure while turning the tool counterclockwise.
- The grip should hold onto the screw, making it easier to unscrew.
- Continue rotating until the screw is fully removed.
Now that you have learned these four effective methods, you can confidently tackle any screw with no head. Remember to choose the technique that suits your situation best and ensure you have the necessary tools. By following this step-by-step guide, you’ll be able to remove that stubborn screw and complete your project with ease.
4. Alternative Methods
When faced with a stubborn screw that has no head, there are alternative methods you can try to remove it. These methods require a little extra effort and some additional tools, but they can save you the hassle of resorting to more drastic measures. Here are two effective methods you can use:
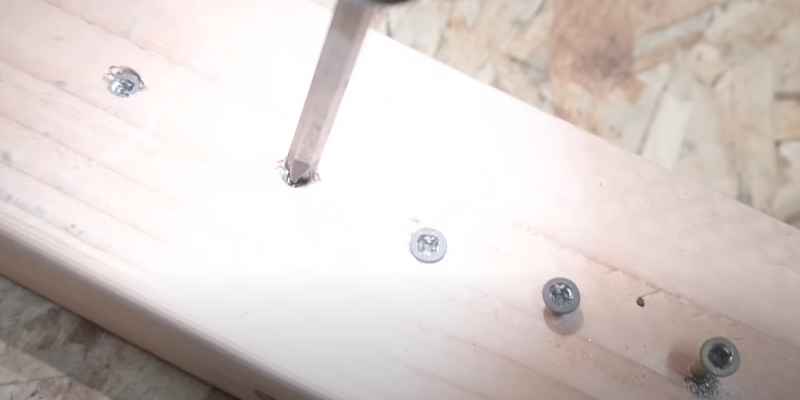
4.1 Using A Drill
One of the easiest ways to remove a screw with no head is by using a drill. This method is simple and requires only a few steps:
- First, you’ll need to select a drill bit that is slightly smaller than the width of the screw shaft. This will allow the drill bit to grab onto the screw without damaging the surrounding material.
- Next, place the drill bit into the chuck of your drill and tighten it securely.
- Position the drill bit on top of the screw shaft. Make sure it is centered and aligned with the screw.
- Apply steady pressure downwards and begin drilling into the screw shaft. The drill bit should cut into the metal, providing you with a new surface to grip onto.
- Once the drill bit has created a groove, switch your drill to reverse mode. Slowly and carefully remove the screw by turning it counterclockwise using the drill.
This method is ideal for screws with softer metal, such as brass or aluminum. If the screw is made of a harder material like stainless steel, you may need to take extra caution and use a carbide drill bit for better results.
4.2 Creating A Groove With A Dremel
Another alternative method to remove a screw with no head is by using a Dremel tool. This method involves creating a groove in the screw, providing you with more grip to twist it out. Follow these steps:
- Attach a cutting wheel or a grinding bit to your Dremel tool. Ensure it is securely tightened.
- Position the cutting wheel or grinding bit on top of the screw shaft. Hold it at a slight angle to create a groove in the screw.
- Turn on the Dremel tool and slowly apply pressure to the screw. The cutting wheel or grinding bit will start to cut into the metal, forming a groove.
- Once the groove is deep enough, switch the Dremel tool off and remove it from the screw.
- Using a pair of pliers or a screwdriver, twist the screw counterclockwise to remove it from the material.
It’s important to wear safety goggles and gloves when using a Dremel tool. Additionally, be careful not to apply too much pressure, as it could cause the cutting wheel or grinding bit to slip or damage the material surrounding the screw.
5. Tips To Avoid Stripping Screw Heads
When it comes to home improvement projects, one of the most frustrating situations is trying to remove a screw with no head. Fortunately, there are several tips you can follow to avoid stripping screw heads in the first place. By taking the right approach, you can save yourself time, frustration, and potentially costly damages. In this section, we will explore five helpful tips that will prevent screw head stripping.
5.1 Using The Correct Screwdriver
Using the correct screwdriver is essential for avoiding screw head stripping. Ensure that the size and type of screwdriver you are using matches the screw head precisely. Using the wrong screwdriver can lead to improper grip and slippage, causing the head to round off. Invest in a set of high-quality screwdrivers with different sizes and types to ensure you have the right tool for the job.
5.2 Applying Steady Pressure
Applying steady pressure is crucial when trying to remove a screw without stripping the head. Avoid using excessive force or sudden jerks, as this can cause the screwdriver to slip and damage the screw head. Instead, use a firm grip and apply constant pressure while turning the screwdriver slowly and steadily. This technique allows the screwdriver to maintain a strong grip on the screw head, reducing the risk of stripping.
5.3 Pre-drilling Holes
Pre-drilling holes is a preventive measure that can help you avoid stripping screw heads, especially when dealing with hardwood or dense materials. Before inserting the screw, use a drill bit slightly smaller than the screw’s diameter to create a pilot hole. This pilot hole will provide a path for the screw, reducing the chances of the head getting stripped. Make sure the pilot hole is deep enough to accommodate the screw’s entire length.
In summary, to avoid stripping screw heads:
- Use the correct screwdriver.
- Apply steady pressure while turning.
- Pre-drill holes using a pilot hole.
Conclusion
Removing a screw with no head may seem like a daunting task, but with the right tools and techniques, it can be done easily. By following the steps outlined you can tackle this challenge efficiently and effectively. Remember to exercise caution and patience throughout the process, and soon enough, you’ll have that stubborn screw out in no time.
Happy fixing!