How to Remove a Sheared Screw: Expert Tips and Techniques
Removing a sheared screw can be challenging. But don’t worry, it’s manageable.
Here’s a quick guide to help you through it. A sheared screw can disrupt any project. It’s frustrating when a screw head breaks off, leaving the rest stuck. This common problem needs simple solutions. We’ll explore easy methods to remove a sheared screw.
We’ll explain each step, so you can follow along with ease. Whether you’re fixing furniture or working on a DIY project, these tips will help you get back on track. Let’s dive in and tackle this problem together.

Credit: www.youtube.com
Safety Precautions
Always wear safety glasses and gloves to protect yourself from metal shards when removing a sheared screw. Ensure the work area is well-lit and stable to prevent accidents. Use the right tools and follow proper techniques.
Protective Gear
Always wear protective gloves to keep your hands safe. Use safety goggles to protect your eyes. Wearing a dust mask can help you avoid inhaling dust. These items will help you stay safe.
Workspace Preparation
Clear your workspace to avoid accidents. Make sure all tools are within reach. Ensure there is enough light to see clearly. Keep a first aid kit nearby in case of injury. Safety first!
Essential Tools
Removing a sheared screw can be tricky. Essential tools like pliers, screw extractors, and left-handed drill bits simplify the process. Ensure you have these tools on hand.
Screw Extractors
Screw extractors are special tools designed to remove broken screws. They have sharp tips that grip the damaged screw. This helps you twist it out. There are many types available. Some are spiral shaped while others are straight.
Drill Bits
Drill bits are used to create holes in the screw. This makes it easier to use an extractor. Choose a bit that is smaller than the screw. Be careful to drill straight. This will help prevent further damage.
Lubricants
Lubricants can make the removal process smoother. They help by reducing friction. Apply a small amount to the screw. This can make it easier to turn. WD-40 and machine oil work well.
Initial Assessment
Check the screw head. Is it broken? Look for any visible damage. Use a flashlight if needed. Broken screws can be tricky. Make sure you have the right tools. Pliers, screwdrivers, and drill bits. Assess the depth of the break. This will help you choose the right method. Be cautious. Avoid damaging the surrounding area.
There are several methods to remove a sheared screw. Extractors are one option. Drilling might be another. Pliers can help if the screw is exposed. Each method depends on the location and depth of the screw. Sometimes, you need multiple tools. Safety is key. Wear gloves and protective eyewear. Patience is necessary. Take your time for best results.
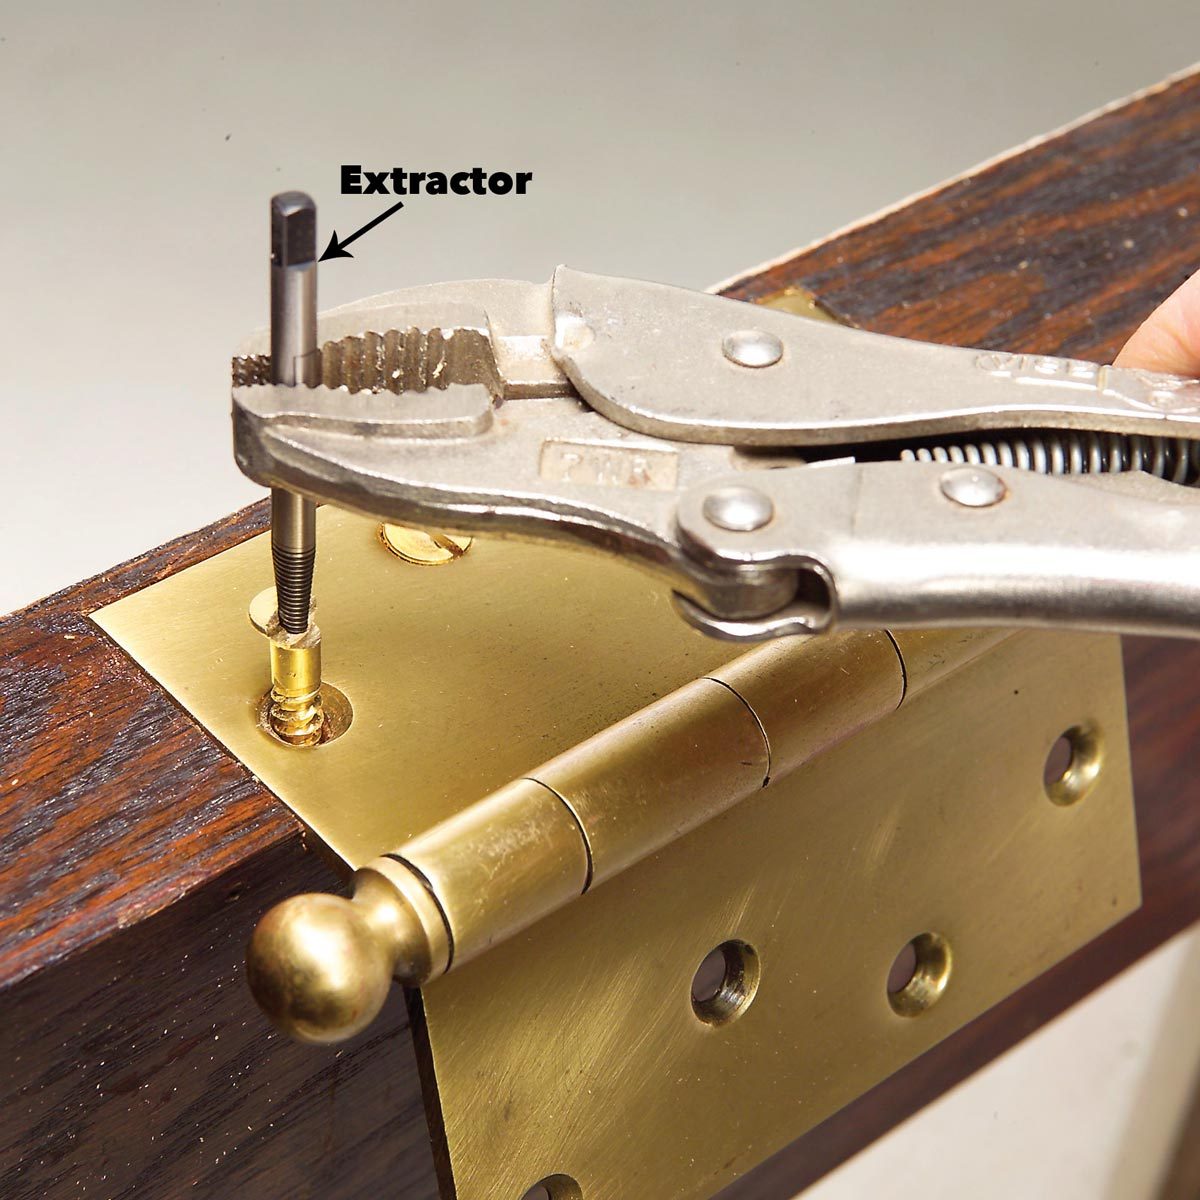
Credit: www.familyhandyman.com
Manual Techniques
First, grab the sheared screw with strong pliers. Twist the pliers slowly to loosen the screw. Be careful not to break it more. If the screw is stuck, try different angles. This might help in removing it.
Use a thick rubber band over the screw head. Place your screwdriver on the rubber band. This gives extra grip. Slowly turn the screwdriver. The rubber band helps prevent slipping. If it does not work, try a different rubber band.
Drilling Methods
Drilling a pilot hole helps guide the drill bit. Use a small bit first. This keeps the larger bit steady. Drill slowly to avoid slipping. It is important to stay centered. This prevents more damage. Pilot holes make removal easier.
Reverse drilling means using the drill in reverse. This helps to back out the screw. Use a left-handed drill bit. These bits are designed for this task. Go slow and steady. This method can loosen the screw. It is useful for stubborn screws.
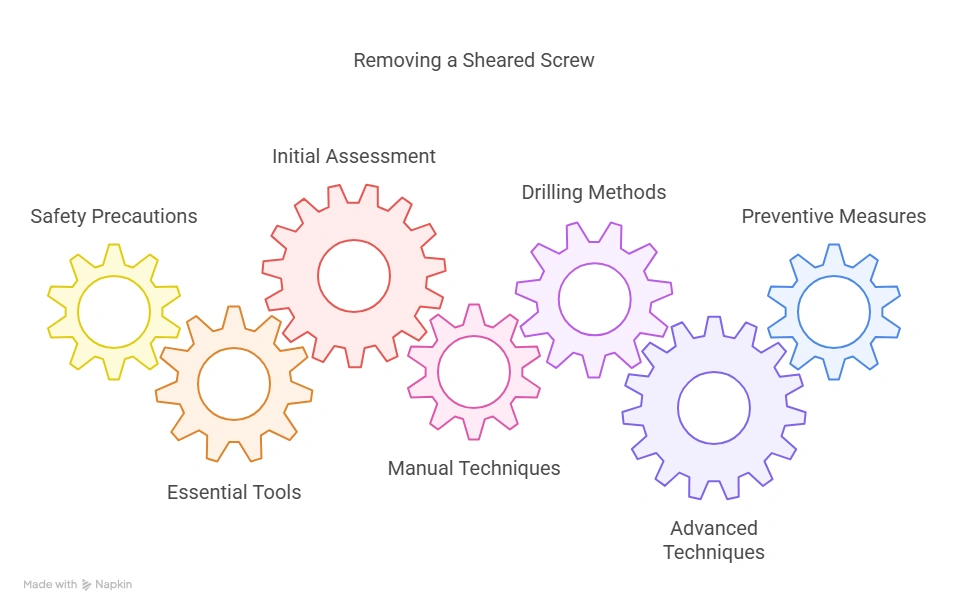
Advanced Techniques
Welding a nut to the sheared screw can be very effective. First, find a nut that fits over the screw. Then, use a welder to attach the nut to the screw. The heat from the welder can help loosen the screw. After welding, use a wrench to turn the nut. The screw will come out with it. Safety is important. Wear protective gear when welding.
An impact driver can help remove a sheared screw. Attach the right bit to the impact driver. Place the bit into the screw head. Apply steady pressure and let the impact driver do the work. The driver provides extra force. This helps to turn the screw out of the material. Be patient. Don’t rush the process.
Preventive Measures
Choose the correct screw type for the job. Using the wrong screw can cause it to break. Always check the material and size. Make sure the screw is not too big or small. This prevents it from shearing.
Check screws regularly for wear. Tighten them if they are loose. Replace any damaged screws quickly. Keeping screws in good condition helps prevent them from breaking. Clean the screws and the area around them. Dirt can cause problems too.
:max_bytes(150000):strip_icc()/194AskWOOD3-2d42915ecb874b478819319990249c27.jpg)
Credit: www.woodmagazine.com
Frequently Asked Questions
How To Remove A Screw That Has Sheared Off?
Use a screw extractor tool. Drill a small hole into the sheared screw. Insert the extractor and turn counterclockwise.
How To Get A Screw Out When The Head Is Stripped?
Use a rubber band for grip, or try a screw extractor. Pliers can also help turn the screw.
How To Get A Screw Out When The Head Snaps Off?
Use a screw extractor or a left-handed drill bit to remove the snapped screw. Apply penetrating oil to loosen it.
How To Remove A Snapped Screw From A Wall?
Use pliers to grip and twist the broken screw counterclockwise. For stubborn screws, drill a small hole and use a screw extractor.
Conclusion
Removing a sheared screw can be challenging, but it is doable. With the right tools and techniques, you can solve the problem effectively. Always stay patient and follow safety measures. Practicing these methods helps build confidence. Next time a screw shears off, you’ll be ready.
Happy fixing!