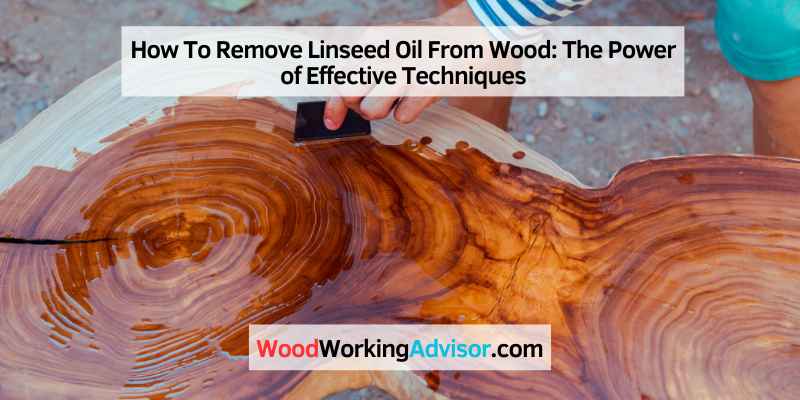
How To Remove Linseed Oil From Wood: The Power of Effective Techniques
To remove linseed oil from wood, apply a mixture of vinegar and water, then wipe it clean with a cloth. Linseed oil on wood can be effectively removed by applying a mixture of vinegar and water, followed by wiping it clean with a cloth.
This method is a simple and effective way to eliminate linseed oil from wood surfaces. The vinegar helps to break down the oil, while the water dilutes it, making it easier to remove. By following these steps, you can restore the natural beauty of your wood without causing any damage.
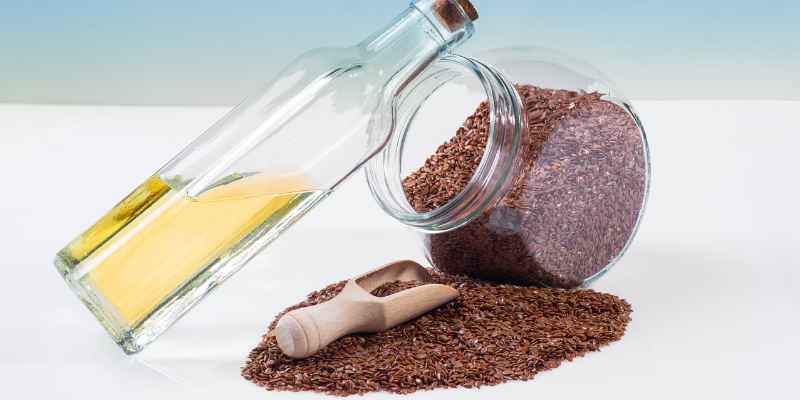
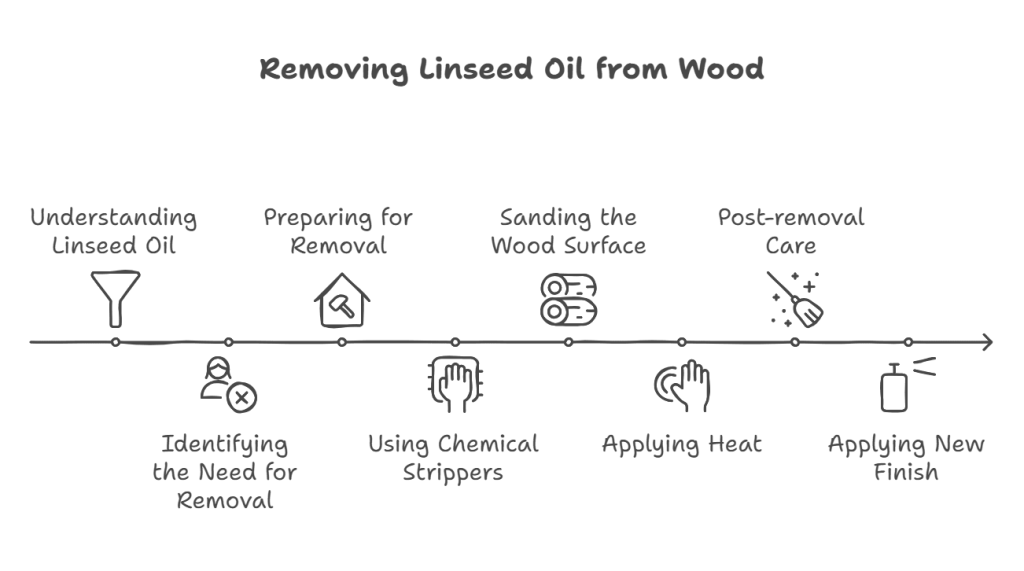
Understanding Linseed Oil
Linseed oil can be a stubborn substance to remove from wood. With simple techniques and a bit of patience, you can effectively remove linseed oil and restore the natural beauty of your wooden surfaces.
The Need To Remove Linseed Oil From Wood
Linseed oil is a popular choice for wood finishes because of its rich and timeless appeal. However, over time, the need to remove linseed oil from wood surfaces may arise due to various reasons. In this article, we will explore the reasons for removing linseed oil and the negative effects of leaving it on wood surfaces.
Reasons For Removing Linseed Oil
There are several reasons why you may want to remove linseed oil from wood:
- To refinish the wood: If you’re planning to refinish the wood surface, removing the existing linseed oil is essential. This allows for a fresh start and ensures that the new finish adheres properly.
- To repair damaged areas: Linseed oil can darken and discolor with time, making it more challenging to restore the wood’s natural beauty. By removing the linseed oil, you can effectively address any damage or imperfections in the wood.
- To remove excess oil: Applying linseed oil can sometimes result in an excessive build-up, leading to a greasy or sticky feel on the wood surface. Removing the excess oil helps restore the tactile qualities of the wood.
Negative Effects Of Leaving Linseed Oil On Wood Surfaces
Leaving linseed oil on wood surfaces can have various negative effects:
- A dull and dirty appearance: Over time, linseed oil can attract dust, dirt, and grime, making the wood appear dull and unclean.
- Yellowing and discoloration: Linseed oil is known to yellow with age, which can cause the wood to lose its original color and vibrancy.
- Sticky or tacky feel: When linseed oil is not properly absorbed or cured, it can leave a sticky or tacky residue on the wood surface, making it unpleasant to touch.
- Inadequate protection: One of the primary purposes of applying linseed oil to wood is to provide protection. However, leaving it on for too long without maintenance can result in reduced protection against moisture, UV rays, and other environmental factors.
By understanding the reasons for removing linseed oil and the negative effects of leaving it on wood surfaces, you can make informed decisions about maintaining and preserving the beauty of your wooden furniture or other wooden items.
Preparation For Linseed Oil Removal
To prepare for linseed oil removal from wood, follow these steps:
1. Begin by sanding the surface to remove any loose or flaking oil.
2. Apply a commercial wood cleaner or a mixture of vinegar and water to break down the oil.
3. Scrub the area gently with a soft brush, then wipe with a clean cloth. Repeat if necessary.
Gather The Necessary Tools And Materials
To effectively remove linseed oil from wood, it is crucial to gather the necessary tools and materials beforehand. Having the right supplies at hand will make the process smoother and more efficient. Here are the essential items you will need:
- Protective gloves
- Eye goggles
- Face mask or respirator
- Plastic drop cloth or newspaper
- Sponge or cloth
- Gentle soap or detergent
- Mineral spirits or paint thinner
- Scrub brush
- Paint scraper or putty knife
- Fine-grit sandpaper
- Clean rags or paper towels
- Wood sealant or finish
Protective Measures To Take Before Starting
Before you begin the linseed oil removal process, it’s important to take necessary protective measures to safeguard yourself and your surroundings. Here’s what you need to do:
- Put on protective gloves to safeguard your hands from potential skin irritations.
- Wear eye goggles to protect your eyes from accidental splashes or drips.
- Put on a face mask or respirator to avoid inhaling harmful fumes or particles.
- Cover the surrounding area with a plastic drop cloth or newspaper to prevent any spills or stains on the floor or nearby furniture.
By following these simple preparation steps, you’ll be well-equipped and protected to tackle the linseed oil removal process effectively. Once you have gathered all the necessary tools and materials and taken the appropriate protective measures, you are ready to move on to the next steps of removing linseed oil from wood.
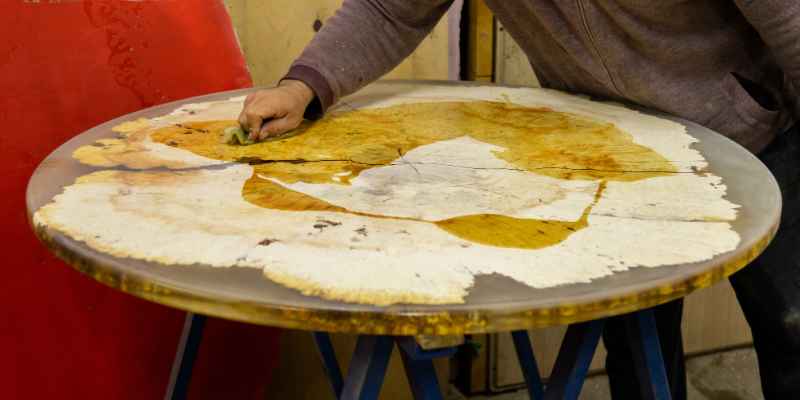
Effective Techniques For Removing Linseed Oil
Learn effective techniques for removing linseed oil from wood with these simple tips. Keep your wood surfaces looking their best by following these easy steps.
When it comes to removing linseed oil from wood, there are several effective techniques you can try. Whether you want to refinish your furniture or get rid of a spill, these methods can help you achieve the desired results. In this article, we will explore three popular techniques for removing linseed oil: using chemical strippers, sanding the wood surface, and applying heat.
Using Chemical Strippers
If you’re looking for a quick and efficient way to remove linseed oil from wood, using chemical strippers is a viable option. These strippers are specially formulated to break down the linseed oil and make it easier to remove. Here’s how you can do it:
- Begin by applying the chemical stripper to the affected area, ensuring it is evenly spread across the surface.
- Allow the stripper to sit on the wood for the recommended time (check the product label for specific instructions).
- Using a scraper or a putty knife, gently scrape off the softened linseed oil along with the stripper.
- Repeat the process if necessary, until all the linseed oil is completely removed from the wood.
- After removing the linseed oil, clean the wood surface thoroughly with a damp cloth to ensure no residue remains.
Sanding The Wood Surface
If you prefer a more hands-on approach, sanding the wood surface can be an effective method to remove linseed oil. Sanding can remove the top layer of the wood, along with the linseed oil. Follow these steps:
- Start by selecting the appropriate grit sandpaper for the job. A lower grit number (around 80) will help remove the linseed oil more quickly.
- Using a sanding block or an electric sander, sand the affected area in a circular motion, applying steady but gentle pressure.
- Continue sanding until the linseed oil is no longer visible on the wood surface.
- Following the sanding process, wipe away any dust or debris with a damp cloth, ensuring the wood surface is clean and ready for further treatment or refinishing.
Applying Heat To Remove Linseed Oil
Another technique you can try is applying heat to remove linseed oil from wood. Heat can help soften the oil, making it easier to wipe away. Here’s what you need to do:
- Using a hairdryer or a heat gun, apply heat directly to the affected area.
- Move the heat source back and forth, ensuring that the heat is evenly distributed.
- As the linseed oil starts to soften, use a clean cloth or paper towel to wipe it away. Ensure the cloth or towel is regularly replaced to prevent reapplying the oil.
- Continue applying heat and wiping away the oil until the wood surface is clean and free of linseed oil residue.
- After removing the linseed oil, clean the wood surface with a mild soap and water solution to remove any remaining traces of oil.
Post-removal Care And Maintenance
Proper post-removal care and maintenance is crucial for removing linseed oil from wood effectively. Follow these steps to ensure a successful removal process and maintain the wood’s condition for long-lasting results.
Cleaning and Preparing the Wood Surface
Once you have successfully removed linseed oil from wood, it is important to thoroughly clean and prepare the wood surface before applying a new finish. Proper cleaning ensures that any remaining residue or contaminants are removed, allowing the new finish to adhere properly to the wood.
To clean the wood surface, follow these steps:
1. Use a mild wood cleaner or a mixture of equal parts vinegar and water. Apply the cleaner to a soft cloth or sponge and gently scrub the surface in circular motions.
2. Rinse the wood thoroughly with clean water to remove any cleaner residue.
3. Dry the wood with a clean, lint-free cloth.
In addition to cleaning, preparing the wood surface is equally important. This involves sanding the wood to remove any roughness or imperfections and to create a smooth and even surface for the new finish.
To prepare the wood surface, follow these steps:
1. Start by using a coarse-grit sandpaper (around 80-120 grit) to remove any remaining traces of linseed oil and to smooth out any rough areas. Sand in the direction of the wood grain to avoid creating scratches.
2. Gradually switch to finer-grit sandpapers (around 180-220 grit) to further smooth the surface and achieve a polished finish.
3. After sanding, use a damp cloth to wipe away any dust or debris from the surface, making sure it is completely clean and smooth.
Applying a New Finish to the Wood
Once the wood surface is cleaned and prepared, it is time to apply a new finish. A new finish not only enhances the appearance of the wood but also provides protection against moisture, scratches, and other damage.
Follow these steps to apply a new finish:
1. Choose the right type of finish for your wood. Popular options include varnish, polyurethane, shellac, or lacquer. Each type offers different advantages and finishes, so consider your needs and preferences.
2. Apply the chosen finish using a clean brush, foam applicator, or lint-free cloth. Start by applying a thin, even coat, following the manufacturer’s instructions for drying time and number of coats required.
3. Allow the finish to dry completely between coats, and lightly sand the surface with fine-grit sandpaper (around 220-320 grit) before applying subsequent coats. This helps ensure a smooth and durable finish.
4. After applying the final coat, allow the finish to cure according to the manufacturer’s instructions. This typically takes a few days and creates a strong protective layer on the wood surface.
Remember, regular maintenance is crucial to keeping your wood furniture or surfaces in top condition. Clean spills immediately, use protective mats or coasters, and avoid placing hot or wet objects directly onto the surface. By following these post-removal care and maintenance tips, your wood furniture will continue to look beautiful and last for years to come.
Conclusion
Removing linseed oil from wood can be a challenging task. By following the methods and tips mentioned in this blog post, you can effectively erase those pesky stains and restore the beauty of your wooden surfaces. Remember to use gentle yet effective techniques and seek professional help if necessary.
With proper care and maintenance, your wood can shine bright for years to come.