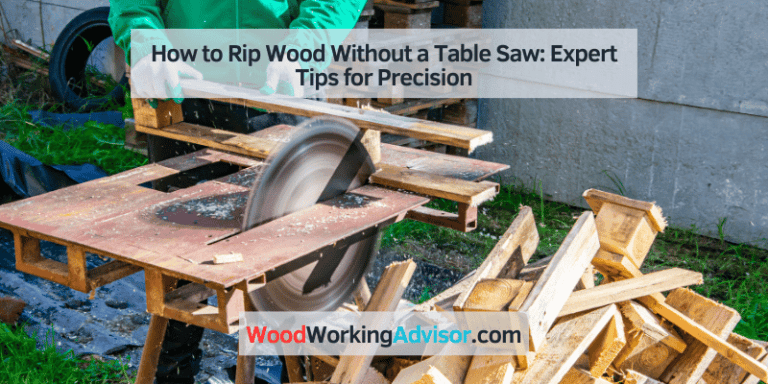
How to Rip a 2X4 With a Table Saw: Easy & Efficient Techniques
To rip a 2X4 with a table saw, follow these steps: align the fence with the desired cut line, adjust the blade height to the desired depth, position the 2X4 on the table saw with its edge against the fence, and guide the 2X4 through the saw using a push stick. Now, let’s dive into the details of how to rip a 2X4 with a table saw.
Ripping a 2X4 with a table saw can be a simple and efficient process when done correctly. Whether you are a seasoned professional or a beginner, understanding the steps involved will help you achieve accurate and clean cuts. We will walk you through the steps you need to follow to successfully rip a 2X4 using a table saw.
So, let’s get started!
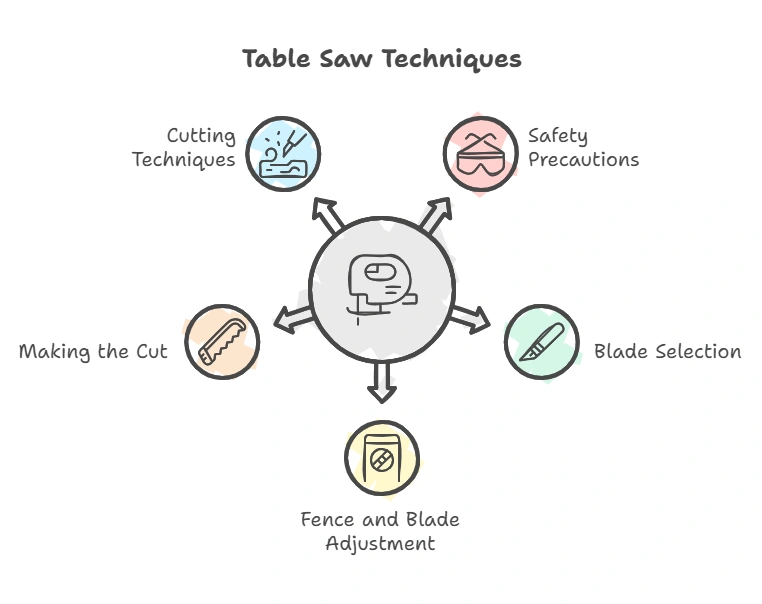
1. Safety Precautions
Before you start ripping a 2×4 with a table saw, it’s crucial to prioritize your safety. Taking the necessary precautions will not only protect you from potential accidents but also ensure a smooth and successful cutting process. In this section, we will discuss the essential safety measures you need to take before working with a table saw.
Protective Gear
Wearing the right protective gear is the first step towards a safe woodworking experience. Here are the essential gears you should have:
- Safety goggles: Protect your eyes from flying debris and sawdust.
- Ear protection: Shield your ears from the loud noise produced by the table saw.
- Dust mask: Prevent inhalation of dust particles released during cutting.
- Gloves: Maintain a firm grip on the 2×4 while keeping your hands safe.
- Appropriate clothing: Avoid loose-fitting clothes or jewelry that could get caught in the saw.
Table Saw Setup
Properly setting up your table saw not only ensures accurate cuts but also reduces the risk of accidents. Pay careful attention to the following:
- Check the blade: Make sure the blade is sharp and securely fastened to the saw. Any signs of wear or looseness should prompt a blade replacement or fix.
- Adjust the height and angle: Set the blade height to approximately 1/4 inch above the 2×4. Adjust the angle if you need to create beveled cuts.
- Fence alignment: Ensure the fence is parallel to the blade to maintain a straight cut. Use a reliable measuring tool to verify its accuracy.
- Clear the workspace: Remove any clutter or obstacles around the table saw area to provide ample space for your movements.
Remember, taking safety precautions is not optional but mandatory. Neglecting safety measures can lead to serious injuries and even accidents. By wearing the appropriate protective gear and properly setting up your table saw, you create a secure environment for your woodworking projects.
2. Choosing The Right Blade
When it comes to ripping a 2×4 with a table saw, one of the most critical factors is choosing the right blade. The blade you select will determine the quality of your cut and the overall efficiency of the process. In this section, we will discuss two key factors that you need to consider when choosing a blade: the blade material and the tooth count.
Blade Material
The blade material plays a significant role in determining its durability and cutting performance. There are primarily two types of blade materials commonly available for table saws:
- High-Speed Steel (HSS): HSS blades are made of a hardened steel alloy, which offers good durability and is capable of cutting through a variety of materials. These blades are suitable for occasional woodworking tasks and are more affordable compared to other options.
- Carbide-Tipped: Carbide-tipped blades are made of a combination of steel and carbide, which provides exceptional durability and cutting precision. These blades are ideal for heavy-duty ripping tasks and are less prone to dulling, ensuring a longer lifespan.
When deciding which blade material to choose, consider the type of projects you typically work on and the frequency of use. If you regularly rip hardwood or engage in demanding projects, investing in a carbide-tipped blade is a worthwhile option. On the other hand, if you primarily work on lighter tasks and have budget constraints, an HSS blade might be suitable.
Tooth Count
The tooth count refers to the number of teeth on the blade and has a direct impact on the quality of the cut. Here are a few important points to consider:
- High tooth count: Blades with a higher tooth count, such as 40 or more, are ideal for achieving smooth cuts on hardwood and other dense materials. They create finer, chip-free cuts by removing a smaller amount of material with each pass.
- Low tooth count: Blades with a lower tooth count, typically between 24 and 30, are suitable for faster cutting speeds and rougher cuts, making them ideal for softwoods and general-purpose ripping applications. They remove material at a quicker pace but may result in a rougher finish.
When considering the tooth count, it’s important to strike a balance between the desired finish and the cutting speed. If you prioritize speed over flawless cuts, a lower tooth count blade may be more suitable for your needs. Conversely, if you require precision and a smoother finish, opt for a higher tooth count blade.
3. Adjusting The Fence And Blade Height
To rip a 2×4 with a table saw, it is important to adjust the fence and blade height. This ensures a precise and safe cut, allowing you to smoothly guide the wood through the saw.
When it comes to ripping a 2×4 with a table saw, adjusting the fence and blade height is crucial to ensure precise and safe cuts. These adjustments play a vital role in achieving accurate ripping results.
Aligning The Fence
One of the first steps in preparing your table saw for ripping is aligning the fence. The fence acts as a guide for the board as it passes through the blade, ensuring a straight and consistent cut. To align the fence:
- Start by unplugging the table saw and ensuring the blade is fully lowered.
- Using a square, check the alignment of the fence with the miter slot. Adjust the fence accordingly to ensure it is parallel to the miter slot.
- Tighten the fence locking mechanism to secure it in place.
Setting The Blade Height
Once the fence is aligned, the next step is to set the blade height. The height of the blade determines how deep the cut will be. To set the blade height:
- Make sure the table saw is unplugged and the blade is fully lowered.
- Look for the blade height adjustment wheel or crank on the side or front of the saw.
- Turn the wheel or crank to raise or lower the blade as needed. For ripping a 2×4, the general recommendation is to set the blade height so it extends about 1/4 inch above the top surface of the board.
- Double-check the blade height with a ruler or measuring tape, ensuring it is consistent across the length of the blade.
By aligning the fence correctly and setting the blade height accurately, you are well on your way to ripping a 2×4 with precision and confidence. Remember to always prioritize safety while operating a table saw and wear appropriate protective gear.
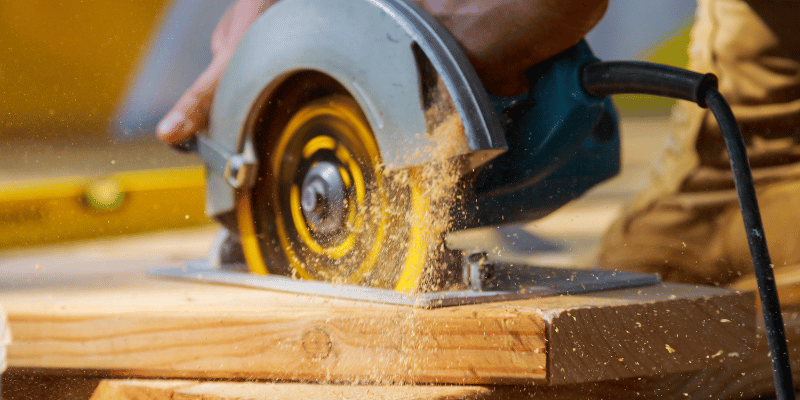
4. Making The Rip Cut
Learn how to make the perfect rip cut for a 2×4 using a table saw. Master the technique with this step-by-step guide.
Once you have measured and marked the 2×4, and positioned it correctly on the table saw, it’s time to make the rip cut. This is the step where you will actually cut the wood along the marked line to create your desired width.
Measuring And Marking
Before making the rip cut, it’s important to accurately measure and mark the 2×4. This will ensure that you achieve the desired width and avoid any unnecessary mistakes.
Start by using a tape measure to measure the desired width that you want to rip the 2×4 to. Make sure to double-check your measurements to ensure accuracy. Once you have determined the width, use a pencil to mark the measurement on the edge of the wood.
Positioning The Wood
Properly positioning the wood on the table saw is crucial for making a clean and accurate rip cut.
Start by aligning the mark you made on the wood with the edge of the blade. This will ensure that the cut is made exactly where you want it to be. Take your time to make sure the wood is positioned securely, as any movement during the cut can result in an uneven and potentially dangerous cut.
Additionally, make sure the wood is flat against the table and against the fence. This will provide stability and help prevent any unwanted shifting or wobbling during the cut.
Pro-Tip: It’s a good idea to use a push stick or push block to safely guide the wood through the cut. This will help keep your hands a safe distance from the blade and provide better control over the cut.
Once the wood is properly positioned and you have taken the necessary safety precautions, it’s time to make the rip cut.
Important: Make sure to keep a firm grip on the wood and feed it steadily into the blade, applying gentle pressure. Avoid forcing the wood through the cut, as this can lead to kickback or an uneven cut.
Continue feeding the wood through the blade until you have completed the rip cut. Take your time and focus on maintaining a smooth and consistent feeding motion. Once the cut is complete, turn off the table saw and carefully remove the wood.
Congratulations! You have successfully made the rip cut and achieved the desired width for your 2×4. Remember to always prioritize safety and take your time when using power tools like a table saw. With practice and proper technique, you’ll be able to make clean and accurate rip cuts with ease.
5. Techniques For Smooth And Straight Cuts
Learn the effective techniques for achieving smooth and straight cuts while ripping a 2X4 with a table saw. Mastering these methods will result in precise and professional-looking cuts for your woodworking projects.
When it comes to ripping a 2X4 with a table saw, achieving smooth and straight cuts is essential for the success of your woodworking project. With the right techniques, you can ensure precision and accuracy every time you rip a board. In this section, we will discuss the top five techniques that will help you achieve smooth and straight cuts with your table saw.
Pushing The Wood
To achieve smooth and straight cuts, it’s important to understand the proper way of pushing the wood through the table saw. The key here is to apply steady and consistent pressure throughout the cut, while maintaining control over the board. Avoid pushing too hard, as it can result in kickback. Instead, let the saw’s blade do the work as you guide the wood through the cut. Remember to keep your hands a safe distance away from the blade and always use a push stick when necessary.
Using A Push Stick
A push stick is a simple tool that can make a significant difference in ensuring your safety and achieving precise cuts. It helps you maintain control and distance from the blade, reducing the risk of accidental injuries. When using a push stick, make sure it has a comfortable grip and is long enough to safely guide the wood through the saw. Additionally, always position the push stick in a way that allows you to maintain a firm grip on the wood and keeps your hands clear of the blade.
Using a push stick provides an added layer of safety and control, giving you the confidence to make accurate cuts without the risk of accidents.
Proper Setup And Alignment
Before making any cuts, it’s crucial to ensure that your table saw is properly set up and aligned. Check the fence alignment to ensure it is parallel to the blade. Additionally, make sure the blade is at the correct height and angle for your desired cut. A misaligned setup can result in uneven cuts and a less satisfying woodworking experience. Take the time to adjust and align your table saw before each cutting session to achieve the best results.
Using A Featherboard
A featherboard is a fantastic tool that helps to prevent the wood from drifting away from the fence during the cut. It applies pressure against the wood and keeps it firmly against the fence, resulting in straight and accurate cuts. Position the featherboard before making the cut, adjusting it to apply consistent pressure. This tool is especially handy when ripping long boards, as it maintains a straight line throughout the entire cut.
Proper Blade Selection And Maintenance
The blade you use for ripping 2X4s plays a crucial role in the quality of your cuts. For smooth and straight cuts, choose a blade with a high tooth count, such as a rip blade. These blades are specifically designed for ripping through wood fibers with minimal resistance. Additionally, regularly check and clean your blade to maintain its sharpness. Dull blades can cause tear-out and rough cuts, so ensure your blade is well-maintained for optimal performance.
By applying these techniques, you can achieve smooth and straight cuts when ripping a 2X4 with a table saw. Remember to prioritize safety, precision, and the proper maintenance of your tools. Now, you’re ready to tackle your next woodworking project with confidence!
Conclusion
To wrap it up, ripping a 2×4 with a table saw is a practical and efficient way to make clean and accurate cuts for various woodworking projects. By following the proper safety precautions and using the correct techniques, you can achieve precise results with ease.
Remember to always measure twice, set the right blade height and fence alignment, and maintain a steady hand throughout the process. With practice and patience, you’ll be able to tackle any woodcutting task confidently and efficiently. Happy woodworking!