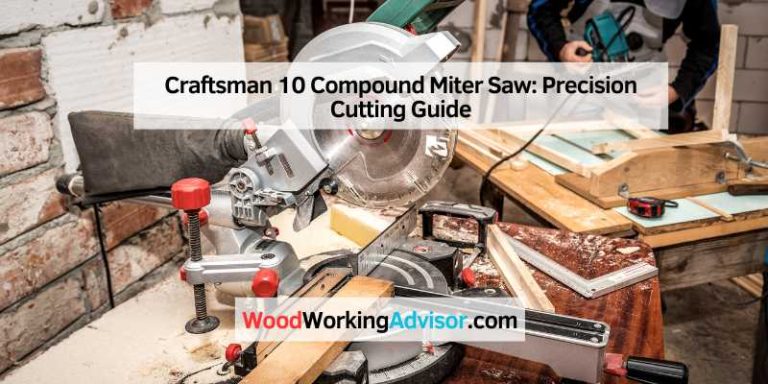
How to Square a Miter Saw Like a Pro: 7 Expert Tips
To square a miter saw, adjust the bevel angle and the miter angle for accurate cuts. If you want your miter saw to make precise and accurate cuts, it’s crucial to ensure that it is properly squared.
Squaring a miter saw involves adjusting both the bevel angle and the miter angle for accurate and reliable cuts. By taking the time to square your miter saw, you’ll be able to achieve clean and precise cuts every time. We will walk you through the steps for squaring a miter saw, so you can start using your tool with confidence and precision.
So, let’s get started and make sure your miter saw is perfectly squared!
Understanding The Importance Of A Square Miter Saw
Understanding the importance of squaring a miter saw is crucial for achieving accurate cuts. By following step-by-step instructions and utilizing alignment tools, you can ensure that your miter saw is perfectly calibrated, resulting in precise and professional-looking woodworking projects.
Accurate measurements are crucial in woodworking projects, ensuring precision and a professional finish. A square miter saw plays a vital role in achieving this accuracy. Let’s delve into the importance of having a properly squared miter saw, common issues that can arise when it is not square, and the benefits of using one that is.
Importance Of Accuracy In Woodworking Projects
Having precise measurements is essential when working with wood. Accuracy ensures that the various components of your project fit together seamlessly, resulting in a structurally sound and aesthetically pleasing outcome. A square miter saw is an invaluable tool that helps achieve this accuracy by cutting perfect angles and making precise bevel cuts.
Using a miter saw that is square ensures:
- Consistency in cuts: A properly squared miter saw allows you to make consistent and repeatable cuts. This is especially important when you need to create multiple identical pieces for your project.
- Proper angle cuts: Woodworking projects often involve cutting various angles, such as 45-degree or 90-degree cuts. A square miter saw enables you to make these cuts accurately, ensuring tight and clean joints.
- Reliable joinery: Whether you’re creating a picture frame, assembling furniture, or building cabinets, precise joinery is crucial. A squared miter saw helps you achieve tight and accurate joints, resulting in sturdy and well-fitted connections.
- Professional finish: When working on woodworking projects, attention to detail is paramount. An accurately squared miter saw helps you achieve a professional finish by ensuring precise and clean cuts, enhancing the overall appearance of your work.
Common Issues Caused By An Improperly Squared Miter Saw
Using a miter saw that is not properly squared can lead to a range of problems and compromises the quality of your woodworking projects. Some common issues that can arise include:
- Inaccurate cuts: An improperly squared miter saw will result in cuts that are not true to the intended angle, leading to misaligned joints and poorly fitting components.
- Uneven bevels: If the miter saw is not square, bevel cuts may be uneven, causing gaps or overlaps when joining pieces together.
- Waste of materials: Inaccurate cuts can lead to wastage of expensive materials, as you may need to recut or replace improperly cut pieces.
- Compromised structural integrity: Improperly squared miter saw cuts can weaken the structural integrity of your woodworking projects, resulting in instability or potential failure over time.
- Time-consuming adjustments: Working with an un-square miter saw requires constant adjustments and recalibrations, consuming valuable time that could be better spent on actual woodworking.
Benefits Of Using A Squared Miter Saw
Investing time in squaring your miter saw is well worth the effort due to the numerous benefits it brings to your woodworking projects. These advantages include:
- Improved accuracy: A squared miter saw ensures precise and accurate cuts, reducing the chances of errors in your measurements and resulting in a high-quality finished product.
- Time savings: With a properly squared miter saw, you can make accurate cuts from the start, eliminating the need for constant adjustments and recalibrations throughout your project, saving you time and frustration.
- Enhanced efficiency: Using a squared miter saw allows you to work more efficiently, as you can trust that each cut will be accurate and in line with your project requirements.
- Professional results: A squared miter saw enables you to create professional-looking furniture, cabinetry, and other woodworking projects that showcase your craftsmanship and attention to detail.
- Increased project success rate: When your miter saw is squared, you are more likely to achieve successful and satisfying outcomes in your woodworking projects, boosting your confidence and skills as a woodworker.
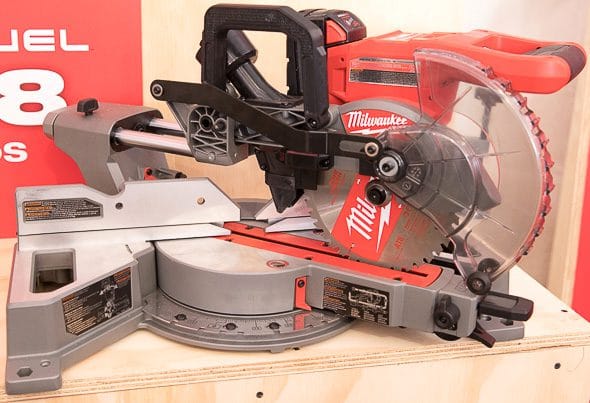
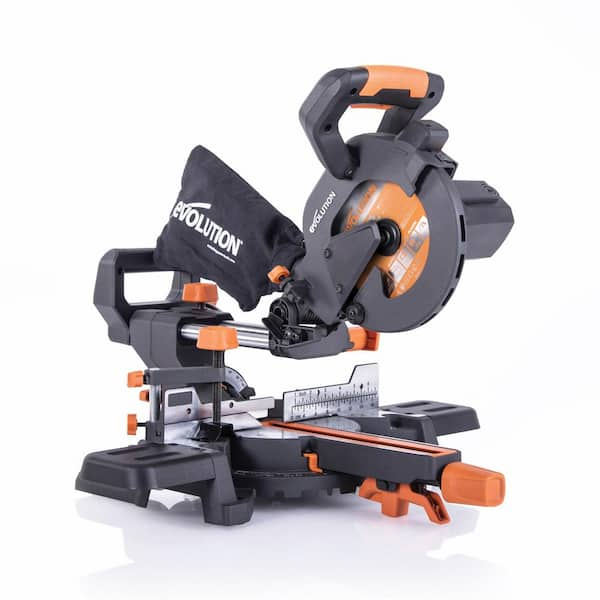
Essential Tools And Equipment For Squaring A Miter Saw
To square a miter saw, you’ll need essential tools and equipment like a square, measuring tape, and a screwdriver. Ensure precise cuts by following these steps carefully.
Having the right tools and equipment is essential for squaring a miter saw accurately. Quality tools not only make the task easier but also ensure precise and consistent results. Here is a list of necessary tools you’ll need to square your miter saw:
- Combination square: This tool helps you measure and check the accuracy of the miter and bevel angles on your saw.
- Protractor: A protractor allows you to measure angles precisely, ensuring your miter cuts are on point.
- Miter saw stand: A stable and sturdy stand provides a secure base for your miter saw, allowing for safer and more precise cuts.
- Clamps: Clamps are useful for securing your workpiece firmly in place, minimizing any movement during cutting.
- Dust collection system: Keeping your work area clean is important for accuracy and safety, so having a good dust collection system will assist in maintaining clear visibility.
- Safety glasses and hearing protection: Protecting your eyes and ears while operating power tools is crucial for your safety.
Importance Of Quality Tools For Accurate Results
Investing in high-quality tools is vital for achieving accurate results when squaring a miter saw. Here’s why using quality tools matters:
- Precision: Cheap or poorly made tools may lack accuracy, leading to inaccurate miter cuts. High-quality tools, on the other hand, are designed to provide precise measurements and consistent performance.
- Durability: Quality tools are built to last, ensuring they can withstand the demands of heavy use without compromising their accuracy. Investing in durable tools means you won’t have to worry about constant adjustments or replacements.
- Safety: Cheap tools may not meet strict safety standards, posing a risk of accidents or injuries. Reliable, high-quality tools are engineered with safety features and built to meet rigorous safety regulations.
Tips For Maintaining And Calibrating Tools
To ensure your tools remain accurate and reliable, regular maintenance and calibration are necessary. Here are some tips to keep your tools in optimal condition:
- Cleanliness: Remove any dust, debris, or rust from your tools regularly to prevent interference with their functionality.
- Lubrication: Apply appropriate lubrication to moving parts, such as hinges or handles, to ensure smooth operation and prevent rust.
- Storage: Properly store your tools in a dry and dust-free environment to prevent damage that could affect their accuracy.
- Calibration: Regularly check and calibrate your measuring tools, such as the combination square or protractor, to ensure they provide accurate readings. Follow the manufacturer’s instructions or consult an expert if needed.
- Blade maintenance: Keep your miter saw blade clean, sharp, and properly aligned. Dull or misaligned blades can affect the accuracy of your cuts.
By using the right tools, maintaining them properly, and calibrating as needed, you can achieve accurate and precise results when squaring your miter saw. Remember to prioritize safety and invest in quality tools for optimal performance.
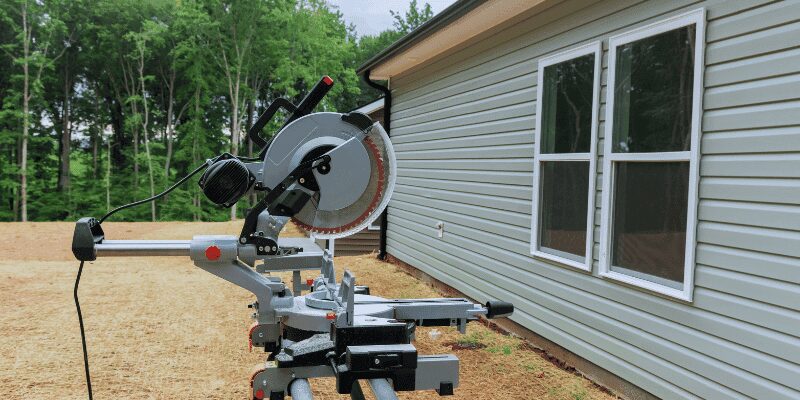
Step-By-Step Guide To Squaring A Miter Saw
In this step-by-step guide, you will learn how to square a miter saw effectively. These instructions will help you achieve precise and accurate cuts every time, ensuring optimal performance from your tool.
Whether you’re a professional woodworker or a DIY enthusiast, ensuring that your miter saw is perfectly squared is crucial for achieving accurate and precise cuts. Follow this step-by-step guide to properly square your miter saw and enhance the overall performance of your woodworking projects.
Ensuring The Miter Saw Is Securely Set Up:
- Start by checking the stability of your miter saw. Ensure it is securely set up on a flat, sturdy surface to prevent any wobbling or vibrations during operation.
Properly Positioning The Saw On A Sturdy Surface:
- Place your miter saw on a solid workbench or table that can adequately support its weight. This will provide stability and minimize the risk of accidents while operating the saw.
Checking And Adjusting The Saw’S Level:
- Use a reliable bubble level to check the levelness of your miter saw. Adjust the adjustable feet or add shims underneath the saw’s base as needed until it is perfectly level in both directions.
Aligning The Blade With The Miter Gauge:
- Begin by loosening the miter gauge locking mechanism. Gently move the blade towards the miter gauge and align the blade’s teeth parallel to the miter gauge’s slot.
Adjusting The Bevel Angle And Miter Angle:
- Use the bevel adjustment on your miter saw to set the bevel angle to zero degrees. Similarly, adjust the miter angle to zero degrees. These adjustments will ensure that the blade is perfectly perpendicular to the saw’s fence.
Verifying The Accuracy Of The Blade’S Alignment:
- To check the alignment, perform a test cut on a scrap piece of wood. Inspect the resulting cut and ensure that the blade cuts through the wood square and without any deviation.
Calibrating The Miter Gauge And Fence:
- Loosen the miter gauge locking mechanism and use a reliable square to check if the miter gauge is perpendicular to the saw blade. If necessary, adjust the miter gauge until it is perfectly square.
- Similarly, check for any deviations in the alignment of the fence. Make necessary adjustments to ensure that the fence is perfectly parallel to the blade.
Ensuring The Gauge Is Perpendicular To The Saw Blade:
- Verify that the miter gauge is perpendicular to the saw blade by using a square. Place the square against the miter gauge and ensure it forms a perfect 90-degree angle.
Checking For Any Deviations In The Fence Alignment:
- Use a reliable straight edge to inspect the alignment between the fence and the blade. Ensure that the gap between the straight edge and the blade remains consistent along the entire length of the fence.
Testing And Fine-Tuning The Squared Miter Saw:
- Perform test cuts on scrap material to evaluate the accuracy of the squared miter saw. Inspect the resulting cuts and make necessary adjustments to achieve precise and square cuts.
- Fine-tune the bevel angle, miter angle, or any other parameters as needed to achieve the desired level of accuracy.
By following these step-by-step instructions and taking the time to properly square your miter saw, you’ll enhance the performance and accuracy of your woodworking projects. Enjoy precise and clean cuts, elevating the quality of your craftsmanship.
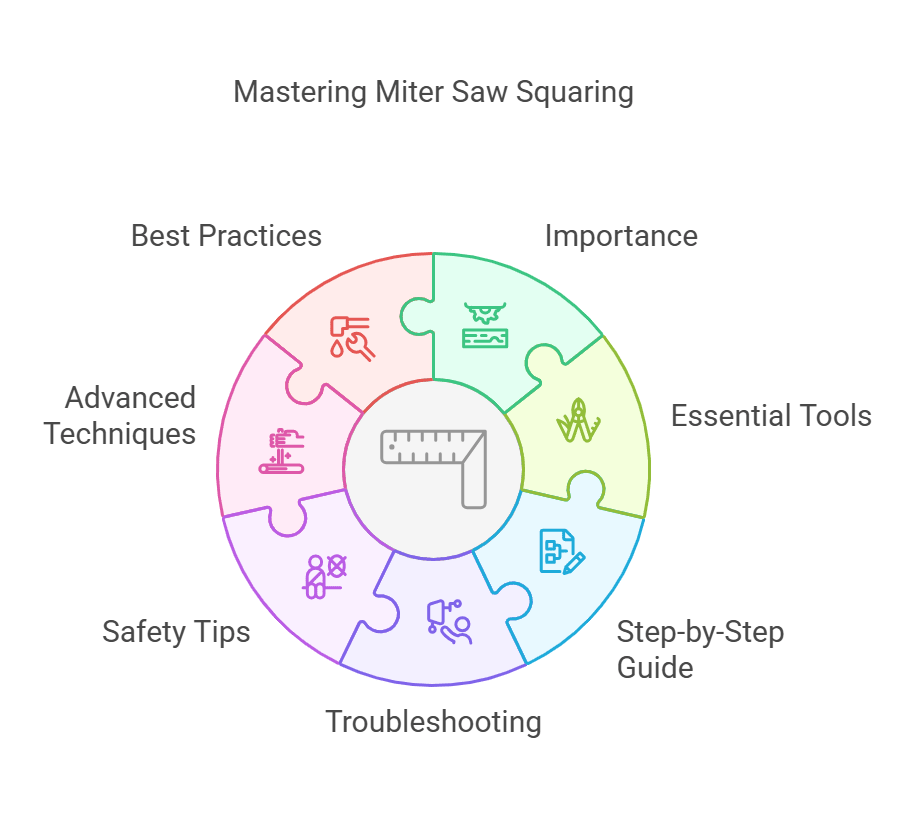
Troubleshooting Common Issues When Squaring A Miter Saw
Square a miter saw with ease by troubleshooting common issues. Follow these simple steps for accurate and precise cuts, ensuring the saw is aligned correctly for optimal performance. Experience frustration-free woodworking with a perfectly squared miter saw.
Identifying Potential Problems During The Squaring Process
Uneven cuts or inaccurate angles:
- Blade not perpendicular to the base: This can result in cuts that are not at a true 90-degree angle. Check the bevel scale on your miter saw and make sure it is properly aligned.
- Fence not square to the blade: If the fence is not square, it can cause your cuts to be off. Use a square to check the alignment and adjust if necessary.
Blade wobbling or struggling to cut through materials:
- Loose blade arbor bolt: A loose arbor bolt can cause the blade to wobble and result in uneven cuts. Ensure that the arbor bolt is tightened securely.
- Dull blade: A blade that is dull or worn down can struggle to cut through materials. Replace the blade if it is no longer sharp.
Possible Causes And Solutions For Each Issue
Loose or misaligned components:
- Loose screws and bolts: Over time, the vibrations from the saw can cause screws and bolts to become loose. Check all components of the miter saw, including the blade guard, fence, and bevel scale, and tighten any loose screws or bolts.
- Misaligned bevel scale: If the bevel scale is misaligned, it can affect the accuracy of your cuts. Refer to the miter saw’s user manual to adjust the bevel scale and ensure it is aligned correctly.
Dull blade or improper blade installation:
- Blade not installed properly: If the blade is not installed correctly, it can lead to wobbling and uneven cuts. Make sure the blade is securely fastened and aligned with the arbor.
- Dull blade: A dull blade can struggle to cut through materials and result in rough cuts. Replace the blade with a new one to ensure clean and precise cuts.
Remember, troubleshooting common issues when squaring a miter saw requires attention to detail and regular maintenance. By identifying and addressing these problems, you can ensure accurate and clean cuts for all your woodworking projects.
Safety Tips For Squaring A Miter Saw
Learn how to square a miter saw with these safety tips. Follow the 6 guidelines carefully for accurate cuts and a safer woodworking experience.
Before you begin squaring your miter saw, it’s crucial to prioritize safety. Personal protective equipment (PPE), such as safety glasses, gloves, and ear protection, should be worn to prevent potential accidents. Properly securing materials for stability is also vital to avoid any mishaps.
In addition, ensuring the correct handling and storage of tools is essential for a safe and efficient working environment.
Importance Of Personal Protective Equipment (Ppe):
- Safety glasses: Protect your eyes from any flying debris or wood chips.
- Gloves: Provide a firm grip and protect your hands from potential cuts or injuries.
- Ear protection: Reduce the risk of hearing damage caused by prolonged exposure to loud noises.
Securely Clamping Materials For Stability:
- Use clamps: Secure the material firmly, preventing any movement during the cutting process.
- Check for stability: Ensure that the material is well-balanced on the saw’s table before operating.
- Avoid overloading the saw: Be mindful of the weight and size of the material to prevent instability.
Proper Handling And Storage Of Tools:
- Keep tools clean and dry: Moisture can cause damage and affect the saw’s precision.
- Store tools safely: Utilize a designated area or toolbox to prevent accidents and maintain organization.
- Regularly inspect tools: Check for any wear, loose parts, or malfunctions before each use.
Remember, by following these safety tips, you can minimize the risk of accidents and work confidently with your miter saw. Stay safe and enjoy your woodworking projects!
Advanced Tips And Techniques For Squaring A Miter Saw
For advanced tips and techniques on how to square a miter saw, this comprehensive guide has you covered. Learn step-by-step instructions and tricks to ensure precise and accurate cuts every time, without any unnecessary hassle.
Are you ready to take your miter saw skills to the next level? In this section, we’ll explore some advanced tips and techniques for squaring a miter saw, ensuring that your cuts are precise and accurate. From utilizing digital angle finders to fine-tuning the saw for complex cuts, we’ve got you covered with expert advice.
Utilizing Digital Angle Finders For Precise Measurements:
- Digital angle finders are valuable tools that provide accurate measurements for miter saw setups.
- They eliminate guesswork and ensure your angles are spot-on for precise cuts.
Here’s how to make the most of digital angle finders:
- Place the angle finder on the saw’s base and adjust until it reads zero.
- Lock the angle finder’s position.
- Use the digital display to set the desired angle for your cut.
- Double-check the reading to ensure accuracy before making your cut.
Using Auxiliary Fences For Increased Accuracy:
- Auxiliary fences are add-on attachments that improve the accuracy of your miter saw cuts.
- They provide additional support and alignment for your workpieces.
Here’s how to use auxiliary fences effectively:
- Attach the auxiliary fence securely to the miter saw’s existing fence.
- Check that the auxiliary fence is perfectly aligned with the blade.
- Make sure the fence is parallel to the saw’s base and blade.
- Ensure the workpiece is in contact with both fences for stability during the cut.
Fine-Tuning The Miter Saw For Complex Cuts Or Angles:
- When tackling intricate cuts or unique angles, fine-tuning the miter saw becomes crucial.
- These adjustments ensure optimal performance and precision.
Here’s how to fine-tune your miter saw:
- Calibrate the saw’s bevel angle to achieve accurate bevel cuts.
- Check the miter gauge alignment for precise angle cuts.
- Make micro-adjustments to the saw’s stops and detents to fine-tune angles.
- Regularly lubricate the moving parts of the miter saw for smooth operation.
By incorporating these advanced tips and techniques into your miter saw setup, you’ll elevate your woodworking projects to new heights of precision. Embrace the power of digital angle finders, enhance accuracy with auxiliary fences, and fine-tune your miter saw for complex cuts.
With practice and attention to detail, you’ll master the art of squaring a miter saw and achieve outstanding results in your woodworking endeavors.
Best Practices For Maintaining A Square Miter Saw
Learn the best practices for maintaining a square miter saw with these simple steps. Keep your miter saw in optimal condition and ensure accurate cuts every time by following these guidelines.
A miter saw is a versatile tool that can make precise angled cuts, but over time, its accuracy may be compromised. To ensure that your miter saw remains square and accurate, it is essential to follow some best practices for maintenance.
By regularly cleaning and removing dust, lubricating moving parts, and periodically calibrating the saw, you can enhance its performance and longevity.
Regular Cleaning And Dust Removal:
Maintaining a clean miter saw not only improves its functionality but also reduces the risk of errors during operation. Follow these best practices for regular cleaning and dust removal:
- Clear the work surface: Remove any debris, sawdust, or wood chips from the miter saw’s work surface before and after each use. This prevents material buildup that can affect the accuracy of your cuts.
- Clean the blade: Wipe down the saw blade regularly using a clean cloth or brush. This removes any resin buildup that can impact its cutting performance.
- Dust collection system: Ensure that your miter saw’s dust collection system is working effectively. Regularly empty the dust bag or connect a shop vacuum to prevent dust from obstructing the cutting line.
Lubricating Moving Parts For Smooth Operation:
Proper lubrication of a miter saw’s moving parts is crucial for smooth and precise operation. Consider these tips for lubricating your saw:
- Blade pivot points: Apply a few drops of lubricating oil to the blade pivot points, allowing the blade to move freely and smoothly.
- Sliding rails: Lubricate the sliding rails with a silicone-based lubricant to ensure seamless sliding motion for accurate cuts.
- Bevel and miter locks: Check the bevel and miter locks regularly for smooth operation. Apply lubricant to these locks to prevent any sticking or grinding during adjustments.
Periodic Calibration To Ensure Ongoing Accuracy:
Even a well-maintained miter saw may require calibration from time to time. Use these steps to ensure ongoing accuracy:
- Check for misalignments: Examine the miter saw’s alignment by placing a square against the fence and blade. If there is any gap or misalignment, adjustments may be needed.
- Adjust the bevel and miter angles: Use a protractor or angle gauge to verify the accuracy of the bevel and miter angles. Make any necessary adjustments according to the manufacturer’s instructions.
- Fine-tune the detents: If your miter saw has detents for common angles, ensure that they are accurate. Some models allow you to adjust the detents for precise cuts.
Regular cleaning and dust removal, lubricating moving parts, and periodic calibration are essential for maintaining a square miter saw. By following these best practices, you can maximize the accuracy and functionality of your miter saw, ensuring clean cuts for your woodworking projects.
Credit: www.homedepot.com
Frequently Asked Questions On How To Square A Miter Saw
How Do You Calibrate A Miter Saw?
To calibrate a miter saw, follow these steps: align the blade, check the bevel angle, adjust the fence, and verify accuracy with test cuts.
What Should You Use To Ensure The Miter Saw Is Square Before Making Your First Cut?
To ensure the miter saw is square before cutting, use a combination square or a digital angle gauge.
Why Is My Mitre Box Not Cutting Square?
Your Mitre box may not be cutting square due to misalignment or dull blade. Check and adjust the alignment or replace the blade for precise cuts.
How Do You Adjust A Dewalt Miter Saw To Square?
To adjust a Dewalt miter saw to square, follow these steps: Align the saw blade with the miter slot, square the fence to the blade with a square tool, adjust the bevel angle to 0 degrees, and check the cuts for accuracy.
Conclusion
To ensure accurate and precise cuts, it is essential to square your miter saw properly. By following the steps outlined in this blog post, you can confidently square your miter saw and improve the quality of your woodworking projects. Start by checking the fence alignment and making any necessary adjustments.
Next, ensure that the blade is square to the table by using a reliable square. If needed, adjust the bevel angle and make sure it is accurate. Finally, verify that the miter gauge is perpendicular to the blade and adjust as needed.
Remember, a properly squared miter saw will not only enhance the precision of your cuts but also contribute to the overall safety of your workshop. Taking the time to square your miter saw will pay off in the long run, allowing you to tackle projects with confidence and achieve professional-level results.
So go ahead, take the time to square your miter saw, and unlock the full potential of this versatile tool. Happy woodworking!