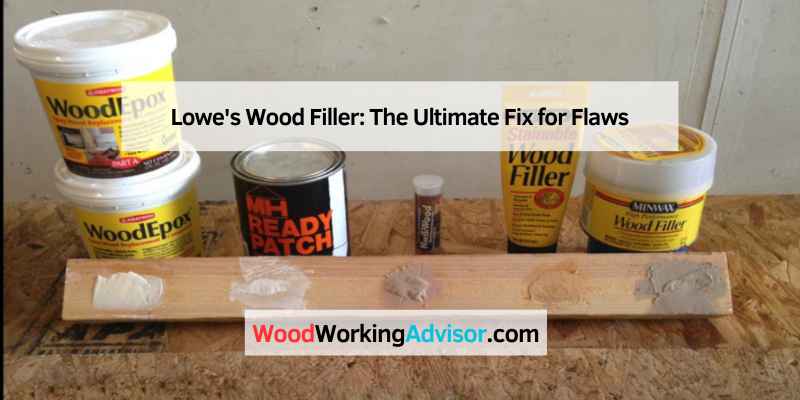
Lowe’s Wood Filler: The Ultimate Fix for Flaws
Lowe’s Wood Filler is a versatile product designed for repairing wood surfaces. It effectively fills cracks, holes, and imperfections in wood.
Wood repairs can seem daunting, but with the right tools, achieving a flawless finish is possible. Lowe’s Wood Filler stands out for its ease of use and reliable results. Whether you’re tackling a DIY project or a professional job, this filler can help restore your wood surfaces to their original state.
It dries quickly and can be sanded, painted, or stained to match existing woodwork. This flexibility makes it ideal for furniture repair, cabinetry, and trim work. Choosing the right wood filler ensures a seamless finish, enhancing the beauty of your woodworking projects. Discover how Lowe’s Wood Filler can elevate your repairs.
Introduction To Lowe’s Wood Filler
Lowe’s Wood Filler is a game changer for DIY projects. This product helps repair and restore damaged wood surfaces. It’s easy to use and highly effective. Whether fixing furniture or crafting, Lowe’s Wood Filler gets the job done.
The Essential For DIY Enthusiasts
DIY enthusiasts love Lowe’s Wood Filler for various reasons:
- Versatility: Works on different wood types.
- Ease of Use: Simple to apply with minimal tools.
- Quick Drying: Dries fast for quick repairs.
- Durability: Long-lasting results for repairs.
This wood filler fills gaps, cracks, and holes effectively. Use it for:
- Repairing furniture.
- Fixing wooden doors.
- Restoring cabinets.
- Completing craft projects.
How Wood Filler Can Save Your Furniture
Lowe’s Wood Filler can save your furniture from damage. Here’s how:
| Issue | Solution with Lowe’s Wood Filler |
|---|---|
| Scratches | Fill and smooth for a seamless finish. |
| Holes | Completely fill and sand for a perfect look. |
| Cracks | Repair with a durable filling that blends well. |
Using Lowe’s Wood Filler prolongs the life of your furniture. It maintains the beauty and functionality of wooden items.

Types Of Wood Filler Available At Lowe’s
Lowe’s offers various types of wood fillers for every project. Each type has unique features. Choosing the right one ensures a great finish. Let’s explore the types available.
Choosing The Right Filler For Your Project
Selecting the right wood filler depends on your needs. Consider the following factors:
- Project type: Interior or exterior work?
- Wood type: Softwood or hardwood?
- Size of the damage: Small cracks or large holes?
Here’s a quick guide to help you:
| Filler Type | Best For |
|---|---|
| Lightweight Filler | Small cracks and dents |
| Heavy-Duty Filler | Large holes and gaps |
| Color-Matching Filler | Visible repairs on stained wood |
Water-based Vs. Solvent-based Options
Wood fillers come in water-based and solvent-based options. Each has its advantages.
- Water-based fillers:
- Easy to clean up with water.
- Fast drying time.
- Low odor.
- Solvent-based fillers:
- More durable for outdoor use.
- Stronger adhesion.
- Longer drying time.
Think about your project conditions. Choose the right filler type for the best results.
Benefits Of Using Lowe’s Wood Filler
Lowe’s Wood Filler offers many advantages for your woodworking projects. It helps you achieve strong repairs and a beautiful finish. Here are some key benefits to consider.
Durability And Strength For Repairs
Lowe’s Wood Filler is known for its durability. It can withstand pressure and resist cracking. This makes it ideal for:
- Furniture repairs
- Cabinet touch-ups
- Flooring fixes
Using Lowe’s Wood Filler ensures your repairs last. It bonds well with wood, creating a strong hold. You can sand it down easily to match the surface.
Seamless Blending With Existing Wood
One of the best features of Lowe’s Wood Filler is its color-matching ability. It blends well with various types of wood. This helps create a smooth, invisible repair.
Key points about blending:
- Available in multiple shades
- Easy to stain or paint over
- Dries quickly for immediate use
With Lowe’s Wood Filler, you get a clean finish. It helps maintain the beauty of your wood projects.
Step-by-step Guide To Applying Wood Filler
Applying wood filler can restore the beauty of your furniture. Follow these steps for a smooth finish. This guide helps you understand how to prepare and fill wood surfaces effectively.
Preparing The Wood Surface
Start by cleaning the area you plan to fill. Remove any dirt, dust, or old finish. Use a damp cloth to wipe the surface. Let it dry completely.
Next, inspect for cracks or holes. This ensures you know where to apply the wood filler.
- Sand the area lightly. Use medium-grit sandpaper.
- Remove the sanding dust with a vacuum or brush.
- Apply masking tape around the area if needed.
Filling And Smoothing Techniques
Now it’s time to apply the wood filler. Use a putty knife for even application. Follow these steps:
- Take a small amount of wood filler.
- Press it firmly into the crack or hole.
- Use the knife to smooth it out. Remove excess filler.
Allow the filler to dry completely. This usually takes a few hours. Check the manufacturer’s instructions for specific drying times.
Once dry, sand the area again. Use fine-grit sandpaper for a smooth finish. Wipe away any dust afterward.
Finally, you can stain or paint over the filled area. This makes it blend seamlessly with the rest of the wood.
| Steps | Description |
|---|---|
| 1. Clean | Remove dirt and dust from the surface. |
| 2. Inspect | Look for cracks or holes. |
| 3. Sand | Smooth the surface with sandpaper. |
| 4. Apply | Use wood filler and a putty knife. |
| 5. Dry | Let the filler dry completely. |
| 6. Finish | Sand and apply stain or paint. |
Tips For A Perfect Finish
Achieving a perfect finish with Lowe’s Wood Filler requires careful attention. The right techniques ensure your project looks professional. Follow these tips for stunning results.
Sanding For A Flawless Surface
Sanding is crucial for a smooth finish. Follow these steps:
- Choose the right sandpaper: Start with 80-grit paper.
- Sand gently: Use light pressure to avoid damaging the wood.
- Progress to finer grits: Move to 120-grit, then 220-grit for a smooth feel.
- Check for imperfections: Look for uneven areas. Sand them down.
- Clean the dust: Wipe the surface with a damp cloth.
Proper sanding creates a flawless surface. Take your time to achieve the best results.
Painting And Staining Over Wood Filler
Painting or staining over wood filler can enhance your project. Follow these tips:
- Wait for the filler to dry: Ensure it is completely dry before proceeding.
- Use primer: Apply a coat of primer for better adhesion.
- Choose the right paint: Use high-quality paint for a smooth finish.
- Test your stain: Always test on a scrap piece first.
- Apply in thin layers: This prevents drips and uneven color.
These steps help achieve a beautiful finish. Enjoy your woodworking project!
Common Mistakes To Avoid
Using Lowe’s Wood Filler can enhance your woodworking projects. Avoiding common mistakes ensures a smooth finish and lasting results. Here are key areas to focus on.
Overfilling And Underfilling
Finding the right amount of wood filler is crucial. Both overfilling and underfilling can lead to problems.
- Overfilling: This occurs when too much filler is applied. It can lead to:
- Cracking as it dries.
- Difficulty in sanding down.
- Visible patches in the wood.
- Underfilling: This happens when not enough filler is used. It can result in:
- Weak spots in the wood.
- Uneven surfaces.
- Less durability.
Use a putty knife for precise application. Fill the hole or crack just enough. Let it slightly overfill for proper sanding later.
Not Allowing Adequate Drying Time
Drying time is vital for a successful application. Rushing this step leads to issues.
| Drying Time | Result of Not Waiting |
|---|---|
| 1 hour | Soft spots remain. |
| 2-4 hours | Incomplete curing. |
| Overnight | Fully cured and ready to sand. |
Check the manufacturer’s instructions for specific drying times. Avoid sanding until the filler is completely dry. This ensures a smooth finish.
Creative Uses For Wood Filler Beyond Repairs
Wood filler is not just for fixing holes. It serves many creative purposes. From crafting projects to customizing furniture, it adds unique touches. Discover how to use Lowe’s wood filler in unexpected ways.
Crafting With Wood Filler
Wood filler can enhance various craft projects. Here are some fun ideas:
- Artistic Sculptures: Shape filler into small sculptures. Let your imagination run wild.
- DIY Home Décor: Create decorative items like picture frames. Fill gaps for a smooth finish.
- Custom Stamps: Carve designs into wood filler. Use them for unique stamping.
- Textured Art: Mix with paint for a textured look. Perfect for canvas art.
These ideas make crafting more enjoyable. Wood filler is versatile and easy to use.
Customizing Furniture Designs
Transform your furniture with wood filler. Here’s how:
- Fill Holes: Use it to fill nail holes or scratches.
- Enhance Texture: Add texture to flat surfaces. Make your furniture stand out.
- Create Shapes: Mold filler into desired shapes. Craft unique designs on furniture.
- Color Matching: Stain or paint over filled areas. Ensure a seamless look.
Customizing furniture elevates your home style. Lowe’s wood filler helps achieve a professional finish.
Explore these creative uses. Wood filler is a handy tool for all projects.
Maintaining And Storing Your Wood Filler
Proper maintenance and storage keep your Lowe’s Wood Filler effective. Following the right steps ensures it lasts longer and performs better. Let’s explore how to extend its shelf life and the ideal storage conditions.
Extending The Shelf Life
To maximize the shelf life of your wood filler, follow these tips:
- Check the expiration date: Always use before this date.
- Seal tightly: Ensure the container is closed after each use.
- Avoid contamination: Use clean tools to scoop out the filler.
- Store in small amounts: If possible, buy smaller containers.
Ideal Storage Conditions
Storing wood filler correctly is vital. Here are the best practices:
| Condition | Recommendation |
|---|---|
| Temperature | Keep between 50°F to 80°F |
| Humidity | Avoid high humidity areas |
| Light Exposure | Store in a dark place |
These conditions help maintain the quality of your wood filler. Regularly check storage areas to ensure they meet these standards.
Success Stories: Before And After
Many customers have transformed their projects with Lowe’s Wood Filler. This product fixes cracks, holes, and imperfections easily. Users share their impressive results, showcasing the power of effective repairs.
Transformations With Lowe’s Wood Filler
Homeowners and DIY enthusiasts have reported amazing changes. Here are some successful transformations:
- Furniture Restoration: Old chairs and tables look brand new.
- Cabinet Refurbishment: Damaged cabinets regain their original charm.
- Wall Repairs: Holes and dents disappear, creating smooth surfaces.
| Project Type | Before Condition | After Condition |
|---|---|---|
| Dining Table | Scratched and worn | Polished and restored |
| Cabinet Doors | Chipped edges | Seamless and smooth |
| Wooden Fence | Cracked and peeling | Freshly filled and painted |
Customer Testimonials And Reviews
Many users praise Lowe’s Wood Filler for its effectiveness. Here are some highlights:
- James R.: “This filler works wonders! My old table looks fantastic.”
- Linda K.: “Easy to use and dries quickly. Highly recommend!”
- Mike T.: “Perfect for my cabinet repairs. Very satisfied!”
These stories show that with Lowe’s Wood Filler, anyone can achieve great results. Transform your projects and enjoy the satisfaction of a job well done.
Frequently Asked Questions
What Is Lowe’s Wood Filler Used For?
Lowe’s Wood Filler is designed for repairing damaged wood surfaces. It effectively fills holes, cracks, and imperfections in furniture, cabinetry, and flooring. This versatile product can be sanded, stained, or painted once dry, making it ideal for various DIY projects and home repairs.
How To Apply Lowe’s Wood Filler?
To apply Lowe’s Wood Filler, start by cleaning the area thoroughly. Use a putty knife to scoop the filler and press it into the damaged area. Smooth it out for a level finish. Allow it to dry completely before sanding or painting to achieve a seamless look.
Is Lowe’s Wood Filler Waterproof?
Lowe’s Wood Filler is water-resistant but not fully waterproof. It can withstand occasional moisture exposure, making it suitable for indoor use. However, for outdoor projects or areas with high humidity, consider using a specialized exterior wood filler for better durability.
Can Lowe’s Wood Filler Be Painted?
Yes, Lowe’s Wood Filler can be painted. Once the filler has dried and been sanded smooth, it is ready for painting. Use a compatible paint or stain to match the surrounding wood. This allows for a seamless finish that blends perfectly with your project.
Conclusion
Choosing Lowe’s Wood Filler ensures a durable, smooth finish for your woodworking projects. Its easy application and quick drying time make it a go-to for both professionals and DIY enthusiasts. Achieve flawless results and restore your wood surfaces effortlessly with this reliable product.
Transform your projects with confidence today!