
Miter Saw Angle Chart: Master Precision Cuts Every Time
A miter saw angle chart helps you determine the correct angles for precise cuts. It simplifies the process of setting up your miter saw for various projects.
Understanding miter saw angles is essential for achieving accurate cuts in woodworking and construction. This tool is invaluable for creating precise bevels and miter cuts, which are crucial for joints and edges. Whether you’re a DIY enthusiast or a professional carpenter, knowing how to read and use an angle chart will enhance your efficiency and accuracy.
The chart provides clear guidelines for common angles, making it easier to set your saw correctly. With this knowledge, you can tackle projects with confidence, ensuring your cuts are perfectly aligned and your work is of the highest quality.
The Essentials Of Miter Saw Angle Charts
A Miter Saw Angle Chart is a tool for woodworking. It shows the correct angles for cutting wood. Using this chart helps achieve perfect joints and edges.
Accurate angles are very important in woodworking. They ensure pieces fit together well. Incorrect angles lead to gaps and uneven cuts. This can ruin a project and waste materials.
Using a miter saw angle chart saves time. It helps woodworkers avoid mistakes. Knowing the right angles also boosts confidence in the work.
Types Of Miter Saws And Their Angle Ranges
Basic miter saws offer simple cuts. They usually have a range of 0° to 45°. These saws are ideal for basic woodworking tasks.
Compound miter saws can tilt and rotate. Their angle range is typically 0° to 45° for bevel cuts. This feature allows for more complex projects.
Sliding compound miter saws have a sliding arm. This design increases the cutting capacity. They also have an angle range from 0° to 60°. This makes them great for larger pieces of wood.
Understanding Common Angles For Cutting
Understanding common angles is essential for precise cuts. Here are some standard cut angles in woodworking:
- 90 degrees: Perfect for square cuts.
- 45 degrees: Ideal for creating miter joints.
- 22.5 degrees: Useful for half-miter joints.
Specialty angles help with complex projects. These angles include:
- 30 degrees: Often used for decorative designs.
- 60 degrees: Great for making hexagonal shapes.
- 15 degrees: Helpful for unique angles in custom pieces.
Reading And Interpreting The Angle Chart
Understanding the symbols and terms on the angle chart is essential. Each symbol represents a specific cut angle or measurement. Familiarize yourself with these to read the chart correctly. Common terms include miter angle and bevel angle. Knowing these will help you choose the right settings.
To use the chart for different cuts, first identify the desired angle. Then, find that angle on the chart. It will show the miter and bevel settings needed. Set your saw according to these values. Always double-check your settings for accuracy.
| Cut Type | Miter Angle | Bevel Angle |
|---|---|---|
| Cross Cut | 0° | 0° |
| 45° Miter | 45° | 0° |
| Compound Cut | 30° | 15° |
Setting Up Your Miter Saw For Precision
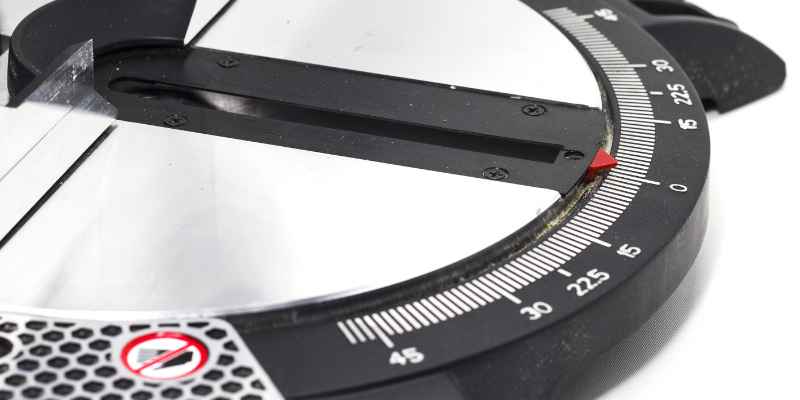
Calibrating your miter saw is essential for accurate cuts. Start by checking the angle settings. Use a protractor to confirm they match the angle chart. Adjust the saw’s bevel and miter settings as needed.
To adjust the saw to match chart angles, follow these steps:
- Loosen the locking knob for the miter angle.
- Turn the miter handle to the desired angle.
- Tighten the locking knob to secure the angle.
For bevel adjustments, repeat similar steps. Set the bevel angle using the gauge. Always double-check with the angle chart for accuracy.
Tips For Making Accurate Cuts
To ensure accurate cuts, always use a reliable tape measure. Mark your measurements clearly with a pencil or marker. Double-check your marks before cutting to avoid mistakes.
Use a square to create straight lines. This helps in making precise angles. For angles, use a protractor or angle finder for better accuracy.
Securing your materials is essential. Use clamps to hold your workpiece firmly in place. This prevents movement during cutting, which can lead to errors.
Always cut on the waste side of your mark. This ensures your piece is the right size. Remember to follow all safety guidelines while operating your miter saw.
Troubleshooting Common Cutting Mistakes
Cutting mistakes can happen for many reasons. Imperfect angles can cause uneven cuts. To fix this, use a protractor to measure angles accurately. Adjust the miter saw to match the desired angle. Check the saw’s settings before starting each cut.
Slipping or movement during cutting can ruin your project. To prevent this, secure the workpiece with clamps. Ensure the material is flat on the saw’s table. Use a sacrificial board underneath to protect both the saw and the workpiece.
Always keep the blade sharp. A dull blade can cause more movement. Take your time and make sure everything is aligned properly before cutting.
Advanced Techniques And Applications
Cutting angles for crown molding requires precision. Common angles include 45 degrees and 22.5 degrees. Use the miter saw to achieve clean cuts. Adjust the saw to the desired angle for best results.
Creating custom angles adds a personal touch. Measure the wall angle accurately before cutting. Use a protractor for exact measurements. Mark the wood before making any cuts. This helps avoid mistakes and wasted material.
| Angle | Common Use |
|---|---|
| 0 degrees | Flat cuts |
| 45 degrees | Corner joints |
| 22.5 degrees | Octagonal shapes |
Maintaining Your Miter Saw For Long-term Accuracy
Regular maintenance helps keep your miter saw accurate and efficient. Check the blade frequently for wear. A dull blade can cause uneven cuts. Replace it when you notice signs of damage.
Inspect other parts like the fence and table. Ensure they are straight and aligned. Misalignment can lead to incorrect angles. Tighten any loose screws and bolts to maintain stability.
Cleaning is essential. Dust and debris can affect performance. Use a soft brush to remove buildup. Lubricate moving parts to ensure smooth operation.
Always follow the manufacturer’s guidelines for replacements. Use high-quality parts for the best results. This practice extends the life of your miter saw.
Leveraging Angle Charts For Professional Results
Using angle charts helps professionals achieve precise cuts. For example, a 45-degree angle is common for making corners. Carpenters rely on these charts to ensure accuracy in their projects. They save time and reduce mistakes.
In cabinet making, angle charts guide the cuts needed for joints. This ensures a perfect fit and a polished look. In roofing, the right angles prevent leaks and structural issues. Angle charts help workers measure and cut quickly.
Efficiency rises when teams use angle charts consistently. They serve as a quick reference to avoid errors. This leads to better quality and faster project completion.
Frequently Asked Questions
What Is A Miter Saw Angle Chart?
A Miter Saw Angle Chart is a guide that helps users determine the correct angles for various cuts. It simplifies the process of setting up your miter saw for precise cuts. Whether you’re making crown molding or framing, this chart ensures accuracy and efficiency.
How Do I Use A Miter Saw Angle Chart?
To use a Miter Saw Angle Chart, locate the desired cut angle. Adjust your miter saw’s settings according to the chart’s recommendations. This ensures that your cuts are accurate and fit perfectly. Always double-check your measurements before making any cuts for optimal results.
Why Is An Accurate Angle Important In Woodworking?
Accurate angles in woodworking ensure that joints fit together seamlessly. Incorrect angles can lead to gaps and weak structures. Using a Miter Saw Angle Chart helps achieve precision. This is crucial for aesthetics and structural integrity in your woodworking projects.
Where Can I Find A Miter Saw Angle Chart?
Miter Saw Angle Charts can be found online or in woodworking manuals. Many manufacturers provide charts on their websites. You can also create a custom chart based on your specific needs. Ensure you use a reliable source for the most accurate information.
Conclusion
Understanding the miter saw angle chart is essential for precise cutting. It helps simplify complex angles and improves your woodworking projects. By referring to this chart, you can achieve professional-quality results every time. Keep this resource handy to enhance your skills and confidence in using a miter saw effectively.