Miter Saw Blade Replacement: Quick & Precise Guide
To replace a miter saw blade, first unplug the saw for safety. Then, use the appropriate wrench to loosen and remove the old blade.
Replacing the blade on a miter saw is essential for maintaining cutting precision and efficiency. A dull or damaged blade can lead to poor cuts and increased strain on the motor. Regularly changing the blade ensures your projects meet the highest standards.
Understanding the right type of blade for your specific needs can enhance performance. Whether you’re tackling wood, metal, or composite materials, selecting the right blade makes all the difference. This guide will walk you through the steps for a safe and effective miter saw blade replacement, ensuring your saw remains in top condition for all your woodworking tasks.
Introduction To Miter Saw Maintenance
Keeping your miter saw in good shape is very important. Sharp blades make clean cuts. Dull blades can lead to poor performance and safety issues.
Watch for these signs that indicate it’s time for a new blade:
- Rough edges on cuts
- Unusual vibration during use
- Burn marks on the material
- Excessive noise when cutting
- Blade shows signs of wear or damage
Regularly checking your blade helps ensure smooth and safe operation. Don’t ignore these signs to maintain your miter saw effectively.
Types Of Miter Saw Blades
Choosing the right miter saw blade is important for effective cutting. Blade materials include high-speed steel (HSS) and carbide-tipped options. HSS blades are good for softwood. Carbide-tipped blades last longer and cut through hardwoods better.
Coatings like teflon reduce friction and help with cleaning. This keeps blades sharper for longer. Tooth configurations also matter. Flat-top teeth are great for quick cuts. Alternate top bevel (ATB) teeth provide smooth edges. Triple chip grind (TCG) teeth are perfect for hard materials.
| Blade Material | Best Use |
|---|---|
| High-Speed Steel (HSS) | Softwood |
| Carbide-Tipped | Hardwood |
Safety First: Preparing For Blade Replacement
Disconnecting power is the first step in blade replacement. Always unplug the miter saw. This action prevents any accidental starts.
Wearing protective gear is very important. Use safety goggles to protect your eyes. Ear protection helps reduce noise. Wear gloves to keep your hands safe.
Ensure your workspace is clean and organized. Remove any loose items that could cause accidents. Always keep children and pets away from the area.
Tools Required For Blade Replacement
Replacing a miter saw blade requires some essential tools. Here’s what you need:
- Wrench or socket set for removing the old blade.
- Safety goggles to protect your eyes.
- Gloves for hand protection during the process.
- New miter saw blade suitable for your specific saw model.
For added convenience, consider these optional items:
- Magnetic tray to hold screws and small parts.
- Wood clamps to secure your workpiece.
- Shop vacuum for cleaning sawdust.
Step-by-step Blade Removal
Start by securing the saw on a flat surface. Use clamps to hold it steady. Make sure the area is clean and safe.
Next, remove the blade guard. This part usually has screws or a lever. Unscrew or unlock it carefully to avoid damage.
Loosen the arbor nut using the appropriate tool. Turn it counterclockwise to release the blade. Be careful not to lose any small parts during this process.
Choosing The Right Blade
Choosing the right miter saw blade is essential for your project. Different materials need different blades. For wood, use a crosscut blade. For metal, opt for a ferrous metal blade.
Blade quality matters too. Higher quality blades last longer and cut better. Look for carbide-tipped blades for durability. Always check the teeth count; more teeth give smoother cuts.
| Material | Recommended Blade Type |
|---|---|
| Wood | Crosscut Blade |
| Metal | Ferrous Metal Blade |
| Plastic | Specialty Plastic Blade |
Installing The New Blade
To install the new blade, start by aligning it properly. Ensure the teeth face the right direction. This affects cutting performance greatly.
Next, tighten the abor nut securely. Use a wrench to avoid any movement during operation. A loose blade can cause serious accidents.
After that, reassemble the blade guard. This part protects users from injuries. Make sure it moves freely and covers the blade completely.
Post-installation Checks
After replacing the miter saw blade, check its alignment carefully. A misaligned blade can cause poor cuts and safety issues.
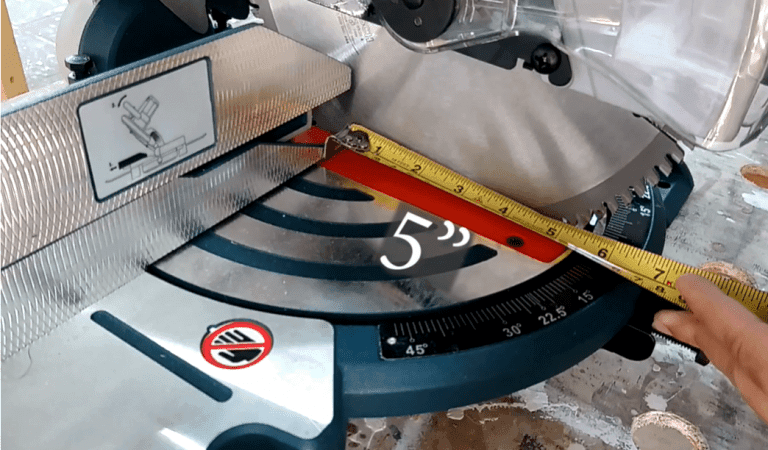
To test alignment, use a straight edge. Place it against the saw bed and measure the distance to the blade. Ensure it is consistent across the entire length.
Performing test cuts is crucial. Use a scrap piece of wood to check the blade’s performance. Look for smooth cuts and no splintering.
If the cuts are not clean, adjust the blade again. Repeat the test until the results are satisfactory.
Maintenance Tips For Longevity
Regular cleaning of your miter saw blade is essential for optimal performance. Use a soft brush to remove dust and debris. A clean blade cuts better and lasts longer.
Store the saw properly to avoid damage. Keep it in a dry place, away from moisture. Use a protective cover to shield it from dust and scratches.
Check the blade regularly for wear. Replace it if you notice any chips or dullness. A well-maintained saw ensures safety and efficiency.
Troubleshooting Common Issues
Wobble and vibrations can cause problems during cutting. Check the blade alignment first. Make sure the blade is tight and properly installed. A worn-out blade can also cause wobbling. Replace the blade if it looks damaged.
Blade stalling during cuts may happen for several reasons. The motor could be overheating. Ensure the power supply is stable and sufficient. A dull blade will also stall frequently. Always keep blades sharp for better performance. If stalling continues, check for any obstructions in the cutting path.
Conclusion: Enhancing Cutting Precision
Replacing the miter saw blade is important for better cuts. A dull blade can ruin your projects. Always choose the right blade for your material. For wood, use a fine-tooth blade. For metal, select a carbide-tipped blade.
Before starting, unplug the saw. This keeps you safe while changing the blade. Use the right tools to remove the old blade. Be careful with the new blade; it can be sharp!
Once installed, check the blade alignment. Proper alignment ensures smooth cuts and less wear. Regularly replacing the blade enhances the saw’s performance and your work quality.

Frequently Asked Questions
How Do I Know When To Replace My Miter Saw Blade?
You should replace your miter saw blade when it shows visible signs of wear, such as dullness or chipping. If you notice the blade tearing the material instead of cutting cleanly, it’s time for a replacement. Regularly inspecting your blade can prevent inefficient cuts and ensure safety.
What Type Of Miter Saw Blade Should I Use?
The type of miter saw blade you should use depends on your project. For general woodworking, a combination blade works well. For fine finish cuts, opt for a high tooth count blade. Always choose a blade that matches the material you are cutting for optimal results.
Can I Use A Different Size Blade On My Miter Saw?
Using a different size blade on your miter saw is not recommended. Each miter saw is designed for specific blade sizes, which affects safety and performance. Always refer to your saw’s manual to ensure compatibility and maintain cutting efficiency.
How Do I Replace A Miter Saw Blade Safely?
To replace a miter saw blade safely, first unplug the saw. Use the proper tools to loosen the arbor nut, then remove the old blade. Install the new blade, ensuring it’s oriented correctly, and secure the nut tightly. Always wear safety glasses during the process.
Conclusion
Replacing your miter saw blade is essential for optimal performance. A sharp, appropriate blade improves cutting accuracy and efficiency. Regular maintenance ensures safety and longevity of your tools. Follow the steps outlined in this guide for a seamless replacement process.
Keep your projects on track with a reliable miter saw!