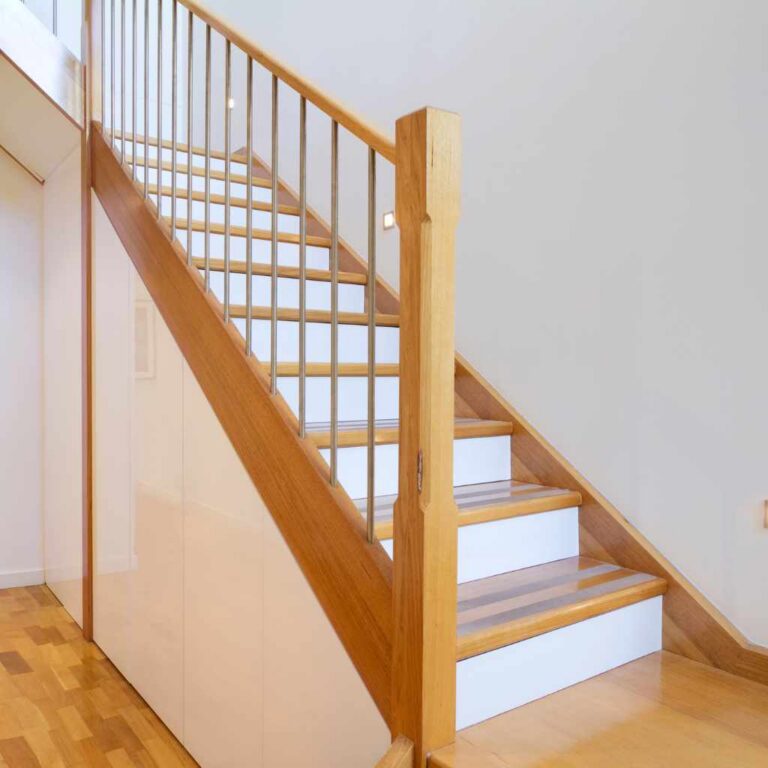
Rough Opening for Interior Doors: Sizes Explained
To measure for rough opening interior doors, determine the width and height of the door and add 2 1/2 inches to both measurements. For a well-rounded introduction, measuring for the rough opening of interior doors is an essential step in the installation process.
A properly sized opening ensures that a door will fit optimally and operate smoothly. There are a few steps involved in taking accurate measurements, as well as some common mistakes to avoid. Additionally, it’s important to understand the standard sizes for interior doors and how to adjust for different types of trim and jambs.
We’ll cover all the basics of measuring for rough opening interior doors to help you get your project started on the right foot.
Understanding Rough Openings
Understanding rough openings for interior doors is vital for homeowners and builders alike. It involves correctly measuring and framing the opening, considering the type of door and flooring to be installed and ensuring it meets the standard rough opening dimensions.
With accurate measurements, the final door installation will be a perfect fit and complement the overall aesthetics of the room.
What Is A Rough Opening?
Before installing an interior door, it’s important to understand what a rough opening is. Essentially, a rough opening is the framed space that the door is going to fit into. This space must be slightly larger than the actual door itself, to allow for the installation of the door frame and to ensure that the door fits properly.
What Are The Importance Of Rough Openings?
Understanding the importance of rough openings is crucial when installing interior doors. After all, the rough opening must be the correct size to ensure that the door fits properly. If the rough opening is too small or too large, the door may not function correctly, or you may need to spend more time and money on adjustments. In addition, understanding how to calculate rough openings is important if you want to order a pre-hung door or if you plan on framing the door yourself.
Calculating rough openings is a multi-step process that involves measuring both the height and width of the door, adding space for the door frame, and calculating the size of the header and trimmers. This can be a daunting task, but there are many resources available to help you through the process, including online calculators and instructional videos.
In conclusion, understanding rough openings is an important step when installing interior doors. By taking the time to calculate the proper rough opening size, you can ensure that your door functions properly and fits seamlessly into your home’s architecture.
Measuring Rough Openings
Measuring rough openings for interior doors is essential to ensure the right fit. It involves careful calculation of height, width, and depth to create the perfect frame for your door. Expert builders suggest measuring the door’s width, height, and depth, as well as adding a little extra for clearance.
Before ordering or installing interior doors, it is crucial to measure the rough opening accurately. A rough opening refers to the space between studs in a wall where a door will be installed. This measurement must account for the size of the door and ensure that it fits seamlessly into the wall.
Tools required for Measuring Rough Openings
The measuring process requires a few essential tools. These tools include:
– Tape measure
– Carpenter’s square
– Level
Calculating Rough Opening Width and Height
To calculate the rough opening width, measure the width of the door slab and add an additional two and a half inches for the space on each side. For example, if the width of the door slab is 30 inches, the rough opening width should be 35 inches.
To calculate the rough opening height, measure the height of the door slab and add three-quarters of an inch to the total. This additional measurement is vital to ensure the door’s clearance above rough flooring and carpet. Once these measurements are calculated, use a carpenter’s square and level to ensure the opening’s vertical and horizontal alignment.
Using Measurement Charts
Many manufacturers offer measurement charts to help ensure that you get the correct measurements needed for the door’s proper installation. These measurement charts include recommended rough opening sizes to accommodate a particular door size.
In conclusion, measuring rough openings is an essential step in ensuring the proper installation of interior doors. It is crucial to have the correct measurements to guarantee that the door fits seamlessly into the wall. By utilizing the right tools and measurement charts, you can measure with ease and confidence.
Framing A Rough Opening
Framing a rough opening for interior doors can be challenging, but it’s important to get it right to ensure the door is installed properly. One of the key steps in the process is framing the rough opening. Here’s what you need to know:
Necessary Materials For Framing
Before you begin framing the rough opening, you’ll need a few essential materials:
- 2×4 lumber for framing
- 1/2 inch plywood for sheathing
- Hammer
- Nails
- Saw
- Tape measure
- Level
- Square or speed square
- Pencil
Preparing The Opening
The first step to framing a rough opening for an interior door is to prepare the opening. This includes measuring the height and width of the door to determine the size of the rough opening. Add an extra inch to the width and height to allow for any adjustments during installation.
Next, remove any drywall or plaster from the area where the door will be installed. Use a saw to cut through any framing or studs if necessary. Install a header if it’s not already in place to support the weight of the door.
Building And Installing The Header
The header is an important part of the door frame. It provides support for the weight of the door and prevents the opening from sagging over time. Here’s how to build and install the header:
- Measure the width of the rough opening and cut two pieces of 2×4 lumber to this length.
- Place the two pieces of lumber on their sides and nail them together to create a beam.
- Insert the beam into the rough opening at the top of the frame.
- Nail the beam to the studs on either side of the rough opening.
Trimming And Adjusting The Opening
Once the header is in place, it’s time to trim and adjust the rough opening to ensure it’s level and plumb. Here’s what you need to do:
- Insert jack studs on either side of the door opening to support the header.
- Attach the door frame to the jack studs using nails.
- Use a level to ensure the door frame is plumb and adjust as necessary.
- Insert shims between the door frame and the rough opening to level the frame.
- Nail the frame to the rough opening and remove any excess shims.
By following these steps, you’ll be able to frame a rough opening for an interior door that will ensure a proper installation and prevent future problems.
Installation Process
Learn how to easily measure and frame the rough opening for interior doors with step by step instructions from experts. From calculating the rough opening to laying out trimmers and installing the header, this guide covers all the essential steps for successful door installation.
When it comes to installing interior doors, it’s important to have precise measurements to ensure a perfect fit. In this section, we’ll cover everything you need to know about the installation process for interior doors. We’ll start by discussing how to size a door to a rough opening, then move onto installing the prehung door and hanging a door.
Sizing Door to Rough Opening
Before you can begin installing your door, you need to make sure you have the correct measurements for your rough opening. This is the opening in your wall where the door will be installed. To get the most accurate measurements, measure both the height and width of the opening at three different points – top, middle, and bottom. This will help you determine if the opening is level and plumb.
Once you have your measurements, take the smallest width measurement and subtract 2 inches from it. Take the smallest height measurement and subtract 2 1/2 inches from it. This will give you the door size you need to order. Keep in mind that most interior doors come in standard sizes, so you may need to adjust your rough opening accordingly.
Installing the Prehung Door
Once you have your door, it’s time to install the prehung door. This means that the frame and door are already attached and ready to be installed into a rough opening. First, remove any packaging from the door and frame. Then, set the door into the rough opening and use shims to make sure it’s level and plumb. Make sure to leave a gap of about 1/8 inch between the door and frame to allow for any swelling or movement.
Next, secure the door to the frame using screws. Be sure to follow the manufacturer’s instructions for the correct screw placement. Finally, add trim around the door frame to cover any gaps and create a finished look.
Hanging a Door
If you’re not using a prehung door, you’ll need to hang a door from scratch. This means attaching hinges to the door and frame, and then installing the door into the rough opening. Start by attaching the hinges to the door first, using the manufacturer’s instructions for the correct placement. Then, hold the door up to the frame and mark the hinge placement on the frame with a pencil. Pre-drill holes in the frame for the hinge screws, and then attach the hinges to the frame.
Finally, test the door to make sure it swings smoothly and doesn’t stick. If necessary, adjust the hinges to ensure a perfect fit. Add trim around the door frame to cover any gaps and create a finished look.
In conclusion, knowing how to properly install a door can save you time and frustration. Whether you’re using a prehung door or hanging a door from scratch, following these steps will ensure a perfect fit and a professional-looking result. With a little patience and attention to detail, you’ll have a beautiful new door in no time.

Common Issues And Solutions
Having trouble with rough opening interior doors in your home in Austin, TX? There are various solutions, including measuring the rough opening for ordering and framing the door opening before installing the header. Measuring accurately is crucial for a proper fit, and it is recommended to seek guidance from experts or consult specific measurement charts.
Common Issues and Solutions: Rough Opening Interior Doors
Rough openings are crucial in ensuring your interior doors fit into the framed wall. However, many people encounter issues with rough openings that can lead to ill-fitting doors, frustrating delays, and unnecessary costs. In this article, we will explore common issues with rough openings and their causes, as well as how you can fix these problems.
Issues With Rough Openings And Their Causes
There are several issues that can arise when it comes to rough openings. Some of these include:
– Incorrect measurements: Measuring the wrong size can lead to a door that is too small or too big for the frame.
– Uneven framing: Uneven framing can cause a door to tilt or swing, making it difficult to open and close.
– Wall thickness: If the wall is too thin or thick, the door may not fit properly.
– Poor alignment: Any misalignment or mistakes in the placement of the door frame can cause issues with the rough opening.
How To Fix Common Problems
Thankfully, there are several solutions to common rough opening problems. Here are some fixes you can try:
– Recalculate measurements: Always double-check your measurements before you order a new door or frame.
– Use shims: If you encounter uneven framing, use shims to level the door frame.
– Adjust the wall thickness: You can add or remove drywall to adjust the wall’s thickness, ensuring a proper fit for the door.
– Check alignment: Always ensure that the door frame is level and plumb before installation.
Remember, it is always best to measure twice and cut once. Take your time during the rough opening stage to ensure your door fits perfectly into the wall frame.
In conclusion, rough openings can be stressful, but with careful planning and execution, you can have a well-functioning interior door in your home. By following the above solutions to common problems, you can save yourself time, money, and frustration.
Best Practices
To properly measure for rough opening interior doors, it’s important to understand the necessary steps. Begin by identifying the appropriate door size and flooring type, then measure and frame the opening accordingly. Follow expert guides to ensure proper installation for a seamless finish.
to Frame an Interior Door Rough Opening: Tips and Tricks
Framing a rough opening for an interior door may seem like a daunting task, but with the right tips and tricks, it can be a breeze! Here are some best practices to keep in mind:
Tips And Tricks For Framing An Interior Door Rough Opening:
- Before starting, measure the door to determine the proper rough opening size.
- Use a level and plumb bob to ensure the opening is perfectly straight.
- Install jack studs and a header to support the weight of the door.
- Anchor the frame to the surrounding wall using screws or nails.
- Check and adjust the rough opening size as needed throughout the installation process to ensure a perfect fit.
Things To Keep In Mind:
- Be sure to account for any obstructions, such as electrical or plumbing, when framing the opening.
- When ordering a door, always provide the exact measurements of the rough opening to ensure a proper fit.
- Consider the type of door hardware you will be using when framing the opening to ensure there is enough space for installation.
By following these tips and tricks, framing an interior door rough opening can be a straightforward and stress-free process. Remember to measure twice and cut once to avoid mistakes, and enjoy the satisfaction of a job well done!
Frequently Asked Questions Of Rough Opening Interior Doors
What Should The Rough Opening Be For A 32 Inch Interior Door?
For a 32 inch interior door, the rough opening should be approximately 34 inches in width and 82 inches in height.
What Is The Rough Opening For A 36 Prehung Door?
The rough opening for a 36 Prehung door is generally 38 inches wide by 82 inches tall. It is important to measure accurately to ensure the door fits properly. Avoid starting any sentence with phrases like “When it comes” or “Additionally”.
For assistance, consult a guide to interior door sizing and rough openings.
What Is The Rough Opening For A 36 By 80 Inch Door In Inches?
The rough opening for a 36 by 80 inch door in inches is 38 by 82 inches.
What Is The Rough Framing For A 30 Inch Door?
The rough framing for a 30 inch door varies depending on the manufacturer, but typically the width of the rough opening should be 32 inches. The height of the rough opening should be 82 1/2 to 83 inches. These measurements allow for proper installation, adjustment, and operation of the door.
Conclusion
To conclude, measuring rough openings for interior doors may seem like a daunting task, but with the right tools and guidance, it can be a simple and easy process. Whether you’re a DIY enthusiast or a professional contractor, getting accurate measurements for your door opening ensures a perfect fit and a seamless installation.
Remember to follow the steps outlined in this post, take accurate measurements, and consult with sizing charts to get the right size for your interior door. With these tips, you can achieve a beautiful and functional interior door that meets your requirements and adds value to your space.