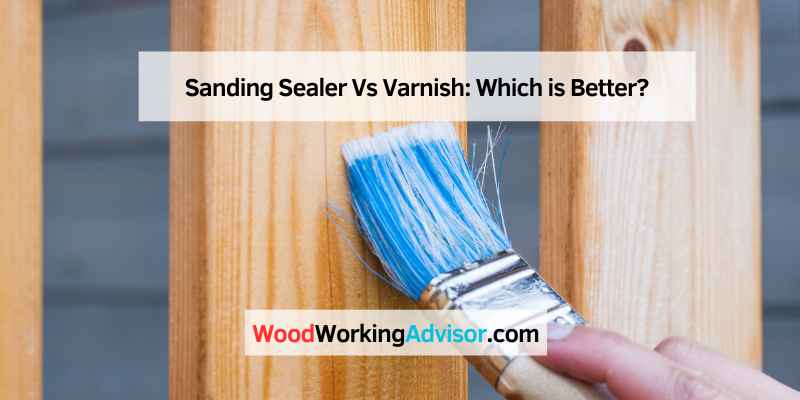
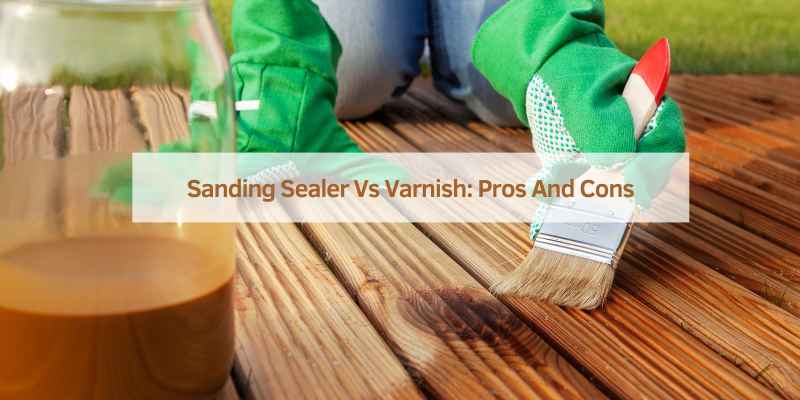
Sanding Sealer Vs Varnish: Which is Better?
Sanding sealer is a base coat that seals wood pores before painting, while varnish is a protective finish that adds shine and durability to wood surfaces. Sealers are recommended for any types of surface, while varnish is better for indoor woods with minimal chance of moisture or high humidity.
When it comes to finishing wood surfaces, it is important to choose the right product to achieve the desired outcome. The decision between using sanding sealer or varnish depends on several factors, including the type of wood, the desired level of shine and durability, and whether the surface will be exposed to moisture or high humidity.
We will explore the differences between sanding sealer and varnish, their benefits and drawbacks, and when to use each product. We will also address common questions about these two products, such as whether sanding sealer is necessary before applying varnish, and whether varnish can be used as a sealer.
What Is Sanding Sealer?
Sanding sealer is a base coat used to seal wood pores before painting, helping to finish projects faster and with fewer coats of paint. It is recommended to use sanding sealer when painting or coating cabinets, furniture, doors, or any porous surfaces.
Sanding sealer is different from varnish, which is better recommended for indoor woods where there is minimal chance of moisture or high humidity.
Definition And Overview
Sanding sealer is a coating applied to wood surfaces to seal the pores of the wood and create a smooth surface for the application of a topcoat. It is a base coat that dries quickly and easy to sand. Sanding sealer is typically used before the application of stains, lacquers, or varnishes.
Purpose Of Using Sanding Sealer
The main purpose of using sanding sealer is to create a smooth surface for the final finish. When wood is left untreated, it has open pores that absorb the finish and cause an uneven appearance. By using sanding sealer, the pores can be filled, and a smooth surface can be achieved. Additionally, sanding sealer makes it easier to sand the wood, which reduces the amount of sanding required for obtaining a smooth surface.
Sanding sealer is commonly used on porous woods such as cedar, poplar, and spruce. When applied directly to these woods, the first few layers of varnish or lacquer will be absorbed deep into the pores. This means that more coats of varnish or lacquer will be needed to obtain a smooth finish. With sanding sealer, the pores are filled, reducing the number of topcoat layers required, and providing a more even finish.
In summary, sanding sealer is an essential part of the wood finishing process, as it seals the pores, creates a smooth finish and reduces the number of topcoat layers required. It is particularly useful on porous woods and can be used before staining, lacquering, or varnishing.

When To Use Sanding Sealer?
Sanding sealer is a base coat that seals wood pores before painting. It is best used on porous woods like cedar, spruce, and poplar. Varnish, on the other hand, is better used on indoor woods with minimal chance of moisture or high humidity like laundry room, bathroom, or kitchen cabinets.
Types Of Wood That Need Sanding Sealer
Not all woods require sanding sealer, but some types benefit from the use of it. These include cedar, spruce, and poplar, which are porous and easily soak up the first few layers of lacquer if nothing was applied. Even after using pore filler, certain woods like walnut and mahogany need a significant amount of sanding before the pores become level.
The Purpose Of Sanding Sealer
A sanding sealer is a base coat used to seal wood pores before painting. It can give projects a faster finishing time with fewer coats of paint. When painting or coating cabinets, furniture, doors, and more, using sanding sealer ensures a smoother and more even finish.
Applying Sanding Sealer With A Brush
When using a brush to apply sanding sealer, it is essential to use a natural bristle brush. Synthetic brushes do not work as well and can leave behind brush marks. Start by stirring the sanding sealer, then apply a single coat to the wood, making sure to cover all the areas evenly. After the coat has dried, sand the surface lightly with a fine-grit sandpaper before applying the next coat.
Repeat the process until the desired number of coats is achieved. Keep in mind that sanding sealer can only be applied to bare wood and not over existing finishes.
Using Sanding Sealer Before Varnish
While sanding sealer and varnish serve different purposes, there are instances where sanding sealer should be used before applying the varnish. If the wood being used is exceptionally porous, using sanding sealer can help seal the pores, preventing the varnish from penetrating too deeply into the wood. Using sanding sealer also helps achieve a smoother finish with fewer coats of varnish.
It is important to note that sanding sealer and varnish are not interchangeable, and sanding sealer should always be used as a base coat before applying varnish.
How To Apply Sanding Sealer?
Before applying varnish on wood, it is recommended to use a sanding sealer which seals the pores of the wood and prevents the varnish from penetrating too deep. Sanding sealer helps to provide a smooth and even surface for varnish application, making the finishing process easier and faster.
How to Apply Sanding Sealer?
If you want to achieve a smooth finish on your woodwork, using a sanding sealer is a must. It acts as a barrier between the wood and the lacquer or varnish and helps to ensure that the final finish is smooth and even. Follow these steps to apply sanding sealer effectively.
Tools Required
Make sure you have the following tools on hand before beginning to apply sanding sealer:
Application Techniques
You can apply sanding sealer with a brush or a spray gun, depending on your preference. Here’s how to do it:
1. Sand the wood surface with 220-grit sandpaper to ensure that it is smooth and free of any blemishes.
2. Use a clean rag to remove any dust or debris from the surface.
3. Apply the sanding sealer with a paintbrush or spray gun, making sure to cover the entire surface evenly. Apply a thin coat and do not allow the sealer to pool or drip.
4. Allow the sanding sealer to dry thoroughly. This will usually take around 30 minutes, but check the manufacturer’s instructions for guidance.
5. Sand the surface lightly with 220-grit sandpaper to remove any raised grain or imperfections.
6. Apply a second coat of sanding sealer and allow it to dry completely.
7. If necessary, sand the surface again lightly with 220-grit sandpaper before applying your final finish, such as varnish or lacquer.
Conclusion
Using sanding sealer is an essential step in achieving a professional, smooth finish for your woodwork. By using the right tools and techniques, you can apply sanding sealer effectively and create a beautiful final product.
What Is Varnish?
Varnish is a protective coating applied to wood surfaces for durable and glossy finish. Unlike a sanding sealer that primarily seals the pores of the wood for paint adhesion, varnish provides a tougher layer of protection against scratches, water damage and UV light.
Definition And Overview
Varnish is a transparent coating that is typically applied to wood surfaces to give them a glossy, smooth and protective finish. It is made up of oil, resin, and solvents that dry to form a hard, durable layer on the surface of the wood.
Purpose Of Using Varnish
The primary purpose of using varnish is to provide a protective layer on the surface of the wood, preventing moisture, scratches and other types of damage from getting through. This makes the wood surface more durable, allowing it to last longer. Varnish also enhances the natural beauty of the wood and gives it a glossy look.
When it comes to deciding between sanding sealer vs varnish, varnish is a better option for long-term protection as it forms a thicker and harder coating. However, using varnish without a base coat of sanding sealer may cause the surface of the wood to become rough and uneven, as varnish can highlight surface inconsistencies. It is recommended to use sanding sealer as a base coat to ensure a smooth and even surface before applying varnish.
In conclusion, varnish is an excellent choice for providing long-term protection to wooden surfaces, but it is important to use sanding sealer as a base coat to ensure a smooth and even surface. By doing so, the result will be a beautiful, long-lasting finish that will enhance the natural beauty of the wood.
When To Use Varnish?
Sanding sealer is a base coat that seals wood pores before painting, while varnish is a protective finish that adds a glossy sheen to woodwork. Sanding sealer is used to level out the porous surface of certain woods and reduce the number of coats of paint needed, whereas varnish can be used as a sealer but takes longer to dry before additional coats can be applied.
Varnish is a solid option for adding a protective finish to wood, but it’s not always necessary. Here are some indications that it might be the right choice for your project.
Types Of Wood That Need Varnishing
Some types of wood, such as cedar, spruce, poplar, walnut, and mahogany, are more porous than others. These porous woods tend to soak up the first few layers of lacquer like nothing has been applied, making it difficult to achieve a smooth finish. Even with pore fillers, some woods, like walnut and mahogany, require more sanding to level the pores. In this case, applying a varnish can save you time and effort by providing a sealed base coat for your lacquer.
Recommended Uses For Varnish
While a sanding sealer is ideal for cabinets, furniture, and doors, varnish can be a great option for indoor woods in low-moisture environments. It is recommended for laundry rooms, bathrooms, and kitchens, as it provides adequate moisture resistance. However, it is not recommended for outdoor projects where it will be exposed to the elements.
If you are considering varnish, be sure to weigh the pros and cons and consider the specific needs of your project. Varnish can provide a beautiful and durable finish, especially when applied properly, but it may not be necessary for every project.
How To Apply Varnish?
When it comes to applying varnish, it’s important to understand the difference between sanding sealer and varnish. Sanding sealer is used to seal wood pores before painting, while varnish is a protective finish used on wood surfaces to provide durability and enhance the natural beauty of the wood.
It’s best to use a sanding sealer before applying varnish on porous woods like cedar, spruce, and poplar.
Tools Required
Before you start applying varnish, you’ll need a few tools on hand. It’s always best to gather everything you need ahead of time so you don’t have to pause in the middle of the application.
- Varnish or polyurethane
- A fine-grit sandpaper (320 or higher)
- Rags and/or a brush for application
- A well-ventilated workspace
- Sandpaper block or power sander (optional)
Application Techniques
There are a few different techniques you can use to apply varnish, but the most common is brushing it on.
- Begin by lightly sanding the surface you want to varnish with a fine-grit sandpaper. This will help the varnish adhere better and give you a smooth finish.
- Clean the surface thoroughly to remove any dust or debris.
- Stir the can of varnish well before opening it. Don’t shake it, as this can create air bubbles that will show up on the finished surface.
- Using a brush or rag, apply a thin layer of varnish to the surface, working in the direction of the grain. Be sure to brush out any bubbles or drips.
- Allow the first coat to dry completely (usually overnight), then lightly sand the surface again with a fine-grit sandpaper. This will help the second coat adhere better.
- Apply a second coat using the same technique. Depending on the type of wood and the look you’re going for, you may need to apply a third or fourth coat.
Always be sure to read the manufacturer’s instructions before using any product. Some varnishes may require a specific application technique or drying time.
Overall, applying varnish is a fairly simple process, but it does require patience and attention to detail. By following these steps, you can ensure a beautiful and long-lasting finish on your woodworking projects.
Sanding Sealer Vs Varnish: Pros And Cons
Sanding sealer and varnish are two popular wood finishing products with different pros and cons. Sanding sealer is great for binding pores and grains, making it easier to sand and apply a second coat of lacquer. Varnish, on the other hand, provides more moisture protection and durability, but requires more effort to apply.
It’s important to consider the type of wood and desired finish before choosing between sanding sealer and varnish.
When it comes to wood finishing, you have a plethora of options to choose from. Sanding sealer and varnish are two popular choices that provide a protective and aesthetic layer to the wood. However, choosing the right one can be daunting, especially if you don’t know the pros and cons. In this section, we will compare sanding sealer and varnish based on various factors and help you make an informed decision.
Benefits of Sanding Sealer
Sanding sealer is a quick-drying and transparent coat that acts as a base layer for other finishes such as lacquer or varnish. Here are some benefits of sanding sealer:
| Benefits |
|---|
| 1. Seals wood pores and prevents blotching |
| 2. Improves adhesion and appearance of the topcoat |
| 3. Easier to sand and requires less sanding |
| 4. Dries faster and can be recoated within an hour |
| 5. Enhances the color and grain of the wood |
Drawbacks of Sanding Sealer
Sanding sealer is not suitable for all types of woods, and it has some limitations. Here are some drawbacks of sanding sealer:
- 1. Not suitable for outdoor use as it is not waterproof
- 2. Can lead to discoloration if applied unevenly
- 3. May require more coats if the wood is highly porous
- 4. Not suitable for woods that are already stained or finished
- 5. Can raise the grain of the wood, requiring extra sanding
Benefits of Varnish
Varnish is a durable and long-lasting finish that provides excellent protection to the wood. Here are some benefits of varnish:
| Benefits |
|---|
| 1. Waterproof and suitable for outdoor use |
| 2. Provides a hard and smooth finish |
| 3. Resistant to scratches, heat, and chemicals |
| 4. Enhances the wood’s natural color and grain |
| 5. Can be applied over stained or unfinished wood |
Drawbacks of Varnish
Varnish is not without some drawbacks, though they may not be significant for every user. Here are some drawbacks of varnish:
- 1. Takes longer to dry and requires more time between coats
- 2. Can yellow over time, which can alter the appearance of the wood
- 3. Can be challenging to repair or remove once applied
- 4. Can crack or peel if applied too thickly
- 5. Not suitable for woods that are highly porous
Conclusion
Both sanding sealer and varnish have their pros and cons, and choosing the right one depends on your project’s needs. If you want a protective and quick-drying base layer, sanding sealer is an excellent choice. On the other hand, if you want a durable and waterproof finish, varnish is a better option. Evaluate your project’s requirements, consider the benefits and drawbacks of each option, and select the one that best suits your needs.
Frequently Asked Questions On Sanding Sealer Vs Varnish
Do I Need Sanding Sealer Before Varnish?
Yes, it is recommended to use a sanding sealer before applying varnish. Sanding sealer helps to fill in pores and create a smooth surface for varnish to adhere to. It also helps to reduce the number of coats needed for a smooth finish.
Use sanding sealer on porous woods such as cedar, spruce, and poplar.
Which Is Better Varnish Or Sealer?
Sealers are recommended for any surface, while varnish is better for indoor woods with minimal moisture. Sanding sealer seals wood pores before painting, making finishing faster with fewer coats of paint. Varnish can be used as a sealer, but you must wait for it to dry before scuff-sanding and re-coating.
A sanding sealer is a thinned lacquer or varnish modified with additives that make it easier to sand and give it better holdout.
What Is The Purpose Of A Sanding Sealer?
The purpose of a sanding sealer is to seal wood pores before painting, which saves time and effort as fewer coats of paint are required. It is recommended to use sanding sealer when coating cabinets, furniture, doors, and other projects.
Sanding sealer is a thinned version of a lacquer or varnish-based finish, which has been modified with zinc stearate or a resin to make the finish easier to sand and give it better holdout for subsequent coats.
Can I Use Varnish As A Sealer?
Yes, you can use varnish as a sealer, but it may slow down your finishing process. You need to make sure it is completely dry before scuff-sanding and re-coating. It may be worth it if you want to avoid re-coat compatibility problems, but using a sanding sealer may be a better option for a smoother finish.
Conclusion
Choosing between sanding sealer and varnish comes down to the specific needs of your project. Sanding sealer is great for sealing wood pores before painting and can save time and effort by requiring fewer coats. Varnish is better suited for indoor woods with minimal humidity or moisture, making it a great choice for cabinets and furniture.
Ultimately, both options have their benefits and drawbacks, and choosing the right one depends on your individual circumstances. We hope this article has helped you make an informed decision about which option to choose for your woodworking project.