Snap Lock Laminate Flooring: Easy Install Guide
Thinking about new floors? Snap lock laminate is a great choice because it’s designed for DIYers. Many people find installing floors a bit tricky, but with the right steps, it’s totally doable.
This guide is made to make the Snap Lock Laminate Flooring: Easy Install Guide clear and simple for everyone. We’ll walk you through everything you need to know to get beautiful new floors without a pro. Get ready to see how easy it can be!
Choosing Your Snap Lock Laminate Flooring
Picking the right flooring sets the stage for a successful installation. Snap lock laminate offers a variety of looks and is known for its straightforward assembly. This section covers how to select the best laminate for your space, considering factors like durability, style, and your budget.
We’ll help you understand the different types available and what makes one a better fit than another for your specific needs. This choice impacts not just the final look but also the installation process itself.
Understanding Laminate Flooring Types
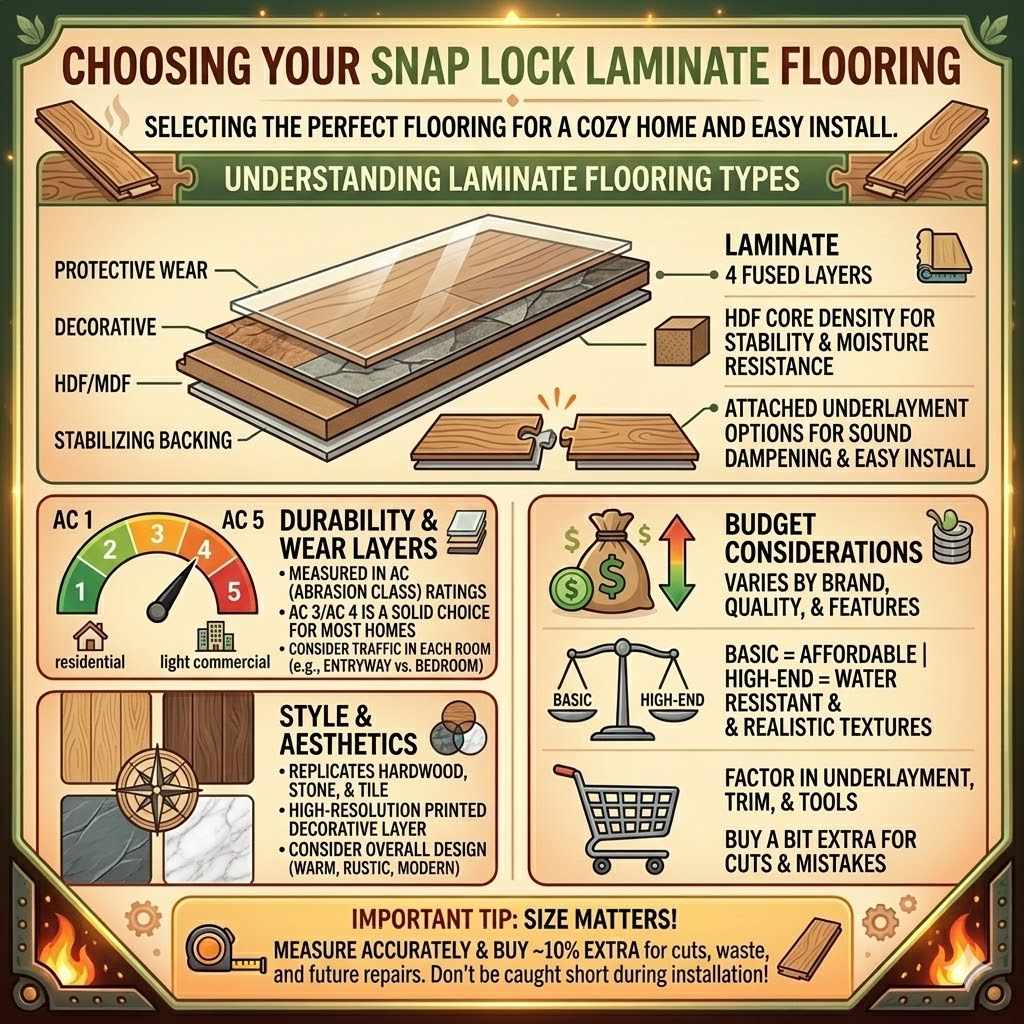
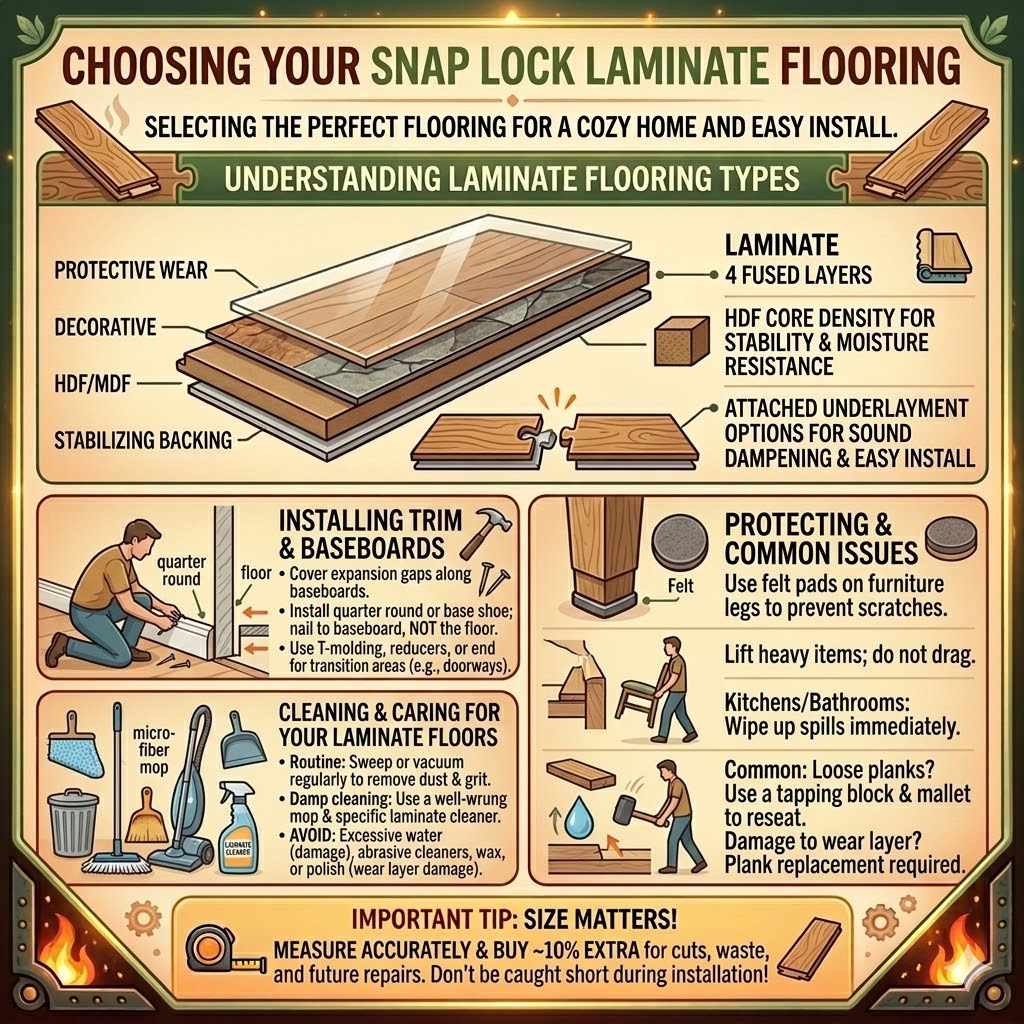
Laminate flooring is made up of several layers fused together. The top layer is a clear, protective wear layer that shields the design. Beneath that is a decorative layer, often printed to mimic wood, stone, or tile.
The core layer is typically made of high-density fiberboard (HDF) or medium-density fiberboard (MDF), providing stability and resistance to moisture. The bottom layer, or backing, offers stability and sometimes moisture resistance.
For a Snap Lock Laminate Flooring: Easy Install Guide, the core layer’s density is important. A denser core offers better stability and can help prevent the planks from shifting. Some laminates also have an attached underlayment, which can save a step during installation and improve sound dampening and comfort.
Durability and Wear Layers
The wear layer is the first line of defense against scratches, stains, and fading. It’s measured in AC (Abrasion Class) ratings. An AC rating of 1-2 is suitable for light residential use, while AC 3 is good for moderate residential traffic.
AC 4 and AC 5 are designed for heavy residential and even commercial use. For most homes, an AC 3 or AC 4 rating is a solid choice for durability.
Consider the traffic in each room. A busy entryway or a kitchen might need a higher AC rating than a guest bedroom. This ensures your floors will look good for years to come.
Style and Aesthetics
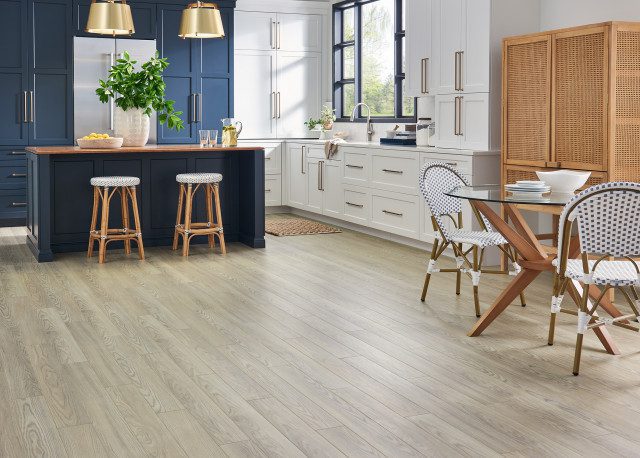
Laminate flooring comes in an astonishing array of styles. You can find planks that perfectly replicate the look of hardwood, from light oak to dark walnut, with realistic grain patterns. There are also options that mimic natural stone tiles, such as slate or marble, or even ceramic tiles.
The decorative layer uses high-resolution printing to achieve these looks.
Think about the overall design of your home. Do you want a warm, rustic feel or a sleek, modern look? The color and pattern of your laminate flooring will significantly influence the atmosphere of the room.
Budget Considerations
The cost of laminate flooring varies based on brand, quality, and features. Basic options can be quite affordable, making them a budget-friendly flooring solution. Higher-end laminates with enhanced water resistance or realistic textures will naturally cost more.
When budgeting, remember to factor in the cost of underlayment (if not attached), trim pieces, and any tools you might need to purchase or rent. Buying a bit more than you need for cuts and potential mistakes is also a good idea.
Preparing Your Subfloor For Installation
A smooth and level subfloor is the foundation for a successful laminate installation. This section details the crucial steps of preparing your subfloor, ensuring your new floors will lay flat and last longer. We cover how to check for flatness, clean the area, and address any issues that could affect the final result.
Getting this part right is key to a professional-looking outcome.
What is a Subfloor?
The subfloor is the structural layer of your floor that lies beneath the finished flooring material. It’s typically made of plywood or oriented strand board (OSB) and is attached to the floor joists. It provides a solid base for walking and supports the weight of furniture and people.
The subfloor also helps distribute weight evenly across the joists.
It’s essential that the subfloor is clean, dry, and level before laying any new flooring. Any imperfections in the subfloor can telegraph through to the laminate, causing unevenness or even damage over time.
Checking for Levelness and Flatness
Laminate flooring, especially click-lock systems, requires a very flat subfloor. Use a long, straight edge or a carpenter’s level (at least 6 feet long is ideal) to check for high spots and low spots. Place the level on the subfloor and check in multiple directions.
Most manufacturers allow for a certain tolerance, typically no more than 3/16 inch variation over a 10-foot span. If you find significant dips or humps, you’ll need to address them.
Addressing Imperfections
High spots on the subfloor can often be sanded down. Use a floor scraper or a belt sander for larger areas. Be careful not to create new low spots when sanding.
Low spots can be filled with a self-leveling compound. This is a cementitious material mixed with water that flows into the low areas and dries hard. Follow the manufacturer’s instructions carefully for mixing and application.
Ensure the area is completely dry before proceeding.
Cleaning the Subfloor
The subfloor must be completely free of dust, debris, and any old adhesives or coatings. Sweep thoroughly, then use a vacuum cleaner to pick up fine dust particles. If there are any stubborn residues, use a putty knife or scraper to remove them.
Ensure the subfloor is also completely dry. Moisture can cause laminate to swell and warp, or it can lead to mold growth. If the subfloor feels damp, allow it to air dry, or use fans to speed up the process.
Dealing with Existing Flooring
In some cases, you can install laminate over existing flooring. However, this is not always recommended and depends on the type of existing floor. Vinyl, linoleum, or tile can sometimes be suitable subfloors if they are smooth, level, and well-adhered.
Carpet, on the other hand, is never a suitable subfloor for laminate. It’s too soft and will not provide the necessary support. If you have carpet, it must be removed, along with its padding and tack strips.
The Snap Lock Laminate Flooring Easy Install Guide
This is where the magic happens. This section provides a clear, step-by-step walkthrough of the actual installation process for Snap Lock Laminate Flooring: Easy Install Guide. We’ll cover starting the first row, cutting planks, and locking them together.
Following these instructions will help you achieve a professional finish.
Tools and Materials You’ll Need
Gathering all your tools and materials beforehand makes the process much smoother. You’ll need the laminate flooring itself, along with the correct underlayment. For cutting, a laminate cutter, jigsaw, or circular saw is essential.
A tapping block and a pull bar are crucial for properly locking the planks together.
Don’t forget a tape measure, pencil, safety glasses, and a utility knife. You might also need spacers to maintain an expansion gap around the room’s perimeter.
Acclimating the Flooring
Before you begin installation, it’s vital to let the laminate flooring acclimate to the room’s temperature and humidity. Bring the unopened boxes into the room where they will be installed and let them sit for at least 48 hours. This allows the material to expand or contract to match the environment, preventing issues later on.
This step is crucial for all types of laminate flooring. Skipping it can lead to planks gapping or buckling after installation due to environmental changes.
Starting the First Row
Begin installing the first row along the longest, straightest wall in your room. You’ll typically want to install the planks with the tongue side facing the wall. However, most snap-lock systems allow you to insert the plank directly or at an angle.
The specific method depends on the locking mechanism.
Most manufacturers recommend removing the tongue from the planks that will face the wall to ensure a flat surface. Use a utility knife to cut off the tongue. The goal is to have a flat edge against the wall.
Making Cuts for Fit
As you lay the planks, you’ll inevitably need to make cuts, especially for the last plank in a row and around obstacles like doorways or corners. Measure the space carefully and mark your cut on the back of the laminate plank. Use a straight edge to ensure a clean line.
For straight cuts, a laminate cutter or circular saw works well. For more intricate cuts, such as around door frames, a jigsaw is useful. Always wear safety glasses when cutting.
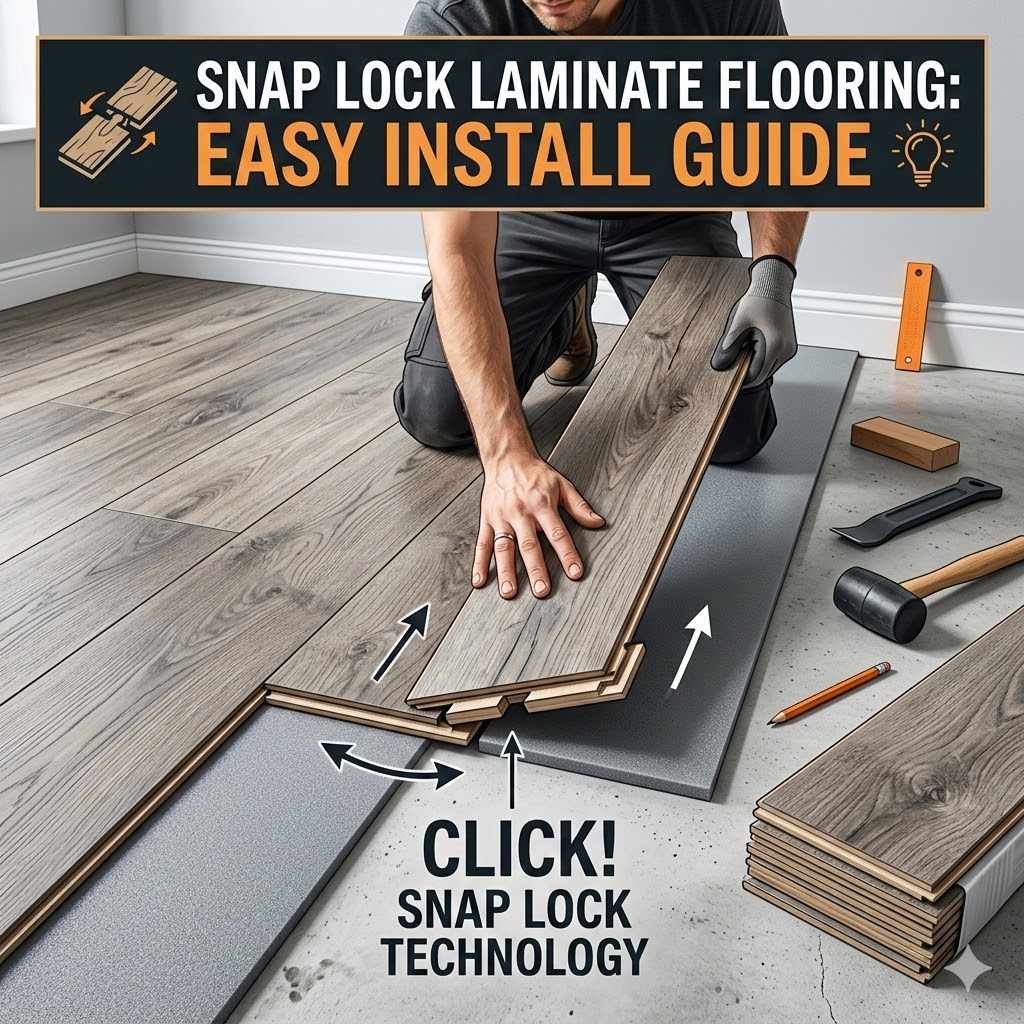
Locking the Planks Together
Snap-lock systems are designed to click or lock into place with relative ease. For most systems, you’ll insert the tongue of one plank into the groove of another at a slight angle, then push down to lock it. Another common method involves tapping the edge of the plank with a tapping block and a rubber mallet to secure the joint.
The tapping block protects the edge of the plank from damage while you gently tap it into place. A pull bar is used to close the gap on the last plank in a row.
Expansion Gaps
It is absolutely critical to leave an expansion gap around the perimeter of the room. Laminate flooring expands and contracts with changes in temperature and humidity. If you don’t leave space, the flooring can buckle or warp.
Use spacers (typically 1/4 to 3/8 inch) between the planks and the walls, baseboards, cabinets, and any other fixed objects. This gap will be covered by your baseboards or trim once installation is complete.
Working Around Obstacles
Doorways and other architectural features require careful measurement and cutting. You may need to undercut door casings so that the laminate can slide underneath. This creates a seamless transition.
For pipes or other fixed objects, you’ll need to cut a hole slightly larger than the object to allow for expansion. You can then cover these areas with a special transition piece or caulk.
Finishing Touches and Maintenance
Completing the installation involves adding trim, and learning how to care for your new floors ensures they stay beautiful. This section covers the final steps, from installing baseboards to recommended cleaning practices, making your Snap Lock Laminate Flooring: Easy Install Guide complete.
Installing Trim and Baseboards
Once the main flooring is laid, it’s time to cover the expansion gaps. Install quarter round or base shoe molding along the bottom of your baseboards. This molding is usually nailed to the baseboard, not the floor, so it doesn’t interfere with expansion.
For transition areas, such as doorways leading to other rooms or where laminate meets tile, use appropriate transition strips. These can include T-molding, reducers, or end caps, depending on the height difference and the materials involved.
Cleaning Your Laminate Floors
Routine cleaning is simple. Sweep or vacuum your laminate floors regularly to remove dust and grit that can scratch the surface. For damp cleaning, use a damp mop (well wrung out) and a cleaner specifically designed for laminate flooring.
Avoid using excessive water, as standing water can damage the planks.
Never use abrasive cleaners, wax, or polish on laminate floors, as they can damage the wear layer.
Protecting Your Floors
To prevent scratches and dents, use felt pads on the bottom of furniture legs. Avoid dragging heavy items across the floor; lift them instead. For areas with heavy traffic or direct sunlight, consider using rugs or mats.
In kitchens or bathrooms, wipe up spills immediately to prevent moisture from seeping into the seams. While many laminates are water-resistant, prolonged exposure to moisture is still not recommended.
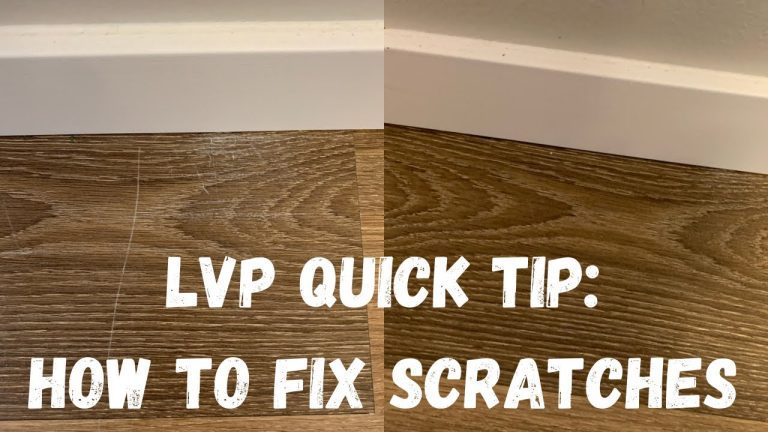
Common Issues and Solutions
Occasionally, you might encounter issues. If planks feel loose, check that they are properly locked. Sometimes a joint may not have clicked fully into place.
Gently use a tapping block and mallet to reseat it.
If you notice any damage to the wear layer, it’s usually not repairable on an individual plank without replacing it. However, with proper care and protection, this is less likely to occur.
Frequently Asked Questions
Question: Can I install snap lock laminate flooring over concrete?
Answer: Yes, you can install snap lock laminate flooring over a concrete subfloor, but proper preparation is key. The concrete must be clean, dry, and level. You’ll also need to install a suitable underlayment designed for concrete, which often includes a vapor barrier to prevent moisture from rising into the laminate.
Question: Do I need special tools for snap lock laminate installation?
Answer: While some basic tools are universal, snap lock laminate requires specific items like a tapping block and a pull bar for properly locking the planks. A laminate flooring cutter or a jigsaw is also essential for making precise cuts. Safety glasses are a must.
Question: How do I deal with uneven subfloors?
Answer: Significant unevenness in subfloors needs to be corrected before laying laminate. High spots can be sanded down. Low spots can be filled with a self-leveling compound.
Check for variations of no more than 3/16 inch over a 10-foot span.
Question: How wide should the expansion gap be?
Answer: A typical expansion gap for snap lock laminate flooring is 1/4 to 3/8 inch around the entire perimeter of the room. This gap allows the flooring to expand and contract naturally with changes in temperature and humidity without buckling.
Question: Is snap lock laminate flooring waterproof?
Answer: While many modern snap lock laminate floors are highly water-resistant, they are not typically fully waterproof. Prolonged exposure to standing water can still cause damage. It’s important to wipe up spills quickly and to choose a laminate with enhanced water resistance for areas prone to moisture.
Summary
Following this Snap Lock Laminate Flooring: Easy Install Guide empowers you to tackle your flooring project. You’ve learned how to choose the right materials, prepare your subfloor, and lay the planks with confidence. With careful attention to detail, especially regarding expansion gaps and proper locking techniques, your new floors will look fantastic.
Enjoy your beautiful, DIY-installed laminate flooring!