How to Get a Straight Edge on Plywood (4 Easy Methods)
Clamp a straightedge guide flush to your cut line and run a circular saw’s shoe against it for a factory-straight edge — freehand cuts on a 4×8 plywood sheet can drift 1/8 inch or more, enough to ruin a tight cabinet joint. A dull blade or a skipped masking-tape line is the top cause of splintered veneer. This guide covers the circular-saw guide method, table saw and router options, and the no-splinter tape trick.
Introduction To Plywood Crafting
Best Straight-Edge Guide Pick
Kreg Rip-Cut Circular Saw Guide – $49.00
Clamps directly onto your circular saw for hands-free, repeatable straight cuts — the same clamp-and-guide principle this guide’s Cutting Guide Advantage section walks through, without building your own jig.
- Best for: Repeatable rip cuts on full plywood sheets
- Why we picked it: No separate straightedge or clamps needed — the guide travels with the saw
- Main drawback: Limited to 24-inch-wide cuts, so it won’t span a full 4-foot-wide sheet in one pass
Compare more straight-edge guide options
 Option 1 POWERTEC 24″ Straight Edge Guide – $35.99
|
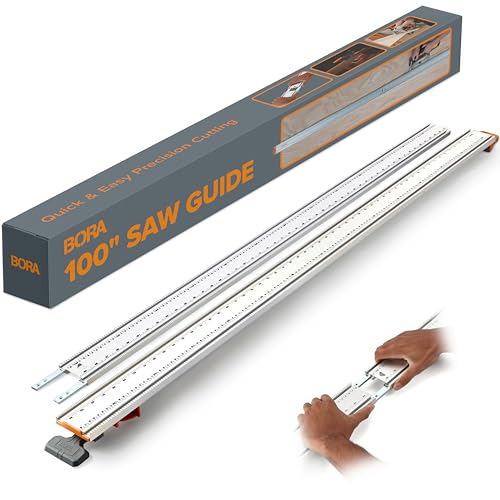
 Option 2 BORA NGX 100″ Guide Rail – $89.99
|
 Option 3 Kreg Straight Edge Guide XL – $79.00
|
As an Amazon Associate we earn from qualifying purchases.
Plywood crafting requires precise cuts. A straight edge ensures clean lines and accurate measurements. Using a straight edge improves the overall quality of your projects. It helps in achieving better joints and finishes.
Common challenges include warped or bent plywood. This can lead to uneven cuts. Dull blades can also make cutting difficult. Always ensure tools are sharp for the best results.
Using a straight edge or guide can help a lot. It keeps the saw on track. Always check your measurements before cutting. This reduces mistakes and waste.
Selecting The Right Tools
Choosing the right saw is essential for a straight edge on plywood. Table saws offer precision and stability. They work well for long cuts.
Circular saws are portable and easy to use. They are good for quick tasks. Jigsaws are helpful for curves but may not give a straight edge.
| Type of Saw | Best Use |
|---|---|
| Table Saw | Long, straight cuts |
| Circular Saw | Portable, quick cuts |
| Jigsaw | Curved cuts |
The type of blade also matters. Fine-toothed blades create smooth edges. Rough blades work for faster cuts but leave marks.
Using the right tools will help achieve a clean cut. Good preparation is key for the best results.
Measurement And Marking
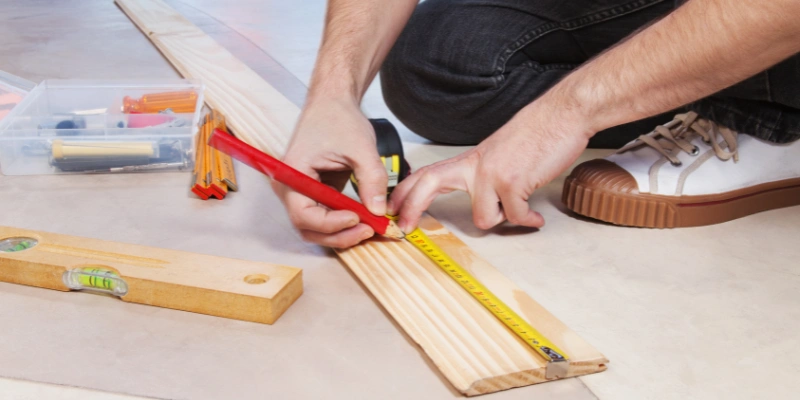
Accurate measuring is crucial for a straight edge on plywood. Use a tape measure for precise lengths. Always pull the tape tight for accuracy. Mark the plywood with a pencil for clear visibility.
For better results, use a square for straight lines. Place the square at the edge and mark it. This ensures the line is perfectly perpendicular. For larger sheets, a straightedge can help guide your cuts.
Marking should be clear and visible. Use a sharp pencil for fine lines. Avoid using dark markers that may confuse measurements. Check your marks before cutting to ensure precision.
The Cutting Guide Advantage
Using a cutting guide makes plywood projects easier and more precise. It helps create straight cuts every time. Follow these steps for a simple DIY cutting guide.
First, find a flat board that is longer than the plywood piece. This will serve as your guide. Measure the distance from the edge of the board to the desired cut line. Mark this spot clearly.
Next, clamp the board onto the plywood. Ensure it is straight and secure. Use a circular saw along the edge of the guide. This method uses the factory edges for better accuracy.
Remember to wear safety gear while cutting. A straight edge leads to cleaner and more professional results.
Sawing Techniques
Choosing between a hand saw and a power saw can affect your work. A hand saw is quiet and allows for more control. It is ideal for small, detailed cuts. A power saw is faster and easier for larger projects. It can save time and energy.
To maintain a straight line, use a guide. A straight edge or clamp can help. Mark your cut line clearly on the plywood. Follow the line closely with your saw. Take your time for the best results.
Practice will improve your skills. Try both saws to see which you prefer. Each has benefits depending on the project.
Preventing Splintering
To prevent splintering on plywood, use a sharp blade for cutting. A dull blade can cause rough edges. Masking tape on the cut line helps too. It keeps the wood from splintering as you cut.
For pre-cutting tips, measure twice before cutting. Mark your line clearly with a pencil. Use a straight edge or a square to guide the saw. This ensures a straight cut every time.
Sanding the edges gives a smooth finish. Start with coarse sandpaper, then move to finer grit. Sand in the direction of the grain to avoid scratches. A smooth edge looks better and is safer to handle.
Finishing The Edge
To achieve a clean finish on plywood edges, edge banding is essential. This technique enhances the aesthetic appeal of your project. It covers the raw edges, making them look smooth and polished.
Using edge banding can be done with various materials. Common options include PVC, wood veneer, and melamine. Choose the one that best matches your plywood.
| Material | Benefits |
|---|---|
| PVC | Durable and easy to clean |
| Wood Veneer | Natural look and feel |
| Melamine | Cost-effective and available in various colors |
Trimming the edge band is crucial for a neat finish. Use a sharp utility knife for precise cuts. Ensure the banding aligns perfectly with the plywood edge.
After trimming, sanding the edges smooths any rough spots. This step is important for a seamless appearance. A good finish will make your plywood project look professional.
Advanced Tips And Tricks
Using a router for edge straightening can be very effective. A router can create a smooth and precise edge on plywood. Choose a straight cutting bit for the best results. Set up your router with a guide or fence for accuracy.
Jigs and fixtures can also help with edge straightening. A simple edge guide can keep your cuts straight. Make a custom jig to fit your plywood size. Using clamps will hold your workpiece in place securely.
Always remember to wear safety gear while working. Eye protection and hearing protection are important. A clean workspace ensures a safe and effective project.
For the full technique, including offset measurement and bit selection, see our dedicated guide to routing a straight edge.
Safety Measures
Wearing the right protective gear is essential for safety. Always use safety goggles to protect your eyes. A dust mask will help you breathe easier. Wear ear protection to avoid noise damage.
Using safe handling techniques is crucial. Always keep tools in good condition. Store tools in a safe place when not in use. Hold tools firmly to avoid slips. Make sure to follow the manufacturer’s instructions for each tool.
Troubleshooting Common Issues
Warped plywood can be a real challenge. First, check the moisture levels. Use a moisture meter for accuracy. A humidity-controlled environment helps prevent warping.
To fix warped plywood, try wetting the concave side. Place weight on the wet side to flatten it. Let it dry completely before using.
For mistakes made after cutting, use wood filler to fix small gaps. Sand the area smoothly after filling. For larger mistakes, consider using a patch or replacing the piece.
| Issue | Solution |
|---|---|
| Warped Plywood | Wet concave side and apply weight |
| Small Cuts | Use wood filler and sand |
| Large Cuts | Patch or replace the piece |
Frequently Asked Questions
How Can I Get A Straight Edge On Plywood?
To achieve a straight edge on plywood, use a circular saw with a guide. A straightedge or a level can serve as a guide. Clamp the straightedge firmly to the plywood. This method ensures a clean, straight cut, eliminating the need for extensive sanding later.
What Tools Do I Need For Cutting Plywood Straight?
For cutting plywood straight, you’ll need a circular saw, a straightedge, clamps, and a measuring tape. A square can help ensure accurate measurements. Additionally, a jigsaw can be handy for intricate cuts. Each tool plays a vital role in achieving precision and efficiency.
Can I Use A Hand Saw For Straight Cuts?
Yes, a hand saw can be used for straight cuts. However, it requires more skill and patience. Ensure you mark your line clearly and use a straightedge as a guide. This method may take longer but can yield satisfactory results with practice.
What Is The Best Technique For Cutting Plywood?
The best technique for cutting plywood involves using a circular saw with a straightedge guide. Start by measuring and marking your cut line accurately. Clamp the straightedge securely, then make the cut slowly and steadily. This technique minimizes splintering and produces a clean edge.
Conclusion
Achieving a straight edge on plywood is essential for quality projects. With the right tools and techniques, anyone can master this skill. Whether you’re a DIY enthusiast or a seasoned woodworker, practice makes perfect. Embrace these tips, and enjoy the precision in your woodworking endeavors.
Happy crafting!
Sponsored / affiliate links. As an Amazon Associate I earn from qualifying purchases. I may earn additional commission from eligible campaigns.