Vinyl Floor Installation Kit: Essential Tools for Success
Are you planning to install vinyl flooring in your home? You’re likely eager to transform your space with a fresh, modern look.
But, let’s face it, tackling a flooring project can be a bit overwhelming. That’s where the Vinyl Floor Installation Kit comes to your rescue. This kit is your secret weapon for a smooth, professional-looking finish, even if you’re a DIY newbie.
Imagine the satisfaction of completing the project yourself, saving money, and having a floor that looks like it was installed by a pro. Intrigued? Dive into this article to discover how the right tools can make all the difference in your flooring adventure, and why your choice of kit can make or break your project. Don’t miss out on learning how to achieve stunning results effortlessly.

Credit: www.amazon.co.za
Choosing The Right Vinyl Flooring
Vinyl flooring comes in many types. Vinyl sheets are large and cover big areas. Vinyl tiles look like real tiles. They are easy to replace. Luxury vinyl planks mimic wood. They are waterproof and durable. Peel-and-stick tiles are simple to install. They are good for small projects. Each type has its own benefits. Choose what fits your needs best.
Think about the room use. Is it a busy room? Durability is important for busy spaces. Water-resistance matters for kitchens and bathrooms. Appearance is also key. Pick a style you like. Installation method should be easy for you. Some floors need glue. Others click together. Budget is crucial too. Find a balance between cost and quality.
Preparation For Installation
Before starting, organize your tools. The vinyl floor installation kit includes everything needed for a smooth setup. Proper preparation ensures a quick and easy installation process.
Measuring And Planning
First, gather all your tools for measurement. A measuring tapeand chalk lineare essential. Measure the room’s lengthand widthcarefully. Write down the measurements. Planning is key. Decide the direction of the vinyl. Consider lightand doorways. Make a rough sketch. It helps to visualize the layout. Calculate how many vinyl pieces you need. Always add extra for mistakes. Check the vinyl’s packaging. Follow the manufacturer’s advicefor cutting and fitting. Proper planning saves time and effort.
Subfloor Assessment
Check the subfloor condition. It must be cleanand dry. Look for any damage. Fix cracks or holes. A smooth surface ensures a good finish. Use a leveling compound if needed. Make sure the subfloor is flat. Uneven floors cause problems later. Sweep the floor to remove dust. A clean start is important. Inspect for moisture issues. Moisture can damage vinyl. Use a moisture meter if unsure. Proper subfloor care leads to a lasting floor.
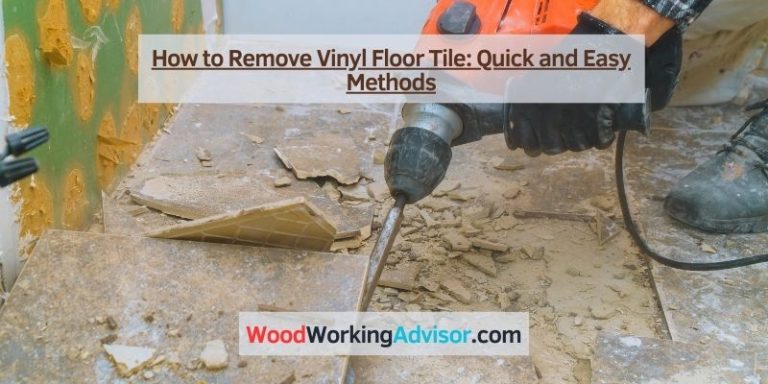
Essential Tools For Vinyl Installation
Cutting tools are very important in vinyl installation. A utility knife is perfect for straight cuts. For curves, a vinyl cutter works best. Always use a sharp blade. This makes cutting easy and clean. Keep extra blades handy. A straightedge helps with precise lines. Precision matters.
Good measuring tools make the job easier. A tape measure is a must-have. It helps get the right size. Square rulers ensure perfect corners. Always double-check measurements. This saves time and materials. Mistakes can be costly. Use a chalk line for straight guides. Perfect lines every time.
Adhesive tools are needed for strong floors. A trowel spreads glue evenly. This ensures a firm hold. Use a roller to press the vinyl. This removes air bubbles. Firm pressure is key. Glue guns are useful for tricky spots. Always follow the glue instructions. Proper adhesion is vital.
Finishing tools add the final touch. A seam roller smooths edges. This gives a polished look. Trim tools are used for neat corners. They ensure a clean finish. Use cleaning cloths to wipe excess glue. Keep the work area tidy. A neat finish looks professional.

Credit: www.amazon.com
Understanding The Installation Process
Place vinyl pieces on the floor. Check how they fit together. Ensure no gaps appear. Adjust pieces until they align perfectly. Mark spots where cuts are needed. This helps with perfect fitting. Dry fitting ensures smooth installation later.
Start by cleaning the floor. Spread adhesive evenly using a trowel. Follow instructions on the adhesive package. Place vinyl on the adhesive carefully. Press down firmly to secure. Check for air bubbles. Remove bubbles if found.
Align seams tightly for a neat look. Use seam roller to press seams down. This prevents lifting. Check that seams are flush. They should not overlap. Seam alignment is crucial for a smooth finish. Double-check every seam.
Tips For A Smooth Installation
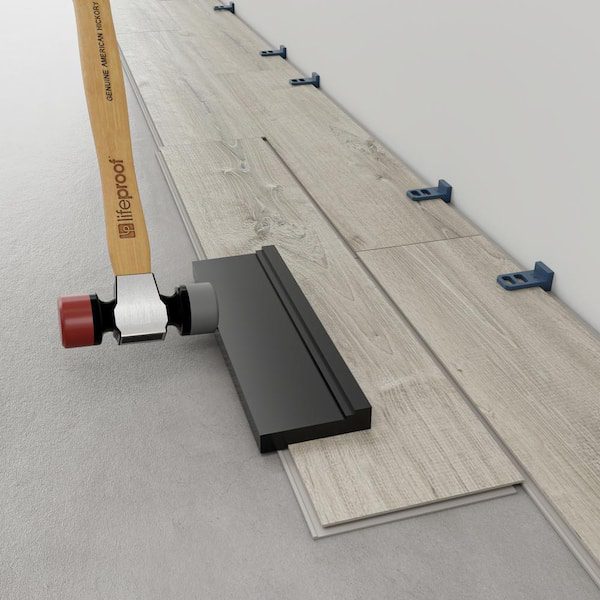
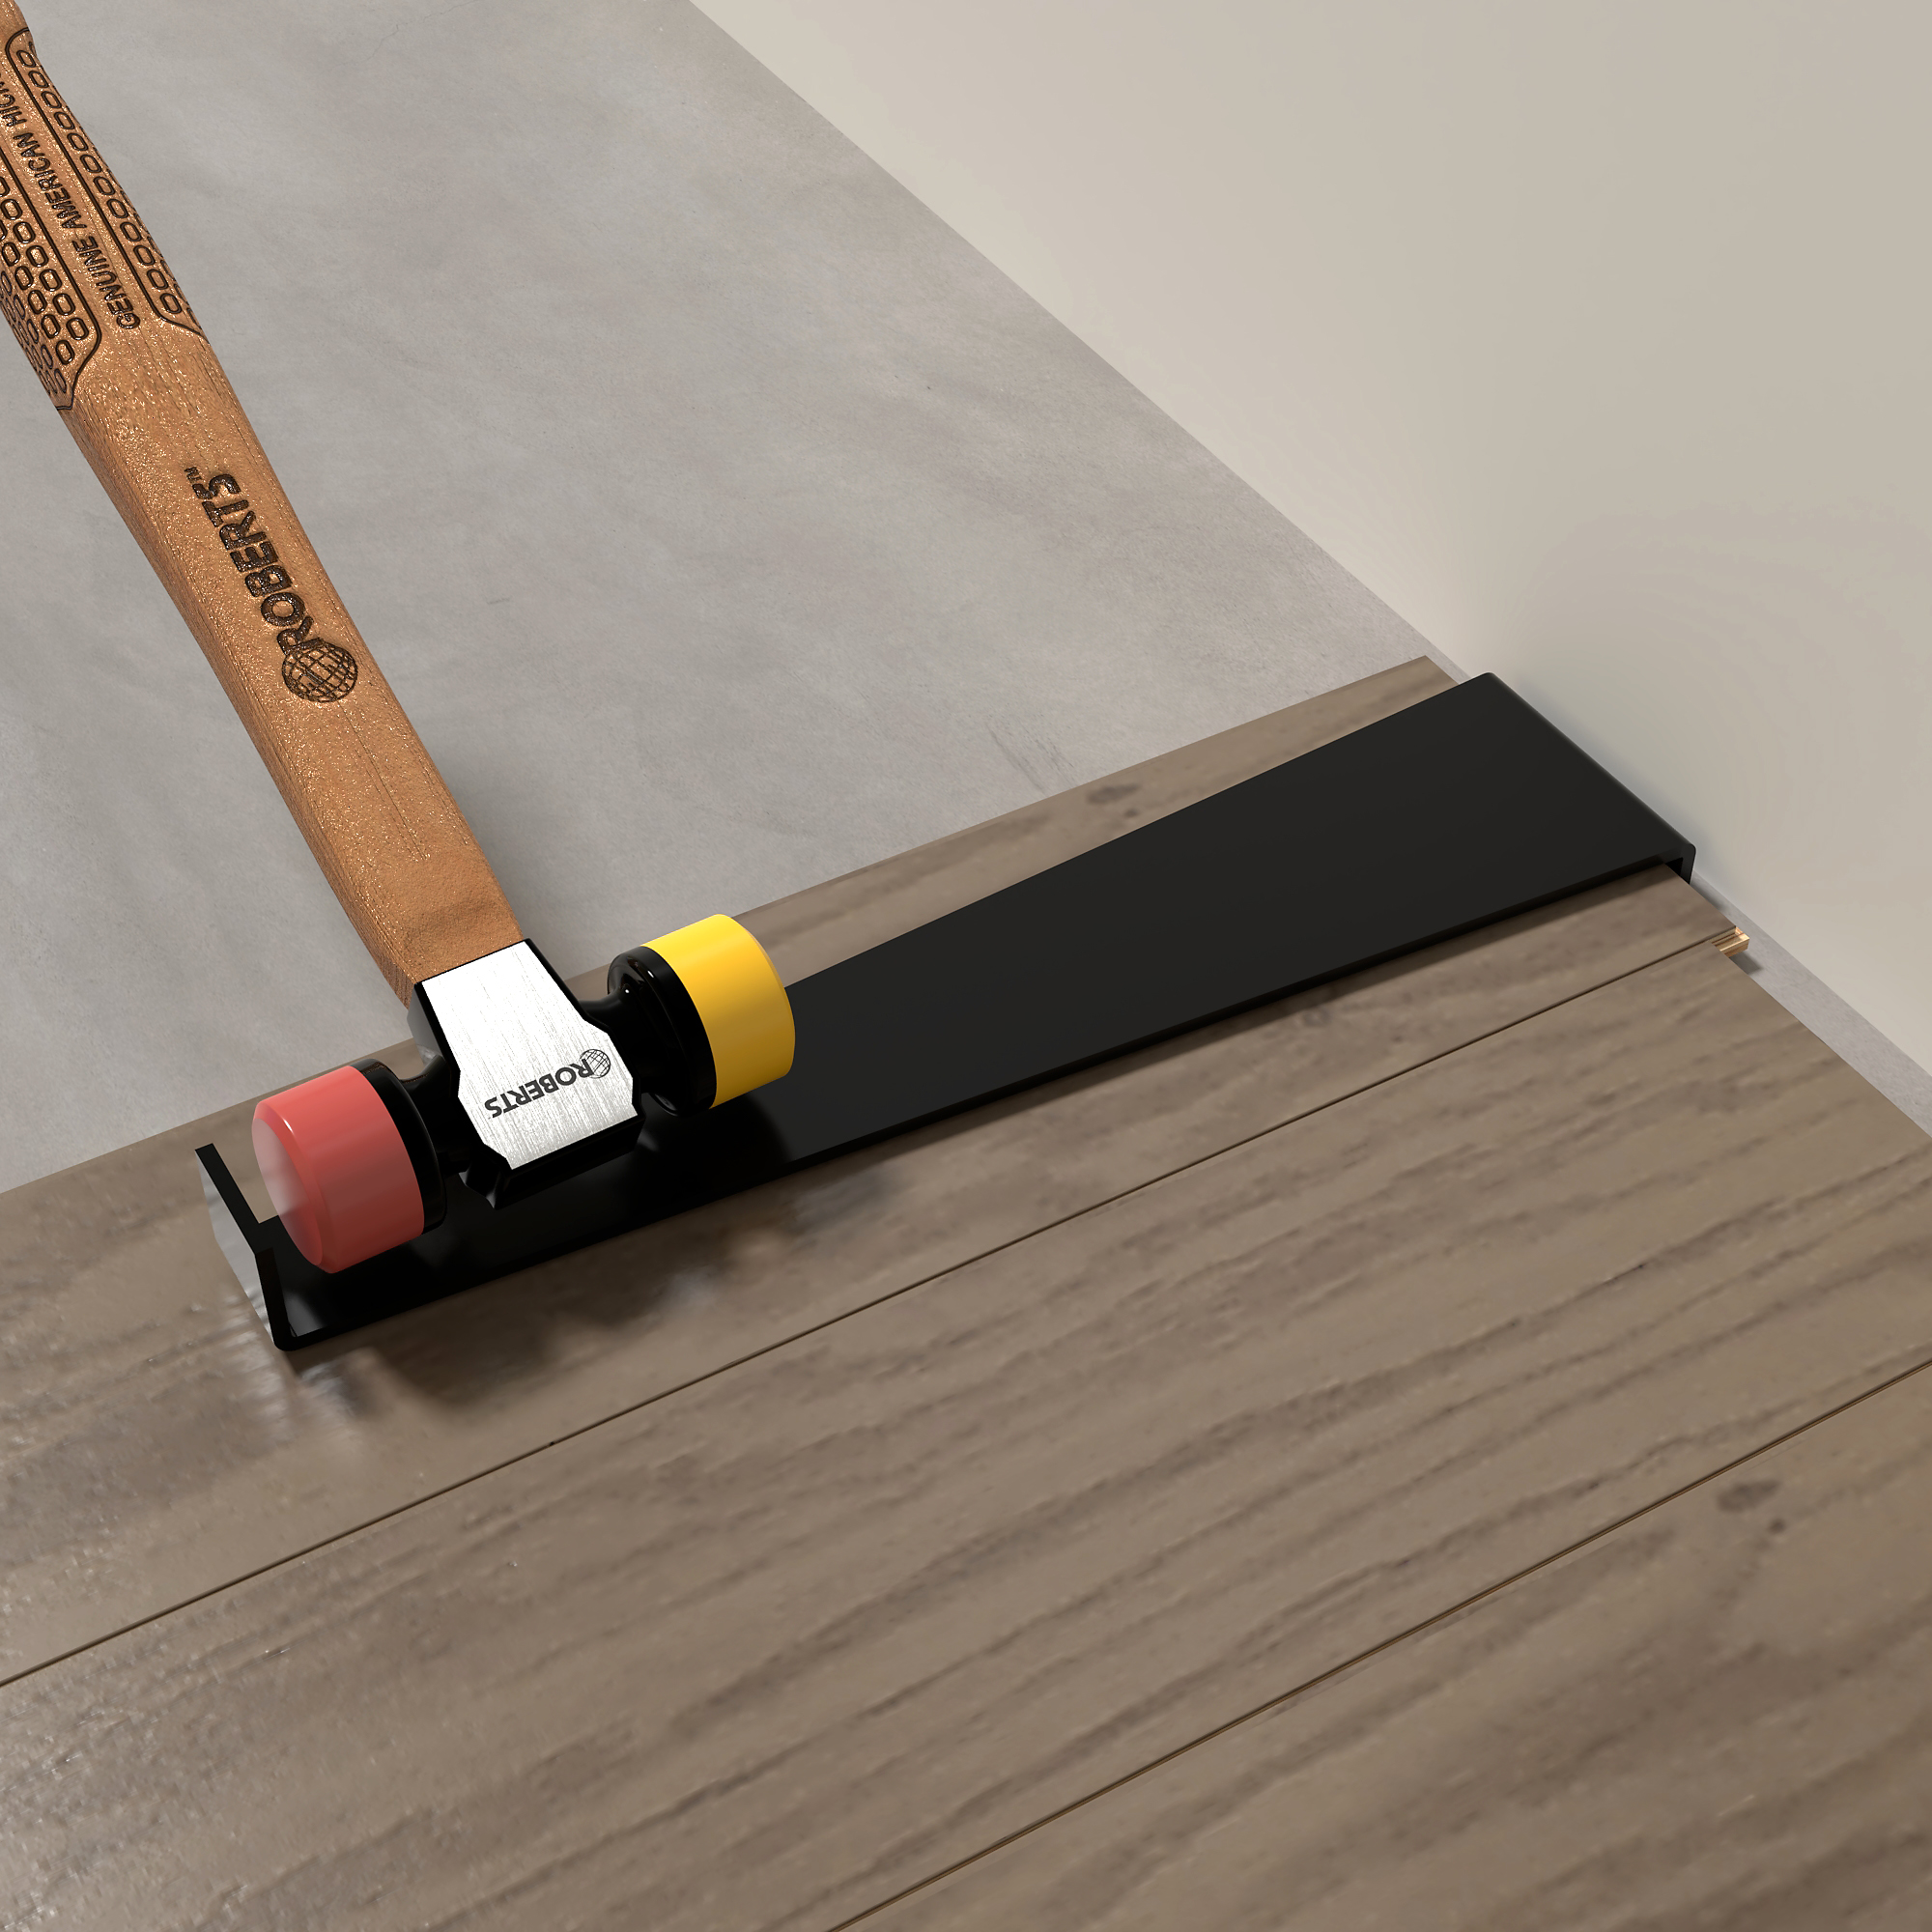
Ensure a smooth vinyl floor installation with the right kit. Quality tools simplify tasks and improve results. Choose kits with spacers, cutters, and hammers for precision.
Maintaining Consistent Pressure
Apply even pressureduring installation. This helps the vinyl stick well. Use a roller to press down. This removes air bubbles. Keep the roller moving. Do not press too hard. It may damage the vinyl. Keep your hands steady. Check for any gaps. Fill them if needed.
Ensuring Accurate Cuts
Measure the vinyl before cutting. Use a sharp knifefor clean edges. Cut slowly and carefully. Check your measurements twice. This avoids mistakes. A straight edge helps in cutting. Make sure the knife is sharp. Dull knives make bad cuts. Trim excess vinyl with care.
Troubleshooting Common Issues
Air bubbles can make the floor look uneven. Use a floor roller to press the bubbles out. Start from the center and roll to the edges. This pushes the air out. Warm the area with a hairdryer. This helps the vinyl stick better. Be careful not to get it too hot. Heat can damage the vinyl.
Vinyl pieces must fit well together. Misaligned pieces look messy. Lift the piece gently with a putty knife. Align it properly and press it down. If the piece is sticky, wet the knife first. This stops the vinyl from tearing. Always work slowly to avoid mistakes.
Caring For Your New Vinyl Floor
Keep your vinyl floor clean with a soft broom. This helps remove dust and dirt. Use a damp mop with warm water for deeper cleaning. Avoid using a lot of water. It can damage the floor. A mild detergent can help with stains. Rinse well to remove soap residue. Avoid harsh chemicals. They might harm the vinyl’s surface.
Place doormats at entrances. They catch dirt and grit. Use furniture pads under heavy items. This prevents scratches. Keep pet nails trimmed. They can easily scratch the floor. Avoid dragging furniture. Lift instead. Direct sunlight can fade the vinyl. Use curtains or blinds to protect it. Regular care keeps the floor looking new.
Credit: www.robertsconsolidated.com
Frequently Asked Questions
What Is Included In A Vinyl Floor Installation Kit?
A vinyl floor installation kit typically includes tools like a tapping block, pull bar, spacers, and a utility knife. These tools help ensure precise installation, reducing gaps and ensuring a secure fit. Some kits may also include adhesive and cleaning supplies for finishing touches.
How Do Spacers Help In Vinyl Flooring?
Spacers maintain consistent gaps between vinyl planks and walls, allowing expansion and contraction. This prevents buckling and enhances the floor’s durability. Proper spacing is crucial for a professional finish and long-lasting flooring.
Can Beginners Use A Vinyl Installation Kit?
Yes, beginners can use vinyl installation kits easily. These kits provide essential tools and instructions for a straightforward installation process. With patience and attention to detail, even novices can achieve professional-looking results.
Are All Vinyl Installation Kits The Same?
No, not all vinyl installation kits are the same. They vary in tool quality and additional accessories offered. Choosing a kit tailored to your flooring type ensures better results and simplifies the installation process.
Conclusion
Installing vinyl floors can be simple with the right tools. A vinyl floor installation kit offers essential items for the job. These kits provide efficiency. They help achieve professional results. Tools include spacers and cutters. They ensure smooth and precise fitting.
With a kit, beginners and pros can install floors easily. No need for extra gadgets. Just follow steps carefully. Enjoy your new vinyl flooring with confidence. Get the right kit. Make installation stress-free and quick. Remember to measure twice and cut once.
Happy flooring!