How to Fix Cracks in Wood Cabinets: Cosmetic or Structural?
Wood cabinet cracks fall into two categories: cosmetic surface splits you fill in an afternoon, and structural splits through the panel or frame that need glue and clamps. Press both sides of the crack — flex or creak means it’s structural. Filling a structural crack with putty alone lets it reopen within months. This guide covers the flex test, wood filler versus epoxy versus glue-and-clamp repairs, and keeping humidity between 35% and 50% so cracks do not return.
This post contains affiliate links. If you buy through them, we may earn a small commission at no extra cost to you.
Is the Crack Cosmetic or Structural? (Quick Test)
Best Cabinet Crack Repair Pick
Gorilla All Purpose Wood Filler Kit, with Putty Knife and Sanding Block
A complete kit for hairline and small cracks in one box — filler, putty knife, and sanding block, no separate tool shopping needed.
- Best for: Hairline and small cracks (under 1/16 in) that passed the cosmetic flex test
- Why we picked it: Matches the wood filler recommendation in our decision table and includes the two tools this repair needs
- Main drawback: Not rated for structural gaps over 1/8 in — use epoxy or glue-and-clamp instead
Compare more cabinet repair options
 Option 1 PC-Woody Wood Repair Epoxy Paste Kit, Two-Part 6 oz
|
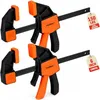 Option 2 HORUSDY 6-Inch Bar Clamps for Woodworking, 2-Pack
|
 Option 3 Gorilla Wood Glue, Fast Clamp, Water Resistant PVA, 8 oz
|
As an Amazon Associate we earn from qualifying purchases.
Press gently on both sides of the crack with your thumbs. If the wood does not move and you hear nothing, it’s cosmetic — a surface-only split you can fill and sand in one afternoon. If the panel flexes or you hear a faint creak, the crack runs deeper and needs glue and a clamp, not just filler. Filling a flexing crack with putty alone just traps the movement under the surface, and it reopens within a few months.
Crack width is the second clue. Compare it to something you already have in a kitchen drawer — a credit card edge is about 1/32 inch, a dime is about 1/16 inch:
| Crack Width | What It Looks Like | Flex Test | Best Repair | Dry / Cure Time |
|---|---|---|---|---|
| Hairline (thinner than a credit card) | Follows the wood grain, surface only | No flex, no sound | Tinted wood filler | 30 min set, 24 hr cure |
| Small (about a dime’s edge, ~1/16 in) | Visible gap when the door is closed | No flex, faint tick | Wood filler pressed in with a putty knife | 30 min set, 24 hr cure |
| Medium (~1/16–1/8 in) | Holds a fingernail edge | Slight flex, no creak | 2-part epoxy wood filler | 4–6 hr set, 24 hr cure |
| Structural (over 1/8 in, or runs through the panel) | Door will not sit flush; panel moves | Visible flex or audible creak | Wood glue + bar clamps; check hinge screws for strain | 24 hr clamped, 48 hr before normal use |
Tools and Materials You’ll Need
What you need depends on which row of the table above matches your crack. For other wood repair and upkeep beyond cabinets, our wood care and maintenance guide rounds up the full library.
- Putty knife
- 220-grit and 320-grit sandpaper
- Microfiber cloth and mild dish soap
- Wood filler for hairline and small cracks, or 2-part epoxy for medium gaps
- Wood glue and bar or spring clamps for structural splits
- Matching stain or touch-up paint, plus a protective topcoat
How to Fix a Crack in a Wood Cabinet, Step by Step
- Remove the door or drawer front: Unscrew the hinges so you can work flat on a bench. Skip this step for cracks in a face frame you can’t remove.
- Clean the crack: Wipe with a damp microfiber cloth and mild soap, then let it dry fully for at least 30 minutes before filling.
- Open hairline cracks slightly: Run a utility knife tip along a hairline crack so filler has somewhere to key in — skip this on wider cracks.
- Apply filler or epoxy: Press wood filler (or 2-part epoxy for gaps over 1/16 in) into the crack with a putty knife, slightly overfilling.
- Clamp structural splits: For cracks that flexed in the test above, run a thin bead of wood glue into the crack and clamp for 24 hours before sanding.
- Sand flush: Once fully cured, sand with 220-grit, then 320-grit, always with the grain, until smooth.
- Match the finish: Stain or paint to match the surrounding wood, then seal with a matching topcoat.
No Wood Glue on Hand? Try This
Sprinkle baking soda into the crack, then drip thin CA (super) glue over it — the mix hardens almost instantly into a filler nearly as hard as the wood itself. It works well for hairline and small cracks when you do not want to wait out an overnight clamp, but it is not a substitute for glue-and-clamp on a crack that flexed in the test above.
Cosmetic-Only Options If You Do Not Want to Sand
If the flex test above says cosmetic and you just want it out of sight, two no-sand options work: peel-and-stick wood-look wallpaper cut to size hides a crack on the inside face of a door, and a touch-up paint pen matched to the cabinet color can disguise a hairline surface crack in minutes. Neither adds strength, so only use them on cracks that passed the flex test as cosmetic.
Why Wood Cabinets Crack, and How to Stop It Happening Again
Wood is hygroscopic — it absorbs and releases moisture with the surrounding air, expanding and shrinking as humidity swings through the seasons. Cracks form when that movement happens unevenly: the end grain at panel edges changes moisture content faster than the center of the board, and that mismatch pulls the wood apart along the grain. Heavy objects stacked on a shelf or a slow leak under a sink adds mechanical stress on top of that seasonal movement.
📊 Most cabinet and moisture-control guidance keeps indoor relative humidity between 35% and 50% — below that range, wood dries out and shrinks; above it, panels swell and joints can bind.
To keep cracks from coming back: run a humidifier during dry winter months and a dehumidifier in humid summer months, check under sinks for slow leaks every few months, and avoid stacking heavy cookware directly on thin cabinet shelves. For water damage that has already set in, see our guide to fixing water-damaged wood. If the split runs through a solid board rather than a cabinet panel, our guide to repairing split wood covers butterfly keys and larger structural splits in more depth.
Frequently Asked Questions
How do I identify cracks in wood cabinets?
Inspect surfaces in natural light, paying close attention to panel joints and corners where wood movement is greatest. Run a fingernail across suspicious areas — a hairline crack will catch it even when it is hard to see. Checking every few months catches cracks while they are still cosmetic.
What materials do I need to fix cabinet cracks?
For cosmetic cracks: a putty knife, wood filler, and fine-grit sandpaper. For structural cracks that flex under gentle pressure, add wood glue, clamps, and possibly 2-part epoxy for gaps over 1/16 inch. Matching stain or touch-up paint finishes the repair either way.
Can I use wood filler on large cracks?
Standard wood filler works up to about 1/16 inch wide. Beyond that, switch to a 2-part epoxy wood filler, which bridges gaps without shrinking as it cures. For anything over 1/8 inch or a crack that flexes when pressed, glue and clamp the wood first, then fill and sand what remains.
Is a cracked cabinet door cosmetic or structural damage?
Press both sides of the crack. If nothing moves and there’s no sound, it’s cosmetic and safe to fill and sand. If the panel flexes or creaks, treat it as structural — glue and clamp it before filling, or the crack will reopen within months.
Can you fix a cracked cabinet without wood glue?
Yes, for small and hairline cracks — baking soda packed into the crack and set with a few drops of thin CA super glue hardens almost instantly. It is not a substitute for a glue-and-clamp repair on a crack that flexes under pressure.
A ten-second flex test is what separates a five-minute filler job from a repair that needs glue and an overnight clamp — skip it and even a careful fill can reopen within months. Match the repair to what the crack actually is, keep indoor humidity in the 35–50% range, and most wood cabinets will not crack again in the same spot.
Sponsored / affiliate links. As an Amazon Associate I earn from qualifying purchases. I may earn additional commission from eligible campaigns.