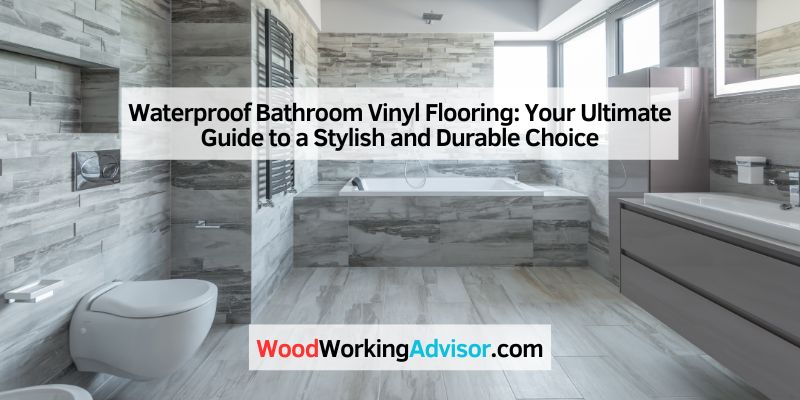
Waterproof Bathroom Vinyl Flooring: Your Ultimate Guide to a Stylish and Durable Choice
Hey there! If you’re thinking about upgrading your bathroom, let me tell you—waterproof vinyl flooring is a game-changer. As someone who’s spent years exploring home improvement options, I’ve seen firsthand how this material can transform a space. It’s affordable, stylish, and tough enough to handle the splashes and spills of a busy bathroom. Whether you’re a DIY newbie or a seasoned renovator, this guide is packed with everything I’ve learned about waterproof bathroom vinyl flooring. Let’s dive in and explore why it’s such a fantastic choice, how to pick the right one, and tips to make it last.
Why Waterproof Vinyl Flooring is Perfect for Bathrooms
I remember the first time I walked into a friend’s newly renovated bathroom. The floor looked like sleek hardwood, but she told me it was vinyl—100% waterproof vinyl, to be exact. I was hooked. Bathrooms are wet zones. Water from showers, sinks, and even the occasional overflow can wreak havoc on traditional flooring like hardwood or laminate. Vinyl, though? It laughs in the face of moisture.
Waterproof vinyl flooring is designed to resist water completely. Unlike regular vinyl, which might let water seep through seams, waterproof options like luxury vinyl planks (LVP) or tiles (LVT) have advanced technology to keep water out. The core is often made of stone plastic composite (SPC) or wood plastic composite (WPC), which makes it rigid and impervious to water damage. Plus, it’s slip-resistant, which is a big win for safety in a bathroom where wet feet are the norm.
Another reason I love it? It’s budget-friendly. Compared to ceramic tiles or natural stone, vinyl gives you a high-end look without breaking the bank. It’s also super easy to clean. A quick sweep and mop, and you’re done—no special sealants or treatments needed.
Types of Waterproof Vinyl Flooring
When I started researching vinyl flooring, I was amazed at the variety. There’s something for every style and budget. Let’s break down the main types so you can figure out what’s best for your bathroom.
Luxury Vinyl Plank (LVP)
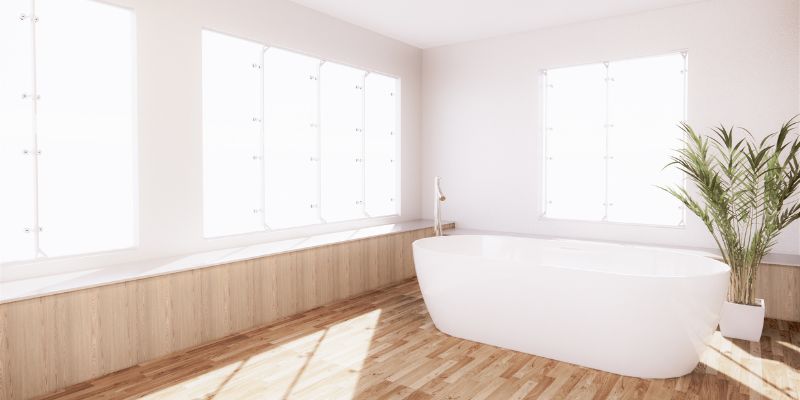
LVP is my personal favorite. It mimics the look of hardwood with realistic wood grain textures. You’d swear it’s real wood until you touch it or spill water on it. LVP comes in planks, usually 4 to 8 inches wide and 36 to 48 inches long. It’s perfect if you want a warm, cozy vibe in your bathroom.
Luxury Vinyl Tile (LVT)
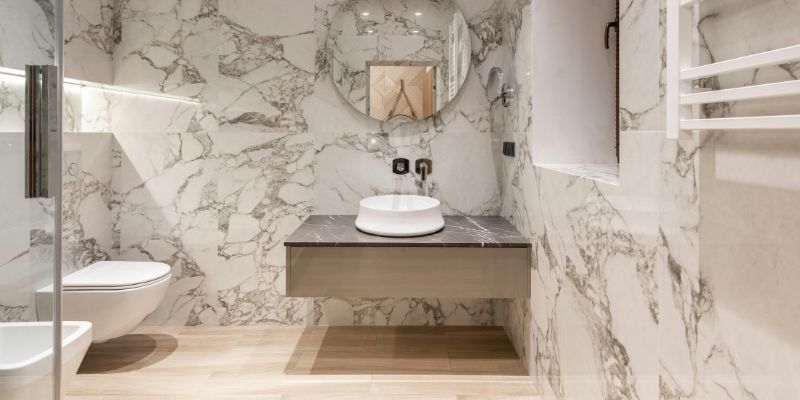
LVT is the tile version of luxury vinyl. It’s designed to look like ceramic or porcelain tiles, often with stone or slate textures. I’ve seen LVT that looks so much like marble, I had to do a double-take. It’s great for a modern or classic bathroom aesthetic.
Sheet Vinyl
Sheet vinyl comes in large rolls, typically 6 to 12 feet wide. It’s a single, seamless piece, which makes it fantastic for bathrooms since there are fewer seams for water to sneak through. I find it less trendy than LVP or LVT, but it’s a solid choice if you want something simple and cost-effective.
Peel-and-Stick Vinyl Tiles
These are the DIY dream. Peel-and-stick tiles are adhesive-backed and super easy to install. I tried them in a small powder room once, and it was a weekend project that didn’t stress me out. They’re waterproof on the surface, but you need to be careful with installation to ensure seams are tight, as water can seep underneath if not done right.
Here’s a quick comparison to help you decide:
| Type | Look | Installation | Cost | Best For |
|---|---|---|---|---|
| Luxury Vinyl Plank | Wood-like | Click-lock or glue-down | Moderate to High | Cozy, rustic bathrooms |
| Luxury Vinyl Tile | Stone or tile-like | Click-lock or glue-down | Moderate to High | Modern, elegant bathrooms |
| Sheet Vinyl | Various patterns | Glue-down or loose-lay | Low to Moderate | Budget-friendly, seamless look |
| Peel-and-Stick Tiles | Tile or simple patterns | Adhesive-backed | Low | DIY projects, small spaces |
Benefits of Waterproof Vinyl Flooring
Let’s talk about why I’m such a fan of waterproof vinyl. It’s not just about surviving water—there’s so much more to love.
Durability
Bathrooms get a lot of action—foot traffic, spills, you name it. Vinyl is tough. It resists scratches, dents, and stains, which is perfect if you’ve got kids or pets. I once dropped a heavy shampoo bottle on my vinyl floor, and there wasn’t a mark. Try that with ceramic tile, and you’re risking a crack.
Easy Maintenance
I’m all about low-effort upkeep, and vinyl delivers. A quick sweep to get rid of dust and a damp mop with a mild cleaner is all it takes. No waxing, no polishing, no stress. If you spill some toothpaste or makeup, just wipe it up—no stains left behind.
Comfort Underfoot
Unlike cold, hard tiles, vinyl has a bit of cushion. It feels softer and warmer when you step out of the shower. Some vinyl even has underlayment for extra comfort. I noticed this big time in my own bathroom—barefoot mornings are way more pleasant now.
Style Versatility
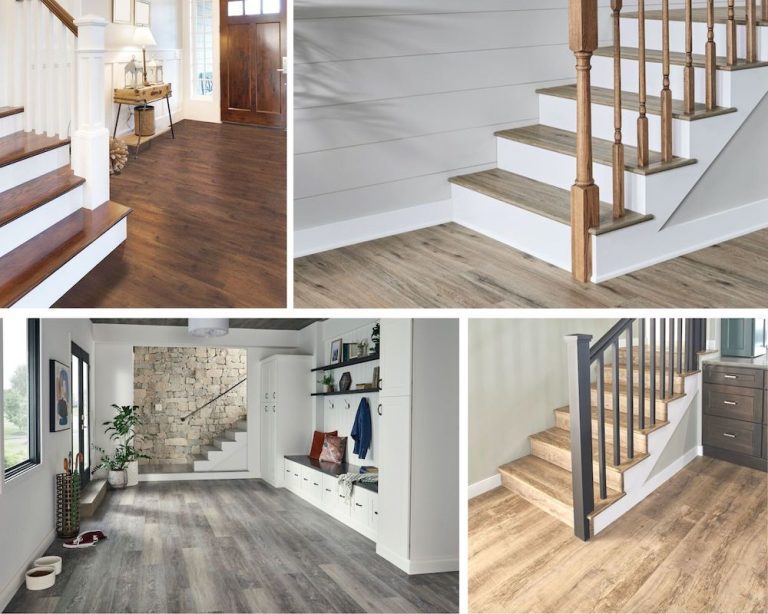
Whether you want a rustic barnwood look, a sleek marble finish, or something bold and colorful, vinyl’s got you covered. I’ve seen designs that mimic everything from reclaimed oak to polished granite. You can match it to any bathroom vibe, from farmhouse to minimalist.
Affordability
Let’s be real—renovations can get pricey. Vinyl is a lifesaver for your wallet. You can get a high-end look for $1 to $5 per square foot, compared to $10 or more for ceramic or stone. Installation is often cheaper too, especially if you go the DIY route with peel-and-stick or click-lock options.
How to Choose the Right Waterproof Vinyl Flooring
Picking the perfect vinyl for your bathroom can feel overwhelming with so many options. Here’s what I’ve learned to focus on to make the decision easier.
Check for 100% Waterproof Labeling
Not all vinyl is created equal. Look for labels that say “100% waterproof” or “waterproof core.” This ensures the flooring can handle standing water without damage. I made the mistake once of assuming all vinyl was waterproof—don’t skip this step.
Consider Thickness and Wear Layer
Thicker vinyl (measured in millimeters) is generally more durable. The wear layer, which is the protective top coat, is key too. For bathrooms, I recommend a wear layer of at least 12 mils for light traffic or 20 mils for busier spaces. Thicker layers mean better resistance to scratches and wear over time.
Match Your Style
Think about your bathroom’s vibe. Do you want a spa-like retreat with stone-look tiles? Or a cozy, cabin feel with wood-look planks? I always suggest bringing home samples to see how they look in your lighting. What looks great in a showroom might not vibe in your space.
Think About Installation
Your skill level and budget matter here. If you’re a DIYer like me, click-lock or peel-and-stick options are straightforward. For sheet vinyl or glue-down types, you might want a pro to ensure a watertight seal. I learned the hard way that sloppy installation can lead to water sneaking under seams.
Slip Resistance
Safety first! Look for vinyl with a textured surface or anti-slip coating. This is especially important if you’ve got kids or elderly folks at home. I always check the coefficient of friction (COF) rating—higher means better grip.
Installation Tips for Waterproof Vinyl Flooring
Installing vinyl flooring is one of those projects that can be super rewarding. I’ve done it a few times, and while it’s not rocket science, there are some tricks to get it right.
Prep Your Subfloor
A smooth, clean subfloor is critical. I once tried to install vinyl over an uneven floor, and let’s just say it wasn’t pretty. Remove old flooring, fill in cracks, and make sure it’s level. For bathrooms, ensure the subfloor is dry and free of mold.
Acclimate the Flooring
Vinyl can expand or contract with temperature changes. I always let my vinyl sit in the bathroom for 24-48 hours before installing. This helps it adjust to the room’s temperature and humidity, preventing gaps later.
Seal the Edges
Even waterproof vinyl needs tight seams. For click-lock or glue-down vinyl, use silicone caulk around the edges, especially near the tub or shower. I skipped this once, and water got under the floor—big mistake.
Follow Manufacturer Guidelines
Every vinyl product is a bit different. Some need specific adhesives; others require a certain underlayment. I always read the instructions twice to avoid surprises. Trust me, it saves headaches.
Tools You’ll Need
For DIYers, gather a utility knife, tape measure, straightedge, and a roller for glue-down vinyl. For click-lock, a tapping block and mallet are handy. I keep a spare box of tiles or planks in case I mess up a cut.
Maintenance and Care Tips
One of the reasons I love vinyl is how easy it is to keep looking great. Here are my go-to tips for keeping your bathroom floor in top shape.
Clean Spills Right Away
Even though vinyl is waterproof, standing water can sneak into seams if left too long. I always wipe up spills with a damp cloth as soon as I notice them. It’s a habit that keeps the floor pristine.
Sweep and Mop Regularly
Dust and dirt can scratch the surface over time. I sweep my bathroom floor every couple of days and mop it weekly with a mild cleaner. Avoid harsh chemicals like bleach—they can dull the finish.
Use Mats and Rugs
A bath mat near the shower or sink catches drips and adds extra protection. I picked a machine-washable rug with a non-slip backing, and it’s been a game-changer for keeping the floor dry.
Avoid Extreme Heat
Vinyl doesn’t love super-hot temperatures. I learned this when I accidentally left a curling iron on the floor—oops. Keep hot tools off the surface to avoid damage.
Common Mistakes to Avoid
I’ve made my share of flooring blunders, so let me save you some trouble. Here are pitfalls to watch out for.
Skipping Subfloor Prep
An uneven or dirty subfloor can cause vinyl to buckle or peel. I rushed this step once, and the floor started lifting within months. Take the time to get it right.
Choosing Non-Waterproof Vinyl
Not all vinyl is waterproof. I learned this the hard way when I installed regular vinyl in a laundry room and ended up with water damage. Always double-check the label.
Poor Installation Around Fixtures
Bathrooms have tricky spots like toilets and van fully sealed around these areas can let water seep underneath. I use a steady hand and caulk to make sure every edge is secure.
Ignoring Maintenance
Even low-maintenance vinyl needs some love. I got lazy once and let dirt build up, which dulled the shine. A quick cleaning routine keeps it looking brand new.
Cost of Waterproof Vinyl Flooring
Let’s talk numbers. Vinyl is one of the most affordable flooring options, but costs vary. Here’s what I’ve found based on my projects and research.
- Peel-and-Stick Tiles: $0.50 to $2 per square foot. Great for small bathrooms or rentals.
- Sheet Vinyl: $1 to $3 per square foot. Budget-friendly for larger spaces.
- Luxury Vinyl Plank/Tile: $2 to $5 per square foot. Worth it for a premium look.
- Installation: DIY is free (minus tools), but professional installation runs $1 to $3 per square foot.
For a 50-square-foot bathroom, you’re looking at $25 to $250 for materials alone, plus installation if you hire a pro. I always shop around and check for sales to get the best deal.
Environmental and Health Considerations
As someone who cares about sustainability, I’ve looked into vinyl’s environmental impact. Vinyl isn’t the greenest material—it’s made from PVC, which isn’t biodegradable. But some brands are stepping up. I look for vinyl with recycled content or low-VOC (volatile organic compound) certifications to minimize off-gassing. Phthalate-free options are also a good choice, especially if you have kids or pets.
Check for certifications like FloorScore, which ensures the flooring meets indoor air quality standards. I also recycle any scraps from installation to reduce waste. It’s not perfect, but these steps make a difference.
Trends in Bathroom Vinyl Flooring for 2025
I love keeping up with design trends, and vinyl flooring is having a moment. Here’s what’s hot for 2025.
Natural Textures
Wood-look planks with realistic grain and stone-look tiles are huge. I’m seeing a lot of oak and walnut-inspired LVP in warm tones. It’s perfect for a spa-like bathroom.
Bold Patterns
Geometric or herringbone patterns are popping up in LVT. I tried a herringbone layout in a guest bathroom, and it’s such a conversation starter.
Matte Finishes
Glossy finishes are out; matte is in. It gives a modern, understated look that hides smudges better. I switched to matte LVP in my master bath, and it feels so chic.
Large-Format Tiles
Bigger tiles (12×24 inches or larger) make small bathrooms feel more spacious. I’ve noticed this trend in showrooms, and it’s a great way to elevate a simple design.
My Personal Experience with Vinyl Flooring
When I redid my bathroom last year, I went with LVP in a weathered oak finish. The installation was a weekend project, and I’m still thrilled with how it turned out. It’s held up to daily showers, my toddler’s bath-time splashes, and even a leaky pipe incident with zero damage. The floor feels warm underfoot, and I get compliments on how “fancy” it looks, even though I stayed well within budget. It’s been a practical and stylish choice that I’d make again in a heartbeat.
Conclusion
Waterproof vinyl flooring has been a revelation for me, and I hope this guide has shown you why it’s such a fantastic option for your bathroom. It’s durable, affordable, and comes in endless styles to match your vision. Whether you’re dreaming of a sleek, modern space or a cozy, rustic retreat, vinyl can make it happen without the stress of water damage or high costs. From choosing the right type to installing and maintaining it, I’ve shared everything I’ve learned to help you make an informed decision. Ready to transform your bathroom? Grab some samples, roll up your sleeves, and get started—you won’t be disappointed!
FAQs
Is Waterproof Vinyl Flooring Really Waterproof?
Yes, 100% waterproof vinyl, like LVP or LVT with an SPC or WPC core, can handle standing water without damage. Just make sure seams are sealed properly during installation to prevent water from sneaking underneath.
Can I Install Vinyl Flooring Myself?
Absolutely! Click-lock and peel-and-stick vinyl are beginner-friendly. I’ve done both, and with a little patience, it’s doable. Sheet vinyl or glue-down types might be trickier, so consider a pro for those.
How Long Does Vinyl Flooring Last in a Bathroom?
With proper care, quality vinyl can last 10-20 years. My LVP is going strong after a year of heavy use, and thicker wear layers (20 mils or more) can extend lifespan even further.
Is Vinyl Flooring Safe for My Family?
Look for low-VOC, phthalate-free vinyl with certifications like FloorScore. I chose this for my home, and it’s been great for my family, including my toddler and dog.
Can I Use Vinyl Flooring in a Wet Room?
Yes, waterproof vinyl is ideal for wet rooms due to its moisture resistance and slip-resistant options. I’ve seen it used in shower areas with great results—just ensure proper installation.