What Grit Sandpaper for Cedar Wood? (Start with 80 Grit)
For cedar wood, it is recommended to start sanding with 80 grit sandpaper. Cedar wood is soft and fragile, so too rough grit sandpaper can damage the wood surface.
As cedar has a soft surface, 80 grit sandpaper is suggested to remove the rough edges without causing any damage. You can sand the cedar wood with varying levels of grit to achieve a smooth surface, but you should start with a lower grit sandpaper, especially with rough cedar or for wood with rough surfaces.
Sanding cedar wood without the correct grit sandpaper can lead to uneven or inconsistent staining or finishing, so choosing the right sandpaper is vital. When sanding cedar wood, it’s also important to use proper safety equipment such as masks and goggles due to the sawdust that cedar wood produces and the know-how of the sanding techniques.
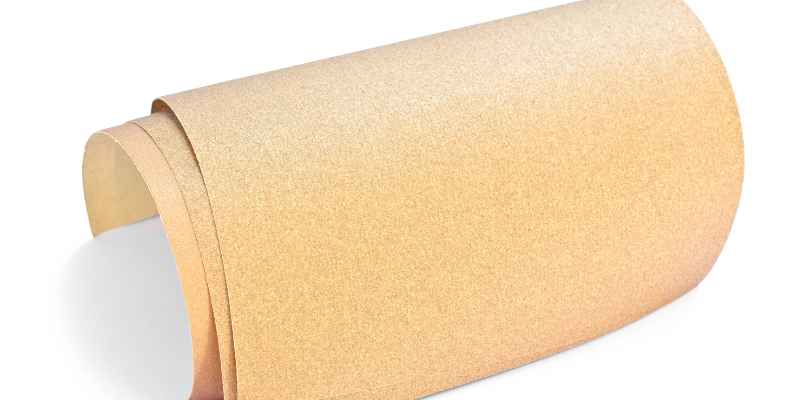
Choosing The Right Sandpaper For Cedar Wood
Cedar wood is a popular choice for outdoor decks and furniture for its beauty and durability. However, over time, cedar wood can become discolored, weathered, and rough. Sanding is an essential step for restoring the natural beauty of cedar wood. But with an abundance of sandpaper options available, it can be overwhelming to choose the right one for the job. Here’s a guide to help you select the right grit sandpaper for cedar wood.
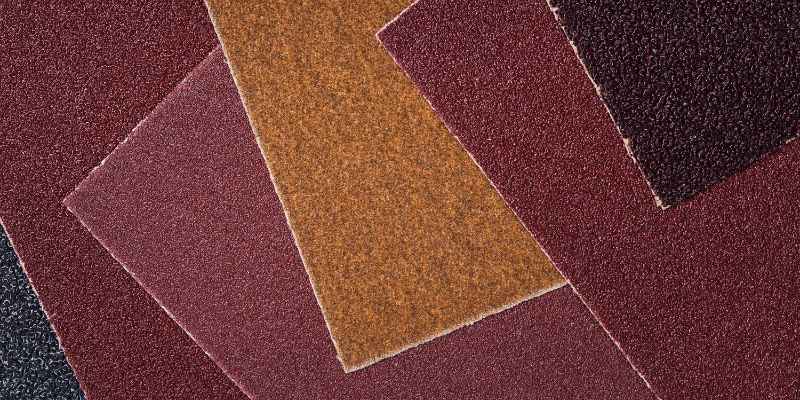
Understanding Sandpaper Grit Sizes
Sandpaper comes in different grit sizes, which represent the number of abrasive particles per square inch. The lower the grit number, the coarser the sandpaper, while higher grits are finer. Coarse sandpaper removes rough and uneven surfaces, while fine sandpaper removes fine imperfections and prepares the surface for staining or painting.
Coarser Sandpaper For Initial Sanding
The initial sanding of cedar wood requires coarser sandpaper, typically in the range of 60 to 80 grit. This rough sandpaper removes rough patches and weathered damaged areas on the surface. Start with the coarser sandpaper and move gradually to finer grits to get a smooth finish. For cedar wood with more finish or stain buildup, start with 40-grit sandpaper, although this grit may leave visible scratches on the surface.
Finer Sandpaper For Smoothing
To achieve a smooth and polished finish, use finer sandpaper between 100 to 150 grit to remove any visible scratches and prepare the cedar wood for staining or painting. At this stage, the wood grain should feel smooth and free of roughness and imperfections. Sanding with a 220 grit sandpaper may be necessary for an extra smooth finish on premium cedar wood furniture or decks.
The Right Grit For Staining
When sanding cedar wood for staining, the grit size choice is also important to get an even coat of stain. Sanding with a fine grit of 120 or 150 grit is optimal for staining as it helps to open and soften the wood grain. This allows the stain to penetrate the wood fibers more evenly and produce a deep and even finish.
It is important to note that sanding should be done with care to avoid over-sanding and damaging the cedar wood surface. Use an appropriate grit size and sandpaper type; avoid orbital sanders, as they can leave visible circular marks on the surface. Regularly check your sandpaper to ensure it’s still effective and replace it frequently when it begins to lose its grit. Sanding is just one step in the cedar wood restoration process, but the right grit sandpaper can make all the difference.
Preparing Cedar Wood For Sanding
To prepare cedar wood for sanding, it’s important to use the right grit sandpaper. A medium grit sandpaper, between 80 and 120 grit, will work well to remove any roughness on the surface while not damaging the wood fibers. Be sure to follow proper safety precautions when sanding cedar wood.
Cleaning Cedar Wood
Before sanding cedar wood, it is vital to clean the surface properly. The wood may contain dirt, debris, or oils that could clog sandpaper. Use a soft-bristled brush or vacuum to remove the dirt and debris from the surface. Avoid using water or any harsh chemicals as it can damage the wood.
Sanding Equipment Preparation
Before sanding, prepare the required equipment such as sandpaper sheets, power sander, sanding blocks, and a dust mask. When working with cedar wood, a power sander or sanding block is recommended for faster and effective sanding. Always wear a dust mask to prevent inhaling sawdust, which may cause respiratory problems. Also, use sandpaper with the appropriate grit for cedar wood.
The Right Sandpaper Grit For Cedar Wood
The type or grit of sandpaper you choose depends on the cedar wood type and condition. Rough cedar wood would require a lower grit of sandpaper to remove roughness, and smooth cedar wood would require a higher grit sandpaper to avoid further damage. A grit range of 80 to 120 is recommended for rough cedar wood, while a grit range of 150 to 220 is recommended for smooth cedar wood. Choose sandpaper grit accordingly by evaluating the condition of the cedar wood.
Conclusion
Preparing cedar wood for sanding is crucial to achieve a smooth finish. Always clean the surface and use sanding equipment and sandpaper with the appropriate grit for cedar wood. By following these simple steps, you can achieve a beautiful finished product.
Sanding Techniques For Cedar Wood
Achieving smooth and even results when sanding cedar wood requires selecting the right grit sandpaper. Begin with a coarse grit, around 80 or 100, and work your way up to a fine grit of 220 or higher for a flawless finish.
It’s important to sand with the grain to avoid creating scratches or discoloration on the wood surface.
Sanding With The Grain
When sanding cedar wood, it’s important to sand with the grain of the wood to achieve a smooth and even surface. Sanding with the grain means following the lines of the wood fibers, which will help prevent splintering and tearing of the wood. Begin sanding with a coarse-grit sandpaper, such as 60-grit, and gradually work your way up to a finer grit, like 120-grit. Be sure to use a sanding block or pad to keep the sandpaper flat and even on the wood surface.
Sanding Against The Grain
While it’s generally recommended to sand with the grain, there may be instances where sanding against the grain is necessary. This is particularly true when sanding the edges or corners of cedar wood pieces. Sanding against the grain can help create a crisp edge and remove any rough spots or splinters. However, when sanding against the grain, be sure to use a lighter touch and a finer grit sandpaper to prevent any damage to the wood fibers.
Sanding Edge Profiles
When sanding the edge profiles of cedar wood pieces, it’s important to use a sanding block or pad that matches the shape of the profile. This will help ensure an even sanding surface and prevent any unwanted rounding or flattening of the edges. Begin with a coarse-grit sandpaper to remove any rough spots or splinters, and then work your way up to a finer grit for a smooth finish. When sanding curved edges or profiles, consider using a flexible sanding sponge or sanding disc for maximum flexibility and control.
In conclusion, sanding cedar wood requires a bit of patience and attention to detail. Whether you’re sanding with or against the grain, or sanding edge profiles, be sure to use the proper sandpaper grit and tools for the best results. By following these sanding techniques, you can achieve a smooth and polished finish on your cedar wood projects.
Finishing Options For Cedar Wood
When sanding cedar wood, it’s important to choose the appropriate grit sandpaper based on the density and roughness of the wood. For rough cedar wood, start with a lower grit sandpaper of around 80 or 100 before moving on to a higher grit of 120 or 150 for a smoother finish.
Cedar wood is a popular choice among homeowners for indoor and outdoor projects due to its natural beauty and durability. But to maintain its attractive appearance, cedar wood requires finishing. In this post, we will explore the various finishing options for cedar wood and discuss the importance of each of them.
Protective Coatings
One of the most popular finishing options for cedar wood is protective coatings. These coatings protect the wood from moisture, UV rays, and insects. Polyurethane, varnish, and lacquer are some examples of protective coatings that can be used for cedar wood. Protective coatings not only preserve the natural beauty of cedar wood but also extend its life.
Natural Finishes
If you are a fan of the natural look of cedar wood, then natural finishes are the way to go. Natural finishes penetrate the wood and bring out the natural beauty of the cedar. Linseed oil, tung oil, and beeswax are some examples of natural finishes. Natural finishes enhance the grain and color of the wood while providing it with water-resistant properties.
Sanding Cedar Wood
Before applying any finishing option, sanding cedar wood is crucial. Sanding helps to remove any rough patches or splinters from the wood surface, allowing the finish to adhere better. Usually, 100 to 120-grit sandpaper is the best choice for sanding cedar wood. However, the grit size depends on the condition of the wood.
Pre-stain Conditioners
If you plan to stain your cedar wood, staining it directly without a pre-stain conditioner might lead to blotchiness and unevenness. A pre-stain conditioner is used to prep the wood surface before staining. It helps to seal the wood fibers and ensures that the stain is applied evenly.
Safety Measures
When sanding cedar wood, it is essential to wear a mask as cedar dust can be harmful to health. Also, sanding cedar wood produces a lot of dust, so it is best to work in a well-ventilated area.
In conclusion, finishing cedar wood is crucial to maintain its natural beauty and increase its lifespan. Whether you opt for protective coatings, natural finishes, or stains, the results will depend on how well you prepare the wood surface before applying the finish.
Tips For Sanding Cedar Wood Like A Pro
To sand cedar wood like a pro, it’s important to choose the right grit sandpaper. For rough cedar, start with 60-grit sandpaper and finish with 120-grit for a smoother surface. Always sand with the grain of the wood to avoid damage.
Sanding cedar wood can be challenging if you don’t know which sandpaper grit to use. Cedar is a softwood that can easily be scratched or damaged if you use the wrong sandpaper grit. However, with the right sandpaper grit and a few sanding tips, you can achieve a smooth and even finish on your cedar wood project.
Avoiding Common Sanding Mistakes
Before you start sanding your cedar wood, it’s important to avoid the following common sanding mistakes that beginners often make:
- Not using the right sandpaper grit
- Sanding too aggressively
- Not sanding evenly
- Skipping grits
Safety Precautions
When sanding cedar wood, it’s important to take the following safety precautions:
- Wear a dust mask to avoid inhaling sawdust, which can be harmful to your lungs
- Wear eye protection to prevent sawdust from getting into your eyes
- Wear gloves to protect your hands from splinters and sandpaper abrasions
- Work in a well-ventilated area to avoid inhaling sawdust
Which Grit Sandpaper For Cedar Wood?
The grit sandpaper you should use for cedar wood depends on the level of roughness of the wood. If you’re sanding rough cedar, start with 80-grit sandpaper and work your way up to 120-grit sandpaper for a smoother finish. If you’re sanding already smoothed cedar, you can start with 120-grit sandpaper and work your way up to 220-grit sandpaper for a polished finish.
Other Tips For Sanding Cedar Wood
- Use a sanding block to maintain even pressure and avoid sanding off too much material from the edges
- Sand with the grain of the wood to avoid scratches and marks
- Clean the surface with a damp cloth or sponge to remove sawdust before applying a finish or stain
- Avoid over-sanding one spot or area to prevent unevenness or dips in the wood
- Apply consistent pressure while sanding for an even finish
In conclusion, sanding cedar wood requires the right sandpaper grit, safety precautions, and some know-how to achieve a professional-looking finish. By avoiding common sanding mistakes, taking safety precautions, and following our tips for sanding cedar wood like a pro, you can achieve the desired finish for your next cedar wood project.
Frequently Asked Questions For What Grit Sandpaper For Cedar Wood
Should I Sand Cedar Wood?
Yes, sanding cedar wood is important before staining or finishing it. The recommended grit sandpaper for cedar wood is between 80 and 120. Use a regular blade to roughen the surface if you want a more textured look. Ensure the blade is flat and slide it gently over the board.
Take care not to cut into the wood too much.
How Do You Sand Cedar Before Staining?
Before staining cedar wood, it is important to sand it with the right grit sandpaper. The ideal grit sandpaper for cedar wood is between 80-120. Start with the 80 grit sandpaper to remove any rough spots and work up to the 120 grit sandpaper for a smooth finish.
Remember to sand in the direction of the wood grain and wipe the wood clean after sanding.
What Grit For Sanding Cedar Deck?
To sand a cedar deck, use a grit between 60 and 80 for initial sanding, followed by 100-120 grit for finishing. Be cautious not to over-sand to ensure the deck’s color and texture are preserved. Sand in the direction of the wood grain for the best results.
How Do You Make Smooth Cedar Look Rough?
To make smooth cedar look rough, use a regular blade with bent teeth. Lay the blade flat on the surface and slide it backward. Repeat until desired roughness is achieved. There is no need for sandpaper in roughening cedar.
Conclusion
Sanding cedar wood can be a challenging task, especially if you are unclear on which grit sandpaper to use. It’s essential to choose the correct type of sandpaper to ensure that your cedar woodwork ends up with a smooth and even finish.
After researching different techniques and reading our article on what grit sandpaper for cedar wood, you should now have a clear understanding of choosing the appropriate sandpaper for your project. By following our recommendations, you can achieve a beautiful final product that lasts for years to come.