When to Plant Japanese Maple Seeds Best Growth
Figuring out exactly when to plant Japanese maple seeds can feel tricky, especially if you’re just starting out with growing these beautiful trees. Many gardeners wonder if there’s a magic window for sowing seeds to give them the best start. It might seem complicated, but don’t worry!
This guide will break it down into simple steps. We’ll look at the best times and how to prepare for success, so you can confidently plant your Japanese maple seeds and watch them thrive.
Timing Your Japanese Maple Seed Planting
Knowing the ideal time to plant Japanese maple seeds is key to their successful germination and early development. This section will guide you through the most effective planting seasons and explain why timing matters so much for these particular seeds. We will cover the benefits of different planting periods and help you choose the perfect moment for sowing.
Fall Planting Benefits
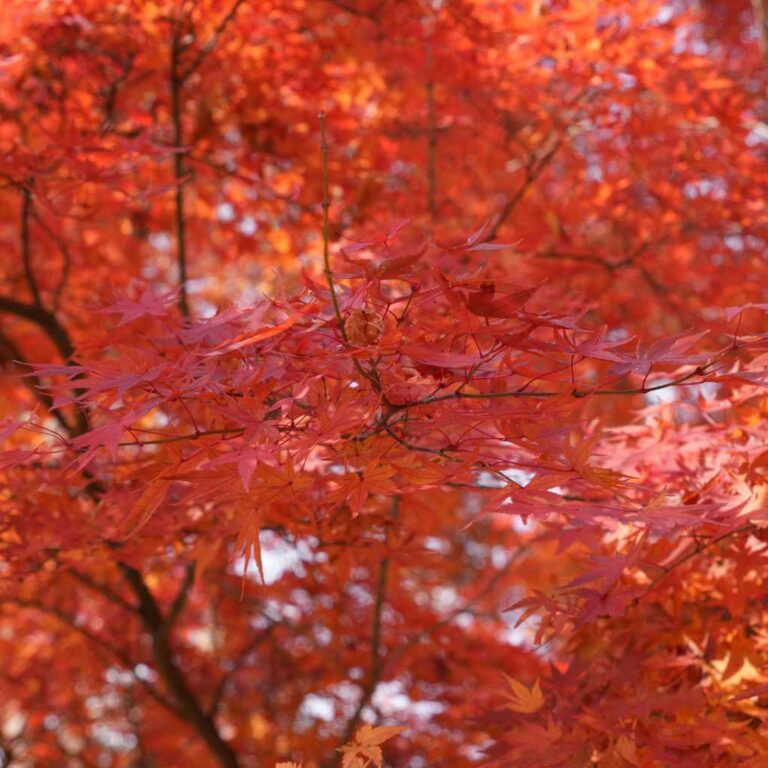
Planting Japanese maple seeds in the fall offers significant advantages for germination. The natural temperature fluctuations of winter mimic the stratification process these seeds often need. This period of cold and moisture helps to break dormancy, signaling the seeds that it’s time to grow when spring arrives.
Sowing in fall allows nature to do much of the work for you.
- Natural Stratification Process
Japanese maple seeds often require a period of cold, moist stratification to break dormancy. This means they need to experience cold temperatures for an extended time before they can sprout. Fall planting outside allows the seeds to undergo this natural process over the winter months.
The fluctuating temperatures, freezing and thawing, help to soften the seed coat and activate the embryo within. This is crucial for many varieties of Japanese maples, making fall the most natural and effective time for sowing. Without this cold period, germination rates can be very low.
- Moisture Availability
Throughout the winter, the soil remains consistently moist from rain and snow. This steady supply of water is essential for the stratification process. The moisture helps the seed coat to absorb water, which is necessary for the internal changes that lead to germination.
If seeds are planted in dry conditions, the stratification process can be delayed or even prevented. Fall planting ensures that the seeds are in a moist environment from the moment they are sown until they are ready to sprout in the spring.
- Reduced Work for the Gardener
For many gardeners, fall planting means less hands-on work compared to spring planting. Once the seeds are sown outdoors, they are left to the elements to do their job. There’s no need for artificial stratification in a refrigerator, which can be a tedious process for large numbers of seeds.
This hands-off approach is particularly appealing for beginners who might feel intimidated by more complex propagation techniques. It leverages the natural cycles of the season to achieve successful germination.
Spring Planting Considerations
While fall planting is often preferred, spring planting can also be successful, though it may require more deliberate effort. If you missed the fall window or live in a region with extremely harsh winters, spring offers an alternative. This approach often involves providing artificial stratification to mimic the cold period that the seeds would naturally experience.
Careful preparation ensures that spring-sown seeds can still achieve good germination rates.
Artificial Stratification for Spring Sowing
Artificial stratification is a technique used to simulate the cold, moist conditions that Japanese maple seeds need to break dormancy. This process is particularly useful when planting in the spring, as it ensures the seeds have undergone the necessary cold treatment before warm weather arrives. It involves storing the seeds in a moist medium under refrigerated temperatures for a specific period.
This careful preparation can significantly boost germination success rates for those planting seeds in the spring.
- The Stratification Process Explained
Artificial stratification typically involves mixing the Japanese maple seeds with a sterile, moist medium. Common mediums include peat moss, vermiculite, or sand. The seeds and medium are then placed in a sealed plastic bag or container.
This mixture is stored in a refrigerator, usually between 35°F and 41°F (1°C and 5°C), for a duration of 60 to 120 days, or even longer for some species. It is important to check the moisture level periodically and ensure the medium remains damp but not waterlogged. This controlled environment provides the consistent cold and moisture necessary to break seed dormancy.
When to Start Artificial Stratification
To time your spring planting correctly, you should begin the artificial stratification process in late winter or very early spring. Calculate backward from your last expected frost date. If your last frost is typically in May and you plan to sow seeds after this date, you should start stratification in January or February.
This ensures that by the time you plant the seeds outdoors or in pots after the danger of frost has passed, they have completed their cold treatment period. Accurate timing is crucial for success.
- Seed Preparation Before Stratification
Before you begin the stratification process, it’s a good idea to clean the seeds. Gently rinse them to remove any debris or fungal spores. Some gardeners also recommend a brief soaking of the seeds in warm water for 24 hours prior to stratification.
This can help to soften the seed coat further and encourage faster germination once the cold treatment is complete. Always use clean tools and materials to prevent introducing any harmful bacteria or fungi to the seeds during this sensitive stage.
Understanding Japanese Maple Seed Dormancy
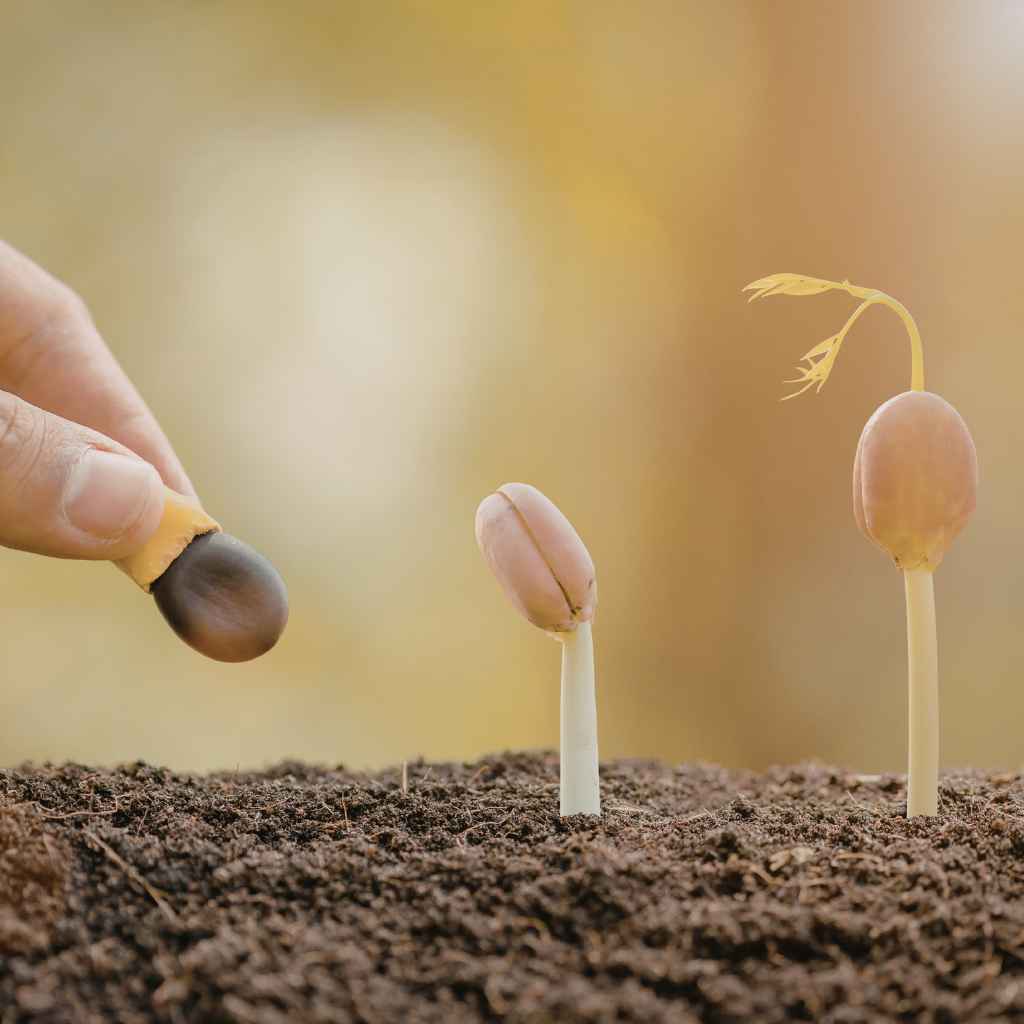
Japanese maple seeds are known for their complex dormancy requirements. This means they don’t just sprout when conditions are right; they have internal mechanisms that prevent germination until specific environmental cues are met. Understanding these cues, primarily the need for cold and moisture, is fundamental to successful seed propagation.
Dormancy can be a challenge for beginners, but with knowledge, it becomes manageable.
Physical Dormancy
Physical dormancy in Japanese maple seeds is often due to a hard or impermeable seed coat. This tough outer layer prevents water and oxygen from reaching the embryo inside, which is essential for germination. Over time, through natural weathering or artificial treatment, this seed coat can soften or crack, allowing germination to proceed.
This is one reason why the seeds may not sprout immediately even under seemingly ideal conditions.
- The Role of the Seed Coat
The seed coat of Japanese maples is remarkably tough. Its primary function is to protect the delicate embryo from damage, pests, and dehydration. However, this protection can also act as a barrier to germination.
For seeds to sprout, they need to absorb water, a process called imbibition, and exchange gases like oxygen. A hard seed coat can significantly impede or entirely prevent these vital exchanges, keeping the seed in a dormant state.
- Breaking Physical Dormancy
To overcome physical dormancy, methods that scarify or weaken the seed coat are employed. For Japanese maple seeds, this often happens naturally through the freeze-thaw cycles of winter when sown outdoors. Artificially, gardeners might nick the seed coat gently with a file or sandpaper, taking care not to damage the embryo.
Another common method is soaking the seeds in warm water for 24-48 hours, which can help to soften the coat and initiate imbibition. These techniques aim to allow moisture and oxygen to reach the embryo.
- Why It Matters for Planting Time
Understanding physical dormancy helps explain why certain planting times are more effective. If you plant seeds with intact, hard seed coats in warm, moist soil in spring, they might sit there for months without sprouting. The seed coat needs time and specific conditions to soften.
Fall planting allows nature to gradually weaken this coat over winter. For spring planting, techniques that mimic this weakening are necessary to ensure germination happens in a timely manner.
Chemical Dormancy
Chemical dormancy is another layer of complexity in Japanese maple seeds. This involves the presence of certain chemical inhibitors within the seed that actively suppress germination. These inhibitors are often washed away or broken down by cold temperatures and moisture, which is why stratification is so effective.
Removing these chemical blocks is just as important as breaking through the physical seed coat.
- Germination Inhibitors
Inside the seed, there are natural compounds that prevent the embryo from developing too early. These compounds, often referred to as germination inhibitors, act as a “kill switch” that keeps the seed dormant. They are produced by the parent tree and can persist within the seed until specific environmental triggers are met.
These triggers essentially signal to the seed that it’s safe and appropriate to begin growing.
- The Role of Cold and Moisture
Cold temperatures and consistent moisture are the primary signals that break chemical dormancy. During the stratification period, whether natural or artificial, the seed slowly absorbs water. This moisture helps to leach out or metabolize the inhibitory chemicals.
The cold temperatures themselves also play a role in breaking down these inhibitors. Together, they create an environment where the seed’s growth-promoting hormones can begin to work.
- Impact on Planting Strategy
Recognizing chemical dormancy highlights the importance of stratification for Japanese maple seeds. If you attempt to germinate seeds without providing the necessary cold and moist period, they are unlikely to sprout, even if planted at the perfect time of year. This is why simply sowing seeds in spring without prior stratification is often unsuccessful.
The seeds need that chilling period to become receptive to germination signals.
Preparing Your Seeds for Planting
Before you even think about sowing your Japanese maple seeds, proper preparation is essential. This involves not only understanding their dormancy but also taking steps to ensure they are healthy and ready to germinate. This section covers pre-treatment and cleaning steps that greatly improve your chances of success, regardless of when you choose to plant.
Scarification Techniques
Scarification is the process of weakening or breaking the hard outer coat of a seed to allow water and oxygen to enter. For Japanese maple seeds, this is a vital step if you’re not relying solely on natural winter stratification. Various methods can be used, ranging from simple physical abrasion to more involved techniques.
Each method aims to make the seed coat more permeable.
- Mechanical Scarification
Mechanical scarification involves physically altering the seed coat. A common and effective method is to gently rub the seeds against sandpaper or a metal file. The goal is to create a tiny nick or abrasion in the seed coat, exposing the inner kernel without damaging the embryo.
Be very careful during this process; over-filing can destroy the seed. Focus on creating a small breach, and then rinse the seeds thoroughly afterward to remove any dust or debris.
- Soaking Seeds
Soaking seeds in water is another widely used scarification technique. For Japanese maples, soaking the seeds in warm water for 24 to 48 hours can be very beneficial. This process allows the seeds to absorb moisture, which helps to soften the seed coat.
It also initiates the initial stages of imbibition, the uptake of water necessary for germination. Make sure to change the water every 8-12 hours to keep it fresh and prevent fungal growth.
- Using Hot Water
A more aggressive scarification method involves using hot water, but it must be done with extreme caution. Pouring boiling water over the seeds and letting them soak as the water cools can rapidly soften the seed coat. However, if the water is too hot or the seeds soak for too long, it can cook and kill the embryo.
A common approach is to pour hot but not boiling water over the seeds and let them soak for 12-24 hours, or until the seeds begin to swell. This method is often combined with cold stratification.
Cleaning and Sterilizing
Ensuring your seeds are clean and free from contaminants is crucial for preventing fungal diseases and promoting healthy germination. Any debris, old seed husks, or potential pathogens can hinder growth or even kill young seedlings. Proper cleaning and sterilization help to give your Japanese maple seeds a clean start.
- Washing the Seeds
Begin by gently rinsing your Japanese maple seeds under cool, running water. You can use a fine-mesh sieve for this. The goal is to remove any surface dirt, dust, or loose fragments.
If you’ve collected seeds directly from a tree, this step is especially important to get rid of any insect eggs or fungal spores that might be clinging to them. Thorough rinsing helps to prepare them for further treatments.
- Using a Mild Fungicide or Hydrogen Peroxide
For an extra layer of protection, you can sterilize your seeds. One method is to briefly soak the seeds in a diluted solution of hydrogen peroxide (about 1 part 3% hydrogen peroxide to 3 parts water) for 5-10 minutes. Alternatively, a very mild, diluted fungicide specifically designed for seeds can be used according to product instructions.
After sterilization, rinse the seeds thoroughly with clean water to remove any residue.
- Importance of Sterility for Seedlings
Young seedlings are extremely vulnerable. Their delicate root systems and developing leaves can easily succumb to common soil-borne diseases like damping-off, which is caused by fungi. By starting with clean, sterilized seeds and using sterile growing media, you significantly reduce the risk of these diseases.
This proactive approach ensures that your efforts in stratification and planting are not undone by preventable infections, leading to healthier, stronger young trees.
Best Practices for Planting Japanese Maple Seeds
Once your seeds are prepared and you know the ideal time to plant, the next step is to get the actual sowing right. This involves choosing the correct planting medium, providing appropriate depth, and ensuring the right environmental conditions. These practices lay the foundation for strong seedling development.
Choosing the Right Planting Medium
The medium you use to sow your Japanese maple seeds is critical. It needs to provide good drainage, aeration, and retain just enough moisture to keep the seeds viable without becoming waterlogged. Using the wrong type of soil can lead to fungal issues or prevent germination altogether.
A well-balanced mix is essential for young seedlings.
- Seed Starting Mix
A good quality seed-starting mix is usually the best choice. These mixes are typically lightweight, sterile, and formulated to provide excellent drainage and aeration. They often contain ingredients like peat moss, perlite, and vermiculite.
This combination ensures that the tiny roots of germinating seeds can easily penetrate the medium and receive the oxygen they need to grow. Avoid using heavy garden soil, which can compact easily and suffocate developing roots.
- DIY Potting Mix
If you prefer to make your own mix, a common recipe for Japanese maple seeds is equal parts peat moss, perlite, and coarse sand. The peat moss helps retain moisture, the perlite ensures good drainage and aeration, and the sand adds further drainage and stability. Whichever mix you choose, ensure it is free of weed seeds and pathogens by either purchasing a sterile mix or sterilizing your homemade blend.
- Moisture Retention and Drainage Balance
The balance between moisture retention and drainage is crucial. Japanese maple seeds need consistent moisture to germinate, but they are also susceptible to rot if the soil stays too wet. Perlite and coarse sand are key ingredients for achieving this balance.
They create air pockets within the soil, allowing for oxygen circulation while still holding enough water for the seeds to access. This prevents the soil from becoming a stagnant, disease-prone environment.
Sowing Depth and Spacing
How deep you plant your seeds and how much space you give them directly impacts their ability to sprout and grow. Planting too deep can prevent emergence, while too shallow can lead to drying out. Proper spacing ensures that each seedling has room to develop without competing for resources.
- Ideal Planting Depth
For most Japanese maple seeds, a planting depth of about 1/4 to 1/2 inch (0.6 to 1.3 cm) is ideal. This depth provides enough covering to protect the seed from drying out and to deter small pests, yet it’s shallow enough for the seedling’s first shoot to emerge without difficulty. If you’ve scarified or soaked the seeds, they may be ready to germinate with less depth, but this general guideline is safe.
- Spacing for Seedlings
If you are sowing seeds directly into a seed tray or pot, space them about 1 to 2 inches (2.5 to 5 cm) apart. This gives each seedling enough room to grow for the first few months without immediate overcrowding. If you plan to transplant them into individual pots soon after germination, you can sow them slightly closer together.
Overcrowding in the early stages can lead to competition for light, water, and nutrients.
- Watering After Sowing
After sowing, water the medium gently but thoroughly. A common method is to use a watering can with a fine rose or a spray bottle to avoid disturbing the seeds. The goal is to moisten the entire soil volume without washing the seeds out of place.
Covering the pot or tray with a clear plastic lid or bag can help maintain consistent moisture and humidity, creating a microclimate conducive to germination.
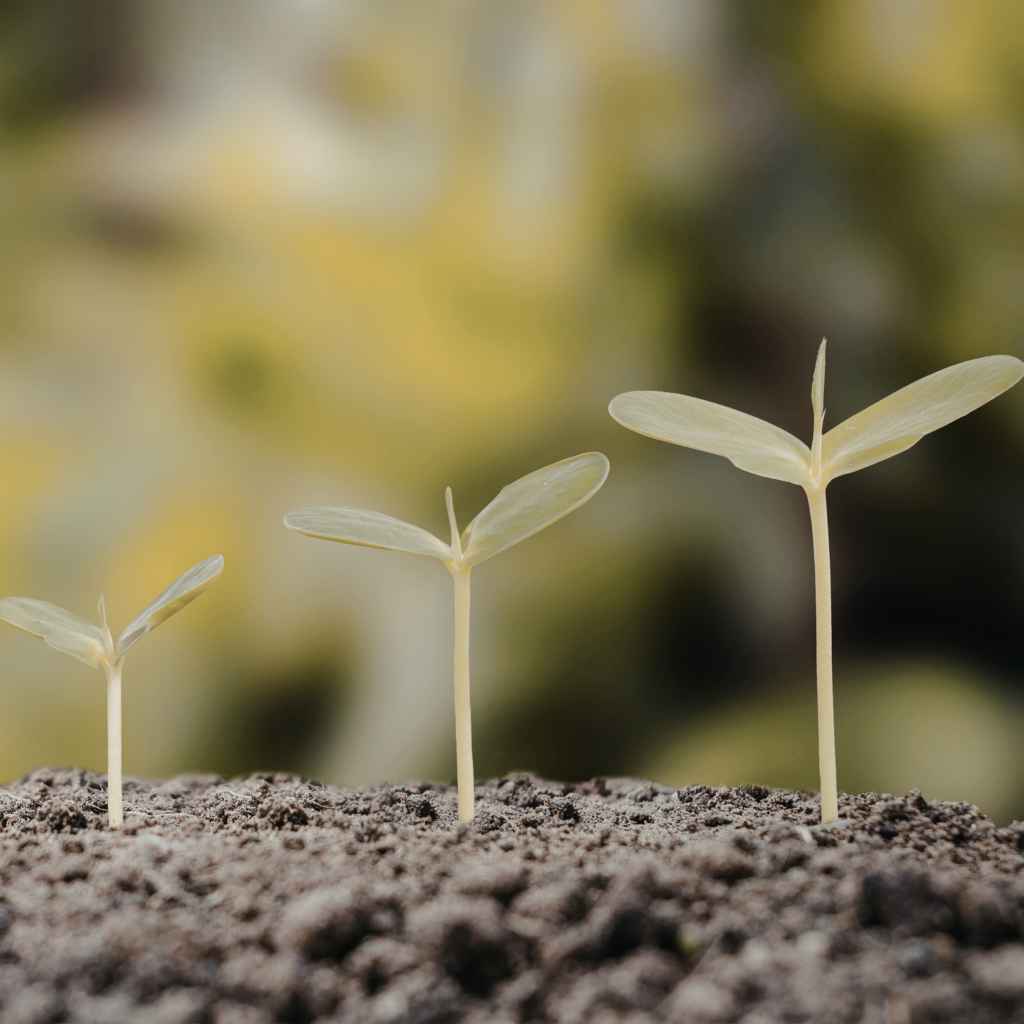
Care for Young Japanese Maple Seedlings
The period immediately after germination is critical for young Japanese maple seedlings. They are fragile and require specific care to thrive and develop into healthy young trees. This section will guide you through providing the right light, water, and protection to ensure your seedlings make it through their initial stages of growth.
Light and Temperature Requirements
Providing the correct light and temperature conditions is essential for the healthy development of Japanese maple seedlings. Too much direct sun can scorch their delicate leaves, while too little light can result in weak, leggy growth. Maintaining a stable, moderate temperature further supports their early growth.
- Indirect Sunlight is Best
Once your Japanese maple seeds have germinated and you see tiny green shoots emerging, they will need light. However, direct, intense sunlight can be too harsh for young seedlings. Place them in a location that receives bright, indirect sunlight.
An east-facing window or a spot under a grow light set to a timer for 12-16 hours a day is ideal. This provides the energy needed for photosynthesis without the risk of sunburn.
- Ideal Temperature Range
Japanese maple seedlings generally prefer moderate temperatures, similar to what you’d find in a spring garden. An ideal range is between 65°F and 75°F (18°C to 24°C). Avoid placing seedlings near heat sources or in drafty areas, as sudden temperature fluctuations can shock them.
Consistent temperatures will promote steady and healthy growth, helping them develop strong root systems.
- Monitoring Seedling Health
Regularly observe your seedlings for signs of stress. Yellowing leaves can indicate too much direct sun or overwatering, while thin, elongated stems reaching for light suggest insufficient light. Adjusting their location or the duration of artificial light can help correct these issues.
Early intervention is key to preventing long-term damage and ensuring robust growth.
Watering and Humidity
Maintaining the right moisture level in both the soil and the air is crucial for young seedlings. They need consistent hydration, but they are also susceptible to fungal diseases if the environment is too damp. Finding that balance is key to their survival and healthy development.
- Consistent Moisture, Not Wetness
Keep the soil consistently moist, but not waterlogged. The top layer of the soil should feel slightly damp to the touch. Water when the surface begins to dry out.
It’s better to water thoroughly and less often than to give frequent, shallow waterings, which can encourage shallow root growth. Use a gentle stream or a spray bottle to avoid displacing the soil and delicate seedlings.
- Maintaining Humidity Levels
Young seedlings benefit from higher humidity levels, which mimic their natural environment. If you are growing them indoors, especially in dry climates or heated homes, consider using a humidity tray or a propagation dome. A clear plastic dome or lid placed over the seed tray can trap moisture and increase humidity.
Ensure there is some ventilation to prevent mold.
- Signs of Over or Underwatering
Wilting leaves can be a sign of both overwatering (due to root rot) and underwatering. If the soil is soggy and the leaves are wilting, it’s likely overwatering. If the soil is dry and the leaves are wilting or crisping, it’s underwatering.
Regularly checking the soil moisture with your finger is the most reliable way to gauge your seedlings’ needs. Adjust your watering schedule accordingly.
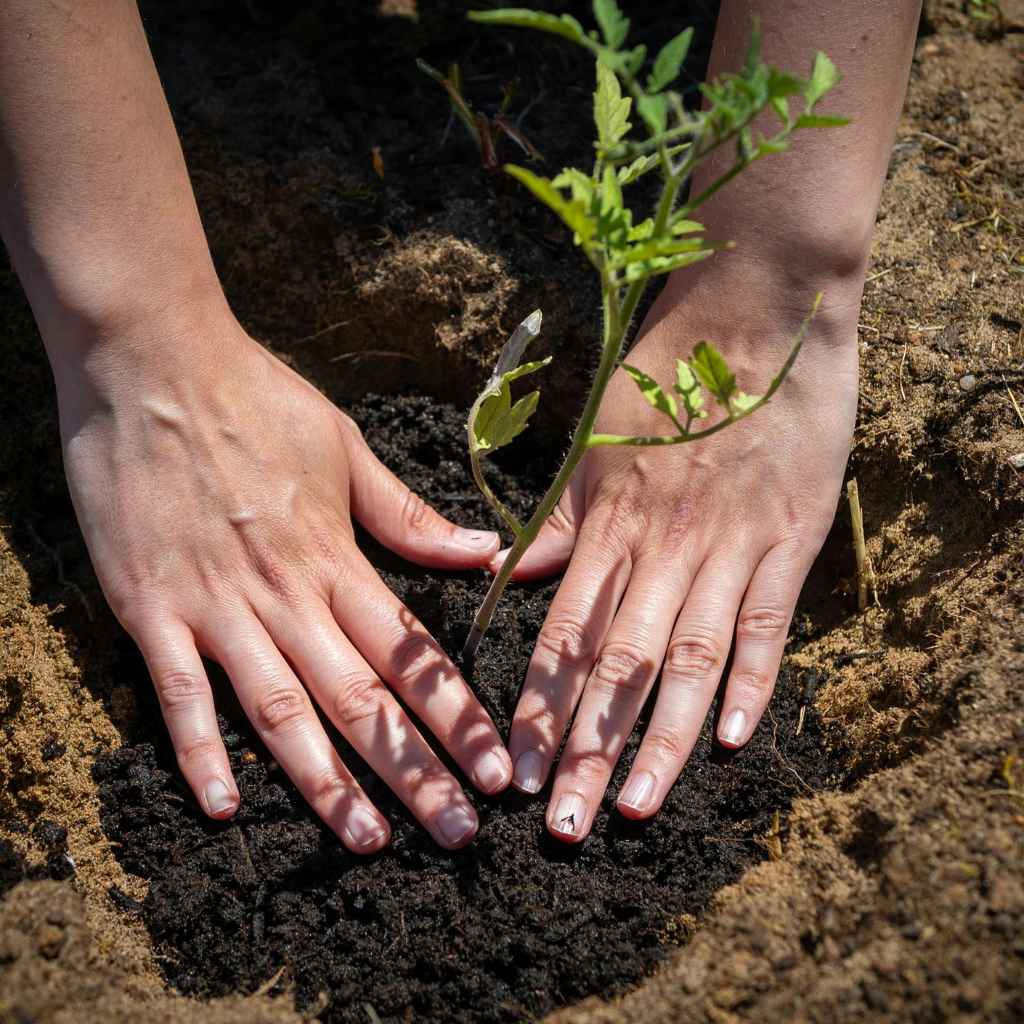
Transplanting Seedlings
Eventually, your Japanese maple seedlings will outgrow their starting pots. Transplanting them into larger containers is an important step in their development, allowing their root systems to expand and their overall growth to accelerate. This process needs to be done carefully to minimize stress on the young plant.
- When to Transplant
You should transplant your seedlings when they have developed their first set of true leaves and their roots are beginning to fill the current pot, often indicated by roots starting to emerge from the drainage holes. This is typically when they are a few inches tall. It’s best to transplant them before they become severely root-bound, as this can stunt their growth.
- Choosing New Pots
Select pots that are a few inches larger in diameter than the current ones. Ensure the new pots have adequate drainage holes. For young seedlings, plastic pots are often preferred as they retain moisture better than terracotta pots, which can dry out more quickly.
However, terracotta allows for better air circulation to the roots.
- The Transplanting Process
Gently remove the seedling from its current pot, being careful not to disturb the roots too much. If the soil is dry, water it lightly beforehand to make removal easier. Place the seedling in the new pot at the same depth it was previously growing.
Fill around it with a good quality potting mix, water thoroughly, and place it in a shaded area for a few days to recover before returning it to its usual bright, indirect light spot.
Frequently Asked Questions
Question: When is the best time to plant Japanese maple seeds outdoors
Answer: The best time to plant Japanese maple seeds outdoors is in the fall. This allows the seeds to naturally stratify over the winter months, which is essential for germination.
Question: Do Japanese maple seeds need stratification
Answer: Yes, Japanese maple seeds typically require a period of cold, moist stratification to break dormancy. This means they need to experience cold temperatures for an extended duration.
Question: How long does it take for Japanese maple seeds to germinate
Answer: Germination times can vary significantly, but it often takes anywhere from 60 days to over a year, especially if stratification is not properly managed.
Question: Can I start Japanese maple seeds indoors
Answer: Yes, you can start Japanese maple seeds indoors, but you will need to perform artificial stratification in a refrigerator before sowing them indoors in spring.
Question: What kind of soil should I use for Japanese maple seeds
Answer: Use a well-draining seed-starting mix. A blend of peat moss, perlite, and coarse sand works well to provide aeration and retain adequate moisture without becoming waterlogged.
Summary
Planting Japanese maple seeds at the right time, typically in fall for natural stratification or in early spring after artificial chilling, is key for successful germination. Proper seed preparation through scarification and cleaning, along with using a good soil mix and consistent care for seedlings, will help your young trees thrive. Following these steps ensures you give your Japanese maple seeds the best possible start for robust growth.