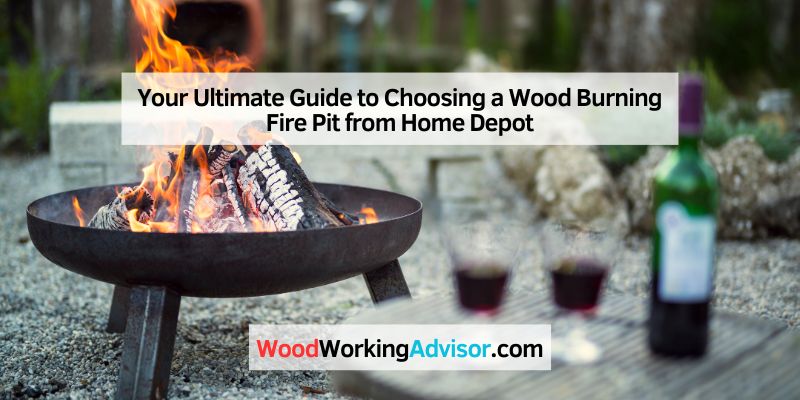
Your Ultimate Guide to Choosing a Wood Burning Fire Pit from Home Depot
Hey there! If you’re dreaming of cozy evenings in your backyard, gathered around a warm, crackling fire, you’re in the right place. There’s something magical about a wood-burning fire pit—it’s like bringing the charm of a campfire right to your home. I’ve spent hours exploring the options at Home Depot, both online and in-store, and let me tell you, their selection of wood-burning fire pits is impressive. Whether you’re a seasoned outdoor enthusiast or just looking to spruce up your patio, a wood-burning fire pit from Home Depot can transform your space into a welcoming retreat. In this guide, I’ll walk you through everything you need to know to pick the perfect fire pit, from styles and materials to safety tips and maintenance. Let’s dive in and find the one that’s just right for you!
Why Choose a Wood-Burning Fire Pit?
I love the authentic feel of a wood-burning fire pit. The sound of logs popping, the smoky aroma, and the glow of real flames create an experience that’s hard to beat. Unlike gas or propane fire pits, wood-burning models give you that classic campfire vibe. They’re also versatile—you can use them for warmth, ambiance, or even cooking s’mores with the kids. Home Depot offers a wide range of wood-burning fire pits, from budget-friendly options to premium designs, so there’s something for every taste and wallet.
Wood-burning fire pits are also eco-friendly in their own way. They use natural wood, which is renewable, and you can source logs locally to reduce your carbon footprint. Plus, they don’t rely on gas tanks or fuel lines, which means less hassle and fewer ongoing costs. But, they do require some upkeep, like cleaning out ashes and storing wood properly. For me, the trade-off is worth it for that authentic, rustic charm.
Exploring Home Depot’s Wood-Burning Fire Pit Collection
When I first browsed Home Depot’s website, I was amazed by the variety. They stock everything from sleek, modern fire pits to rustic, cauldron-style designs. Prices range from as low as $50 for simple models to over $500 for high-end, heavy-duty options. Let’s break down some of the popular types you’ll find:
Fire Pit Bowls
These are lightweight, portable, and perfect for small spaces. I saw models like the Hampton Bay 30-inch steel fire pit, priced around $150, which is a great balance of affordability and durability. The deep bowl design holds plenty of wood and keeps embers contained.
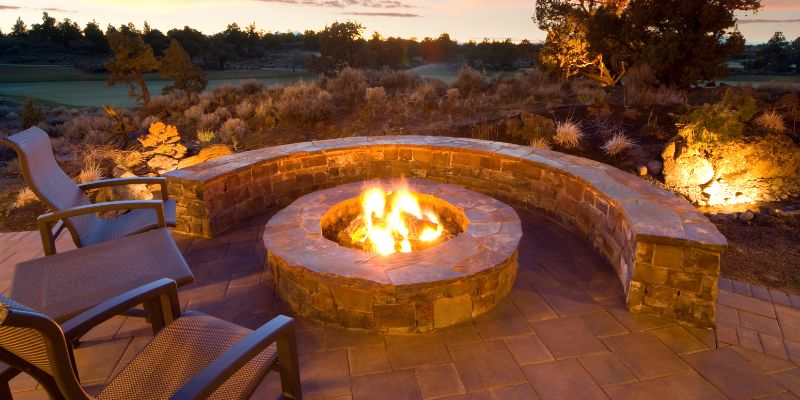
Cauldron-Style Fire Pits
If you’re going for a bold, rustic look, cauldron-style pits are a showstopper. They’re deeper and often come with a stand or tripod. I found one at Home Depot for about $200 that had a cast iron finish—perfect for a cozy, woodland aesthetic.
Smokeless Fire Pits
Smokeless fire pits, like the Solo Stove Bonfire (around $300), are a game-changer. I tested one in my backyard, and the reduced smoke made it so much more enjoyable to sit around. They use a double-wall design to burn wood more efficiently, cutting down on smoke by about 70%. It’s not completely smokeless, but it’s a huge improvement.
Fire Pit Kits
For DIY lovers, Home Depot offers fire pit kits with stackable stone or concrete blocks. These are great if you want a custom look without the hassle of sourcing materials. A kit like the Pavestone Rumblestone, priced around $450, includes everything you need to build a sturdy, professional-looking fire pit.
Here’s a quick comparison of some popular options:
| Fire Pit Type | Price Range | Best For | Key Features |
|---|---|---|---|
| Fire Pit Bowl | $50–$200 | Small patios, portability | Lightweight, easy to move |
| Cauldron-Style | $150–$300 | Rustic aesthetics | Deep bowl, durable materials |
| Smokeless Fire Pit | $250–$600 | Smoke-sensitive environments | Reduced smoke, efficient burning |
| Fire Pit Kit | $300–$600 | DIY enthusiasts, custom designs | Stackable blocks, professional look |

Factors to Consider When Choosing Your Fire Pit
Picking the right fire pit isn’t just about looks—it’s about finding one that fits your lifestyle and space. Here’s what I learned when narrowing down my options at Home Depot:
Size and Space
Measure your outdoor area before you shop. A fire pit that’s 3 to 4 feet in diameter is ideal for most backyards, providing enough room for a good fire while keeping everyone close enough to chat. If you’ve got a small patio, go for a compact bowl-style pit, around 24 inches wide. For larger yards, a 36-inch or bigger model makes a bold statement. I made the mistake of eyeballing it once and ended up with a pit that overwhelmed my deck—don’t skip the measuring tape!
Material Matters
Home Depot’s fire pits come in materials like steel, cast iron, aluminum, and stone. Steel is lightweight and affordable but can rust if not covered. Cast iron is super durable but heavy. Stone or concrete kits look stunning and last forever, but they’re pricier and less portable. I went with a steel model because I wanted something I could move around easily, but I make sure to cover it when it’s not in use.
Safety Features
Safety is huge with wood-burning fire pits. Look for models with spark screens to keep embers from flying out. Some Home Depot options, like the Sunnydaze 36-inch fire pit, come with a screen and a poker tool for safe log handling. You’ll also want a fire pit with a stable base to prevent tipping. I always keep a bucket of water nearby, just in case.
Portability
If you like to move your fire pit for storage or camping, choose a lightweight model. The BioLite FirePit Plus, priced around $250 at Home Depot, weighs under 20 pounds and doubles as a grill. I took one camping last summer, and it was a breeze to pack.
Budget
You don’t have to break the bank to get a great fire pit. Home Depot has options for every budget. If you’re spending under $100, you can still find sturdy steel bowls. For $200–$400, you get premium features like smokeless technology or a DIY kit. I found that spending a bit more upfront often means better durability and fewer headaches down the road.
Setting Up Your Fire Pit Safely
I can’t stress this enough: safety comes first. A wood-burning fire pit is a joy, but it’s still an open flame. Here’s how I set mine up to keep things safe and fun:
Choose the Right Location
Place your fire pit at least 10 feet away from your house, trees, or anything flammable. I picked a spot in my backyard on a gravel base to avoid scorching the grass. Check your local regulations—some towns have strict rules about fire pit placement. Home Depot’s website has a great guide on this, which I found super helpful.
Prepare the Base
Never put a fire pit directly on a wooden deck or grass. I used paver stones to create a stable, fire-resistant base. Home Depot sells fire pit pads for about $30, which are perfect for protecting surfaces. If you’re building a kit, make sure the ground is level and compacted.
Fire Safety Essentials
Always have a fire extinguisher or hose nearby. I keep a small extinguisher on my patio for peace of mind. Use only seasoned, dry hardwood like oak or maple to minimize smoke and sparks. Avoid softwoods like pine, which can pop and throw embers. Home Depot sells kiln-dried firewood, which I highly recommend for cleaner burning.
Extinguishing the Fire
When you’re done, don’t just walk away. I let my fire burn down to ash, then douse it with water and stir until it’s cool to the touch. Home Depot’s fire pit kits often include snuffer lids, which make this process easier and safer.
Maintaining Your Wood-Burning Fire Pit
To keep your fire pit looking great and working well, a little maintenance goes a long way. Here’s what I do to care for mine:
Clean Out Ashes
After every use, I scoop out the ashes once they’re completely cool. Home Depot sells ash buckets for around $15, which make this job easy. Leaving ashes in the pit can cause rust or corrosion, especially in steel models.
Protect Against Rust
If you’ve got a metal fire pit, cover it when it’s not in use. I bought a weather-resistant cover from Home Depot for about $25, and it’s saved my pit from rain and snow. If you notice any scratches, touch them up with high-heat paint to prevent rust.
Store Properly
In winter, I store my portable fire pit in the garage to protect it from harsh weather. For permanent kits, make sure the area drains well to avoid water pooling, which can damage the blocks.
Inspect Regularly
Before each use, I check for cracks or weak spots, especially in stone or concrete pits. A quick inspection can prevent accidents and extend the life of your fire pit.
Enhancing Your Fire Pit Experience
Once you’ve got your fire pit, it’s time to make it the heart of your outdoor space. Here are some ideas I’ve tried to elevate the experience:
Add Comfortable Seating
I surrounded my fire pit with cushioned Adirondack chairs from Home Depot (around $40 each). They’re comfy and add a classic vibe. For larger groups, consider a sectional sofa or benches for extra seating.
Create Ambiance
String lights or lanterns add a magical glow. I hung some solar-powered string lights from Home Depot for about $20, and they make my backyard feel like a resort. You can also add a few potted plants or tall greenery for a cozy, woodsy feel.
Accessorize
Home Depot has tons of fire pit accessories, like grilling grates for cooking or fire glass for a pop of color. I got a grate for about $30, and now I can grill burgers right over the fire. It’s a hit with my friends!
Host Fire Pit Nights
Invite friends over for a marshmallow roast or a storytelling night. I’ve found that a fire pit naturally brings people together. Keep a stack of dry firewood and some homemade fire starters (like dryer lint stuffed in cardboard tubes) to make starting the fire a breeze.
DIY Fire Pit Ideas with Home Depot Materials
If you’re feeling handy, building your own fire pit is a rewarding project. I built one last summer using a Home Depot fire pit kit, and it was easier than I expected. Here’s how you can do it:
Materials You’ll Need
- Fire pit kit (Pavestone Rumblestone is a great choice, around $450)
- Crushed gravel for the base ($5 per bag)
- Construction adhesive ($8 per tube)
- Fire bricks for the interior ($2 each)
- Hand tamper ($30)
- Level and measuring tape
Step-by-Step Process
- Choose Your Spot: Pick a level area at least 10 feet from structures. Mark a circle with a stake and string.
- Prepare the Base: Dig a 7-inch deep hole, then fill it with 5 inches of crushed gravel. Compact it with a tamper.
- Lay the First Layer: Arrange the blocks in a circle or square, ensuring they’re level and touching.
- Build Up: Stack additional layers, using adhesive between rows for stability.
- Add the Fire Bowl: Place the fire pit insert or bowl on top, ensuring it fits securely.
- Finish with Fire Bricks: Line the interior with fire bricks to protect the blocks from heat.
This project took me a weekend and cost about $500, but it looks like a professional job. Home Depot’s DIY guides were a lifesaver for getting the measurements right.
Why Home Depot Is My Go-To for Fire Pits
I keep going back to Home Depot for a few reasons. First, their selection is unmatched—you’ll find everything from budget bowls to premium smokeless models. Second, their website is super user-friendly, with filters for price, material, and customer ratings. I also love their free shipping on most fire pits and the option to pick up in-store for instant gratification. Plus, their staff are knowledgeable and can help you find exactly what you need. If you sign up for their email list, you get $5 off your first purchase, which is a nice bonus.
Conclusion
There’s nothing like sitting around a wood-burning fire pit, watching the flames dance and feeling the warmth on a cool evening. After exploring Home Depot’s vast selection, I’m convinced they have the perfect fire pit for every backyard and budget. Whether you’re drawn to a sleek smokeless model or a rustic stone kit, you’ll find something that sparks joy. I’ve loved turning my backyard into a cozy haven with my Home Depot fire pit, and I’m sure you will too. So, grab a tape measure, check your space, and head to Home Depot to find your dream fire pit. Here’s to countless nights of laughter, s’mores, and memories by the fire!
FAQs
What’s the Best Wood-Burning Fire Pit for a Small Patio?
For small patios, I recommend a compact fire pit bowl, like the Hampton Bay 24-inch steel model from Home Depot, priced around $100. It’s lightweight, easy to move, and fits well in tight spaces without sacrificing heat.
Are Smokeless Fire Pits Worth the Extra Cost?
Absolutely, if you’re sensitive to smoke or have close neighbors. I tried the Solo Stove Bonfire, and the reduced smoke made a huge difference. They’re pricier (around $300), but the cleaner burn is worth it for frequent use.
How Do I Keep My Fire Pit from Rusting?
I prevent rust by covering my steel fire pit with a weather-resistant cover from Home Depot ($25). Clean out ashes after each use, and touch up scratches with high-heat paint. Storing it indoors during winter helps too.
Can I Build a Fire Pit Myself?
Yes, it’s totally doable! I built one using a Pavestone Rumblestone kit from Home Depot. It took a weekend and cost about $500. Follow their DIY guide, use fire bricks for the interior, and you’ll have a pro-looking fire pit.
What Type of Wood Should I Burn?
I stick to seasoned hardwoods like oak or maple, which burn hot and produce less smoke. Home Depot sells kiln-dried firewood, which is my go-to for a clean, safe fire. Avoid softwoods like pine, as they spark more.