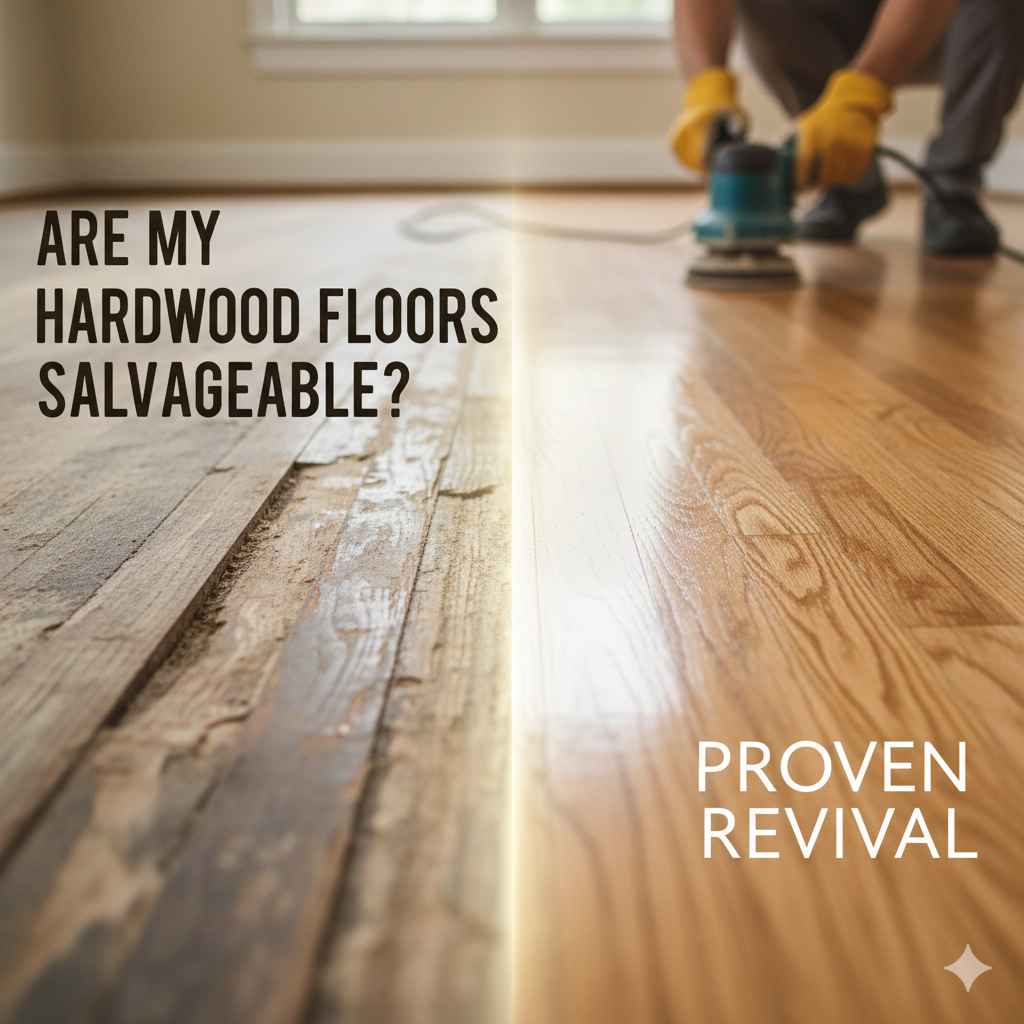
Are My Hardwood Floors Salvageable: Proven Revival
Your hardwood floors are likely salvable, even if they look dull, scratched, or worn. With the right approach, you can revive their natural beauty and add lasting value to your home. This guide will walk you through assessing their condition and choosing the best revival method.
Seeing your beautiful hardwood floors lose their shine can be disappointing. Scratches, dings, and a general lack of luster can make a room feel tired. The good news is that hardwood is incredibly durable and often can be brought back to life with a little care and effort. You don’t always need a professional or a complete replacement. This guide is here to help you figure out if your floors can be restored and show you exactly how to do it. We’ll go from simple clean-ups to more involved refinishing, empowering you to give your floors a new lease on life.
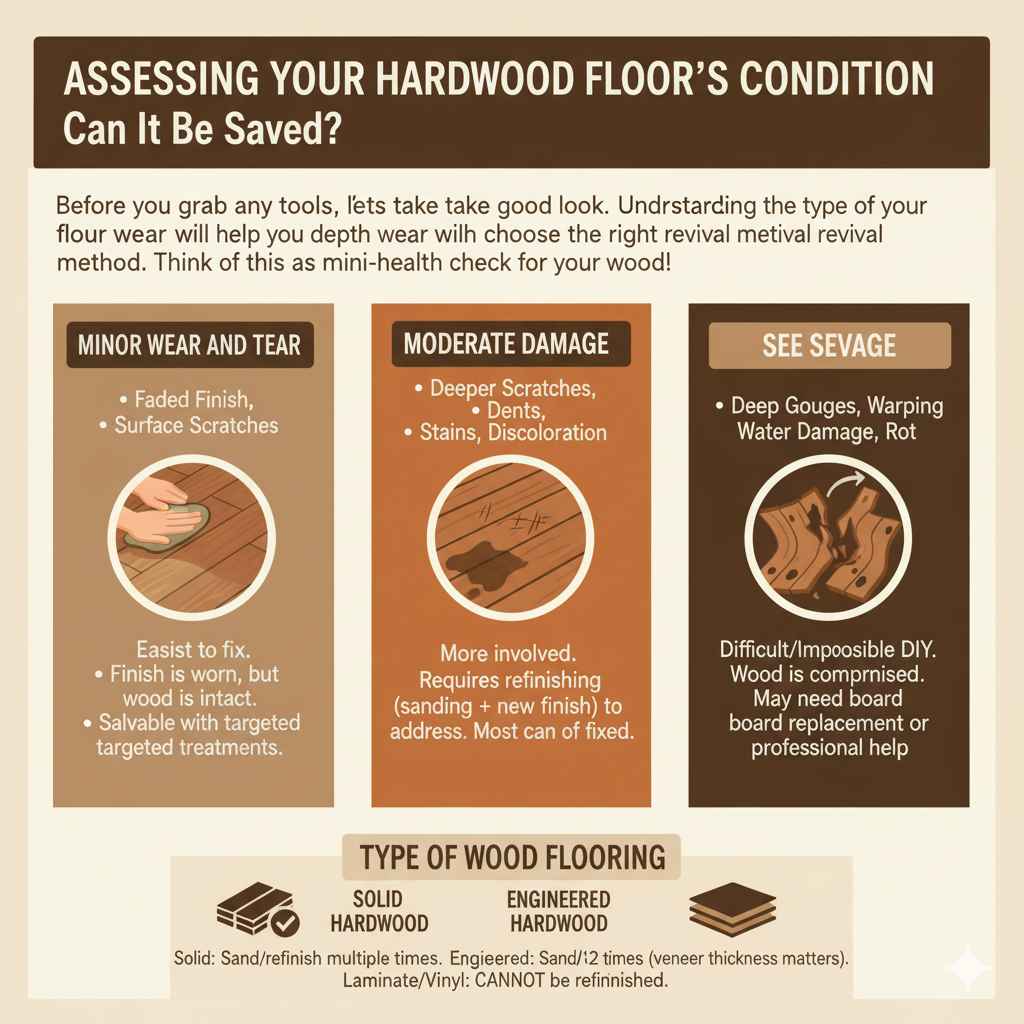
Assessing Your Hardwood Floor’s Condition: Can It Be Saved?
Before you grab any tools, let’s take a good look at your floors. Understanding the type and depth of wear will help you choose the right revival method. Think of this as a mini-health check for your wood!
Minor Wear and Tear: Faded Finish, Surface Scratches
If your floors are generally intact but just look a bit dull or have light scratches that haven’t gone through the wood’s color layer, you’re in luck! This is the easiest type of wear to tackle. The finish might be worn, but the wood itself is still in good shape. These floors are absolutely salvable with targeted treatments.
Moderate Damage: Deeper Scratches, Dents, Stains, Discoloration
This is where things get a little more involved. If you see scratches that show lighter wood underneath, noticeable dents, or areas where the color has changed (perhaps from spills or pet accidents), your floors are still likely salvable. However, you’ll probably need to consider refinishing to address these issues. The good news is that most of these can be fixed by removing the old finish and sanding the wood down to a fresh surface.
Severe Damage: Deep Gouges, Warping, Water Damage, Rot
Honestly, if your floors have deep gouges that have split the wood, sections that are warped out of shape, or signs of rot or extensive water damage, recovery might be difficult or even impossible for DIY revival. Warping means the wood has fundamentally changed shape, and rot means it’s structurally compromised. In these cases, you might be looking at replacing individual boards or, in the worst scenarios, the entire floor. However, don’t despair entirely – sometimes, even severely damaged wood can be a candidate for professional assessment and repair.
Type of Wood Flooring
The type of hardwood you have also matters. Most solid hardwood floors can be sanded and refinished multiple times. Engineered hardwood floors (made of a thin top layer of hardwood over plywood) can usually be refinished once or twice, depending on the thickness of the top veneer. Laminate and vinyl flooring, however, cannot be refinished like real hardwood.
Revival Methods for Salvageable Hardwood Floors
Once you’ve assessed the condition of your floors, it’s time to choose the best way to bring them back to life. We’ll start with the simplest solutions and move to more involved ones.
Method 1: Deep Cleaning and Polishing (For Minor Wear)
Sometimes, all your floors need is a really good clean and a protective polish. This is perfect for floors that look dull but don’t have many visible scratches.
Tools and Materials:
- Good quality hardwood floor cleaner (pH-neutral)
- Microfiber mops (at least two – one for cleaning, one for rinsing/drying)
- Buckets
- Soft cloths or towels
- Hardwood floor polish (compatible with your floor’s finish)
Steps:
- Clear the Room: Remove all furniture, rugs, and decor from the area.
- Thorough Vacuuming/Sweeping: Use a vacuum with a soft brush attachment or sweep with a soft-bristle broom to remove all loose dirt, dust, and debris. Don’t skip this step – you don’t want to grind grit into the wood.
- Prepare Cleaning Solution: Mix your hardwood floor cleaner with water according to the product’s instructions. Use a pH-neutral cleaner to avoid damaging the finish. You can find great guides on pH-neutral cleaners from resources like EPA’s Safer Choice program, which often discusses safe cleaning agents.
- Damp Mop: Lightly dampen one of your microfiber mop heads. It should be damp, not wet. Excess water is the enemy of hardwood floors and can cause significant damage.
- Clean the Floor: Mop the floor in sections, working with the grain of the wood. Rinse the mop frequently in clean water and wring it out thoroughly.
- Rinse (Optional but Recommended): After cleaning, use a second mop head with plain clean water to lightly “rinse” any cleaner residue. Again, ensure the mop is only damp.
- Dry Thoroughly: Use dry microfiber cloths or towels to immediately dry any water spots or damp areas. Good airflow from open windows or fans also helps speed up drying.
- Buff and Polish: Once the floor is completely dry, apply a thin, even layer of hardwood floor polish according to the manufacturer’s instructions. You can usually apply this with a clean microfiber cloth or a special applicator pad. Let it dry completely (usually 30-60 minutes, but check the bottle). You might want to buff lightly with a clean, dry cloth after it dries for extra shine.
Method 2: Screen and Recoat (For Moderate Wear)
If your floors have some dullness and a fair number of surface scratches that haven’t penetrated the wood’s color layer, “screening and recoating” is a great option. This process lightly abrades the existing finish and then applies a new protective coat on top. It’s less intensive than full sanding and great for extending the life of your floors.
Tools and Materials:
- Scraper (for edges and corners)
- Shop vacuum with a fine dust filter
- Sanding screen (e.g., 120-150 grit)
- Floor buffer with a screen attachment (or a pole sander for small areas)
- Tack cloth or microfiber cloths
- High-quality polyurethane finish (water-based or oil-based, depending on your preference and existing finish)
- Applicator for finish (e.g., lamb’s wool applicator, high-quality synthetic brush)
- Painter’s tape
- Safety glasses and dust mask/respirator
Steps:
- Prepare the Room: Clear everything out, just like in Method 1.
- Clean Thoroughly: Vacuum and sweep meticulously.
- Edge Sanding: For areas the buffer can’t reach (edges, corners), use a scraper or detail sander with the appropriate grit sandpaper to slightly scuff the old finish.
- Screening: Attach the sanding screen to your floor buffer or use a pole sander. Go over the entire floor surface. The goal is to lightly abrade the existing finish, not to sand down to bare wood. Work systematically, moving in different directions (e.g., east-west, then north-south) to ensure an even “dullness” of the finish.
- Vacuum and Tack: After screening, vacuum up all the dust with the shop vac. Then, use a tack cloth or a slightly damp microfiber cloth to pick up any remaining fine dust particles. This is crucial for a smooth finish.
- Edge Clean: Ensure edges and corners are also dust-free.
- Apply New Finish: Carefully read and follow the instructions for your chosen polyurethane finish.
- Water-based finishes: Dry faster, low odor, available in varying sheens. Usually requires multiple thin coats.
- Oil-based finishes: More durable, deeper amber tone, longer drying times, stronger odor. Often applied in fewer coats but requires more curing time.
- Application: Pour a small amount of finish onto the floor in a manageable section. Use your applicator (e.g., lamb’s wool applicator for oil-based, synthetic for water-based) to spread the finish evenly, working with the grain of the wood. Avoid applying too thickly, which can lead to drips and unevenness. Maintain a “wet edge” – always blend into the previously coated section while it’s still wet.
- Second Coat (and Subsequent): Allow the first coat to dry thoroughly according to the manufacturer’s instructions. Lightly screen again with very fine grit (e.g., 220 grit) or use a cleaning pad if instructed, vacuum, and tack before applying the next coat. Most projects need two coats, but three may be recommended for high-traffic areas.
- Curing: Allow the final coat to cure fully before moving furniture back. This can take several days to a couple of weeks, depending on the finish. Check the product details.
Method 3: Full Sanding and Refinishing (For Deeper Damage)
This is the heavy-duty option for floors with significant scratches, dents, and general wear that have gone through the top finish layer. It involves sanding down to the bare wood and applying a completely new finish.
Tools and Materials:
- Drum sander and edge sander (rented from a tool rental store)
- Vacuum cleaner with fine dust filter
- Sandpaper of various grits (e.g., 36-60 grit for initial sanding, 80-100 grit for intermediate, 120-150 grit for final sanding)
- Hand scrapers or sanding blocks for corners and edges
- Tack cloths or microfiber cloths
- Stain (optional, if you wish to change the color)
- Your chosen finish (polyurethane, etc.)
- Applicators for stain and finish
- Painter’s tape
- Safety glasses, dust mask/respirator, knee pads
Steps:
- Clear and Prepare: Remove everything from the room. Seal off vents and doorways with painter’s tape and plastic sheeting to prevent dust from spreading throughout your home.
- Initial Prep: Remove any old nails, staples, or debris. Check for any protruding nails and hammer them down below the wood surface.
- First Pass Sanding (Coarse Grit): Attach the coarse grit sandpaper (e.g., 36-60) to the drum sander. Start sanding the main floor area. Work with the grain of the wood in long, overlapping passes. Do not stop the sander in one spot, as it will create divots.
- Edge Sanding: Use the edge sander to sand all the perimeter areas, trying to match the depth and direction of the drum sander.
- Corner and Detail Work: Use hand scrapers or a detail sander for corners and tight spots.
- Intermediate Pass Sanding (Medium Grit): Switch to a medium grit sandpaper (e.g., 80-100). Repeat the process with the drum sander and edge sander, then detail work. This step removes the scratches from the coarser grit.
- Final Pass Sanding (Fine Grit): Install the finest grit sandpaper (e.g., 120-150) on the drum sander. Make one final pass over the entire floor. This creates a smooth surface ready for finishing.
- Thorough Cleaning: This is critical. Vacuum the entire floor using a vacuum with a HEPA filter. Then, use tack cloths or slightly damp microfiber cloths to pick up every last speck of dust. Pay extra attention to corners and edges. Failure to remove all dust will result in a gritty finish.
- Staining (Optional): If you want to change the color of your floors, apply wood stain now. Work in small sections, applying the stain evenly with a brush or cloth and wiping off the excess immediately with a clean cloth, following the wood grain. Allow the stain to dry completely (usually 24-48 hours). For understanding wood staining, many architectural preservation sites offer great insights into color and application.
- Apply Finish Coats: Apply your chosen finish (polyurethane, etc.) in thin, even coats. Follow the same application techniques described in Method 2 (Screen and Recoat). Allow each coat to dry thoroughly, lightly buffing with a very fine grit pad (e.g., 220-320) or screen between coats if recommended by the manufacturer, and always vacuum and tack afterwards. Typically, 2-3 coats are needed.
- Curing: Allow the floor to cure fully before replacing furniture. This is essential for durability and can take up to 30 days for some oil-based finishes.
Choosing the Right Finish
The finish you choose is important for both the look and the longevity of your revived floors. Here’s a quick look at common options:
| Finish Type | Pros | Cons | Best For |
|---|---|---|---|
| Polyurethane (Water-Based) | Fast drying, low odor, clear finish, durable. | Can be less durable than oil-based in high traffic if not premium quality, can look slightly less “warm.” | Homes with pets/kids, quick projects, those sensitive to odors. |
| Polyurethane (Oil-Based) | Very durable, provides a warm, amber tone, good for high traffic. | Slower drying, strong odor, can amber significantly over time changing the wood color. | High-traffic areas, achieving a classic, warm look. |
| Varnish (e.g., Urethane Alkyd Varnish) | Durable, good resistance to abrasion and chemicals. | Can darken with age, may have strong odors. | Areas needing robust protection. |
| Wax (Applied over finish or on bare wood) | Natural, matte or satin sheen, easy spot repair. | Not very durable, easily damaged by water or spills, requires frequent reapplication, not suitable for high traffic. | Restoration of antique floors, low-traffic areas where a natural look is paramount. |
Safety First!
Wood floor work, especially sanding, creates a lot of dust and involves tools that can be dangerous if not handled properly. Always prioritize safety:
- Ventilation: Ensure good airflow, especially when using finishes with strong fumes. Open windows or use fans.
- Dust Protection: Always wear a high-quality dust mask or respirator, especially during sanding.
- Eye Protection: Wear safety glasses to protect your eyes from dust and debris.
- Hearing Protection: If using power tools like a floor sander for extended periods, use earplugs or earmuffs.
- Tool Familiarity: Read the manuals for any power tools you use. Understand how they operate before you start.
- Electrical Safety: Be mindful of cords, especially when using electrical sanders on a wet floor (which you should never do).
- Chemicals: Handle finishes and solvents with care. Follow manufacturer instructions for safe handling and disposal.
For a deeper dive into tool safety, resources like the Occupational Safety and Health Administration (OSHA) provide extensive guidelines for woodworking and construction safety.

Frequently Asked Questions (FAQ)
Q1: How do I know if my floor can be refinished?
A: Solid hardwood floors can typically be sanded and refinished multiple times. Engineered hardwood floors can usually be refinished once or twice, depending on the thickness of the top hardwood veneer. If the veneer is very thin, or if the wood is warped, water damaged, or has deep gouges splitting the wood, it may not be salvable through typical refinishing.