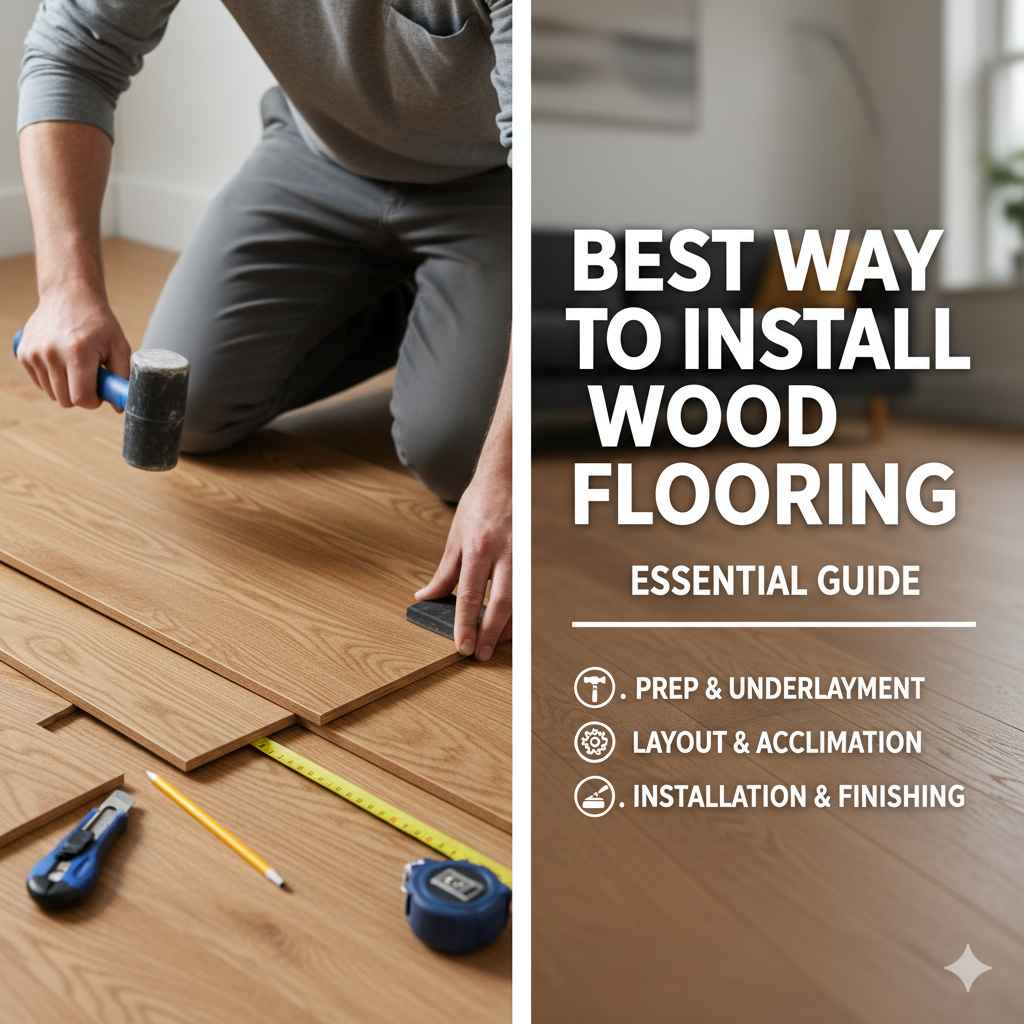
Best Way To Install Wood Flooring: Essential Guide
The best way to install wood flooring for beginners involves meticulous subfloor preparation, acclimation of the wood, and following a clear, step-by-step installation process using the right tools. This guide will walk you through it all, ensuring a beautiful, durable floor you can be proud of.
Thinking about installing wood flooring? It’s a fantastic way to add warmth and beauty to your home. But if you’re new to DIY projects like this, it can feel a bit daunting. You might worry about making mistakes or ending up with a floor that doesn’t look quite right. Don’t let that stop you! With the right guidance and a little patience, installing wood flooring is totally achievable. This guide breaks down everything you need to know, step-by-step, making the process clear and manageable. Let’s transform your space together!
Why DIY Wood Flooring?
Installing your own wood flooring can be incredibly rewarding. Beyond the obvious aesthetic upgrade, it’s a fantastic skill to learn and a great way to save money. Many homeowners shy away from this project, thinking it requires professional expertise. However, with modern flooring options like click-lock or engineered wood, the DIY barrier is lower than ever. You gain the satisfaction of a job well done and a beautiful, lasting improvement to your home. Plus, you’ll have a better understanding of your home’s construction!
Choosing Your Wood Flooring
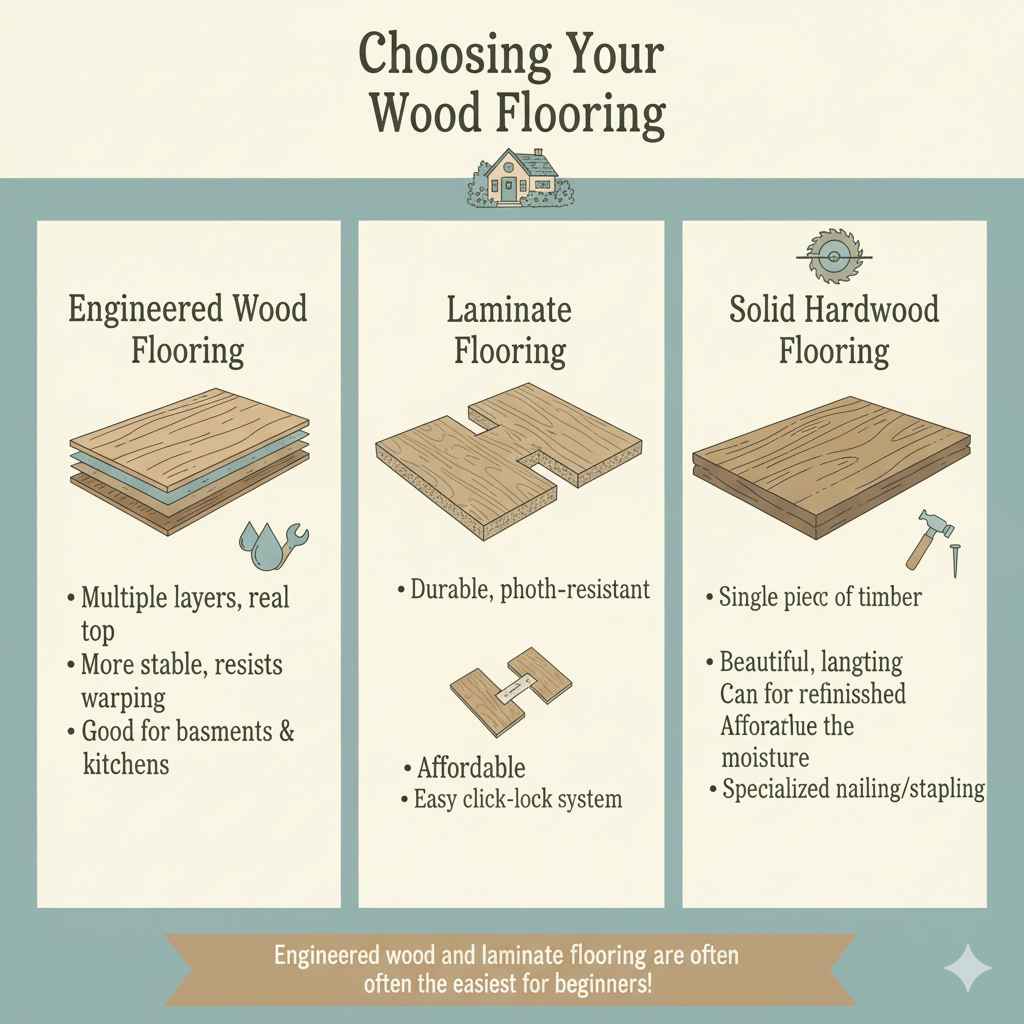
Before we dive into installation, let’s talk about the star of the show: your wood flooring. There are several types, each with its own benefits and installation methods. For beginners, engineered wood and laminate flooring are often the easiest to work with.
Engineered Wood Flooring
Engineered wood is made of multiple layers of wood composite topped with a real wood veneer. This construction makes it more stable than solid hardwood, meaning it’s less likely to warp or expand with changes in humidity. It’s a great choice for areas prone to moisture fluctuations, like basements or kitchens.
Laminate Flooring
Laminate flooring is a synthetic product, essentially a photographic image of wood placed on a fiberboard core. It’s incredibly durable, scratch-resistant, and often the most affordable option. Many laminate floors use a click-lock system, which is very forgiving for beginners.
Solid Hardwood Flooring
Solid hardwood is milled from a single piece of timber. It’s beautiful and can be sanded and refinished multiple times, lasting for generations. However, solid hardwood is more sensitive to moisture and typically requires more specialized installation, often involving nailing or stapling down.
Preparation is Key: Setting Yourself Up for Success
Just like any great project, success in installing wood flooring hinges on thorough preparation. Rushing this stage is a common pitfall that can lead to problems down the line. We need to ensure our foundation is ready!
1. Inspect and Prepare the Subfloor
Your subfloor is the foundation of your new wood floor. It needs to be clean, dry, flat, and structurally sound. Common subfloors are concrete or plywood/OSB (Oriented Strand Board).
Plywood or OSB Subfloors:
- Cleanliness: Sweep and vacuum thoroughly. Remove any old adhesive, paint, or debris.
- Flatness: Use a long, straight edge (like a 6-foot level) to check for low spots or high spots. Low spots can be filled with a leveling compound. High spots might need to be sanded down. The general rule of thumb is that the subfloor should not deviate more than 1/8 inch over a 6-foot span.
- Levelness: Ensure the subfloor is level. If it’s significantly out of level, you may need to use a self-leveling underlayment.
- Soundness: Check for any loose boards or squeaks. Secure them with screws.
- Moisture: Ensure there’s no sign of water damage or excessive moisture.
Concrete Subfloors:
- Cleanliness: Remove all paint, sealers, waxes, and old adhesives. A concrete grinder can be useful here.
- Flatness: Similar to wood subfloors, check for flatness with a straight edge. Use a concrete patching compound or leveling agent for low spots and grind down high spots.
- Moisture: This is critical for concrete. You must perform a moisture test. A simple method is to tape a 2-foot square of plastic sheeting tightly to the concrete for 24 hours. If you see condensation on the underside of the plastic or the concrete darkens, there’s excess moisture that needs addressing, possibly with a moisture barrier. The Building Science Corporation offers in-depth information on concrete moisture.
- Curing: Ensure the concrete has fully cured. New concrete can take weeks or months to adequately dry out.
2. Acclimate Your Flooring
This is a crucial step often overlooked by beginners but vital for the longevity of your wood floor. Wood is a natural material that expands and contracts with changes in temperature and humidity. Acclimating your flooring means letting it sit in the room where it will be installed for a specific period, usually 48-72 hours, with the HVAC system running at a normal temperature.
Keep the flooring in its original, unopened packaging during this process. This allows the wood to adjust to the typical moisture and temperature levels of your home, significantly reducing the risk of warping, buckling, or gapping after installation.
3. Gather Your Tools and Materials
Having everything ready before you start will make the installation process smoother and more efficient. Here’s a list of essential tools and materials:
Essential Tools:
- Measuring tape
- Pencil
- Utility knife
- Tapping block (specifically for your flooring type)
- Pull bar (for the last row)
- Safety glasses
- Work gloves
- Dust mask
- Broom and vacuum cleaner
- Pry bar
- Hammer
- Jigsaw or miter saw (for cutting boards)
- Optional: Floor nailer/stapler (for solid hardwood), underlayment roller, chalk line, straight edge (6-foot level).
Essential Materials:
- Your chosen wood flooring
- Underlayment (if required by your flooring manufacturer – this often adds cushioning and moisture protection)
- Moisture barrier (typically a plastic sheeting if installing over concrete or in basements)
- Expansion gap spacers (to maintain space between the floor and walls)
- Possibly: Wood filler or leveling compound for subfloor repairs.
4. Plan Your Layout
Consider the direction you want to lay your planks. Typically, planks are laid parallel to the longest wall in the room or perpendicular to the joists in the subfloor. This can make a room feel longer or wider. Also, think about where doorways and transitions will be.
It’s a good practice to dry-lay a few rows to visualize the final look and identify any potential issues, like narrow cuts at the end of rows.
The Installation Process: Step-by-Step Guide
Now for the exciting part! We’ll break down the installation process for floating floors (like many click-lock engineered and laminate options), which are the easiest for DIYers. If you’re installing solid hardwood, the process will involve nailing or stapling, which often requires specialized tools. Always consult your specific flooring manufacturer’s instructions!
Step 1: Install Underlayment and Moisture Barrier (If Needed)
If your flooring manufacturer recommends an underlayment, lay it down according to their instructions. For floating floors, the underlayment typically unrolls and severs its own seams or uses an adhesive. If you are installing over concrete or in a basement, lay down a moisture barrier before the underlayment. Overlap the seams of the moisture barrier by at least 6 inches and tape them securely.
This barrier acts as a shield against moisture rising from the subfloor, which is crucial for preventing damage to your wood.
Step 2: Start Your First Row
Begin in the corner of the room that is furthest from the main entry door. This way, your first planks will be hidden as people enter, and the most visible planks will be laid last, allowing for more precise cuts. Lay your first plank with the tongue side facing the wall. You might need to remove the tongue from the planks that will face the wall using a utility knife or saw.
Ensure your first row is perfectly straight. A crooked first row will make the entire floor look off. Use spacers between the planks and the wall to create an expansion gap. This gap is essential for allowing the flooring to expand and contract naturally. The gap size is usually specified by the manufacturer, often ranging from 1/4 inch to 1/2 inch. A good trick is to use several spacers along the wall.
Step 3: Connect Subsequent Planks in the First Row
Take your second plank and connect its tongue into the groove of the first plank. Most click-lock systems require you to angle the second plank down until it clicks or locks into place. You may need to use a tapping block and hammer gently to ensure a tight, seamless fit along the length of the plank. A tapping block protects the edges of your flooring from damage.
Step 4: Laying the Second Row and Beyond
For the second row, start with the offcut from the first plank (if it’s at least 6 inches long) or a new plank cut to a different length to create a staggered pattern. A staggered pattern breaks up the straight lines of the planks and looks more natural. Avoid aligning the seams of adjacent rows too closely; a random or offset pattern is best. Many manufacturers recommend at least a 6-inch offset for the end joints.
Connect the long edge of the second-row planks to the first row by angling and lowering them. Then, connect the short ends of the planks in the second row. You might need to use your tapping block on the short ends as well to achieve a tight fit. Continue this process row by row, always ensuring a tight fit between planks and maintaining your expansion gap along the walls.
Step 5: Cutting Your Last Row
The last row will likely require cutting your planks to fit. Measure the distance from the edge of the already installed flooring to the wall, remembering to subtract the width of your expansion gap. You may need to cut off the tongue of the last row of planks so they fit snugly against the wall. Lay the last plank upside down on top of the second-to-last row (with the wall-facing side touching the wall), mark the cut line, and then cut. A jigsaw is often best for cutting around irregular obstacles like doorframes.
Use a pull bar to gently tap the last row into place, ensuring a tight fit against the previous row. Remember to also use spacers between the last row and the wall for your expansion gap.
Step 6: Install Trim and Transitions
Once the flooring is laid, remove all your spacers. You’ll need to cover the expansion gaps around the perimeter of the room and at doorways. Install baseboards or quarter-round molding to cover the gaps where the flooring meets the walls. For doorways and transitions to other flooring types, use appropriate transition strips (e.g., T-molding, reducers) which are typically nailed or glued down.
Table: Common Wood Flooring Installation Methods & Pros/Cons
Here’s a quick comparison of the most common DIY-friendly installation methods:
| Installation Method | Best For | Pros | Cons | Beginner Friendliness |
|---|---|---|---|---|
| Floating (Click-Lock) | Engineered Wood, Laminate, Vinyl Plank | Easy to install, no adhesive or nails needed, forgiving, can be installed over existing floors (check manufacturer) | Can be less durable than nailed/glued, may produce a hollow sound | High |
| Nail-Down/Staple-Down | Solid Hardwood, some Engineered Wood | Very secure, can be refinished multiple times (solid hardwood), gives a traditional look | Requires specialized tools (nailer/stapler), more labor-intensive, subfloor must be suitable | Medium (requires specific tools & technique) |
| Glue-Down | Engineered Wood, some Laminate | Secure, can be installed over concrete, provides good sound dampening | Messy, requires precise adhesive application, difficult to remove | Medium (requires care with adhesive) |
Maintaining Your New Wood Floor
Congratulations! You’ve installed a beautiful new wood floor. To keep it looking its best for years to come, a little regular maintenance goes a long way.
- Sweep or Vacuum Regularly: Use a soft-bristle attachment for your vacuum to avoid scratching. This removes dirt and grit that can wear down the finish over time.
- Clean Spills Immediately: Wood doesn’t like standing water. Wipe up spills promptly with a dry or slightly damp cloth.
- Use Gentle Cleaners: Avoid harsh chemicals, ammonia-based cleaners, or excessive water. A wood floor cleaner specifically designed for your type of finish is best, or a very lightly damp mop with water.
- Protect from Furniture: Use felt pads on the legs of chairs, tables, and other furniture to prevent scratches.
- Manage Humidity: Try to maintain a consistent humidity level in your home, ideally between 35-55%, depending on manufacturer recommendations. Use a humidifier or dehumidifier as needed.
- Avoid High Heels and Cleats: These can dent or scratch even the most durable finishes.
For specific care instructions, always refer to the guidelines provided by your flooring manufacturer. They know their product best!
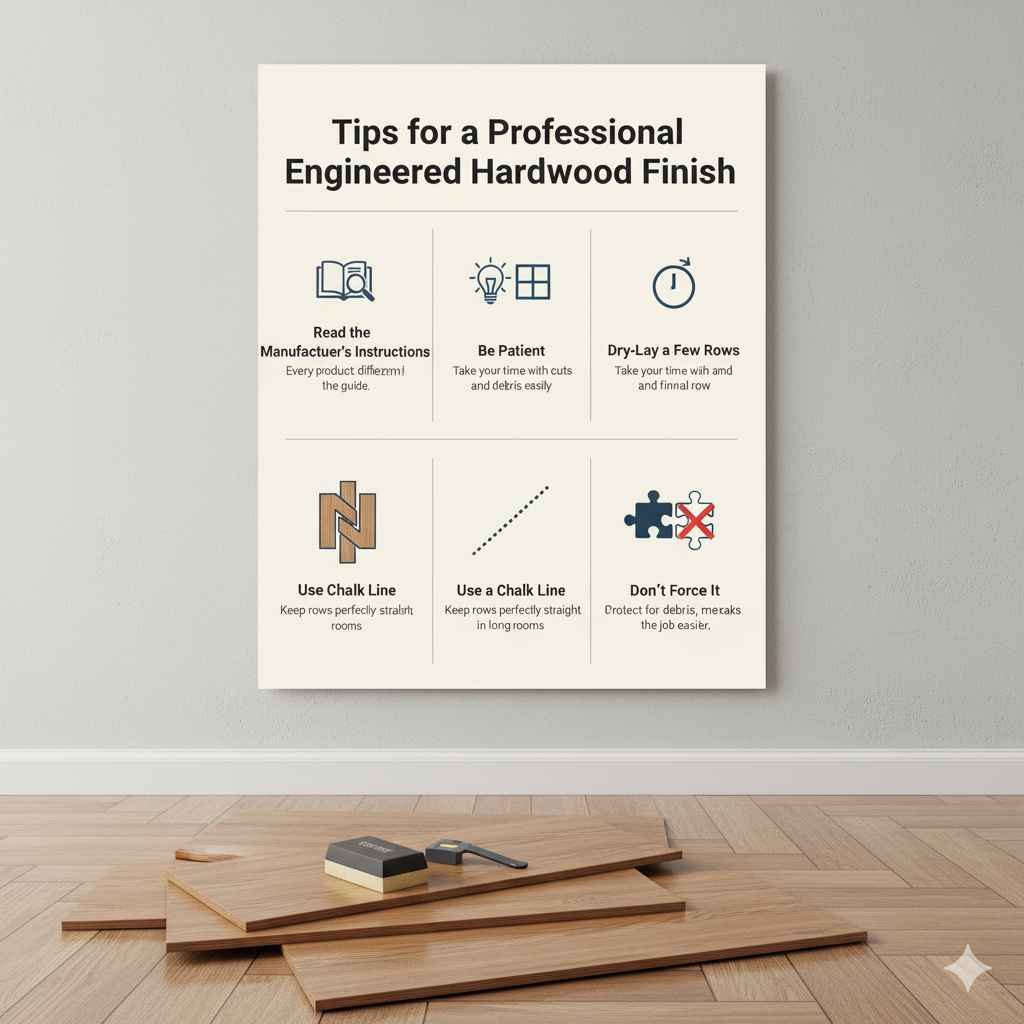
Tips for a Professional Finish
Even as a beginner, you can achieve professional-looking results by following these tips:
- Read the Manufacturer’s Instructions: This cannot be stressed enough. Every flooring product is slightly different.
- Work in Good Lighting: This helps you spot gaps, debris, or imperfections easily.
- Be Patient: Take your time, especially with cuts and the final row.
- Dry-Lay a Few Rows: This lets you visualize the pattern and ensure no awkward small cuts will dominate a visible area.
- Use a Chalk Line: For very long rooms, a chalk line can help you keep your rows perfectly straight.
- Don’t Force It: If planks aren’t clicking together easily, re-check for debris or obstructions. Forcing them can break the locking mechanism.
- Invest in Quality Tools: A good tapping block and pull bar will protect your flooring and make the job easier.
Frequently Asked Questions (FAQs)
Q1: How long does it take to install wood flooring?
The time it takes can vary greatly depending on the room size, your experience level, and the type of flooring. For a beginner in a medium-sized room (e.g., 10×12 feet), a floating floor might take 1-2 full days. This includes preparation and cleanup. Nailing solid hardwood will likely take longer.
Q2: Can I install wood flooring over my existing carpet?
Generally, no. You must have a clean, flat, and structurally sound subfloor. Carpet padding and carpet are not suitable subfloors. You’ll need to remove the carpet and its underlayment first to expose the subfloor.
Q3: Do I need to leave an expansion gap?
Yes, absolutely! All wood flooring, especially floating floors, needs an expansion gap around the perimeter of the room and any fixed objects (like cabinets or columns). This gap allows the wood to expand and contract with changes in humidity and temperature without buckling or damaging walls. Always check your manufacturer’s recommendations for the required gap size.
Q4: What’s the difference between engineered wood and laminate?
Engineered wood has a real wood veneer on top, offering a genuine wood look and feel. Laminate has a photographic image of wood. Engineered wood is generally more expensive but can sometimes be refinished. Laminate is typically more durable, scratch-resistant, and affordable, but cannot be refinished.
Q5: When should I consider hiring a professional?
If you have a very complex room layout, intricate patterns like inlays, or if you are installing solid hardwood and lack the specialized nailing tools, hiring a professional might be a wise choice. Also, if your subfloor has significant damage or leveling issues that you’re uncomfortable addressing, professional help is recommended.