Can I Paint Over Shellac: Genius Essential Tips
Yes, you can absolutely paint over shellac, and it’s a great way to update old furniture! The secret is proper preparation. You must clean the surface thoroughly, scuff sand it lightly, and most importantly, use a high-quality bonding primer. This ensures the new paint sticks beautifully and prevents stains from bleeding through.
Have you ever found a beautiful piece of old furniture, perfect for your home, but the finish is just… not right? Maybe it’s a dated, orangey-brown dresser or a chair with a glossy, yellowed coating. Chances are, you’re looking at a shellac finish. It’s a classic, but it can feel like a major roadblock when you’re dreaming of a fresh coat of paint.
Many people get nervous here. They worry the paint will peel right off or that ugly stains will seep through. But I’m here to tell you that you don’t need to be a professional to get a professional-looking result. With a few simple steps, you can transform that piece from dated to stunning.
In this guide, I’ll walk you through everything you need to know, from identifying shellac to applying that final perfect coat of paint. Let’s get that project done right!
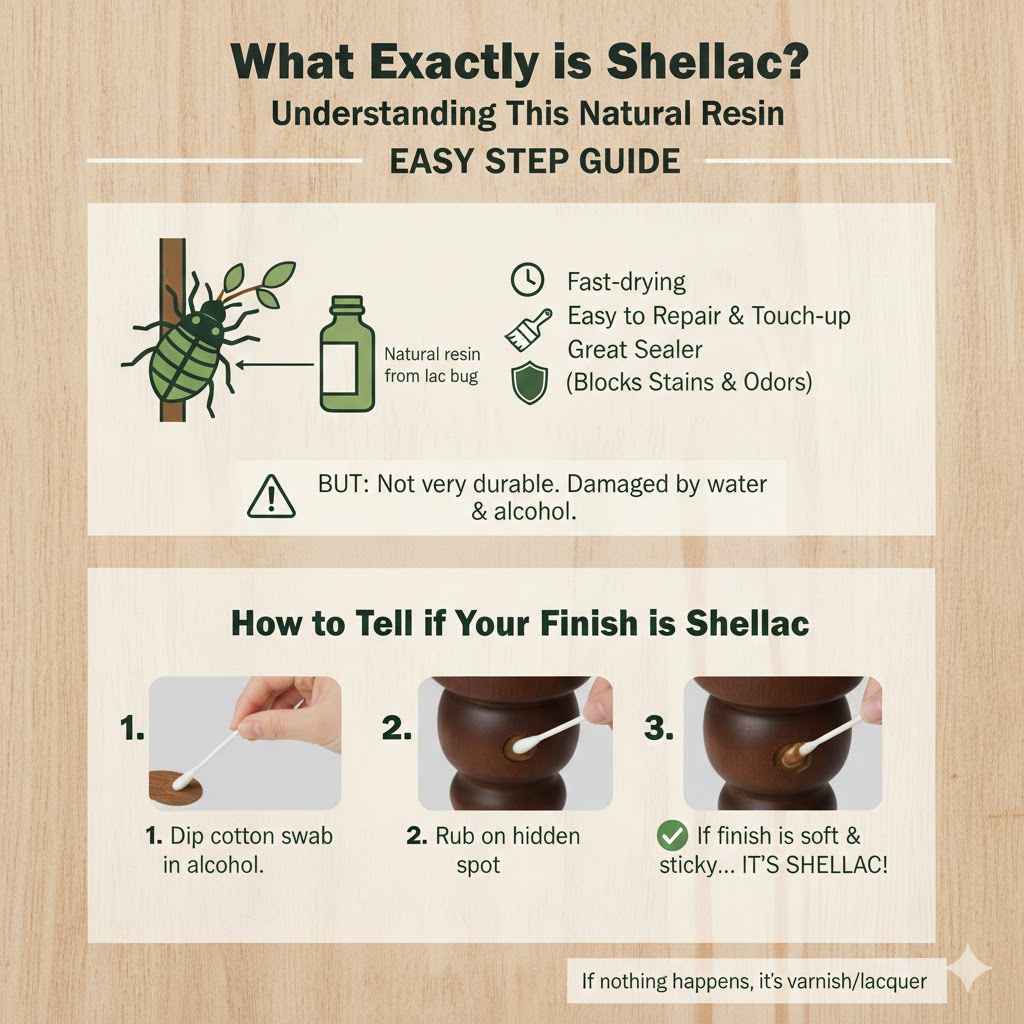
What Exactly is Shellac?
Before we dive into painting, let’s quickly talk about what we’re dealing with. Understanding shellac helps you understand why the prep work is so important. Shellac isn’t a synthetic product made in a lab; it’s actually a natural resin. It’s created by the female lac bug, which lives on trees in India and Thailand.
For centuries, woodworkers have loved shellac because it’s:
- Fast-drying: It dries quickly, allowing for multiple coats in a single day.
- Easy to repair: A new coat of shellac will partially dissolve the coat underneath, making touch-ups seamless.
- A great sealer: It’s fantastic at blocking stains, knots, and odors from bleeding through the wood. This is why it’s often used as a primer itself.
However, it’s not the most durable finish. It can be easily damaged by water and alcohol, which is often why an old shellacked piece might look a little worse for wear. But its amazing sealing power is the main reason you need to prepare it carefully before painting.
How to Tell if Your Finish is Shellac
Not sure if that old table is finished with shellac, varnish, or lacquer? Don’t worry! There’s a super easy test you can do.
- Find a hidden spot on your furniture, like the back of a leg or inside a drawer.
- Dip a cotton swab or a clean rag in denatured alcohol.
- Rub the alcohol on the hidden spot for a few seconds.
If the finish gets soft, sticky, or starts to dissolve, you’ve got shellac! If nothing happens, you’re likely dealing with a varnish or polyurethane finish, which requires a slightly different preparation process.
Why Preparation is Your Best Friend
So, why can’t you just slap a coat of paint directly over shellac? Think of old shellac as a smooth, glossy shield. Paint needs something to grab onto, and a slick surface like shellac offers almost no grip. Without proper prep, your beautiful new paint job could easily peel, chip, or scratch off.
Furthermore, shellac was often applied over wood stains that contain powerful dyes. Without a proper sealing primer, those old reddish or brownish colors can slowly “bleed” through your new light-colored paint, leaving ugly pink or yellow splotches. Taking the time to prep solves both of these problems before they even start.
The Problem with Wax
One more thing to watch out for is wax. In the past, people often used paste wax to polish and protect their shellacked furniture. Paint absolutely will not stick to wax. It’s like trying to paint over a crayon.
Before you do anything else, you need to check for wax. Gently scrape a fingernail across the surface in an inconspicuous area. If you see a waxy residue build up under your nail, you’ll need to remove it. To do this, simply wipe the entire piece down with a clean cloth soaked in mineral spirits. The mineral spirits will dissolve the wax without harming the shellac underneath. Let it dry completely before moving on to the next step.
Your Toolkit: Materials & Supplies
Gathering your tools before you start makes the whole process go much smoother. You won’t have to stop mid-project to run to the hardware store. Here’s what you’ll need:
- Safety Gear: Gloves, safety glasses, and a dust mask or respirator are essential.
- Cleaning Supplies: A bucket, warm water, mild dish soap or a TSP substitute, and plenty of clean cloths or rags.
- Mineral Spirits: Only needed if you detect wax on the surface.
- Sandpaper: A medium grit (around 180-220 grit) is perfect for scuff sanding. Sanding sponges are great for detailed areas.
- Tack Cloth: This sticky cloth is amazing for removing every last speck of sanding dust.
- Primer: A high-quality, stain-blocking bonding primer. A shellac-based primer is your best bet.
- Paint: Your choice of high-quality paint (latex, acrylic, or enamel).
- Brushes/Rollers: Good quality paint brushes and a small foam roller for smooth surfaces.
- Drop cloths: To protect your floors and workspace.
The Step-by-Step Guide to a Flawless Painted Finish
Ready to transform your piece? Let’s walk through the process one step at a time. I promise it’s easier than it sounds!
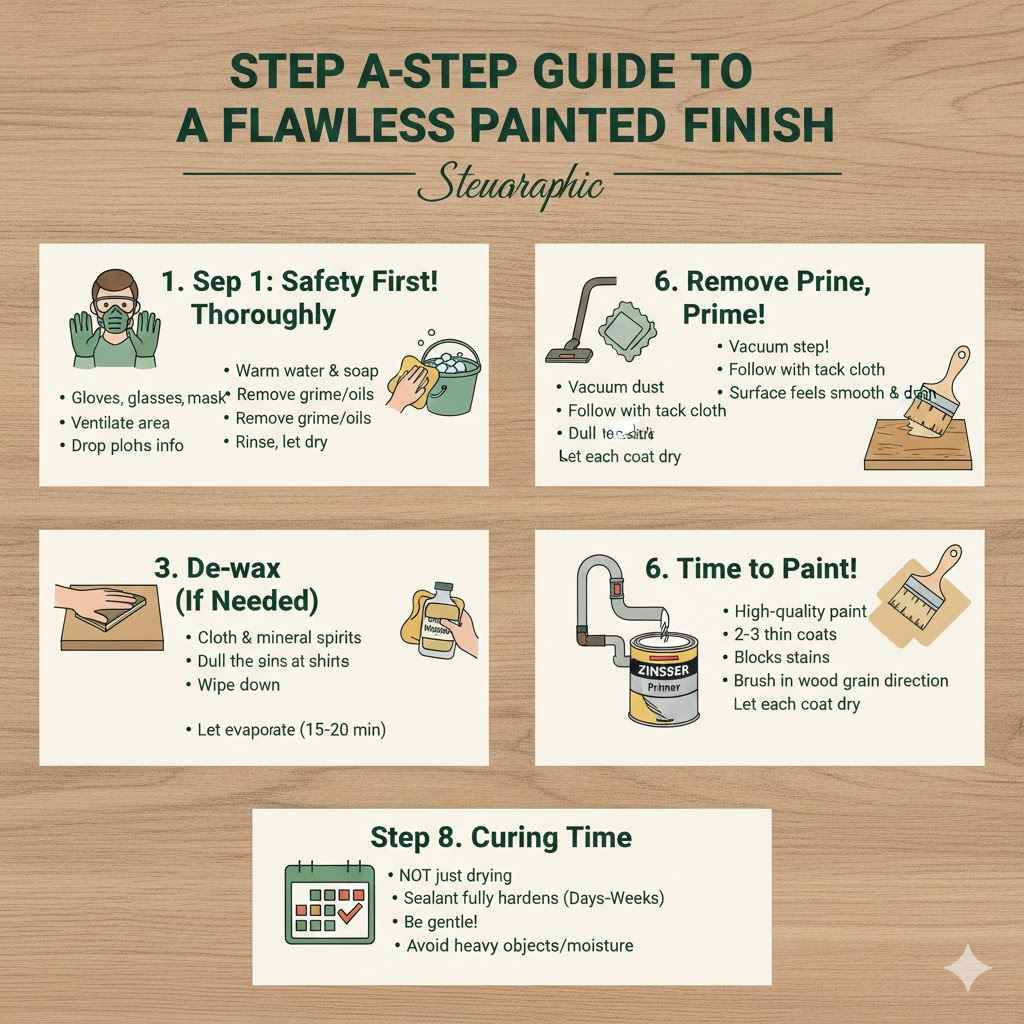
Step 1: Safety First!
Before you open a single can, protect yourself and your space. Lay down drop cloths. Open windows or work in a well-ventilated area, especially when using cleaners, mineral spirits, and primers. Put on your gloves, glasses, and mask. For older furniture made before 1978, be aware it could have been painted with lead-based paint at some point in its life. If you suspect lead paint, follow EPA safety guidelines for proper handling and removal.
Step 2: Clean the Surface Thoroughly
Your furniture has likely collected years of dust, grime, and oils from hands. Paint can’t stick to dirt. Mix a simple solution of warm water and a few drops of mild dish soap. Use a clean rag to wash the entire piece from top to bottom. For tougher grime, a product like a TSP (trisodium phosphate) substitute works wonders. After washing, rinse the surface with a clean, damp cloth to remove any soap residue and let it dry completely.
Step 3: De-wax (If You Found Wax)
If you discovered wax on your piece during the test phase, now is the time to remove it. Dampen a clean cloth with mineral spirits and wipe down the entire surface. You’ll want to switch to a clean section of the cloth frequently to avoid just spreading the wax around. Let the mineral spirits evaporate completely, which usually takes about 15-20 minutes.
Step 4: Scuff Sand for Grip
This is a crucial step for adhesion, but remember: you are not trying to remove the shellac! You are just trying to rough up the glossy surface so the primer has something to grab onto. This is called “scuff sanding.”
Take your 180 or 220-grit sandpaper or sanding sponge and lightly sand every surface you plan to paint. The goal is to simply knock off the shine. You’ll know you’re done when the glossy finish looks dull and matte. Be gentle, especially on corners and edges where the finish is thinner.
Step 5: Remove All the Dust
Sanding creates a fine layer of dust that can ruin your finish. First, use a vacuum with a brush attachment to get rid of the majority of the dust. Then, follow up with a tack cloth. A tack cloth is a slightly sticky piece of cheesecloth that is specifically designed to pick up every last bit of dust. Gently wipe down the entire piece until it feels perfectly clean and smooth to the touch.
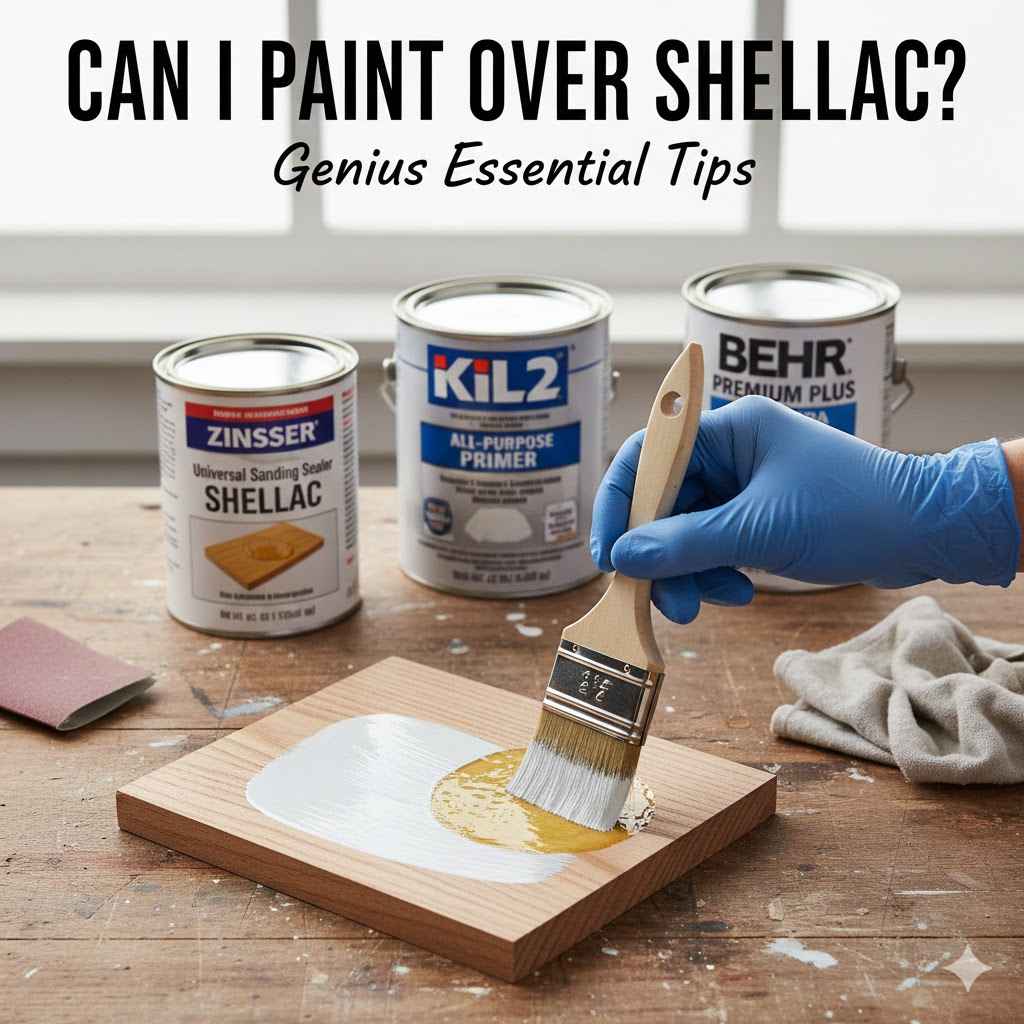
Step 6: Prime, Prime, Prime!
This is the most important step of all. Do not skip the primer! Primer does two critical jobs: it bonds to the tricky shellac surface, and it blocks any old stains from bleeding through your new paint. For painting over shellac, a shellac-based primer like Zinsser B-I-N is the gold standard. It sticks to anything and is the ultimate stain blocker.
Using a good quality brush, apply a thin, even coat of primer to the entire piece. Don’t worry if it looks a little streaky; the goal is coverage, not perfection. Let it dry according to the manufacturer’s instructions. If you’re painting a light color over a very dark piece, a second coat of primer is a great idea.
Choosing the Right Primer
Here’s a quick breakdown of primer types to help you choose the best one for your project.
| Primer Type | Best For | Pros | Cons |
|---|---|---|---|
| Shellac-Based | Painting over shellac, blocking heavy stains and odors, sealing wood knots. |
|
|
| Oil-Based | Durable priming on various surfaces, blocking moderate stains. |
|
|
| Water-Based (Latex/Acrylic) | General purpose priming on clean, simple surfaces. |
|
|
My Recommendation: Stick with a shellac-based primer for this job. It is chemically compatible with the old shellac finish, ensuring the best possible bond and stain blocking.
Step 7: Time to Paint!
You’ve made it to the fun part! Once your primer is completely dry (and lightly sanded with 220-grit paper if needed for an extra smooth finish), you can start painting. Choose a high-quality paint for the best results. A good acrylic or enamel paint will be durable and look fantastic.
Here are a few tips for a beautiful paint job:
- Use a good brush. A high-quality brush will hold more paint and give you fewer brush strokes.
- Apply thin coats. It’s always better to apply two or three thin coats than one thick, drippy one.
- Watch your technique. For flat surfaces, a small foam roller can give you a super smooth, spray-like finish. For detailed areas, use a brush. Always brush in the direction of the wood grain.
- Be patient. Let each coat of paint dry completely before applying the next one. Check the paint can for recommended recoat times. Rushing this step can lead to a tacky, easily damaged finish.
Step 8: Curing Time
You’ve applied your final coat, and it looks amazing! Now, for the hardest part: waiting. Paint may feel dry to the touch in a few hours, but it takes much longer to fully “cure.” Curing is the process where the paint hardens and reaches its maximum durability. This can take anywhere from a few days to a month, depending on the type of paint and the environment (humidity and temperature play a big role). Be gentle with your newly painted piece during this time to avoid nicks and scratches.
FAQ: Your Questions Answered
Do I absolutely have to sand shellac before painting?
Yes, I highly recommend it. It’s not about removing the shellac, but about “scuffing” the surface. A light sanding with fine-grit sandpaper (180-220 grit) removes the gloss and creates a texture for the primer to grip onto, preventing peeling later on.
What happens if I paint directly over shellac without priming?
You’re setting yourself up for disappointment. The paint will have poor adhesion and can easily scratch or peel off. More importantly, stains and tannins from the wood, which the shellac was holding back, can bleed through your new paint, causing ugly yellow or pink splotches.
How do I know if a finish is shellac or varnish?
The alcohol test is the easiest way. Dab a cotton swab in denatured alcohol and rub it on a hidden spot. If the finish gets sticky or dissolves, it’s shellac. If it doesn’t react, it’s likely an oil-based varnish or polyurethane.
Can I use chalk paint over shellac without priming?
While many chalk paint brands claim no priming is needed, it’s very risky over shellac. The powerful colorants in old wood finishes can easily bleed through chalk paint, especially lighter colors. For best results, I always recommend using a coat of shellac-based primer even with chalk paint.
What is the best primer to use over shellac?
A shellac-based primer, like Zinsser B-I-N, is the best choice. It creates an incredible bond with the existing shellac finish and is the most effective product for blocking stains and wood tannins from bleeding through your paint.
Is it better to just remove the shellac completely?
Not usually. Properly stripping a finish is a very messy and time-consuming job that involves harsh chemicals. Since the shellac is an excellent base sealer, it’s much easier and more effective to clean, scuff, and prime over it rather than remove it.
How long should I wait for the primer to dry before painting?
Always follow the directions on the primer can. Shellac-based primers dry very quickly, often ready for another coat or for painting in just 45-60 minutes. Oil-based primers take longer, sometimes needing 6-8 hours or more. Rushing this step can ruin your finish, so be patient.
Conclusion: Your Project, Your Success
See? Painting over shellac isn’t some mystical, impossible task reserved for woodworking pros. It’s all about a simple, methodical process: clean, scuff, prime, and paint. By taking the time to prepare the surface correctly, you are guaranteeing that your hard work will result in a durable, beautiful finish that you can be proud of for years to come.
So, go ahead and rescue that dated piece of furniture. Give it a new life with a fresh color. You now have the knowledge and the step-by-step plan to tackle this project with confidence. Grab your tools, put on some music, and get started on creating something wonderful for your home. You’ve got this!