Can You Change the Color of a Wood Floor? Tips and Tricks
Thinking about updating your home? Maybe you’re wondering, Can You Change the Color of a Wood Floor? It’s a popular question, and for many, it seems a little tricky at first. Don’t worry, it’s totally achievable! We’ll explore the process and share an easy, step-by-step guide to get you started. We’ll examine the different methods and tools you’ll use. Get ready to discover how to revitalize your floors!
Choosing the Right Method for Your Wood Floor’s Color
Changing the color of a wood floor can make a huge impact on your home’s look. There are several ways to go about this, and the best choice depends on what you want. You’ll need to know the type of wood and current finish your floor has. Certain methods work best for some types of wood over others.
For instance, solid hardwood floors react differently compared to engineered wood. Considering your existing finish is also important because it can affect how the new color looks and how well it sticks. Think about the style you’re hoping for too, whether it’s a lighter, modern feel or a richer, traditional look. Making the right decision means beautiful, lasting results.
Sanding and Staining: The Classic Approach
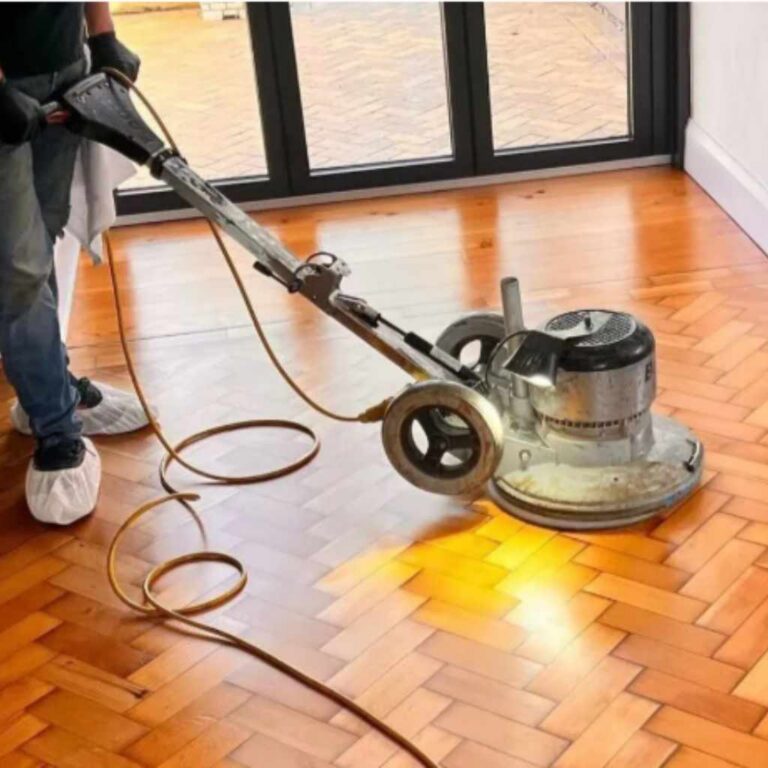
Sanding and staining is a time-tested technique. It’s often the best approach for changing the color of solid hardwood floors. Sanding removes the old finish and any imperfections, providing a fresh surface for the stain to absorb evenly. This process is great if you want to significantly alter the floor’s appearance. You can go from a dark color to a light one or vice versa. The results are a new color and a smooth, refreshed surface. It needs patience, but the long-term rewards are well worth it. You are essentially bringing your floors back to their natural beauty.
- Sanding. This process uses progressively finer sandpaper grits. This smooths out the wood and prepares it for staining. It is essential for an even color.
- Staining. After sanding, apply the stain. Apply an even coat and let it absorb for the suggested time. Wipe away the excess to achieve your desired shade.
- Sealing. Applying a sealant protects the new color and adds durability. It prevents scratches and damage. Polyurethane is the most common and effective option.
Here’s a statistic: According to a study by the National Wood Flooring Association, about 80% of hardwood floor refinishing projects involve sanding and staining.
Using Floor Stain Without Sanding
If you have an existing finish that is in good shape, sanding might not be needed. There are stains available that can be applied without sanding, especially for floors that are only slightly worn or have been well-cared for. These stains work a bit differently. They’re often designed to bond to the existing finish. This method is faster and easier. However, it’s not ideal for major color changes or floors that have significant damage. Success depends on the type of existing finish and the condition of the wood. Carefully following product instructions is a must. This way, you will ensure a good bond and a smooth, even finish.
- Surface Preparation. Clean and lightly scuff the existing finish with a fine abrasive pad. This helps the stain stick.
- Stain Application. Apply the stain evenly, following the manufacturer’s instructions. Use a stain applicator or a clean cloth.
- Sealing. To protect the newly stained surface, use a clear topcoat. This protects it from wear and tear.
Painting Wood Floors: An Alternative to Consider
Painting wood floors provides a distinct look. It gives a solid, uniform color. Painting works well when you want a specific color that isn’t available in stain options, such as bold or custom colors. This method also covers imperfections in the wood more effectively than staining.
You can achieve various styles, from modern and minimalist to vintage-inspired looks. It does require proper surface preparation. You also must choose the right paint. Floor paint is designed to withstand foot traffic and wear. The result can be a creative and durable flooring solution. Painting is a great option for those looking to add a personalized touch to their space.
- Choose the Right Paint. Always use floor paint. It is made to handle foot traffic.
- Primer. Apply a primer. This helps the paint stick to the surface and creates a smooth base.
- Apply the Paint. Apply two to three thin coats. This ensures even coverage and durability.
- Sealing. In some cases, you may wish to apply a sealant to further protect the paint.
Getting Ready: Preparing Your Wood Floor
Preparation is key for achieving great results. Whether you choose sanding, staining, or painting, the steps you take before applying any color are super important. Proper preparation ensures that the new color looks good and lasts. This includes cleaning the floor to remove dirt and debris and examining it for any damages. Remember, taking the time to prepare will make the entire process easier and improve the final look. Getting your space ready correctly is essential to make your new floor stand out.
Cleaning and Inspecting Your Floor
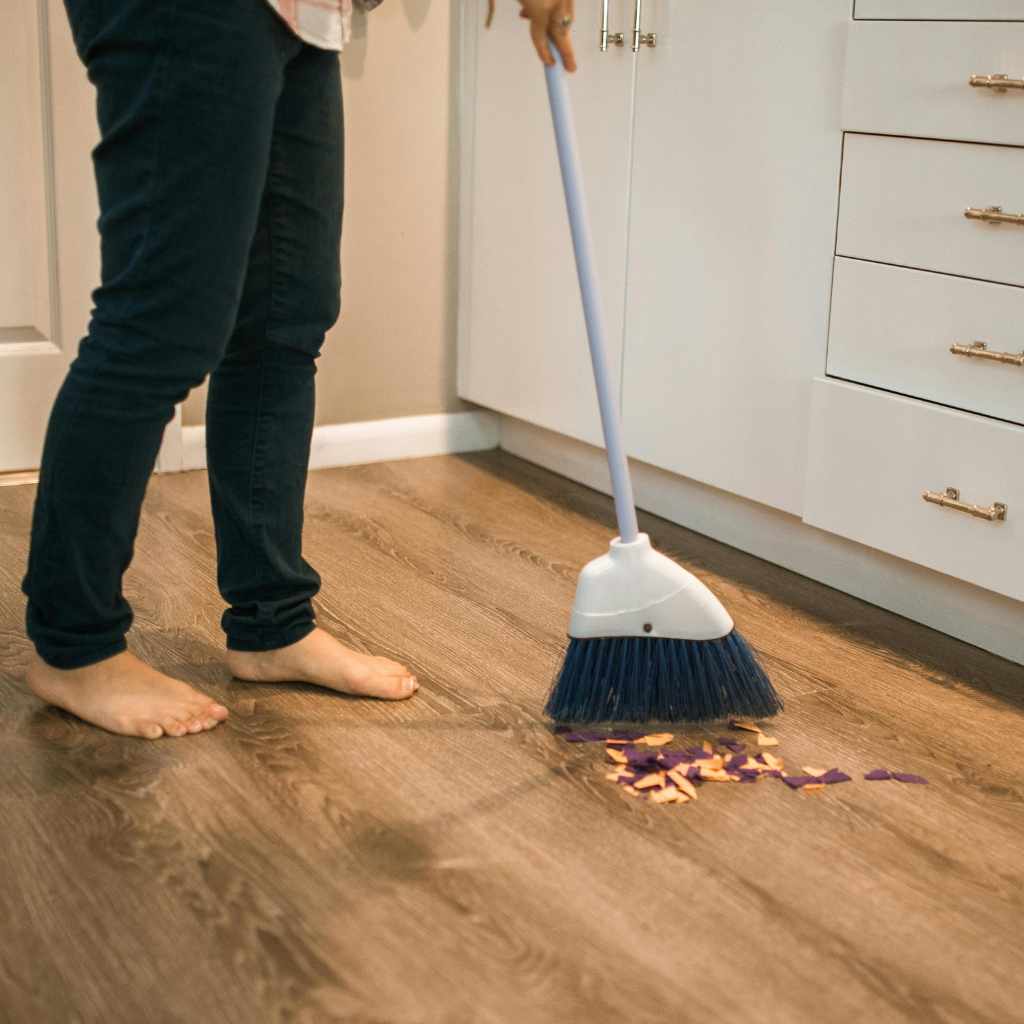
Start with a thorough cleaning. Sweep or vacuum your floor to get rid of dust, dirt, and any loose particles. Then, wash it with a cleaner made for your floor type. This removes any grime or residue that could mess with the color application. Next, check the floor for any damages. Look for deep scratches, dents, or loose boards. These should be fixed before you start. Addressing these issues now will make your new floor look amazing. It will also help your color change go smoothly.
- Remove Debris. Sweep or vacuum the floor completely to get rid of dirt, dust, and any loose particles.
- Deep Cleaning. Clean the floor with a cleaner suitable for your wood. This will remove any grime that could affect the stain or paint.
- Check for Damage. Examine the floor for scratches, dents, and loose boards. Address these problems before you begin.
Gathering the Necessary Tools
Having the right tools is also critical for success. This includes the equipment you’ll use for sanding, like a drum sander or an orbital sander. You may also need safety gear, such as eye protection and a respirator to protect yourself from dust and fumes. For staining or painting, get applicators like brushes or rollers. Prepare your workspace and ensure that it has good ventilation. The right tools save you time and make the job easier. It’s a simple step that helps make the overall process more efficient.
- Sanding Equipment. Decide whether to use a drum sander or an orbital sander. Orbital sanders are easier to handle for beginners.
- Safety Gear. Always use eye protection and a respirator.
- Applicators. Get brushes, rollers, or stain applicators. Choose the right ones for the color method you are using.
Repairing Imperfections in Your Floor
Addressing any problems before you start coloring is important. Fill any holes or cracks with wood filler. Let it dry completely. Then, sand the filler smooth. For loose boards, use wood glue and nails to secure them back in place. Doing this will improve the appearance and durability of the floor. It is about making sure your floor is a great surface to work on. It prevents issues later on. Your hard work will make your floor last and look fantastic.
- Fill Holes. Use wood filler to fill any holes or cracks.
- Leveling. After the filler dries, sand it until it is level with the rest of the floor.
- Securing Loose Boards. Use wood glue and nails to secure any loose boards.
Sanding and Staining: Detailed Instructions
The sanding and staining process is a classic, but it requires patience and focus. It involves removing the old finish. This creates a surface for the new stain. Then, you will apply the stain and seal it. Each step matters. Take your time, and you’ll get great results. Be sure to pay attention to details. It’s how you will get the best-looking and most durable finish.
Sanding Your Wood Floor: Step-by-Step
Sanding is a key part of the process. It removes the old finish. Use a drum sander or an orbital sander. Choose the right sandpaper grits. Start with a coarser grit and then move to finer ones. This creates a smooth surface. It is essential for an even stain. Keep the sander moving. Avoid staying in one place. This can create unevenness. Regular cleaning is crucial. This will help you get rid of any dust. After sanding, the floor needs to be completely smooth and ready for staining. Sanding is critical to creating a great look.
- Start with a Coarse Grit. Use a coarse-grit sandpaper to remove the old finish. Make sure to keep the sander moving.
- Progress to Medium Grit. Switch to a medium-grit sandpaper to smooth out the surface and remove any scratches from the first sanding.
- Finish with Fine Grit. Finish with a fine-grit sandpaper for a super-smooth surface. Make sure there are no visible scratches.
- Clean Thoroughly. After each sanding pass, clean the floor with a vacuum cleaner to get rid of dust.
Applying Wood Stain: Achieving the Right Color
Applying the stain is the exciting part! Pick a stain color. Make sure it matches your desired look. Apply the stain evenly, following the grain of the wood. Use a brush, roller, or cloth. Give it time to absorb. Then wipe off the excess. This will help you control the darkness of the color. The longer you leave it, the darker the result. Always follow the manufacturer’s instructions. That will help you get the best outcome. It’s a rewarding step to see your floor begin to transform!
- Choose Your Stain. Select the color that best matches your style and desired look.
- Apply the Stain. Use a brush, roller, or cloth. Apply evenly, following the grain of the wood.
- Let It Absorb. Let the stain sit for the time recommended by the manufacturer.
- Wipe Off Excess. Wipe off the excess stain. This controls the darkness and prevents stickiness.
Sealing and Protecting Your Refinished Floor
After staining, seal your floor with a clear sealant. This protects your floor from scratches and wear. Apply two or three coats of sealant. Let each coat dry fully before applying the next. This will help create a durable surface. The finish makes your floor easy to clean. Sealants also protect your new color. It’s an important part of the entire process. This will keep your floor looking beautiful for a long time.
- Apply the First Coat. Apply an even coat of sealant, following the manufacturer’s instructions.
- Let It Dry. Let the first coat dry completely, usually overnight.
- Apply Additional Coats. Apply at least one or two more coats. This will give you more durability.
- Let It Cure. Allow the floor to cure for the recommended time. Then, you can put furniture back.
Painting Your Wood Floor: A Comprehensive Guide
Painting is a great way to change your wood floor. It provides a solid color that covers imperfections. It also allows you to be creative. Choose your color. Make sure you use paint that is made for floors. It’s super important to prep the surface. Also, use primer for the best results. You will get a unique and stylish look. With painting, you can create a personalized look in your home.
Selecting the Right Floor Paint
When you’re painting a wood floor, picking the right paint is essential. Floor paint is made to handle foot traffic and wear. It is typically a latex-based or oil-based paint. Latex paints are good for their low odor and quick drying. Oil-based paints offer more durability. Pick a color that matches your style. Consider the room’s decor and the amount of light in the space. Using floor paint guarantees a result that looks great and lasts for years. It’s an investment that offers a long-term improvement.
- Type of Paint. Choose a paint that is made for floors.
- Durability. Make sure the paint can handle foot traffic.
- Color. Pick a color that suits the room’s style.
Preparing the Floor for Painting
Prep your floor carefully. Clean the floor with a strong cleaner to remove dirt and grime. Sand the surface lightly. This roughs it up so the paint can stick. Then, prime the floor with a good primer. Primer helps the paint adhere and creates a smooth surface. It’s the most important step for a great paint job. Properly preparing your floor helps you get even coverage. It gives you a long-lasting, beautiful finish. It’s what you need for a professional look.
- Clean Thoroughly. Clean the floor to get rid of dirt, dust, and grime.
- Sanding. Sand the floor lightly to help the paint stick better.
- Priming. Apply a primer. It’s super important for a great result.
Applying the Paint: Step-by-Step Instructions
Apply the paint in thin, even coats. Use a brush for edges and corners. Use a roller for large areas. Make sure you get full coverage. Allow each coat to dry fully before you put on the next one. This will give you the best results. Apply at least two coats. This will help the color look even and last longer. The right painting technique will give your floor a long-lasting, perfect look. Taking your time with each step is the key to perfection.
- First Coat. Use a brush for the edges and a roller for large areas.
- Allow Drying. Let the first coat dry fully.
- Second Coat. Apply a second coat to make the color even.
- Consider a Third Coat. If needed, add a third coat for more durability.
Important Considerations and Tips
Here are some other important points to keep in mind. Consider your home’s overall design and the durability of the method you choose. Safety is key, so always wear proper gear. Make sure you work in a space with good ventilation. By keeping these points in mind, you will get the best results. Also, it ensures your project goes well. It’s a great way to enjoy your new floor.
Considering the Overall Design of Your Home
When you change the color of your wood floor, think about how it matches your home’s style. A lighter color makes a space feel bigger. Darker colors make a space feel more cozy. Choose colors that work with your furniture, wall colors, and overall look of your home. If you have a modern home, you might want to use light grays or whites. For a more traditional home, consider warm wood tones or classic stains. Your goal is a look that is stylish and matches your home. This makes the space look put-together.
Ventilation and Safety Measures
Safety comes first when working with wood floors. Always use safety gear such as eye protection, gloves, and a respirator. Many stains and paints have strong fumes. It’s important to work in a well-ventilated space. Open windows and doors. Use fans. Be careful about paint spills. Make sure that you dispose of any used materials properly. Taking these safety measures will make the entire process safer. It will also protect your health. Always remember to prioritize safety during your project.
Maintenance and Care
After you change the color of your floor, you will need to keep up with it. Regular cleaning and care are important. Sweep or vacuum regularly to get rid of dirt and debris. Use the right cleaning products for your finish. Avoid using harsh chemicals. Put felt pads under your furniture legs to prevent scratches. When you take care of your floor, you can enjoy it for years to come. It’s a key step to keeping it beautiful and well-maintained.
Can You Change the Color of a Wood Floor? Common Challenges
Even though the process is possible, there are some common challenges you might face when you want to change the color of your wood floor. Knowing about these problems will help you prepare. The process may sometimes take longer than expected. It might also require more effort. Being aware of these points will help you get better results. You will be better prepared to handle issues. It is a good way to improve the entire experience. It will also help you create a finished product that you love.
- Uneven Color Absorption. Different areas of your floor might absorb stain differently. This can result in uneven color.
- Dealing With Existing Finishes. Removing the old finish can be tough. It is super important for an even result.
- Managing Time and Effort. The project can take some time. It may require a lot of energy.
Here’s an example: A homeowner started a staining project but had to stop because their sander broke. They needed to find a replacement. They also needed to get help. This shows that having the correct tools and planning ahead are really important.
According to a study, many homeowners find that sanding and staining take two or three days. It is often a longer process than they expect.
Frequently Asked Questions
Question: Can I stain my wood floor without sanding?
Answer: Yes, in some cases, you can stain your wood floor without sanding, especially if the existing finish is in good condition. You can use a stain specifically designed to bond to the existing finish. Make sure to prepare the surface by cleaning and lightly scuffing it.
Question: What is the best type of paint to use on wood floors?
Answer: The best type of paint to use on wood floors is floor paint. It is made to handle foot traffic. Floor paints are usually latex-based or oil-based. Pick the right option for your needs.
Question: How many coats of stain should I apply to my wood floor?
Answer: Usually, you will need one or two coats of stain on your wood floor, but this can depend on the type of stain you’re using. Always follow the manufacturer’s instructions. Multiple coats can lead to a darker color.
Question: How long does it take for a painted wood floor to dry?
Answer: The drying time for a painted wood floor can change. However, each coat often takes between 4-8 hours to dry. Make sure you let each coat dry completely before applying the next coat. Always read the paint’s instructions.
Question: What’s the best way to clean and maintain a newly stained or painted floor?
Answer: Clean a stained or painted floor by sweeping or vacuuming regularly. Use a suitable cleaner for your finish. It is smart to use felt pads under furniture legs. This will help avoid scratches.
Final Thoughts
So, Can You Change the Color of a Wood Floor? Absolutely! You’ve learned different methods like sanding and staining, or painting. Each technique offers a way to refresh your floors and change your space. You discovered the importance of preparation. You learned about cleaning, repairs, and gathering all the things you need. We covered step-by-step guides.
We talked about how to sand and stain or paint your floor. Remember safety, ventilation, and always consider your home’s style. Be sure to explore different paint and stain choices. By following these steps and tips, you can transform your wood floors and enjoy a beautiful, new look. Get ready to take on the challenge.