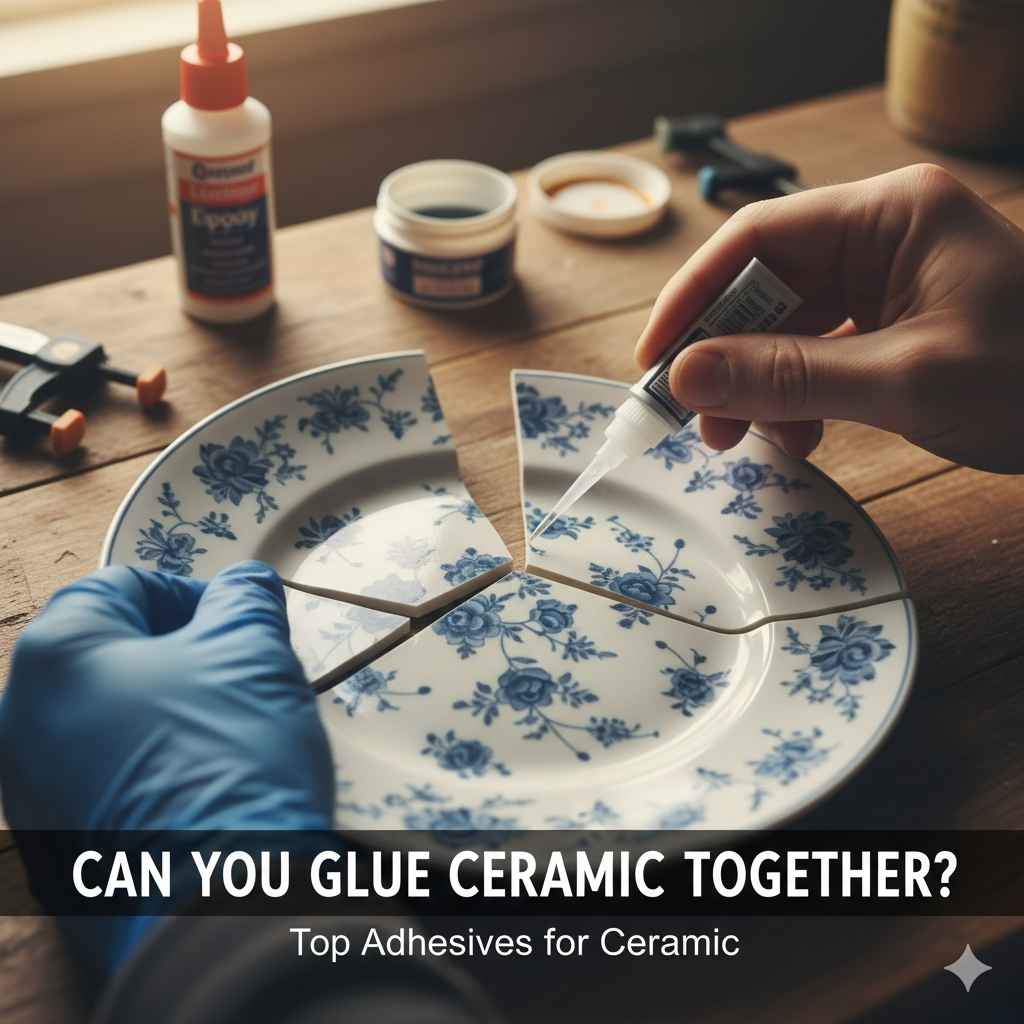
Can You Glue Ceramic Together? Top Adhesives for Ceramic
Thinking about fixing a broken ceramic item? You’re not alone! Knowing Can You Glue Ceramic Together? Best Adhesives is a common question, especially for those new to DIY repairs. It can seem tricky, with so many glue options out there. But don’t worry! This guide will break it down simply. We’ll show you exactly what adhesives to use, step by step, so you can successfully repair your ceramic pieces. Let’s start with a peek at the different types of glues available!
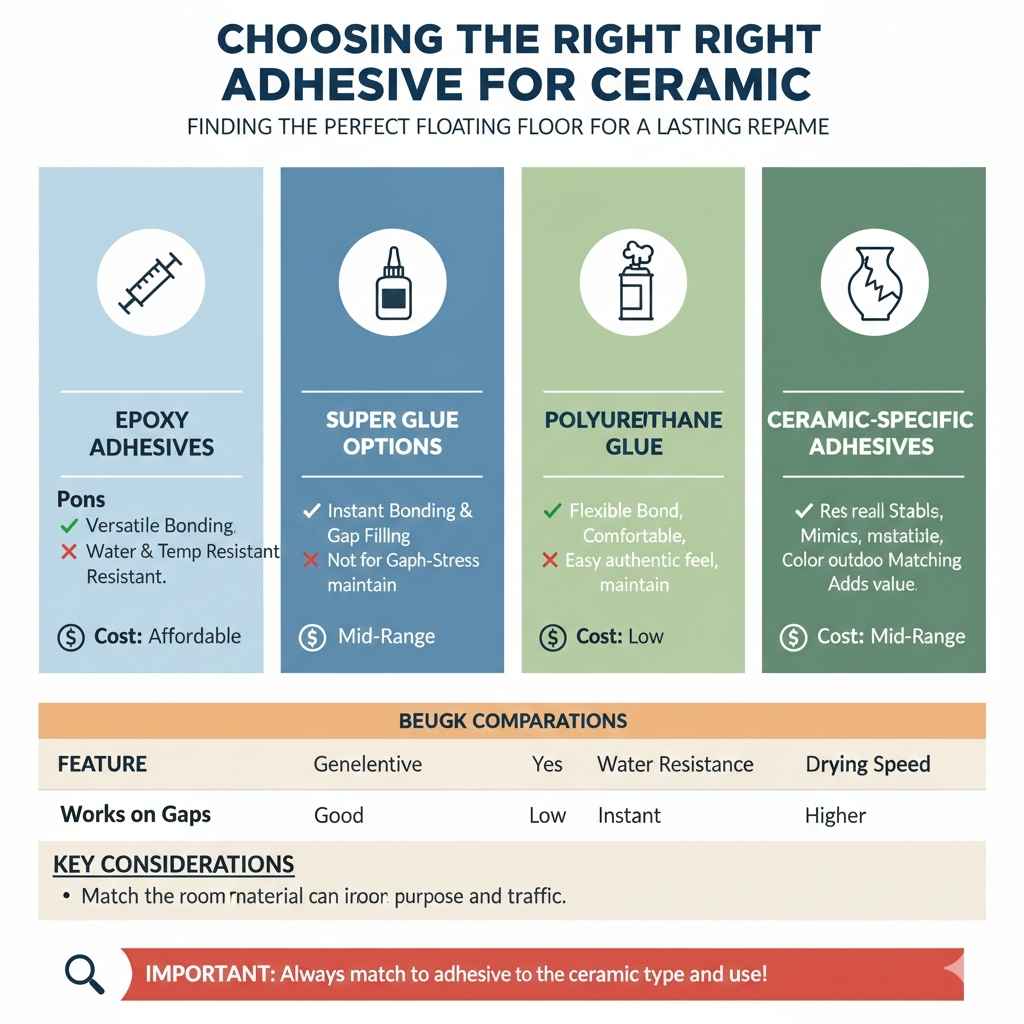
Choosing the Right Adhesive for Ceramic
The first step in any successful ceramic repair is picking the correct glue. This can seem difficult, given the variety of products available. Selecting the wrong adhesive can lead to a weak bond, or even damage to your item. The type of ceramic, the size of the break, and the item’s use will all influence your choice. Understanding the characteristics of each glue type and what it bonds best with is key to a long-lasting fix. We’ll explore the main options, giving you the information needed to make the best decision for your project. Consider this your guide to choosing the best glue.
Epoxy Adhesives for Ceramic
Epoxy adhesives are often the go-to choice for ceramic repairs. These glues are made from two parts: a resin and a hardener. When mixed, they create a strong, durable bond. Epoxy is known for its resistance to water, heat, and many chemicals, making it ideal for items that might be exposed to these elements. There are different types of epoxy, from fast-setting to slow-setting formulas. Fast-setting epoxies can be convenient for quick repairs, while slow-setting ones offer more working time for precise alignment. The strength of epoxy makes it a reliable option for many ceramic repair tasks. Epoxy glue excels at filling gaps, something other glues struggle with.
- Versatile Bonding: Epoxy forms a strong bond with most types of ceramic. This makes it a great choice for various projects.
- Gap Filling: Epoxy is able to fill gaps and imperfections. This is particularly useful when dealing with chipped or broken pieces that don’t fit perfectly.
- Water Resistance: The water-resistant nature of epoxy makes it ideal for items used outdoors or exposed to moisture.
- Temperature Resistance: Some epoxy glues can handle high temperatures without losing their bond. This is important for items that may be exposed to heat.
Many professionals and hobbyists prefer epoxy due to its strength and versatility. Its ability to bond with various materials, fill gaps, and withstand different environments makes it a reliable choice for most ceramic repairs. In a case study, a sculptor successfully restored a valuable ceramic vase using epoxy, demonstrating its effectiveness.
Super Glue Options
Super glue, also known as cyanoacrylate, is another option. It’s known for its rapid bonding speed. This means it can quickly fix small cracks or breaks. It works by reacting with moisture in the air. This rapid reaction causes the glue to set almost instantly. Super glue comes in different forms, including gel-like options. The gel version offers more control, especially on vertical surfaces. Super glue doesn’t fill gaps as well as epoxy. It’s best used for tight-fitting pieces. It’s easy to find and use, making it a good choice for smaller, quick fixes.
- Instant Bonding: Super glue offers a very quick bonding time. This makes it ideal for quick repairs where speed is needed.
- Ease of Use: It is readily available and easy to apply. No mixing is required, which simplifies the repair process.
- Works well on Smooth Surfaces: Super glue works best on smooth, well-fitting surfaces. It’s a good choice for hairline cracks.
- Cost-Effective: Super glue is generally inexpensive, making it a budget-friendly option for smaller projects.
A porcelain figurine was fixed in less than an hour using super glue, demonstrating its effectiveness for quick repairs. However, super glue may not be the ideal solution for large gaps or high-stress applications. Consider the size of the ceramic item and the repair needed before choosing super glue.
Polyurethane Glue Explained
Polyurethane glue is known for its flexibility and strong bonding capabilities. It expands as it cures. This expansion can fill gaps and create a robust bond. Polyurethane is also water-resistant, making it a good choice for items exposed to moisture. It is useful for repairing ceramic items in outdoor settings. Polyurethane glue has a slower setting time than super glue. This allows for more precise alignment of the ceramic pieces. This makes it a great choice for larger repairs. However, it may require clamping or holding the pieces together during the curing time. The expanding feature can be very helpful for imperfect fits.
- Flexible Bond: Polyurethane creates a flexible bond. This means it can handle some movement without breaking.
- Gap Filling: The expanding property of polyurethane can fill gaps. This is great for repairs where the pieces don’t fit perfectly.
- Water Resistance: This glue is also water-resistant, adding to its durability outdoors.
- Versatile Application: Polyurethane adheres well to a wide range of materials. It can handle many ceramic repair challenges.
A customer repaired a ceramic garden statue with polyurethane glue. The statue was exposed to weather, and the flexible bond provided by the glue withstood the seasonal changes. Based on this experience, it’s a solid choice for outdoor projects.
Ceramic-Specific Adhesives
There are also adhesives made specifically for ceramics. These glues are designed to match the characteristics of ceramic materials. This can mean a bond that’s both strong and less noticeable. These adhesives are often designed to be clear or to match the color of the ceramic. This makes them good for items where appearance is important. They often have high bonding strengths, especially for the type of ceramic they are designed for. When you want the strongest bond, or if your repair will be very visible, these specialized glues are a top choice. These glues are developed for the best results on ceramic.
- Specialized Formula: These adhesives are engineered for optimal bonding with ceramic materials. This gives them an advantage over general-purpose glues.
- Color Matching: Some ceramic-specific glues come in colors that match various ceramic shades. They offer a less visible repair.
- High Strength: Many ceramic-specific glues have great strength. They are designed to withstand stress and strain.
- Ease of Use: These glues are made for DIY use. They are often easy to apply and require minimal preparation.
A professional restorer employed a ceramic-specific adhesive on a valuable antique plate. The repair was nearly invisible, showing the value of such glues. The specialized nature ensures both a strong and aesthetically pleasing result.
How to Glue Ceramic Together Step-by-Step
Once you’ve chosen the right adhesive, you’ll want to prepare the pieces. The success of the repair depends on how well you prepare the ceramic. Here are the steps to follow to get the best possible result. Following these steps carefully will give you a better chance of a successful and lasting repair. Pay attention to each step; the quality of your repair depends on them.
Surface Preparation Is Key
Preparing the surface is the most important step in the process. Before you apply any glue, clean the broken pieces. This involves removing any dirt, grease, or old adhesive residue. You can use warm, soapy water and a soft cloth or sponge. For stubborn residue, you might need a gentle abrasive like fine-grit sandpaper. It is important to make sure the surfaces are clean, dry, and free of any debris. Doing this creates the best bond. Proper preparation maximizes the adhesive’s ability to grip the surfaces. Neglecting this step can lead to a weak bond, and your repair may fail. Make sure you don’t skip this important part.
- Cleaning the Surfaces: Use warm, soapy water and a soft cloth to clean the broken pieces. Remove any dust, dirt, or grease to ensure optimal adhesion.
- Removing Old Adhesive: If any old adhesive is present, use a scraping tool or sandpaper to remove it. Ensure the surfaces are completely clean.
- Drying the Pieces: Make sure the pieces are thoroughly dry before applying the new adhesive. Moisture can weaken the bond.
- Roughing Up the Surfaces: For a stronger bond, lightly scuff the surfaces with fine-grit sandpaper. This creates a better surface for the glue to grab.
A ceramic repair job failed when the surfaces were not properly cleaned. This meant the glue could not stick to the ceramic. This highlights the importance of surface preparation. Remember, this step directly affects the strength of your repair.
Applying the Adhesive
Once the ceramic pieces are clean, apply the adhesive. The method will depend on the type of glue you’re using. For epoxy, mix the resin and hardener according to the manufacturer’s instructions. With super glue, you’ll apply a thin layer directly to the surfaces. Make sure to apply the adhesive evenly. Using too much glue can lead to a messy repair, while too little will weaken the bond. Apply the adhesive carefully. You want enough to get a good grip, but not so much it comes out the sides.
- Following Instructions: Always follow the specific instructions on the adhesive’s packaging. Each adhesive has its own application procedures.
- Applying Evenly: Apply the adhesive evenly across the surfaces. This will ensure a balanced bond.
- Using the Right Amount: Do not use too much or too little adhesive. Too much glue can ooze out, while too little can weaken the bond.
- Avoiding Air Bubbles: Try to prevent air bubbles from forming between the pieces. This can weaken the repair.
A DIY project was ruined when too much epoxy glue was used. The excess glue ran down the sides. This made the repair look messy. Remember to apply the right amount of adhesive for the best results. Proper application is critical.
Securing and Curing the Bond
After applying the adhesive, the next step is to secure the pieces and let the glue cure. This process varies depending on the adhesive. Some glues, like super glue, set quickly. Others, like epoxy, require a longer curing time. Use clamps, tape, or rubber bands to hold the pieces together. Make sure the pieces are aligned correctly. Leave the item undisturbed for the full curing time recommended by the manufacturer. Patience is key at this stage. Allowing enough time for the glue to cure completely will lead to a stronger and more durable bond. Resist the urge to handle the item before the recommended cure time.
- Clamping and Holding: Use clamps, tape, or rubber bands to keep the pieces aligned and secure during curing.
- Alignment: Ensure the pieces are correctly aligned before securing them. Check for any gaps.
- Curing Time: Allow the adhesive to cure for the recommended time. This will ensure the strongest bond.
- Avoiding Disturbance: Do not move or put weight on the item during the curing process. This can disrupt the bond.
A customer damaged their ceramic item because they handled it before the glue had fully cured. This weakened the bond, and the item broke again. Allowing the glue to cure fully is essential.
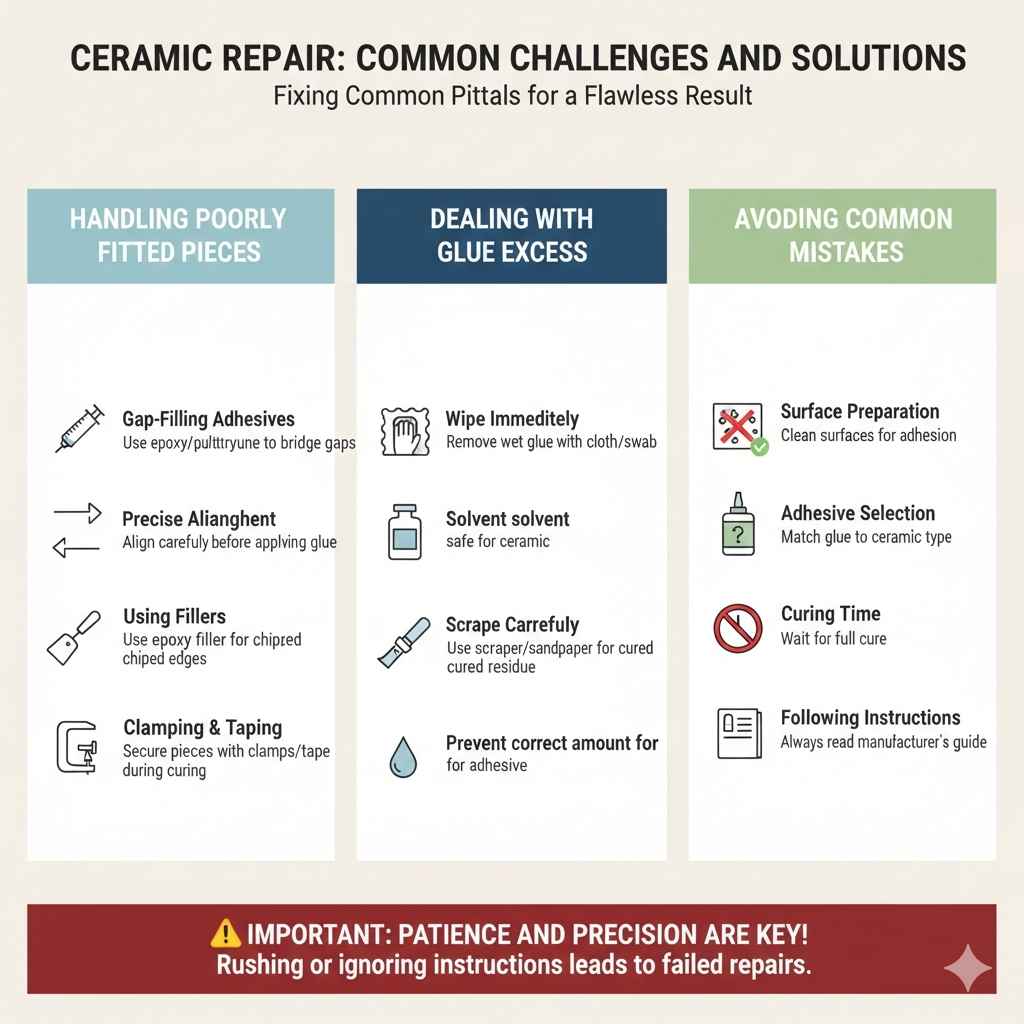
Common Challenges and How to Overcome Them
Ceramic repairs can sometimes present challenges. It is common to experience problems, but these can be overcome with the right techniques. From dealing with difficult-to-fit pieces to correcting glue mishaps, knowing how to handle these issues will increase your chances of success. Let’s look at some common challenges and how you can deal with them.
Handling Misaligned or Poorly Fitted Pieces
One of the biggest problems is dealing with misaligned or poorly fitted pieces. Often, ceramic breaks don’t create a perfect match. The broken edges may be uneven or chipped. When the pieces don’t fit well, use a gap-filling adhesive. This can fill the voids and create a strong bond. Start with careful alignment. Use clamps or tape to hold the pieces in place while the glue sets. If the edges are chipped, you may need to use a filler. Consider building up the edges with epoxy. This will help create a more seamless fit. Take your time to carefully align the pieces. The more accurately you align them, the better the final result will be.
- Gap-Filling Adhesives: Choose a gap-filling adhesive like epoxy or polyurethane. This will help bridge any gaps.
- Precise Alignment: Carefully align the pieces before applying the adhesive. This will minimize the need for adjustments.
- Using Fillers: If the edges are chipped or damaged, consider using an epoxy filler to rebuild the missing material.
- Clamping and Taping: Use clamps, tape, or rubber bands to hold the pieces securely in place during curing.
A customer had a badly broken ceramic vase. They used epoxy to fill the gaps and create a seamless look. The result was a successful repair. Take time to fill gaps to make sure the item comes back together.
Dealing with Glue Excess and Residue
Another common issue is dealing with excess glue and residue. Over-applying glue can lead to unsightly spills and a messy repair. If excess glue oozes out, remove it immediately. Use a clean cloth or a cotton swab dipped in a solvent appropriate for the adhesive you’re using. For cured glue residue, use a scraper or sandpaper. This can help to carefully remove the hardened glue. Be careful not to damage the ceramic itself. Cleaning up spills promptly and carefully will ensure a clean, professional finish. Excess glue can ruin the appearance of your repaired item. Take the time to handle spills and excess glue promptly.
- Wipe Immediately: If glue oozes out, wipe it off immediately with a clean cloth or cotton swab dipped in solvent.
- Solvent Selection: Choose the correct solvent for the type of glue you are using. This will prevent damage to the ceramic.
- Scrape Carefully: Use a scraper or sandpaper to remove cured glue residue. Be careful not to scratch the ceramic.
- Prevent Over-Application: Apply the right amount of glue to prevent excess. Always review application tips for the type of glue you’re using.
An individual accidentally spilled super glue on their ceramic plate. They used acetone to remove the glue and were able to clean the plate successfully. Remember to choose the correct solvent for the type of glue. Proper cleanup is vital.
Avoiding Common Mistakes
There are some frequent mistakes people make when gluing ceramic. These mistakes can cause the repair to fail. One common mistake is not properly cleaning the surfaces before applying the glue. This causes the glue to not stick to the ceramic. Another mistake is using the wrong adhesive for the job. Not all glues are made for ceramic. Choosing the wrong glue will mean that the repair does not hold. It is also important not to move or handle the item before the glue is fully cured. Finally, not following the manufacturer’s instructions can also lead to issues. Pay close attention to these common pitfalls. It can improve the success of your repairs.
- Surface Preparation: Always clean the surfaces. Doing so ensures proper adhesion.
- Adhesive Selection: Choose the right adhesive for the type of ceramic and the repair you need.
- Curing Time: Let the adhesive cure completely. Moving the item too soon can weaken the bond.
- Following Instructions: Always follow the manufacturer’s instructions. This increases the chances of a successful repair.
A homeowner attempted to repair a ceramic tile with the wrong glue. The tile fell off the wall after a few days. They should have used a ceramic-specific adhesive. Selecting the right adhesive is vital.
Frequently Asked Questions
Question: What’s the best glue for ceramic to metal?
Answer: For bonding ceramic to metal, use a specialized epoxy adhesive. Look for one designed for high-strength bonding on dissimilar materials. Follow the manufacturer’s directions for preparing the surfaces.
Question: Can I use super glue on a ceramic mug?
Answer: Super glue can work for small cracks or chips on a ceramic mug, but it’s not ideal for larger repairs. It’s best used for non-food contact areas. If you’ll use the mug for food or drinks, opt for a food-safe epoxy.
Question: Is Gorilla Glue good for ceramic?
Answer: Gorilla Glue can be used on ceramic, but it’s important to use it with care. It expands as it dries, so you should use it only where you can clamp the pieces together. For many ceramic repairs, a more precise glue like epoxy is a better choice.
Question: How do you fix a broken ceramic plate?
Answer: First, clean the broken pieces. Next, choose an appropriate adhesive, like epoxy. Apply the glue carefully. Then, hold the pieces together until the glue dries completely. For decorative plates, a strong bond is critical.
Question: Can you repair ceramic tiles?
Answer: Yes, you can repair ceramic tiles. Use a ceramic-specific adhesive or epoxy. Clean the surfaces and apply the glue. Clamp the tile in place. Allow the glue to cure. You might also use grout to fill any gaps around the repair.
Final Thoughts
Successfully repairing broken ceramic items hinges on understanding Can You Glue Ceramic Together? Best Adhesives. Choosing the right adhesive, preparing the surfaces correctly, and following the proper steps are key to a successful fix. From epoxy to super glue and specialized ceramic adhesives, each option has its strengths. Remember, clean surfaces and precise application are essential for a durable bond. Don’t let a broken ceramic piece get you down. With the right glue and a little patience, you can restore your cherished items. Go ahead and put these tips into practice, and enjoy the satisfaction of repairing your ceramic treasures yourself!