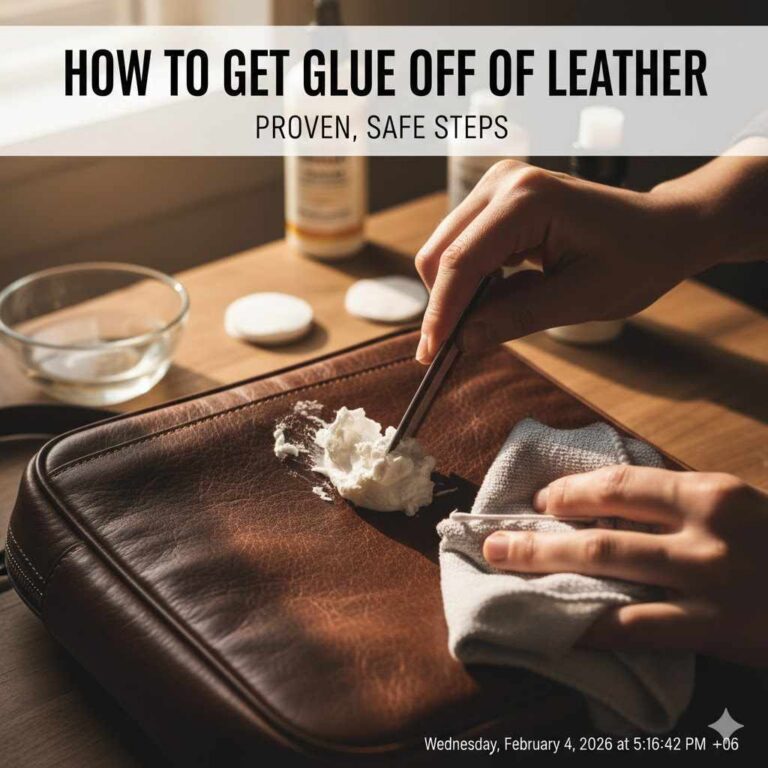
Can You Sand Wood Glue? Best Method Explained
Many woodworkers wonder, “Can You Sand Wood Glue? Best Method Explained” especially when a project doesn’t turn out perfectly. Dried wood glue can sometimes look like part of the wood, making it tricky to know if you can sand it away.
It might seem like a difficult task, but don’t worry. This guide will walk you through everything you need to know with simple steps. We’ll show you exactly how to handle dried glue so your projects look smooth and finished.
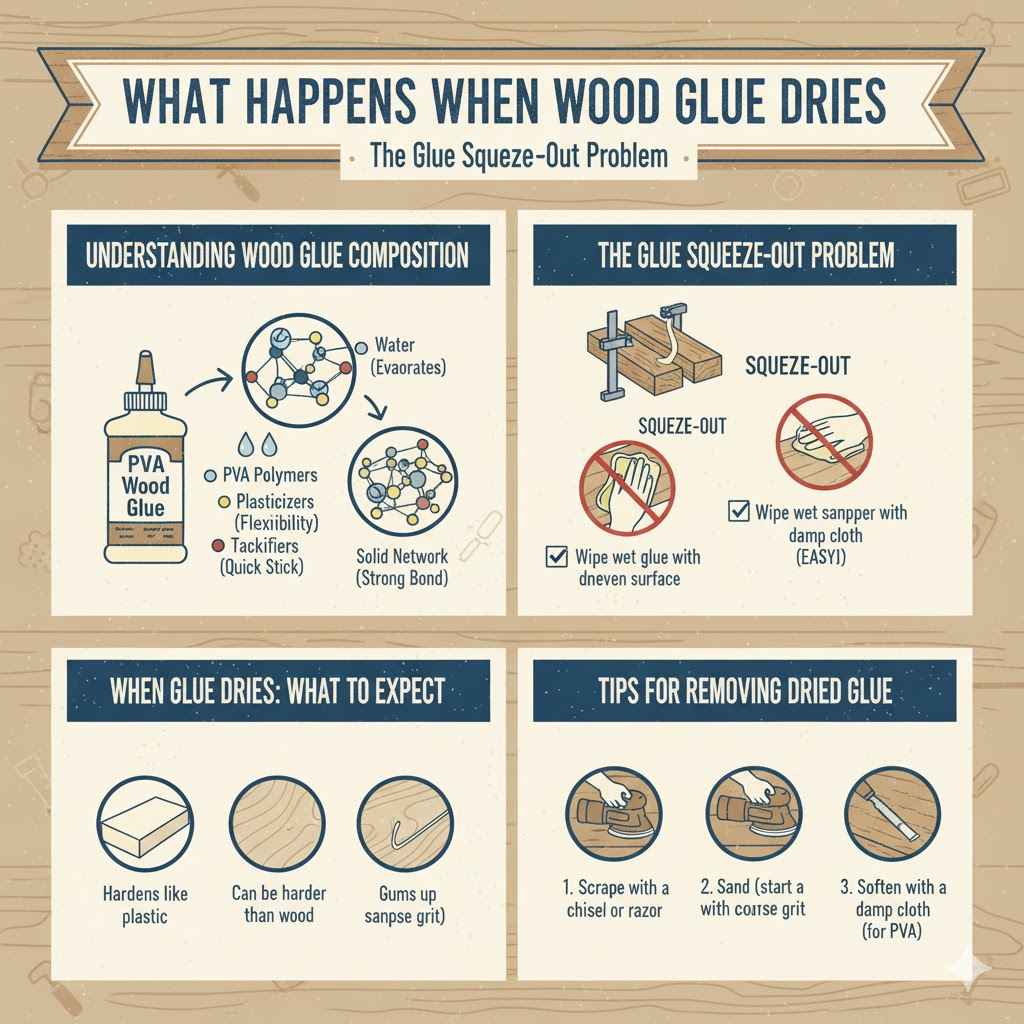
What Happens When Wood Glue Dries
When you use wood glue, it creates a strong bond by soaking into the wood fibers and then hardening. This hardening process is key to its strength. Once dry, the glue becomes a solid material.
It’s often as hard, or even harder, than the surrounding wood. This is why sanding can sometimes be a good way to remove excess glue. It’s like removing a small piece of hard material from your project.
The type of wood glue you use plays a role. Most common wood glues are PVA glues, like Titebond or Elmer’s Wood Glue. These are water-based when wet and become a hard plastic when dry.
Some special glues might behave a little differently. But for typical woodworking, expect a strong, dry bond.
The aim is always to wipe away as much squeeze-out as possible when the glue is still wet. This makes the job much easier later. However, life happens, and sometimes glue dries.
That’s when questions about sanding come up. Understanding the glue’s properties helps you know what to expect when you try to remove it.
Understanding Wood Glue Composition
Wood glue, particularly the common PVA (Polyvinyl Acetate) type, is made of several key ingredients. The main component is a polymer, which is a long chain of molecules. When water is present, these molecules are spread out and can move.
As the water evaporates, the molecules get closer together and form a solid network. This network is what creates the strong bond.
Other ingredients include plasticizers, which make the glue flexible, and tackifiers, which help it stick quickly. Fillers might also be added to make the glue easier to sand or to reduce cost. The exact formula varies between brands and types of glue, affecting its final hardness and how it responds to sanding.
For example, some glues are designed for exterior use and have added properties for water resistance. These might be slightly harder or have a different texture when dry compared to indoor glues. Knowing your glue’s basics helps you predict its behavior under different conditions, including sanding.
The Glue Squeeze-Out Problem
Squeeze-out is the excess glue that forces out from the joint when you clamp pieces of wood together. It’s a sign that you’ve used enough glue to create a strong bond. However, this squeeze-out needs to be managed.
If left to dry completely, it can be difficult to remove cleanly.
Ignoring squeeze-out can lead to several problems. When you try to sand it later, it can gum up your sandpaper. This makes the sandpaper less effective and can leave rough spots on your wood.
Sometimes, the dried glue can even create a slight ridge or uneven surface that is noticeable after finishing. It’s always best to address squeeze-out while it’s still wet.
Wiping away wet glue with a damp cloth is the standard practice. This removes the excess before it hardens. This simple step saves a lot of potential headaches down the line.
But if you miss some, or can’t get to it, then sanding becomes the next option. Learning how to do this effectively is part of mastering woodworking.
Can You Sand Wood Glue? The Direct Answer
Yes, you absolutely can sand wood glue, but with some important considerations. Dried wood glue is essentially a hardened plastic. While it can be removed by sanding, it’s not always as straightforward as sanding the wood itself.
The hardness and texture of the dried glue can affect how easily it sands and what kind of finish you get.
The key is to approach it correctly. Sanding too aggressively or with the wrong grit can cause problems. You might end up with a fuzzy surface or even damage the surrounding wood.
But with the right tools and techniques, you can effectively remove dried wood glue and achieve a smooth, professional finish on your projects. This guide will cover the best methods to ensure success.
It’s good to know that most woodworking glues are designed to be sandable. This is a helpful feature for woodworkers. It means you have a backup plan if you can’t clean up all the excess glue when it’s wet.
The success often depends on the type of glue, how long it has been there, and the tools you use for the job.
Understanding Glue Hardness and Sandability
The hardness of dried wood glue varies. Most common PVA glues become quite hard, similar to some plastics. This hardness means they can be sanded down.
However, they can also be sticky or “gummy” when heated by friction from sanding. This is what causes sandpaper to clog.
Some specialty glues might be formulated differently. For instance, cyanoacrylate (super glue) is very brittle and can sometimes chip away rather than sand smoothly. Epoxy glues, on the other hand, become extremely hard and can be sanded, but they can also be very abrasive to sandpaper.
For standard wood glue, think of it as a material that is less porous than wood. It doesn’t absorb finishes the same way. This difference in material is why you want to make sure it’s removed or blended well.
Getting it flush with the wood is the goal.
Common Issues When Sanding Glue
One of the most common problems when sanding dried wood glue is sandpaper clogging. The softened glue can stick to the grit, rendering your sandpaper useless very quickly. This can be frustrating and costly, as you’ll go through sandpaper rapidly.
Another issue is creating a noticeable dip or gouge in the wood. If the dried glue is very hard, you might need to apply more pressure to sand it down. This extra pressure can accidentally remove more wood than intended, leaving an uneven surface.
This is especially true if you are using a power sander.
Sometimes, the sanded glue area can look different from the rest of the wood. It might appear smoother or have a slightly different sheen, even after applying a finish. This is because the glue doesn’t have the same grain structure as wood.
Careful sanding and finishing can help minimize these differences.
The Best Method for Sanding Wood Glue
To successfully sand wood glue, you need a methodical approach. Start with the right tools and materials, and work your way up in grit. The goal is to remove the excess glue without damaging the surrounding wood or creating an obvious repair area.
Patience is key here.
The best method involves using sandpaper in stages. You’ll begin with a coarser grit to remove the bulk of the dried glue and then move to finer grits to smooth the area. This process ensures a clean removal and a smooth transition back to the natural wood surface.
We will cover specific grit recommendations.
This step-by-step process ensures that even stubborn dried glue can be dealt with effectively. You’ll learn to prepare your sandpaper, the correct pressure to apply, and how to check your progress as you go. This method is designed for reliability and good results.
Preparing Your Workspace and Tools
Before you start sanding, make sure your workspace is clean and well-lit. Dust is a byproduct of sanding, so having good ventilation or a dust collection system is helpful. You’ll need sandpaper in various grits, a sanding block or orbital sander, and possibly some small scraping tools.
Using a sanding block helps maintain a flat surface and prevents you from accidentally creating dips in the wood. If you opt for an orbital sander, use a light touch. Having a variety of sandpaper grits is essential, usually ranging from 100 or 120 grit for initial removal, up to 220 or even 320 grit for final smoothing.
Having the right tools ready makes the job smoother. You don’t want to stop mid-process to search for something you need. Ensure your sandpaper is fresh and not worn out, as this will make the job much harder and less effective.
Step-by-Step Sanding Process
Begin with a grit of sandpaper around 100 or 120. This is coarse enough to start removing the dried glue. If the glue is very thick or hardened, you might even consider starting with an 80 grit sandpaper, but use extreme caution not to oversand the wood.
Gently sand the area with dried glue.
Focus on the glue itself, trying to blend it down to the level of the wood. Sand in a direction that matches the wood grain. If you are using a sanding block, apply even pressure.
For an orbital sander, keep it moving constantly over the area.
Once the bulk of the glue is removed, switch to a finer grit, like 150 or 180. This step removes the deeper scratches left by the coarser grit. Continue sanding until the area feels smooth and is flush with the surrounding wood.
You should no longer feel a ridge or bump where the glue was.
Finally, move to an even finer grit, such as 220. This will smooth out any remaining minor imperfections. If you plan to stain the wood, sanding with a finer grit might be necessary to ensure the stain applies evenly.
For a natural finish or paint, 220 grit is usually sufficient.
Sample Scenario 1: Removing Dried Glue from a Table Leg
Imagine you’ve built a beautiful wooden table, and during the clamping process, some glue squeezed out onto the leg. You missed wiping it off, and now it’s dried hard. You want to sand it smooth without leaving a noticeable mark on the leg.
- Assess the dried glue. Is it a thin film or a thick bead?
- Start with 120 grit sandpaper. Use a sanding block to keep the surface flat.
- Gently sand the dried glue in the direction of the wood grain. Check frequently to see how much is being removed.
- Once the glue is mostly level with the wood, switch to 180 grit sandpaper.
- Continue sanding to smooth out the scratches from the 120 grit.
- Finish with 220 grit sandpaper to make the area perfectly smooth and ready for finishing.
This process ensures that the sanded area blends seamlessly with the rest of the table leg. By moving through the grits, you remove the glue and refine the surface so it looks like it was never there.
Alternative Methods for Glue Removal
While sanding is often the go-to method, there are other ways to deal with dried wood glue, especially if sanding proves difficult or risks damaging delicate wood.
One common alternative is using a sharp chisel or a scraper. For thick blobs of dried glue, you can often carefully scrape or shave it away. The key here is to use a very sharp tool and a shallow angle.
This method requires a steady hand to avoid digging into the wood. It can be very effective for larger, raised areas of glue.
Another approach, particularly for very stubborn glue, involves softening it. Sometimes, a damp cloth left on the dried glue for a short period can help rehydrate and soften it, making it easier to scrape or wipe away. However, be cautious with this method, as too much moisture can raise the wood grain or even affect the wood itself, especially if it’s a type that reacts poorly to water.
For some glues, especially older types or those with specific formulations, using a solvent might be an option. However, this is less common for standard PVA wood glues. Always test any solvent in an inconspicuous area first to ensure it doesn’t damage the wood’s finish or color.
Using Scrapers and Chisels
A sharp cabinet scraper or a sharp chisel can be excellent tools for removing dried wood glue. For a scraper, hold it at a low angle and push or pull it across the dried glue. The idea is to “shave” the glue off the wood surface rather than dig into it.
A chisel works similarly. Use a sharp, flat-ground chisel. Angle it slightly and push it forward, carefully removing thin layers of the dried glue.
The goal is to get the glue flush with the wood. This method can be very precise and is great for detailed areas where sandpaper might be too coarse or difficult to control.
Remember, a dull tool will tear at the wood and glue, creating more problems. Keeping your scrapers and chisels razor-sharp is crucial for success with this technique. It also requires patience and a light touch to avoid damaging the surrounding wood fibers.
The Damp Cloth and Softening Technique
Sometimes, you can soften dried wood glue by applying a damp cloth. For stubborn spots, you might leave a wet cloth over the dried glue for 10-15 minutes. This can reintroduce moisture, making the glue pliable enough to be wiped away with a clean cloth or gently scraped off.
This method works best if the glue hasn’t been dried for an extremely long time or if it’s a water-based PVA glue. However, one must be careful. Excessive moisture can cause the wood itself to swell or raise the grain.
It’s a good idea to test this on a scrap piece of wood if you’re unsure about how your wood will react.
After softening and wiping, you’ll still likely need to do some light sanding to smooth the area. This is because the moisture might have slightly altered the texture of the wood or the glue residue. It’s a complementary technique to sanding, not a complete replacement in all cases.
Grit Selection and Sandpaper Strategy
Choosing the right sandpaper grits is fundamental to success when you sand wood glue. You want to remove the hardened glue efficiently without creating excessive damage to the wood.
- 100-120 Grit: This is your starting point. It’s coarse enough to tackle dried glue without being overly aggressive. Use this to remove the bulk of the glue.
- 150-180 Grit: Once the glue is mostly removed and flush with the wood, move to this grit. It will remove the deeper scratches left by the coarser grit.
- 220 Grit: This is usually your finishing grit for this task. It smooths the surface to a point where it’s ready for most finishes like stain, oil, or clear coats.
- 320+ Grit (Optional): If you are aiming for a very fine finish, especially before applying a clear coat, you might go higher. However, for most situations, 220 grit is sufficient after glue removal.
The strategy is to work in stages. Don’t jump from a very coarse grit to a very fine one. Each successive grit refines the surface left by the previous one.
This systematic approach ensures a smooth, even finish, making the repaired area virtually indistinguishable from the rest of the wood.
Always sand in the direction of the wood grain. If you sand across the grain, you’ll leave noticeable scratches that are difficult to remove. When using an orbital sander, ensure it’s moving constantly and not lingering in one spot.
This prevents over-sanding and accidental damage to the wood.
When to Use Power Sanders vs. Hand Sanding
The choice between power sanding and hand sanding depends on the situation and your preference. Power sanders, like orbital sanders, can speed up the process significantly, especially for larger areas or tougher glue deposits.
However, power sanders require a lighter touch and more careful control. It’s easier to remove too much wood accidentally, creating a noticeable dip or an uneven surface. If you’re not comfortable with a power sander, or if the area is small and precise, hand sanding with a sanding block is a safer bet.
Hand sanding with a block provides more control and helps maintain a flat surface. It’s ideal for detailed work or when you need to be extra careful not to damage delicate features of your project. For very thick glue deposits, a sharp chisel or scraper might even be more effective than sanding before you move to finer grits.
Dealing with Different Glue Types
While this guide focuses on common PVA wood glues, other types exist and might behave differently when dry.
- Titebond Original, II, and III: These are PVA glues and sand well using the methods described above. Titebond III, being waterproof, might be slightly harder but still sands effectively.
- PVA Wood Glues (Generic): Most generic white or yellow wood glues are PVA-based and will respond similarly to Titebond products.
- Cyanoacrylate (Super Glue): This glue is very brittle and hard. It can sometimes be chipped or scraped off. Sanding can work, but it might produce a very fine dust and can wear down sandpaper quickly. Use higher grit sandpapers to avoid excessive dust.
- Epoxy: Two-part epoxy glues create extremely strong bonds and become very hard. They can be sanded, but they are abrasive and can dull sandpaper fast. They are also much harder than wood, so you risk sanding into the wood if you’re not careful.
- Hide Glue: This is a traditional glue that is water-soluble even when dry. It’s generally easier to remove with a damp cloth or light sanding than modern synthetic glues.
Knowing your glue type helps you anticipate how it will react. For most DIY projects, PVA glues are standard, making the sanding methods discussed the most applicable. Always check the manufacturer’s recommendations if you are using a specialized adhesive.
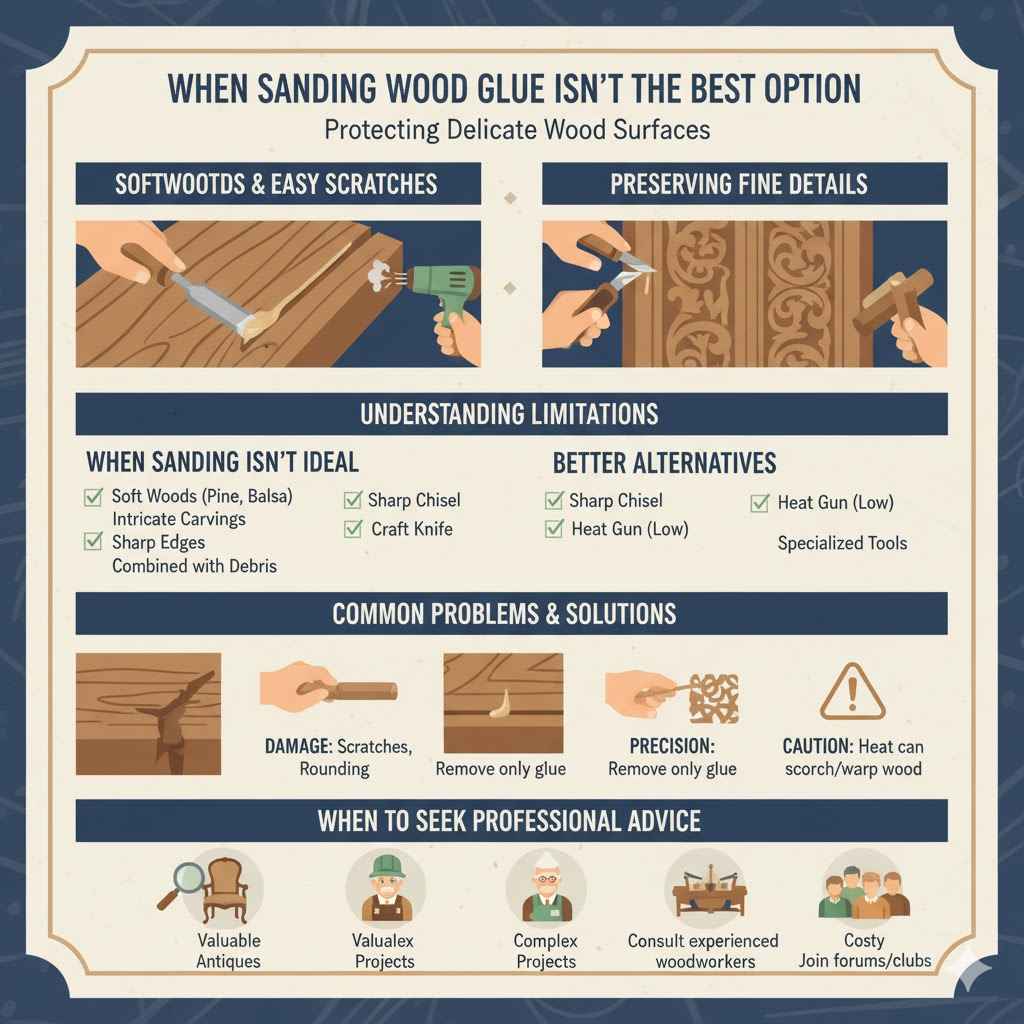
When Sanding Wood Glue Isn’t the Best Option
While sanding wood glue is a common and effective technique, there are times when it might not be the ideal solution. For instance, if the glue is on a very soft wood that scratches easily, aggressive sanding could damage the wood more than the glue.
Another situation is when you have very fine, intricate details. Sandpaper can easily round over sharp edges or remove delicate carvings. In these cases, more controlled removal methods are preferable.
Also, if the dried glue is combined with other debris, a more targeted approach might be needed.
Understanding these limitations helps you choose the best path for your project. It’s about preserving the integrity and beauty of your woodworking piece. Sometimes, a different tool or a slightly different approach can save you a lot of trouble and lead to a better outcome.
Protecting Delicate Wood Surfaces
Softwoods like pine, fir, or balsa are much more prone to damage from sanding than hardwoods like oak or maple. When working with softwoods, even moderate sanding to remove glue can leave noticeable depressions or tear out the wood fibers.
In such cases, it’s better to use a very sharp chisel or a specialized glue-removal tool. Gently scraping away the hardened glue with a sharp blade at a low angle can remove the excess without disturbing the surrounding wood. Patience is key, and you might need to make many light passes.
Another technique for softwoods is to use a heat gun on a low setting very briefly. This can sometimes soften the glue enough to be carefully scraped or wiped away. However, be extremely cautious with heat, as it can scorch or warp soft woods easily.
Preserving Fine Details and Edges
When glue squeeze-out occurs on fine details, like carved elements, chamfered edges, or intricate joinery, sanding can easily ruin the crispness of these features. Sandpaper tends to round over edges and can wear away delicate patterns.
For these areas, a sharp craft knife, a small detail chisel, or even a pointed wooden skewer can be used to carefully pick or scrape away the dried glue. The goal is to remove only the glue without affecting the surrounding wood. Work slowly and use good lighting.
After the bulk of the glue is removed with these precise tools, you might still need a very light touch with fine-grit sandpaper wrapped around a dowel or a pointed object to smooth any remaining residue. The key is precision and control, avoiding broad strokes.
When to Seek Professional Advice
If you are working on a valuable antique, a complex architectural piece, or a project where mistakes are costly, it might be wise to seek advice. Experienced woodworkers or restorers can offer guidance on handling difficult glue situations.
Sometimes, a problem might seem insurmountable, but a seasoned professional might have a trick or a specialized product that can resolve it safely. They can assess the wood type, the glue type, and the overall condition of the piece to recommend the best course of action.
Don’t hesitate to ask for help if you feel unsure. Learning from others is a vital part of woodworking. Online forums, woodworking clubs, or local lumberyards can be great places to get advice from people who have seen and solved many similar issues.
Conclusion
So, Can You Sand Wood Glue? Best Method Explained is that yes, you can. With patience and the right approach, dried wood glue can be removed effectively.
Start with a coarser grit sandpaper and move to finer grits. Always sand with the grain and use a light touch. If needed, scraping or careful chiseling can help remove stubborn spots.
This ensures your woodworking projects look smooth and professionally finished.
Frequently Asked Questions
Question: Will sanding wood glue leave a visible mark on my project?
Answer: It can, if not done carefully. By using progressively finer grits of sandpaper and blending the sanded area with the surrounding wood, you can minimize or eliminate any visible marks. The goal is to make the area flush and smooth so it accepts finishes evenly.
Question: How long should I wait before trying to sand dried wood glue?
Answer: It’s best to let the glue dry completely. For most PVA glues, this means waiting at least a few hours, or ideally overnight. Trying to sand it while it’s still slightly soft can lead to it gumming up your sandpaper.
Question: Can I use steel wool to remove dried wood glue?
Answer: You can use steel wool, but it’s generally not the first choice. It can be messy and might leave behind steel fibers that can rust. Sandpaper or scrapers are usually more controlled and effective methods for removing dried glue.
Question: What’s the difference between sanding wood and sanding dried glue?
Answer: Wood has a grain structure that you sand along. Dried glue is essentially a hard plastic. It doesn’t have grain, and it can become soft and sticky when sanded with friction, which can clog sandpaper.
The goal is to remove the glue without removing too much wood.
Question: If I sand too much, can I fix it?
Answer: Yes, often you can. If you sand too deep, you might need to fill the area. For small imperfections, wood filler can work.
For larger areas, you might need to add a piece of wood or veneer to make a more substantial repair before refinishing the entire surface.
Final Thoughts
Successfully sanding wood glue is achievable for any woodworker. It requires understanding the glue’s properties and using the right tools and grit progression. By following a careful, step-by-step sanding process, you can remove dried glue without damaging your project.
This ensures a smooth, professional finish that highlights your craftsmanship.