Can You Stain Cedar? Unlocking the Secrets for Vibrant Wood
Yes, you can stain cedar. Staining cedar enhances its natural beauty and provides protection against weathering.
Cedar is a popular choice for outdoor furniture, siding, and decking due to its natural resistance to decay and insects. Staining cedar not only highlights its rich grain and color but also extends its lifespan. Proper preparation, such as cleaning and sanding, ensures better stain absorption and a more even finish.
Choosing the right stain type, whether transparent, semi-transparent, or solid, depends on your desired look and level of protection. Regular maintenance, including re-staining every few years, keeps cedar looking its best. By staining cedar, you preserve its beauty and durability for years to come.
The Allure Of Cedar
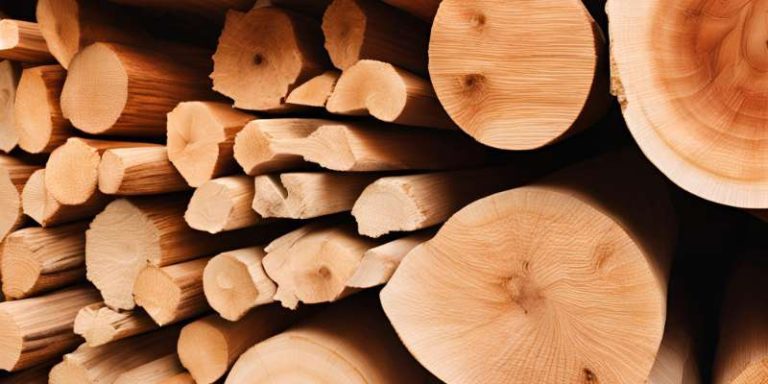
Cedar is a favorite choice for many homeowners and builders. Its natural beauty and durability make it a top pick. Cedar has a rich, warm color and a unique grain pattern. These features make it stand out in any setting. But the allure of cedar goes beyond its looks.
Natural Beauty And Durability
Cedar’s natural beauty is undeniable. The wood has a distinct aroma that many find pleasing. Its color can range from light amber to a deep reddish-brown. This variety in color adds a unique charm to any project.
Durability is another key feature of cedar. The wood is naturally resistant to decay and pests. This makes it ideal for outdoor use. Cedar can withstand harsh weather conditions, making it perfect for decks and fences.
Common Uses In Architecture And Design
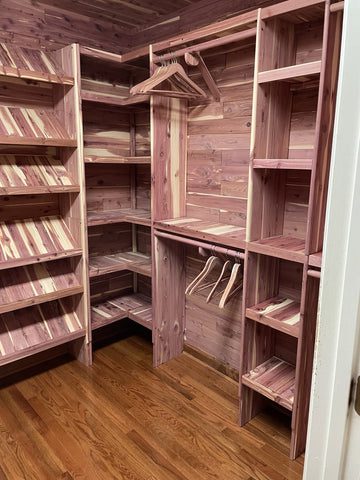
Cedar is versatile and can be used in many architectural designs. It is often used for siding, roofing, and decking. Its natural resistance to moisture makes it suitable for bathrooms and saunas.
In design, cedar is used for both structural and decorative purposes. It is a popular choice for furniture, cabinets, and interior paneling. The wood’s warm tones and unique grain add a touch of elegance to any room.
Here are some common uses of cedar in architecture and design:
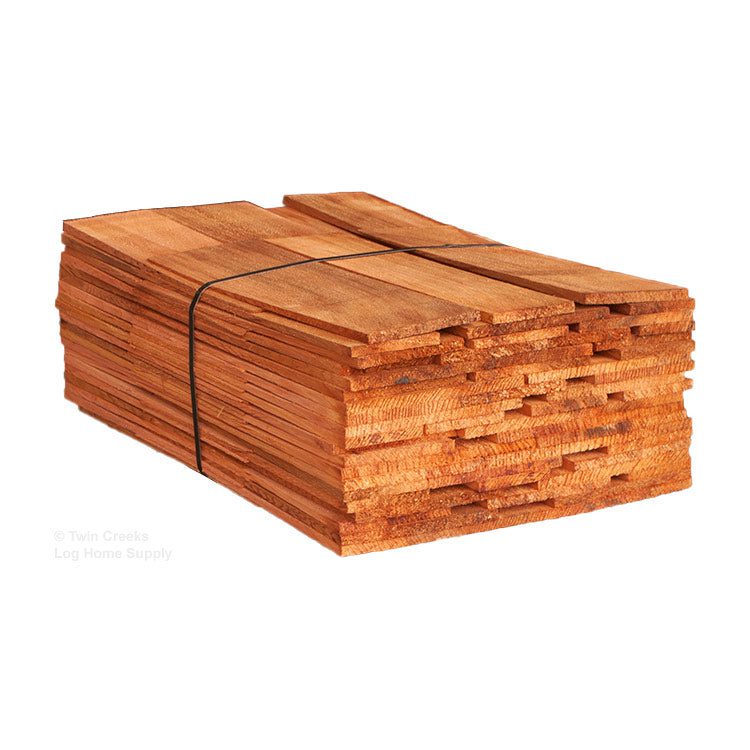
- Siding – Cedar siding is both beautiful and durable.
- Roofing – Cedar shingles add a rustic charm to homes.
- Decking – Cedar decks are long-lasting and weather-resistant.
- Furniture – Cedar furniture is stylish and sturdy.
- Interior Paneling – Adds warmth and texture to interiors.
| Feature | Description |
|---|---|
| Color Range | Light amber to deep reddish-brown |
| Resistance | Natural resistance to decay and pests |
| Common Uses | Siding, roofing, decking, furniture, interior paneling |
Initial Considerations Before Staining
Cedar wood is popular for its beauty and durability. Staining cedar can enhance its natural beauty. Before you start, consider several factors. This ensures a successful staining process.
Wood Condition And Age
First, check the condition and age of your cedar wood. New cedar wood might have mill glaze. This glaze can prevent the stain from penetrating. Older cedar wood may have dirt or mildew. Clean the wood thoroughly before staining.
To clean, use a mild detergent and water. Scrub the surface gently with a brush. For tough stains, use a wood cleaner. Rinse well and let the wood dry completely. This ensures the stain adheres properly.
Inspect the wood for any damage. Repair any cracks or holes. Sand any rough areas. This creates a smooth surface for the stain.
Choosing The Right Time And Weather
Timing and weather are crucial for staining cedar. Choose a dry day with moderate temperatures. Avoid staining on very hot or cold days.
Ideal temperature for staining is between 50°F and 80°F. High humidity can affect the stain’s drying time. Check the weather forecast before you start. Ensure there are no rain showers expected.
If staining outdoors, work in the shade. Direct sunlight can cause the stain to dry too quickly. This can lead to an uneven finish.
By considering the wood condition and age and choosing the right time and weather, you can ensure a beautiful and lasting stain on your cedar wood.
Types Of Stains Suitable For Cedar
Cedar wood is naturally beautiful. To enhance its beauty, staining is a great option. Different stains offer varied benefits. Here, we explore three types of stains suitable for cedar: oil-based stains, water-based stains, and gel stains.
Oil-based Stains
Oil-based stains penetrate deep into cedar. They provide a rich, long-lasting finish.
- Durability: Oil-based stains offer excellent protection against weather.
- Color: They enhance the natural grain and color of cedar.
- Application: Easy to apply with a brush or cloth.
Oil-based stains dry slowly. This allows for an even finish. But, they emit strong fumes. Ensure proper ventilation during application.
Water-based Stains
Water-based stains are eco-friendly. They offer a quick-drying solution.
- Drying Time: Water-based stains dry faster than oil-based stains.
- Cleanup: Easy to clean with soap and water.
- Finish: They provide a clear finish that highlights cedar’s natural look.
Water-based stains are less durable than oil-based. They may need more frequent reapplication. But, they are safer for indoor use.
Gel Stains
Gel stains sit on the surface of cedar. They provide a thick, lustrous finish.
- Application: Ideal for vertical surfaces as they do not drip.
- Thickness: Gel stains offer a uniform color without blotching.
- Versatility: Suitable for both unfinished and finished cedar.
Gel stains are easy to apply. They provide a beautiful, even coat. But, they require thorough surface preparation. Sand the cedar well before application for the best results.
Preparing Cedar For Staining
Staining cedar can enhance its natural beauty and extend its life. Proper preparation is essential for achieving the best results. This guide covers the key steps to prepare cedar for staining.
Cleaning The Surface
The first step is to clean the cedar surface. Use a mild detergent mixed with water. Scrub the wood gently using a soft brush. Remove all dirt, grime, and mildew. Rinse the wood thoroughly with clean water. Allow the cedar to dry completely before moving to the next step.
Sanding For Smoothness
Sanding the cedar is crucial for a smooth finish. Start with a coarse-grit sandpaper (80-grit) to remove rough spots. Follow this with a finer grit (120-grit) to smooth the surface. Always sand in the direction of the wood grain. This ensures an even and smooth surface. Wipe off any sanding dust with a tack cloth.
Applying Pre-stain Conditioner
A pre-stain conditioner helps cedar absorb the stain evenly. This step is especially important for softwoods like cedar. Apply the conditioner with a brush or cloth. Follow the manufacturer’s instructions for the best results. Allow the conditioner to penetrate and dry as recommended.
Once these steps are completed, your cedar is ready for staining. Proper preparation ensures a beautiful, long-lasting finish.
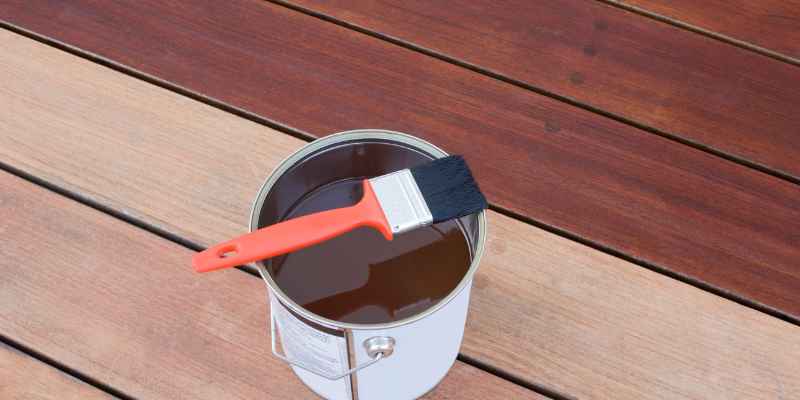
Staining Techniques For Cedar
Staining cedar can enhance its natural beauty. It also provides protection against elements. The right technique ensures a smooth, even finish. Here, we explore various methods.
Brush Vs. Spray Application
Choosing between brush and spray application depends on your project size.
- Brush Application: Ideal for small projects and detailed work. A brush allows for precise control. It helps you cover hard-to-reach areas.
- Spray Application: Best for large areas. A sprayer covers the surface quickly. It provides an even coat without brush marks.
Consider the project size and detail needed. This choice impacts the finish quality.
Working With The Grain
Always stain cedar by following the wood grain. This technique ensures even absorption.
- Identify the Grain: Look for the natural lines in the wood.
- Apply Evenly: Move the brush or sprayer along the grain. This avoids blotches and streaks.
Working with the grain gives a professional finish. It highlights the wood’s natural beauty.
Layering For Depth
Layering stain adds depth and richness. Multiple coats can enhance the wood’s appearance.
- First Coat: Apply the first coat evenly. Let it dry completely.
- Second Coat: Add a second coat for more depth. Ensure even coverage.
- Additional Coats: Apply more coats if desired. Each layer intensifies the color.
Allow each layer to dry before adding the next. This technique builds a rich, lasting finish.
Color Selection For Cedar
Choosing the right color for staining cedar can transform your space. The right stain can highlight cedar’s natural beauty and protect the wood. Let’s explore how to select the perfect color.
Complementing Wood Tones
Cedar has a unique, warm tone. You want to choose a stain that complements this natural color. Consider the existing colors in your space.
If your cedar has a reddish hue, a stain with similar red tones will enhance its warmth. For a more neutral look, opt for a brown or grey stain.
| Wood Tone | Recommended Stain |
|---|---|
| Reddish Cedar | Red, Mahogany |
| Neutral Cedar | Brown, Grey |
Testing Stain Colors
Before committing to a color, always test the stain. Apply a small amount to an inconspicuous area.
- See how the stain looks in different lighting.
- Observe the color after it dries.
- Check for any unexpected color changes.
This helps ensure you are happy with the final result.
Trendy Vs. Timeless Hues
Trendy colors can be exciting, but they may go out of style. Timeless hues, on the other hand, offer lasting appeal.
Trendy hues might include bold colors like dark blue or black. These can make a statement but may not suit everyone’s taste.
Timeless colors include natural wood tones and soft greys. These hues blend well with various styles and remain stylish over the years.
- Trendy: Bold colors (e.g., dark blue, black)
- Timeless: Natural wood tones, soft greys
Maintenance For Long-lasting Results
Staining cedar can enhance its beauty and protect it from the elements. Proper maintenance ensures the stain lasts longer and keeps the wood looking fresh. Follow these steps to maintain your stained cedar for long-lasting results.
Regular Cleaning
Regular cleaning is essential to maintain stained cedar. Dust, dirt, and debris can accumulate on the surface. Use a soft brush or a cloth to remove dirt. For deeper cleaning, mix mild soap with water. Gently scrub the surface and rinse with clean water. Avoid using harsh chemicals as they can damage the stain.
Reapplication Intervals
Stain can fade over time. To keep cedar looking its best, reapply the stain at regular intervals. Typically, re-staining every 2-3 years works well. Inspect the cedar annually. If the stain looks faded or worn, it’s time for a new coat.
Uv Protection
UV rays from the sun can damage the stain and wood. Using a stain with UV protection can extend the life of the cedar. Look for stains that offer UV protection. This helps in preventing the wood from graying and the stain from fading.
| Maintenance Task | Frequency |
|---|---|
| Regular Cleaning | Monthly |
| Stain Reapplication | Every 2-3 years |
| UV Protection Check | Annually |
With these maintenance tips, your stained cedar will look beautiful and last for years. Keep your cedar in top shape with regular care and attention.
Common Pitfalls And How To Avoid Them
Staining cedar can enhance its natural beauty and protect it from the elements. But, there are common mistakes that people make. Knowing these pitfalls and how to avoid them ensures a beautiful and long-lasting finish. Here are some key issues to watch out for.
Blotching And Uneven Absorption
Blotching occurs when the stain absorbs unevenly into the cedar. This often results in dark and light patches. To prevent this, always apply a pre-stain wood conditioner. This helps the wood absorb the stain evenly.
Using a brush or cloth, apply the conditioner in the direction of the wood grain. Let it sit for 15 minutes before staining. This step is crucial for a smooth finish.
Stain Fading
Stain fading is another common issue. This happens when the stain loses its color over time. To avoid this, use a high-quality, UV-resistant stain. Cedar is a softwood and is prone to UV damage.
Apply the stain in thin, even coats. Avoid applying too much stain at once. Multiple thin coats provide better protection and color retention.
Dealing With Moisture Issues
Moisture can wreak havoc on stained cedar. It can cause the stain to peel and the wood to rot. Always ensure the cedar is dry before staining. Use a moisture meter to check the wood’s moisture content. It should be below 15% before you start.
After staining, apply a clear topcoat to seal the wood. This protects it from moisture and extends the life of the stain.
| Issue | Cause | Solution |
|---|---|---|
| Blotching | Uneven absorption | Use a pre-stain conditioner |
| Stain Fading | UV exposure | Use UV-resistant stain |
| Moisture Issues | High moisture content | Ensure wood is dry; apply topcoat |
Taking these steps can help you achieve a beautiful, durable finish on your cedar projects. Remember, preparation and quality products are key.
Eco-friendly And Safe Staining Practices
Staining cedar can enhance its beauty and protect it from the elements. But using eco-friendly and safe methods is essential. This not only protects the environment but also ensures your safety during the process. Below are some tips to help you stain cedar responsibly.
Choosing Low-voc Stains
Volatile Organic Compounds (VOCs) are harmful chemicals found in many stains. They can cause health problems and pollute the air. Choose low-VOC stains to reduce these risks. These stains are safer for your health and the environment. Look for products labeled as “Low-VOC” or “No-VOC”.
- Water-based stains usually have lower VOC levels.
- Always check the product label for VOC content.
- Use natural stains made from plant oils.
Proper Disposal Of Staining Materials
Proper disposal of staining materials is crucial. Improper disposal can harm the environment. Follow these steps to dispose of materials safely:
- Seal used rags in a metal container with water.
- Dispose of the container at a hazardous waste facility.
- Do not pour leftover stain down the drain.
| Material | Disposal Method |
|---|---|
| Used rags | Seal in metal container with water |
| Leftover stain | Hazardous waste facility |
Personal Protective Equipment
Protect yourself while staining cedar. Use proper personal protective equipment (PPE) to stay safe:
- Wear gloves to protect your hands.
- Use a mask to avoid inhaling fumes.
- Wear goggles to protect your eyes.
Always read the safety instructions on the stain’s label. Follow these guidelines for a safe and eco-friendly staining process.
Showcase Of Stained Cedar Projects
Cedar wood is versatile and beautiful. Staining enhances its natural charm. Let’s explore stunning projects where cedar has been stained to perfection.
Residential Success Stories
Many homeowners choose cedar for its durability and aesthetic appeal. Stained cedar decks transform outdoor spaces into cozy retreats. Cedar fences stained in rich hues add privacy and curb appeal.
Stained cedar siding not only protects the home but also adds warmth and elegance. Pergolas and gazebos made from stained cedar become focal points in gardens and backyards.
Commercial Cedar Marvels
Businesses also benefit from stained cedar. Restaurants use stained cedar for outdoor dining areas, creating a rustic and inviting atmosphere. Retail stores employ stained cedar for signage and exterior accents, enhancing their brand image.
In office buildings, stained cedar paneling adds a touch of nature and sophistication. Public parks and community centers use stained cedar for benches and playground structures, ensuring durability and beauty.
Before And After Comparisons
Seeing the transformation of cedar through staining is inspiring. Below is a table showcasing some before and after examples:
Staining cedar not only enhances its appearance but also extends its lifespan. The before and after transformations are striking. They show how staining can bring out the best in cedar.
Frequently Asked Questions
What Stain Looks Best On Cedar?
Semi-transparent stains look best on cedar. They highlight the wood’s natural beauty while providing protection. Popular choices include cedar-tone and natural cedar.
Is It Okay To Stain Cedar?
Yes, staining cedar is okay. Staining helps protect the wood from weather damage. It also enhances its natural beauty. Make sure to use a high-quality, UV-resistant stain. Regular maintenance ensures long-lasting results.
Do I Need To Sand Cedar Before Restaining?
Yes, you should sand cedar before restaining. Sanding removes old stain, smooths the surface, and ensures better stain absorption.
How Long Does Stained Cedar Last?
Stained cedar can last 3-7 years with proper maintenance. Regular sealing and cleaning extend its lifespan.
Conclusion
Staining cedar enhances its natural beauty and provides protection. Choose the right stain for your desired look. Proper preparation ensures a lasting finish. Don’t forget to test a small area first. With these tips, your cedar project will look stunning and stand the test of time.
Enjoy your beautifully stained cedar.