Can You Stain Over Painted Wood? Yes, With Prep
Yes, you can stain over painted wood, as long as you properly prepare the surface. Staining over painted wood requires thorough sanding and cleaning to remove the existing paint and create a smooth, bare wood surface that will properly absorb the stain.
Once the wood is prepped, you can apply the stain and finish it with a protective topcoat. Keep in mind that the final color and appearance will depend on the type of wood and paint you are working with, so it’s important to test the stain on a small, inconspicuous area before proceeding with the entire project.
Understanding The Basics
Staining over painted wood? Understand the basics in this informative post. Find out whether it’s possible, the steps involved, and the outcome you can expect. Explore this topic to enhance your woodworking skills.
Are you contemplating whether you can stain over painted wood, but unsure of where to begin? Don’t worry, we’ve got you covered. In this section, we will delve into the fundamentals of staining over painted wood, shedding light on the key differences between painted and stained wood, as well as the advantages and disadvantages of this process.
Painted Wood vs Stained Wood
Painted wood and stained wood are two distinct treatments that have their own unique attributes. While both methods offer an opportunity to enhance the appearance of wood, they differ in terms of the final finish and the level of protection provided.
Painted Wood:
– Paint forms a protective layer on the surface of the wood, guarding it against moisture, UV rays, and regular wear and tear.
– This finish allows for greater customization, as you can choose from a vast array of colors and finishes to match your style and décor aesthetic.
– However, painting wood tends to conceal the natural grain and texture of the wood, as the paint covers the surface completely.
Stained Wood:
– Stain penetrates the wood, enhancing its natural beauty by accentuating the grain and texture.
– Staining allows the wood to breathe, as it does not form a thick coating on the surface. As a result, the wood retains its natural feel and appearance.
– However, staining may not offer the same level of protection as paint, as it does not create a barrier between the wood and external factors.
Advantages and Disadvantages
Now that you have a better understanding of painted and stained wood, let’s explore the advantages and disadvantages of staining over painted wood.
Advantages:
1. Enhanced Appearance: Staining over painted wood provides an opportunity to achieve a custom look by combining the benefits of both methods. The stained finish can bring out the natural beauty of the wood while incorporating color variations.
2. Cost-Effective: Staining over existing paint can save you both time and money. Instead of undertaking the extensive process of stripping and sanding the paint off the wood, staining allows you to refresh the appearance with less effort and expense.
3. Easy Maintenance: Stained wood is generally easier to maintain than painted wood. The color or finish may fade over time, but touch-ups and reapplication are relatively straightforward compared to repainting.
Disadvantages:
1. Limited Options: Staining over painted wood may restrict your color options. The existing paint may affect the final shade and color achieved. It is essential to test the stain on a small, inconspicuous area before committing to the entire surface.
2. Surface Preparation: To ensure a successful stain application, proper surface preparation is essential. The painted surface should be clean, smooth, and free of any peeling or chipping paint. Sanding or stripping may be necessary before staining.
3. Durability: Stain alone may not offer the same level of protection as paint. If you are looking for a highly durable finish that can withstand heavy use and external factors, paint may be a better option.
Considering these advantages and disadvantages can help you make an informed decision when it comes to staining over painted wood. In the next section, we will explore the step-by-step process of staining over paint, so stay tuned!
Preparation Is Key
When it comes to transforming the look of painted wood, staining can be a great option. But before you dive into the staining process, it is crucial to understand that proper preparation is key to achieving the best results. Taking the time to evaluate the surface, clean and sand it, and repair any damages will ensure that the stain adheres properly and creates a beautiful finish. Let’s break down the necessary steps in preparation for staining.
Evaluating The Surface
Before you start staining over painted wood, it is essential to evaluate the surface. Check for any existing stains or finishes, as well as any peeling or chipping paint. It’s important to determine whether the paint is oil-based or water-based, as this will influence the type of stain you can use. Additionally, assess the condition of the wood underneath the paint to ensure it’s suitable for staining. If the paint has been applied too thickly or if the wood has a rough texture, it may be more difficult to achieve a smooth and even stain.
Cleaning And Sanding
Cleaning and sanding the painted wood surface is a critical step in preparation. Start by thoroughly cleaning the surface using a mild detergent and water solution, as this will remove any dirt, grime, or grease that could hinder the adhesion of the stain. After cleaning, allow the wood to dry completely before moving on to the sanding process. Sanding not only smooths out any imperfections but also creates a roughened surface for the stain to penetrate and adhere to. Use a medium-grit sandpaper and sand in the direction of the wood grain to ensure an even finish.
Repairing Damages
Before proceeding with staining, make sure to repair any damages to the painted wood. This includes filling in any cracks, holes, or dents with a suitable wood filler. Once the filler has dried, sand it down until it is smooth and level with the surrounding wood surface. Taking the time to repair damages will not only improve the appearance of the finished result but also ensure that the stain is applied evenly without any blemishes.
Understanding the importance of preparation when staining over painted wood is crucial for achieving a successful outcome. By evaluating the surface, cleaning and sanding it, and repairing any damages, you will create a solid foundation for the stain to adhere to, resulting in a stunning transformation. So don’t skip the preparation steps – they are the key to achieving a professional and long-lasting finish!
Choosing The Right Stain
When it comes to updating the look of your painted wood furniture or surfaces, staining can be a great option. However, choosing the right stain is essential for achieving the desired results. Considering factors such as the wood type, desired finish, and testing the stain can help you make an informed decision.
Considering The Wood Type
Before diving into the staining process, it’s crucial to consider the type of wood you are working with. Different wood species absorb stain differently, resulting in varying colors and finishes. For example, softwoods like pine tend to absorb stains more unevenly compared to hardwoods such as oak or walnut.
Understanding the characteristics of the wood will help you determine the type of stain that will work best. If unsure, you can consult with a professional or do some research to ensure you choose a stain that suits your specific wood type.
Matching The Desired Finish
The final appearance is an essential aspect when it comes to staining painted wood. Before selecting a stain, think about the finish you want to achieve. Do you desire a lighter or darker look? Are you aiming for a natural wood appearance or a more luxurious finish?
Consider the existing paint color on the wood, as it can affect the outcome of the stain. Lighter paints may require additional preparation or priming to achieve the desired color, while darker paints may influence the final shade of the stain.
To ensure a perfect match between the stain and the desired finish, it’s advisable to test the stain on a small, inconspicuous area of the painted wood before applying it to the entire surface.
Testing The Stain
Testing the stain in a hidden area is a critical step before committing to staining the entire surface. This allows you to observe how the stain interacts with the paint and wood while also giving you an idea of the final color result.
When testing the stain, apply it in thin coats and allow it to dry completely. Assess the color, intensity, and evenness of the stain. If the result is unsatisfactory, you can try a different stain or make adjustments before proceeding.
Remember, staining over painted wood can be a transformative process, bringing out the natural beauty of the wood while adding a touch of elegance to your space. By considering the wood type, matching the desired finish, and thoroughly testing the stain, you can make a well-informed decision and achieve the stunning results you desire.
The Staining Process
The staining process allows you to enhance the color and protect wood surfaces. But can you stain over painted wood? While it may be possible, it requires proper surface preparation and testing to ensure a successful outcome.
Applying The Stain
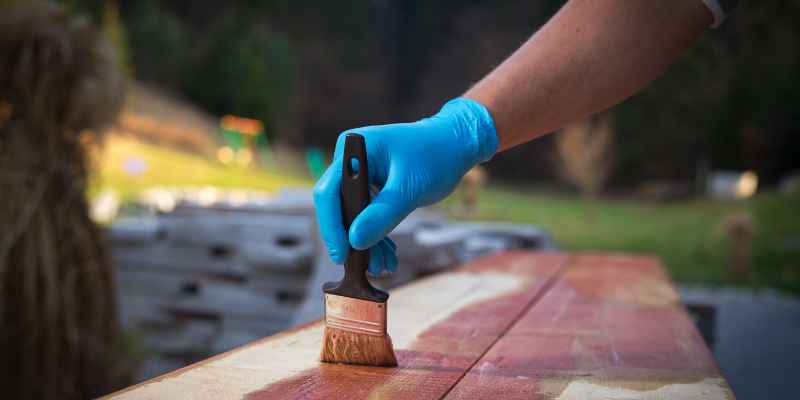
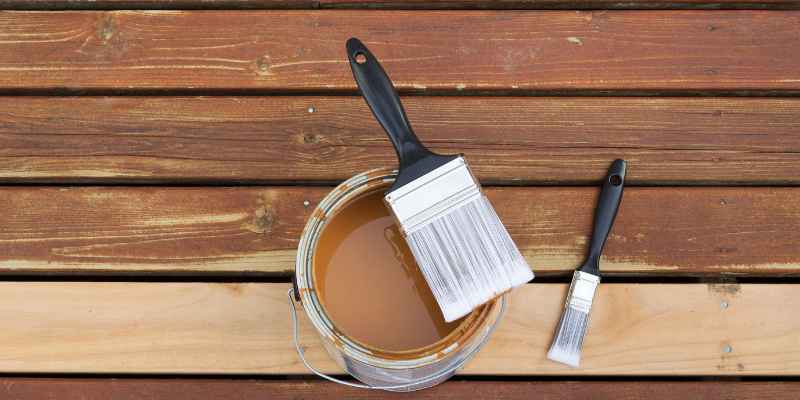
When it comes to staining over painted wood, the first step is to prepare the surface by ensuring it is clean and free of any dust or debris. This can be done by gently sanding the painted surface to create a rough texture that allows the stain to adhere better. Once the surface is clean, apply a thin, even layer of stain using a brush or a cloth. Make sure to work in the direction of the grain to achieve a more natural look. Remember to wear gloves and protect the surrounding areas from any potential stains or spills.
Achieving An Even Finish
To achieve an even finish, it’s important to apply the stain evenly across the entire surface. One helpful technique is to work in small sections, applying the stain and then immediately wiping off any excess with a clean cloth. This prevents the stain from pooling in certain areas and ensures a consistent color. Take your time and pay attention to any drips or streaks that may occur. Remember, patience is key when it comes to achieving a beautiful and even result.
Drying And Curing
After applying the stain, allow sufficient drying time as specified by the manufacturer. This typically takes anywhere from a few hours to overnight. It’s important not to rush this step, as inadequate drying time can lead to an uneven or blotchy finish. Once the stain is dry, it’s essential to let it cure for the recommended period. This allows the stain to fully bond with the painted wood and ensures long-lasting durability. Avoid placing any objects or touching the stained surface until it is completely cured.
Finishing Touches
When it comes to refinishing painted wood, adding the finishing touches is crucial to achieve the desired look. Protective coatings and decorative elements can enhance the durability and aesthetic appeal of your project. In this section, we will explore the importance of protective coatings and how to add a decorative touch to your stained painted wood.
Protective Coatings
Applying a protective coating is essential to ensure the longevity and durability of your stained painted wood. These coatings form a barrier between the wood and external elements, preventing damage from moisture, UV rays, and everyday wear and tear. Here are some popular protective coatings you can consider:
- Polyurethane: This clear coating is known for its excellent durability and resistance to water and chemicals.
- Varnish: Offering a glossy or satin finish, varnish provides excellent protection against moisture and scratches.
- Lacquer: Lacquer dries quickly and offers a durable, high-gloss finish, ideal for indoor furniture or decorative pieces.
Before applying any protective coating, make sure to prepare the painted wood surface by sanding it lightly and removing any dust or debris. Apply the coating using a brush, roller, or spray gun, following the manufacturer’s instructions. Multiple coats may be necessary for optimal protection.
Adding A Decorative Touch
Once you’ve protected your stained painted wood, consider adding a decorative touch to elevate its appearance. This can be achieved through various techniques and elements:
- Stencils: Using stencils allows you to add intricate patterns or designs to your stained painted wood surfaces. Simply position the stencil and apply the desired stain color over it for a decorative effect.
- Antiquing: Give your project a vintage, aged look by using an antiquing glaze. Apply the glaze over the stained wood surface and wipe away the excess for an elegant finish.
- Metallic accents: Incorporating metallic elements, such as leafing or metallic paint, can add a touch of glamour and sophistication to your stained painted wood.
Experiment with different decorative techniques and elements to achieve the desired look. Remember to apply protective coatings over decorative finishes to preserve and enhance their appearance.
Conclusion
Staining over painted wood is a viable option for transforming the look of your furniture or surfaces. By following the proper preparation steps and using the right products, you can achieve a beautiful, durable finish. Remember to test in an inconspicuous area before proceeding, and always consult professional advice for specific situations.
Enjoy the process of refreshing your painted wood with a stunning stain!