Can You Tile Over Plywood? Not Without Cement Backer Board
Yes, you can tile over plywood if you follow proper preparation techniques. Tiling over plywood is possible with the right methods, ensuring a stable and durable surface for the tiles to adhere to.
Prior to tiling, it is crucial to ensure that the plywood is clean, dry, and structurally sound. This can involve patching any imperfections, sanding the plywood surface, and applying a primer or sealer to enhance adhesion. By taking these necessary steps, you can successfully tile over plywood and create a beautiful and lasting tile installation.
Understanding Plywood As A Substrate
Plywood serves as a suitable substrate for tiling projects. Unlike other materials, it offers stability and durability, making it a viable option for tile installation.
When it comes to tiling projects, it’s crucial to have a solid and reliable substrate to ensure the longevity and durability of your tiles. Plywood is a popular choice for substrates due to its affordability and versatility. However, not all types of plywood are suitable for tiling, and proper preparation is essential to achieve a successful installation. In this section, we will delve into the types of plywood suitable for tiling and the necessary steps to prepare the plywood surface for tile installation.
Types Of Plywood Suitable For Tiling
Before proceeding with any tiling project on plywood, it’s important to ensure you are using the right type of plywood. Some varieties of plywood are better suited for tiling due to their structural integrity and moisture resistance. Here are a few types of plywood that are commonly used as substrates for tiling:
| Type of Plywood | Features |
|---|---|
| Exterior Grade Plywood | Constructed with water-resistant glue and designed to withstand outdoor conditions, making it suitable for high-moisture areas like bathrooms and kitchens. |
| Marine Plywood | Specifically engineered for water exposure, marine plywood offers excellent resistance to moisture and is ideal for wet areas. |
| Underlayment Grade Plywood | A specialized type of plywood with a smooth and flat surface, specifically designed for tiling purposes. It provides a solid base for tiles, minimizing the risk of cracks or sagging. |
Ensure that the plywood you choose for your tiling project is of good quality and is suitable for your specific needs. Selecting the right type of plywood will contribute significantly to the success and longevity of your tile installation.
Properly preparing the plywood surface is crucial for ensuring the tiles adhere correctly and the overall stability of your tiling project. Here are the essential steps to follow to prepare the plywood surface:
- Ensure the plywood is structurally sound and free from any damage, such as loose boards or large cracks.
- Clean the surface thoroughly, removing any dust, debris, or grease. A clean surface will allow proper adhesion between the plywood and the tile adhesive.
- Repair any imperfections or irregularities on the plywood surface, such as dents or grooves, using a suitable filler or leveler. A smooth and level surface is crucial for achieving a professional-looking tile installation.
- Apply a primer or sealer on the plywood surface to enhance adhesion and protect against moisture. This step is especially important for plywood that is not inherently moisture-resistant.
- Install a cementitious backer board over the plywood surface for additional stability and to minimize the risk of cracks or movement. This backer board provides a solid foundation for the tiles.
Following these steps will ensure that your plywood substrate is adequately prepared for tile installation, providing a stable and long-lasting surface for your tiles to adhere to.
Considerations Before Tiling Over Plywood
Tiling over plywood can be a cost-effective and straightforward solution for updating your floors or walls. However, before diving into the tiling process, there are a few important considerations to keep in mind. By evaluating the condition of the plywood, determining if reinforcement is necessary, and checking for water damage or moisture issues, you can ensure a successful and long-lasting tile installation. Let’s explore these considerations in more detail.
Evaluating The Condition Of The Plywood
Before tiling over plywood, it’s crucial to assess the condition of the surface. Plywood must be structurally sound, free of major imperfections, and securely fastened to the subfloor or wall studs. Here are a few factors to consider:
- Check for any signs of warping, such as sagging or unevenness.
- Inspect for loose or damaged plywood sheets that may need to be replaced.
- Look for any protruding nail heads or screws that could interfere with the tile installation.
- Ensure the plywood is adequately level and smooth, without significant gaps or cracks.
Determining If The Plywood Needs Reinforcement
In some cases, plywood may require additional reinforcement to ensure its stability and prevent future tile cracks or failures. Here’s what to consider:
- Measure the thickness of the plywood. If it’s less than 1 1/4 inch, additional reinforcement may be necessary.
- Assess the spacing of the floor joists or wall studs. If the joists are spaced more than 16 inches apart, using an additional layer of plywood or cement board can provide extra support.
- If the plywood feels spongy or gives underfoot, reinforcing it with an underlayment or adding more screws can improve its stability.
Checking For Water Damage And Moisture Issues
Water damage and excessive moisture can wreak havoc on a tile installation. Before tiling over plywood, it’s crucial to address any moisture-related concerns. Consider the following:
- Inspect the plywood for signs of water stains, discoloration, or mold growth. These can indicate underlying moisture problems that need to be addressed.
- Conduct a moisture test using a moisture meter to determine if the plywood has excessive moisture levels. Moisture content above specific thresholds may require moisture mitigation measures before tiling.
- Ensure there are no active leaks or water sources that could cause future damage to the plywood and the tile installation.
Preparing The Plywood For Tile Installation
Before you embark on a tiling project, it’s crucial to properly prepare the surface to ensure a successful and long-lasting installation. When tiling over plywood, taking the time to prepare the substrate can make all the difference in the world. In this article, we will guide you through three essential steps to prepare plywood for tile installation: ensuring a clean and dust-free surface, priming the plywood for better adhesion, and addressing any imperfections or unevenness.
Ensuring A Clean And Dust-free Surface
To achieve optimal tile adhesion, it is imperative to start with a clean and dust-free plywood surface. Any debris or dust particles left on the plywood can interfere with the bonding of the adhesive, leading to potential tile failure. Follow these steps to ensure a clean surface:
- Begin by sweeping the plywood with a broom to remove any loose dirt or debris.
- Next, use a vacuum cleaner to remove finer particles and dust that may remain on the surface. Pay extra attention to corners and edges.
- If necessary, wipe the surface with a damp cloth to remove any remaining dust or residue.
By starting with a clean and dust-free surface, you create an ideal environment for the tile adhesive to bond securely to the plywood.
Priming The Plywood For Better Adhesion
Priming the plywood is an essential step that should not be overlooked. A quality primer serves multiple purposes, including improving adhesion, minimizing water absorption, and preventing warping or swelling of the plywood. Follow these steps to prime the plywood:
- Choose a high-quality primer suitable for use on plywood and specifically formulated for tile installation. Consult with your local home improvement store for product recommendations.
- Using a paint roller, apply an even coat of primer to the entire plywood surface. Ensure that the primer completely covers the plywood, including corners and edges.
- Allow the primer to dry thoroughly according to the manufacturer’s instructions.
Priming the plywood provides a solid foundation for the tile adhesive, enhancing its bond and creating a more durable tile installation.
Addressing Any Imperfections Or Unevenness
Before laying tiles, it’s crucial to address any imperfections or unevenness in the plywood surface. Failure to level the substrate properly can result in cracked or uneven tiles. Follow these steps to address imperfections:
- Inspect the plywood surface carefully for any raised edges, cracks, or gaps. Use a putty knife to fill in any cracks or gaps with a suitable wood filler or patching compound.
- If the plywood has noticeable bumps or uneven areas, you may need to sand it down to achieve a smoother surface. Use a handheld sander with fine-grit sandpaper for this task.
- Ensure that the entire plywood surface is level and smooth before proceeding with tile installation.
By addressing any imperfections or unevenness, you create a level and stable foundation for your tiles, ensuring a visually appealing and long-lasting installation.
Choosing The Right Tile And Adhesive
When it comes to tiling over plywood, selecting the right tile and adhesive is crucial for a successful and long-lasting installation. It’s important to choose tiles that are suitable for plywood installation and to use an adhesive specifically designed for securing tiles to this particular substrate. Additionally, considering additional reinforcement methods can further ensure the durability and stability of your tiled surface. In this section, we will delve into each aspect, guiding you on how to make the best choices for your plywood tiling project.
Selecting Tiles Suitable For Plywood Installation
Choosing the correct type of tile for your plywood installation is essential to prevent future problems and ensure a seamless finish. Not all tiles are suitable for installation on plywood, as some may crack or adhesive bond may fail due to the inherent flexibility of plywood. When selecting tiles for plywood, it’s important to consider:
- Tile Material: Opt for tiles that are flexible and can withstand slight movement without cracking. Natural stone tiles like slate or marble may not be the best choice, whereas porcelain and ceramic tiles are more suitable due to their durability and relatively lower risk of cracking.
- Tile Size: Larger tiles can be challenging to install on plywood due to their weight and the potential for uneven weight distribution. It’s generally recommended to choose smaller tiles that can spread the load more evenly.
- Tile Thickness: Thicker tiles are generally more stable and less prone to cracking. Aim for tiles with a thickness of around 6-8mm.
Choosing The Appropriate Adhesive For Plywood
Selecting the right adhesive for plywood installation is crucial to ensure a strong bond between the tiles and the substrate. Ordinary tile adhesives may not provide sufficient bonding strength, leading to tile failures over time. To prevent such issues, it’s important to choose adhesives specifically formulated for plywood installations. These adhesives typically contain flexible additives that allow for slight movement without compromising the bond between the tile and the plywood surface. Additionally, ensure that the adhesive is appropriate for the type of tile you have chosen, following the manufacturer’s guidelines for recommended applications and coverage. Always use a quality adhesive to safeguard your investment and make your tiling project last for years to come.
Considering Additional Reinforcement Methods
While choosing the right tile and adhesive is essential, it may also be wise to consider additional reinforcement methods to ensure the stability and longevity of your tiled surface. One option is to use a cement backer board as an underlayment on top of the plywood surface. This backer board provides additional strength and stability, reducing the risk of tile cracking or adhesive failure. Another option is to employ a mesh tape system, which involves embedding a self-adhesive mesh tape into the tile adhesive. This mesh tape reinforces the tile installation, particularly in areas prone to movement or stress. By considering these additional reinforcement methods, you can enhance the durability and performance of your tiled surface, contributing to a professional and long-lasting finish.
Installation Techniques For Tiling Over Plywood
Tiling over plywood can be done successfully by following proper installation techniques. It is important to use a suitable adhesive and ensure the plywood is properly prepared and level. A professional installer can guide to ensure a successful tile installation on plywood surfaces.
When it comes to tiling over plywood, proper installation techniques are key to ensure a durable and long-lasting result. Whether you’re renovating your bathroom or updating your kitchen backsplash, knowing how to measure, mark the layout, apply adhesive, set the tiles, maintain proper spacing and alignment, as well as cutting tiles to fit around edges and obstacles, will help you achieve a professional-looking finish. In this article, we will explore each of these installation techniques to help you successfully tile over plywood.
Properly Measuring And Marking The Layout
Before starting any tile installation project, proper measurement and marking of the layout are essential. This ensures that you have a clear plan and avoids costly mistakes. Here are a few steps to follow:
- Measure the area where you will be installing the tiles. Use a tape measure to accurately determine the length and width.
- Plan the layout by visualizing how the tiles will look in the space. Consider the size and shape of the tiles, as well as the overall design.
- Use a chalk line or a straight edge and a pencil to mark the starting point and the layout lines on the plywood. This will serve as a guide when applying the adhesive and setting the tiles.
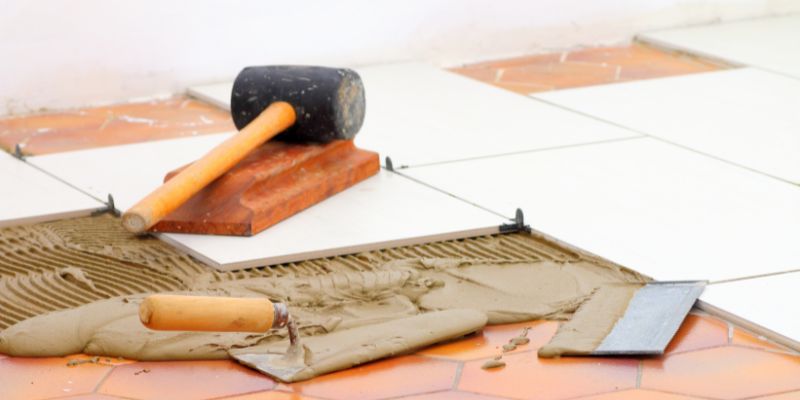
Applying The Adhesive And Setting The Tiles
Once you have measured and marked the layout, it’s time to apply the adhesive and set the tiles. Follow these steps for a successful installation:
- Choose a suitable adhesive for the type of tiles you are using.
- Apply the adhesive to the plywood using a notched trowel, making sure to spread it evenly.
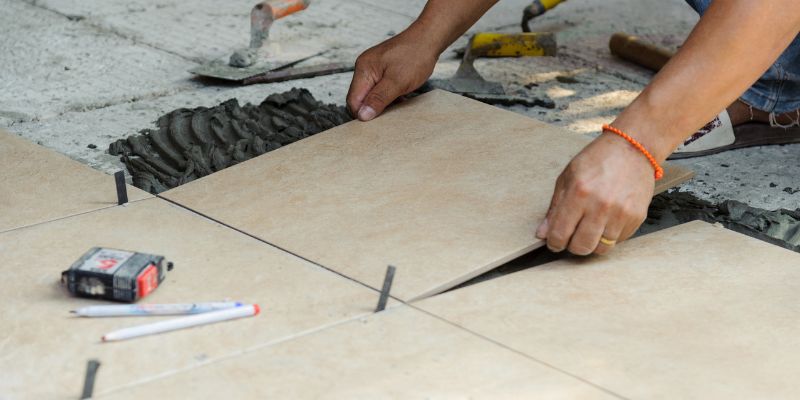
- Place the first tile at the starting point, pressing it firmly into the adhesive. Ensure it aligns with the layout lines.
- Continue placing the remaining tiles, using tile spacers to maintain proper spacing between them.
- Use a tile cutter or a wet saw to trim tiles that need to fit around edges and obstacles. Smooth the cut edges with a tile file or sandpaper.
- Allow the adhesive to dry according to the manufacturer’s instructions before proceeding.
Ensuring Proper Spacing And Alignment
To achieve a professional-looking tile installation, it’s important to maintain proper spacing and alignment throughout. Here’s how:
- Regularly check the spacing between the tiles using tile spacers. Adjust if necessary to ensure consistency.
- Use a level to check the alignment of the tiles. Adjust as needed to keep the rows and columns straight.
- Don’t forget to periodically clean excess adhesive from the tiles with a damp sponge to maintain a clean and polished appearance.
Cutting Tiles To Fit Around Edges And Obstacles
When tiling over plywood, it’s common to encounter edges and obstacles that require tiles to be cut. Follow these steps to ensure a precise fit:
- Measure the area where the tile needs to fit.
- Transfer the measurements onto the tile using a pencil or a marker.
- Carefully cut the tile along the marked lines using a tile cutter or a wet saw.
- Test the tile fit before applying adhesive to ensure it matches the required shape or angle.
- Make any necessary adjustments to the cut tile, such as smoothing rough edges or resizing, using a tile file or sandpaper.
By following these installation techniques, you can confidently tile over plywood and achieve a stunning result. Proper measurement, marking, adhesive application, tile setting, spacing, alignment, and cutting will ensure a durable and visually appealing finish for your tile project.
Grouting And Sealing The Tiles
Once you have successfully installed tiles on your plywood, it’s time to move on to the next crucial steps – grouting and sealing the tiles. These steps are essential to ensure the longevity and durability of your tile installation. In this section, we will walk you through each step in detail, from applying grout to sealing the tiles.
Applying Grout To Fill The Tile Joints
Grout plays a vital role in keeping the tiles in place and filling the gaps between them. To apply grout, follow these simple steps:
- Prepare the grout mixture according to the manufacturer’s instructions.
- Using a grout float or a rubber grout trowel, spread the grout over the tile surface.
- Hold the float at a 45-degree angle and apply the grout diagonally to ensure it fills the joints completely.
- Work in small sections to prevent the grout from drying too quickly.
- Use a damp sponge to wipe away any excess grout from the tile surface before it dries.
Cleaning Excess Grout And Smoothing The Surface
Once you have applied the grout, it’s important to remove any excess grout and achieve a smooth surface finish. Follow these steps to clean and smooth the surface:
- Fill a bucket with clean water.
- Dampen a grout sponge or a clean cloth in the water.
- Gently wipe the sponge or cloth over the tiled surface in circular motions to remove the excess grout.
- Periodically rinse the sponge or cloth in the water to prevent grout buildup.
- Check the tiles for any remaining haze or residue and clean it off with a dry, clean cloth.
Allowing The Grout To Cure Before Sealing
Before you move on to sealing the tiles, it’s crucial to give the grout enough time to cure. This allows it to harden and set properly, ensuring its durability. Ideally, you should wait for at least 24 to 48 hours before proceeding to the next step.
Applying A Suitable Sealant To Protect The Tiles
To protect your newly tiled surface and enhance its lifespan, applying a suitable sealant is a must. Here’s how you can do it:
- Choose a high-quality tile sealant that is suitable for your type of tiles.
- Follow the manufacturer’s instructions for applying the sealant.
- Using a paintbrush or a sealant applicator, evenly apply the sealant over the tiled surface.
- Make sure to cover all the grout lines and tile edges.
- Allow the sealant to dry completely before using the tiled area.
By following these steps, you can ensure a proper grouting and sealing process for your tiled plywood surface. This will not only improve the overall aesthetics of your space but also protect your investment for years to come.
Maintaining And Caring For Tiled Plywood Floors
Tiling over plywood floors is possible with proper preparation and maintenance. Take care of your tiled plywood floors by ensuring a level surface, using the right adhesive, and regular cleaning and sealing to prolong their lifespan.
Maintaining and caring for tiled plywood floors is essential to ensure their longevity and durability. Proper maintenance practices can help to preserve the beauty and functionality of the tiles while preventing any potential issues. In this section, we will discuss some important aspects of maintaining and caring for tiled plywood floors, including regular cleaning and maintenance practices, avoiding excessive moisture and water exposure, and dealing with any potential tile or grout issues.
Regular cleaning and maintenance practices
Regular cleaning is crucial to keep your tiled plywood floors looking their best. It helps to remove dirt, dust, and any stains that may accumulate over time. Here are some cleaning and maintenance practices you should follow:
- Sweep or vacuum the floor regularly to remove loose debris.
- Use a mild detergent mixed with warm water to mop the floor.
- Avoid using harsh chemicals or abrasive cleaners that can damage the tiles or the plywood.
- Dry the floor thoroughly after cleaning to prevent any water or moisture from seeping into the wood.
- Periodically, apply a tile and grout sealer to protect the surface from discoloration and stains.
Avoiding excessive moisture and water exposure
Excessive moisture and water exposure can cause damage to the plywood underneath the tiles. To prevent this, take the following steps:
- Avoid placing water-prone items directly on the floor, such as potted plants without water-catching saucers or damp rugs.
- Wipe up any spills immediately to prevent moisture from seeping into the plywood.
- Provide proper ventilation in rooms with tiled plywood floors, especially in areas prone to moisture, such as bathrooms and kitchens.
Dealing with any potential tile or grout issues
Even with proper care, there may be some issues that arise with the tiles or grout. Here are some common problems and how to address them:
- Cracked or loose tiles: If you notice any cracked or loose tiles, carefully remove them and replace them with new ones. Use the appropriate adhesive and grout to ensure a proper bond.
- Discolored grout: Over time, grout may become discolored. You can use a grout cleaner or a mixture of baking soda and water to restore its color.
- Grout haze: Sometimes, a grout haze may appear on tiles after installation. This can be removed by using a haze remover or a mixture of vinegar and water.
- Stains on tiles: To remove stains on tiles, use a non-abrasive tile cleaner and a soft brush or sponge. Avoid using abrasive materials that can scratch the surface of the tiles.
By following these regular cleaning and maintenance practices, avoiding excessive moisture and water exposure, and addressing any potential tile or grout issues promptly, you can ensure that your tiled plywood floors remain beautiful and functional for years to come.
Common Mistakes To Avoid
If you’re planning to tile over plywood, it’s important to take the necessary steps to ensure a successful and long-lasting installation. While tiling over plywood can be a great option, there are some common mistakes that you need to avoid to prevent future problems.
Skipping Proper Plywood Preparation Steps
One of the biggest mistakes people make when tiling over plywood is skipping the necessary preparation steps. If you neglect to properly prepare your plywood surface, you run the risk of your tiles not adhering properly or even cracking over time.
Here are some important steps to follow for proper plywood preparation:
- Clean the plywood thoroughly to remove any dirt, dust, or debris. Use a vacuum cleaner or a broom to ensure the surface is free from any loose particles.
- Inspect the plywood for any damage or uneven areas. Ensure that there are no loose or protruding nails, screws, or staples. If you come across any, make sure to secure them or remove them completely.
- Fill any cracks, gaps, or seams in the plywood with a suitable wood filler. This will help create a smooth and even surface for the tile installation.
- Sand the plywood surface lightly to remove any rough spots or imperfections. This will provide a better bond for the tile adhesive.
- Prime the plywood surface with a high-quality primer. This will create a barrier between the plywood and the tile adhesive, preventing moisture damage and ensuring proper adhesion.
Using The Wrong Type Of Tile Adhesive
The type of tile adhesive you choose plays a crucial role in the success of your plywood tile installation. Using the wrong adhesive can lead to tiles that don’t stick properly or even come loose over time.
Here’s what you need to consider when selecting tile adhesive:
- Choose an adhesive specifically designed for plywood installations. These adhesives are formulated to provide a strong bond to wood surfaces.
- Ensure that the adhesive is suitable for the type and size of tiles you are using. Different adhesives have different properties and working times, so make sure to read the manufacturer’s instructions carefully.
- Apply the adhesive using the correct trowel size and technique. A too-thin or too-thick layer of adhesive can affect the bonding process. Follow the manufacturer’s recommendations for the proper application method.
- Allow the adhesive to cure properly before grouting or applying any additional weight on the tiles. This will ensure that the tiles have a strong and durable bond with the plywood surface.
Neglecting To Address Potential Moisture Issues
Moisture is one of the biggest enemies of any tiling project, and failing to address potential moisture issues can lead to serious tile damage and even mold growth. Plywood is particularly susceptible to moisture, so it’s crucial to take the necessary precautions.
Consider the following to prevent moisture-related problems:
- Ensure that the plywood is dry and free from any moisture before beginning the tile installation. Use a moisture meter to check the moisture content of the plywood.
- If the plywood is located in an area prone to moisture, such as a bathroom or basement, consider installing a waterproofing membrane or a cement backer board before tiling. These products provide an extra layer of protection against moisture.
- Apply a waterproofing or crack isolation membrane over the plywood surface to prevent any moisture from seeping through and damaging the tiles. This extra step can significantly increase the lifespan of your tile installation.
- Ensure proper ventilation in the room to minimize moisture buildup. Use exhaust fans or open windows during and after hot showers or baths.
By avoiding these common mistakes when tiling over plywood, you can ensure a successful installation that will stand the test of time. Take the time to properly prepare your plywood surface, choose the right adhesive, and address any potential moisture issues, and you’ll enjoy your beautiful tiled space for years to come.
Frequently Asked Questions On Can You Tile Over Plywood
Can I Lay Tile Directly On Plywood?
Yes, you can lay tile directly on plywood. However, you need to follow these guidelines:
1. Ensure the plywood is clean, dry, and structurally sound.
2. Use a flexible mortar and adhesive suitable for plywood.
3. Apply a liquid waterproofing membrane to the plywood before tiling.
4. Use a notched trowel to create a strong bond between the tiles and plywood.
5. Grout the tiles and seal them properly to prevent water damage.
Do You Need To Prep Plywood Before Tiling?
Yes, it is important to prep plywood before tiling. This helps ensure a smooth and stable surface for the tiles to adhere to. Prep involves cleaning, sanding, and applying a primer to the plywood. This helps prevent future issues such as tile cracking or shifting.
What Is The Best Underlayment For Tile Over Plywood?
The best underlayment for tile over plywood is cement backer board. Cement backer board provides a stable and durable surface for tile installation on plywood.
Why Is Tiling Over Plywood Illegal?
Tiling over plywood is illegal because plywood is a flexible material that can expand and contract with changes in temperature and humidity. This movement can cause tiles to crack and come loose, resulting in a damaged and unsafe floor. It is important to use a more rigid and stable surface, such as cement board, to ensure a long-lasting and secure tile installation.
Conclusion
Tiling over plywood can be a viable option for your flooring project. By ensuring the plywood is properly prepared and using the right adhesive and tile installation techniques, you can achieve a durable and aesthetic finish. Just remember to consider the weight of the tiles and the structural integrity of the plywood to prevent any issues in the long run.
Embrace this opportunity to transform your space with beautiful tiled floors over plywood.