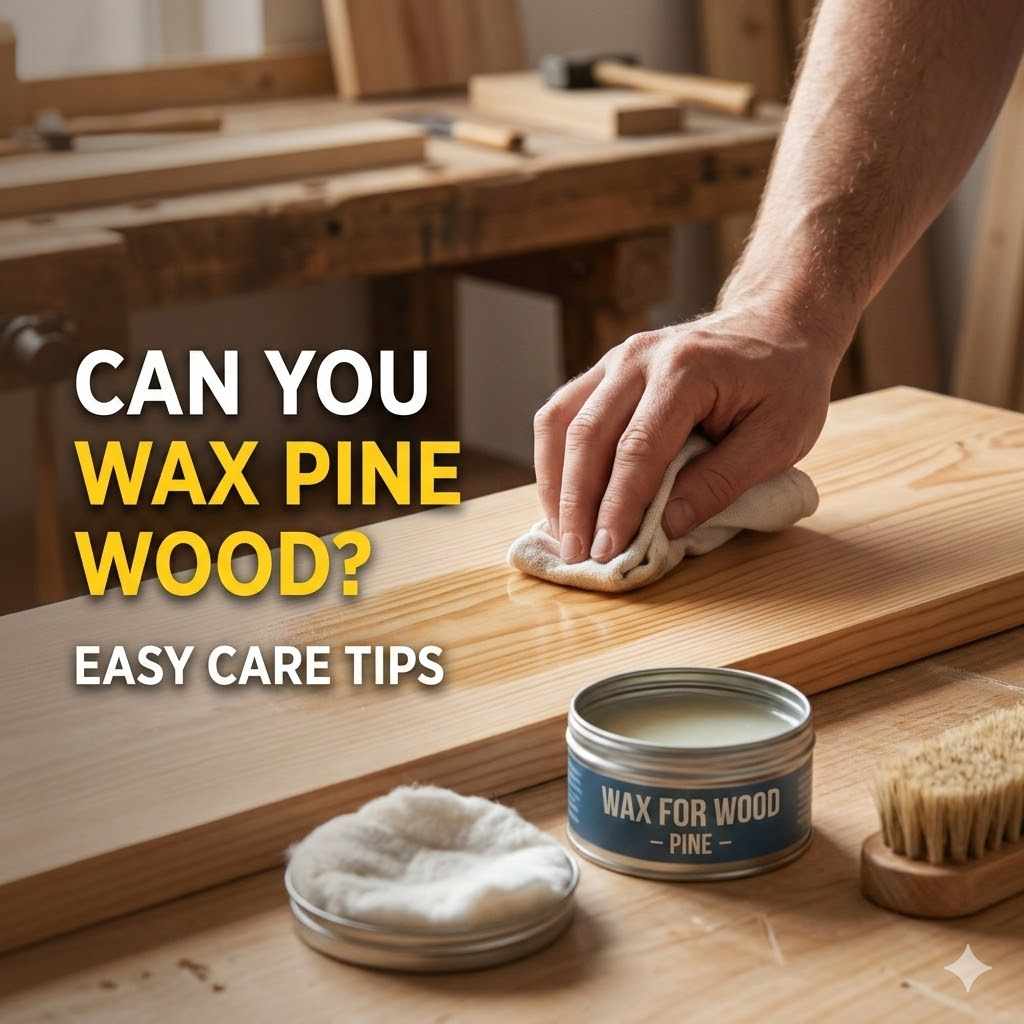
Can You Wax Pine Wood? Easy Care Tips
Many folks wonder if they can wax pine wood. It sounds tricky, right? Pine can be soft, and sometimes people worry about making a mess or not getting it right.
You might think it’s too hard to learn. But don’t worry! It’s actually quite simple to wax pine wood and keep it looking great.
We’ll walk you through it step by step so you can feel confident. Get ready to learn how to give your pine furniture a beautiful, protected finish and discover some great tips for keeping it that way. This guide will show you exactly what to do.
Is Waxing Pine Wood A Good Idea
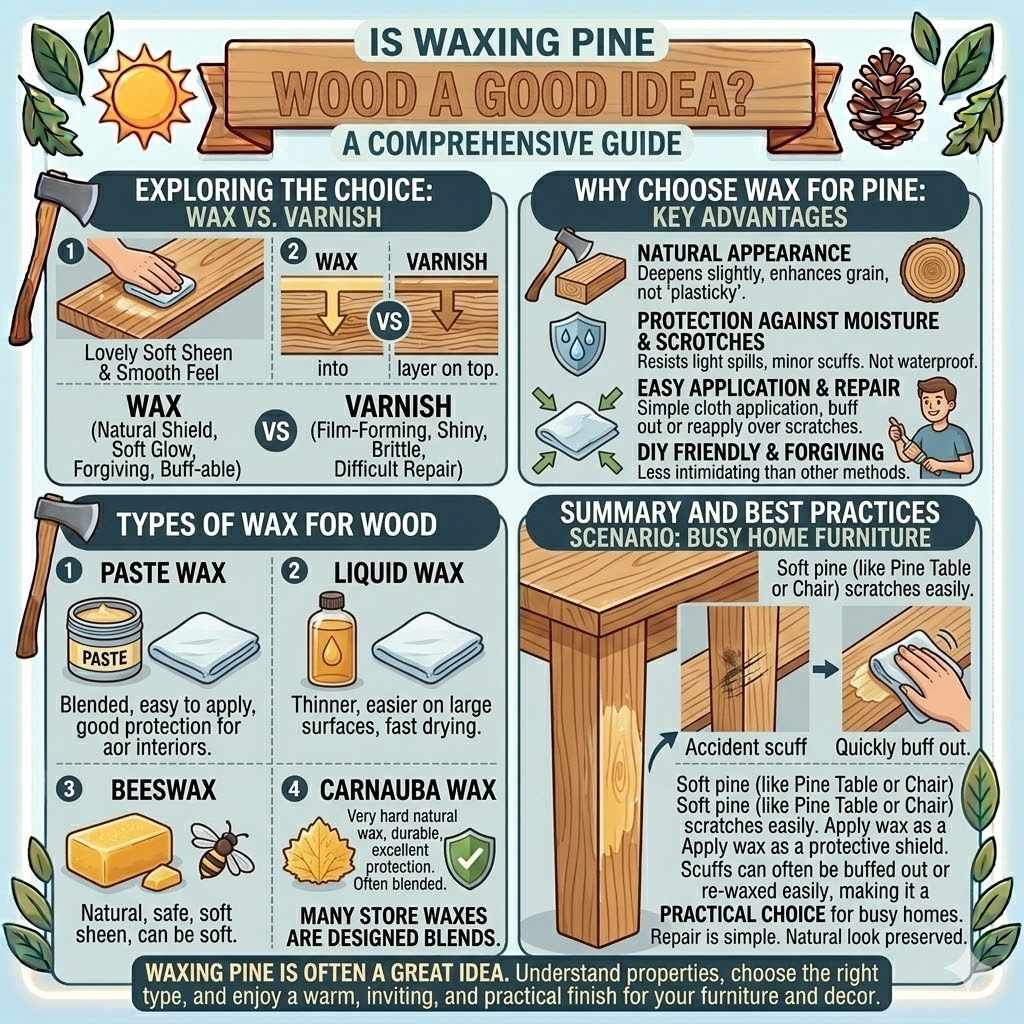
Waxing pine wood is often a great choice for furniture and decor. It gives the wood a lovely soft sheen and a smooth feel that many people prefer over a shiny varnish. Pine is a softwood, meaning it can scratch more easily than hardwoods like oak or maple.
Applying a wax finish can add a protective layer. This layer helps to resist minor scratches, scuffs, and water spots. It also makes the wood easier to clean and maintain.
Think of it like a natural shield that enhances the wood’s natural beauty without hiding its grain. Many DIYers find waxing to be a rewarding process because it’s less intimidating than some other finishing methods. It’s forgiving, and mistakes can often be buffed out.
Plus, the resulting look is warm and inviting.
Why Choose Wax For Pine
Wax is a fantastic option for pine because it works with the wood’s natural characteristics. Unlike some film-forming finishes, wax soaks into the wood a bit and sits on top, creating a barrier that isn’t brittle. This means it’s less likely to crack or peel over time, especially on furniture that might get bumped around.
It truly enhances the natural look and feel of pine, giving it a soft glow rather than a plasticky shine. This is especially important for pine, which often has beautiful knots and grain patterns you’ll want to show off. For beginners, wax is often easier to apply and repair.
If you accidentally scuff your waxed pine, you can usually just buff it out or reapply a bit of wax to the affected area. This makes it a very practical choice for busy homes.
Wax offers several advantages that make it ideal for pine projects:
- Natural Appearance Wax doesn’t change the color of the wood drastically. It deepens it slightly and adds a soft sheen that lets the natural wood grain shine through. This is perfect for pine, which has a distinctive look.
- Protection Against Moisture and Scratches While not waterproof, a good coat of wax will repel light spills and make the surface more resistant to minor scuffs. This is a big help for soft pine.
- Easy Application and Repair Most waxes are simple to apply with a cloth. If you get a scratch, you can often buff it out or wax over it easily. This makes it a forgiving finish.
Types of Wax for Wood
There are a few main types of wax you’ll come across for wood finishing. Understanding these will help you pick the best one for your project. Each has its own properties regarding durability, shine, and ease of use.
Paste Wax
Paste wax is probably the most common type for furniture. It’s a blend of hard and soft waxes, sometimes with solvents to make it spreadable. It’s easy to apply and buff to a nice sheen.
It offers good protection for interior use.
Liquid Wax
Liquid wax is thinner and often easier to apply than paste wax, especially on larger surfaces. It might contain a bit more solvent. It dries quickly and buffs to a lovely shine, offering decent protection.
Beeswax
Beeswax is a natural wax that is safe and effective. It provides a soft sheen and good protection. It can sometimes be a bit softer than other waxes, especially in warm temperatures, so it might be blended with harder waxes.
Carnauba Wax
Carnauba wax is a very hard natural wax. It’s often blended with softer waxes to create a durable finish with a good shine. It offers excellent protection and can make the surface more resistant to heat and moisture.
Many furniture waxes you buy in stores are blends of these, designed for optimal performance on wood. Always check the product label for specific recommendations.
How to Wax Pine Wood Step By Step
Waxing pine wood is a straightforward process. It just takes a little patience and the right materials. This guide will take you through each step, from preparing your pine to buffing it to a beautiful shine.
You’ll be amazed at how simple it is to get professional-looking results.
Preparing Your Pine Surface
This is the most important step for a good finish. If your pine is new or unfinished, you need to make sure it’s clean and smooth. Old furniture might have old finishes or dirt you need to remove.
Cleaning the Wood
First, wipe down the entire surface with a clean, dry cloth. If there’s any dust, grime, or old wax, you might need a slightly damp cloth. Use a soft rag lightly dampened with water.
For tougher spots, you can use a bit of mineral spirits on a cloth, but be sure to let it dry completely. This removes any oils or residues that could stop the new wax from sticking properly.
Sanding for Smoothness
Pine can sometimes have rough spots or raised grain, especially if it’s new or has been exposed to moisture. For a super smooth finish, you’ll want to sand it. Start with a medium-grit sandpaper, like 120 or 150 grit, to remove any imperfections.
Then, move to a finer grit, like 220 grit, to make the surface really smooth. Always sand in the direction of the wood grain. After sanding, wipe away all the dust with a tack cloth.
A tack cloth is a sticky cloth that picks up every last bit of dust, which is crucial for a flawless finish.
Choosing Your Wax
For most pine furniture projects, a good quality paste wax is a great choice. Look for products specifically designed for wood furniture. They often come in clear or natural colors, or sometimes tinted to match different wood tones.
For pine, a clear or natural wax is usually best so you don’t hide the wood’s natural color and grain.
Applying the Wax
Now for the fun part! Applying wax is not difficult, but doing it right will give you the best results. Remember, a little wax goes a long way.
Using a Wax Applicator or Cloth
You can use a soft, lint-free cloth (like an old cotton t-shirt or microfiber cloth) or a dedicated wax applicator pad. Take a small amount of paste wax on your cloth or pad. You don’t need much – just enough to coat the applicator.
Gently rub the wax onto the wood surface in a thin, even layer. Work in the direction of the wood grain. Don’t try to put on too thick a coat; this will make it harder to buff later and can lead to a sticky finish.
Think of it like applying a very thin layer of frosting. You want to cover the entire surface, including any edges or carved details.
Allowing the Wax to Dry
After you’ve applied the wax, you need to let it sit for a bit. This allows the solvents in the wax to evaporate and the wax to harden slightly. The drying time can vary depending on the product and the humidity in your room.
Usually, it’s about 10-15 minutes. The wax will look dull and hazy when it’s ready to be buffed. It shouldn’t feel wet or sticky to the touch.
Buffing to a Shine
This is the step that brings out the beauty of the waxed wood. It’s where you turn that dull haze into a lovely sheen.
Using a Soft Cloth for Buffing
Grab another clean, soft, lint-free cloth. You can use a microfiber cloth, a soft cotton rag, or even a piece of an old wool sweater. Gently buff the waxed surface.
Again, work in the direction of the wood grain.
Apply moderate pressure and move the cloth in a circular motion or back and forth with the grain. You’ll start to see the haze disappear and a beautiful, soft sheen emerge. Keep buffing until you achieve the level of shine you desire.
It takes a bit of elbow grease, but the results are worth it!
Achieving the Desired Sheen
Some people like a very subtle, matte finish, while others prefer a bit more of a gentle glow. You can control this by how much you buff. For a softer look, buff less.
For a bit more shine, buff more vigorously.
If you find that the wax is still coming off on your cloth after buffing, it might mean you applied too thick a coat, or it hasn’t fully dried. You can try buffing a bit longer, or even lightly sanding with very fine steel wool (0000 grade) followed by more buffing. Usually, though, just good buffing is all that’s needed.
Caring for Your Waxed Pine
Once your pine wood is waxed, it looks beautiful and is protected. But like anything, it needs a little care to stay looking its best. Regular upkeep is key to maintaining that lovely finish.
- Regular Dusting The simplest way to care for waxed pine is to dust it regularly. Use a soft, dry cloth to wipe away dust. This prevents dust from building up and becoming ground-in grime.
- Cleaning Spills Quickly If you spill something on your waxed pine, wipe it up immediately with a clean, dry cloth. Don’t let liquids sit on the surface, as they can still mark the wood, even with wax.
- Occasional Re-waxing Over time, the wax finish can wear down, especially on high-traffic surfaces. You might notice it looking duller or feeling less smooth. When this happens, simply clean the surface lightly and apply another thin coat of wax, buffing as usual.
This re-invigorates the finish.
For more stubborn marks, avoid harsh chemical cleaners. You can try a specialized wood cleaner designed for waxed finishes, or a very mild soap solution followed by a thorough drying. Always test any cleaning product in an inconspicuous spot first.
Can You Wax Over Old Finishes Or Paint
Many people wonder if they can apply wax over existing finishes like varnish, lacquer, or even paint. This is a common question for those looking to refresh old furniture without stripping it down completely. The answer is yes, but with some important considerations.
Applying wax over certain finishes can be a great way to add a protective layer and a softer sheen, but it’s not always a straightforward process. You need to understand how wax interacts with different types of finishes to avoid problems.
Waxing Over Varnish or Lacquer
Wax can be applied over most cured varnish and lacquer finishes. The key is that the old finish must be completely dry and hardened. If the varnish or lacquer is still soft or sticky, the wax won’t adhere properly and could cause a messy, gummy surface.
To prepare, clean the varnished or lacquered surface thoroughly with a good degreaser or mineral spirits to remove any wax, polish, or oils that might be present. This ensures the new wax can bond to the old finish. Once clean and dry, you can apply a thin coat of paste wax and buff it.
This adds a layer of protection and can give an older, dull finish a nice boost of shine and smoothness. It’s a great way to revitalize antique furniture.
Example Scenario
Imagine you have an old pine coffee table with a worn varnish finish. The varnish is chipped in a few places, and it looks dull. Instead of stripping it and starting over, you can clean it well, perhaps fill the chips with wood filler, and then apply a quality furniture paste wax.
The wax will fill in minor imperfections and give the entire surface a uniform, soft sheen, making the table look much more presentable and protected.
Waxing Over Painted Surfaces
Yes, you can wax over painted surfaces! This is a popular technique, especially for chalk paint or milk paint finishes, which are often designed to be waxed. Waxing over paint gives it a beautiful, velvety matte look and seals the paint against dirt and minor wear.
When waxing over paint, ensure the paint is fully dry and cured. For chalk or milk paint, this usually means waiting at least 24-48 hours. Apply the wax in thin coats using a soft cloth or applicator, working it into the paint.
Then, buff it well. The wax not only protects the paint but also enriches its color. You can even use tinted waxes to add depth or an antiqued look to painted furniture.
It’s a fantastic way to achieve a durable, beautiful finish on painted pieces.
Case Study: The Painted Dresser Refresh
Sarah found an old pine dresser that had been painted a bright, somewhat chalky blue. The paint was lovely but felt very porous and easily marked. She decided to try waxing it.
After cleaning the dresser, she applied a clear furniture paste wax with a cloth, working it into the paint. She then buffed it for about 15 minutes until it had a soft, smooth sheen. The wax sealed the paint, made it feel much smoother, and gave it a more sophisticated, matte appearance.
The blue color also seemed richer. Sarah found it so easy that she ended up waxing all her painted furniture.
When Not to Wax Over Existing Finishes
There are times when waxing over an existing finish is not recommended. If the old finish is peeling, bubbling, or severely damaged, waxing will just seal in the problem and likely won’t adhere well. In such cases, it’s better to remove the old finish completely before applying a new one.
Also, some very modern or specialized finishes, like certain polyurethane types, might not interact well with wax. If you’re unsure, it’s always best to test the wax on a small, hidden area first.
Here are situations where you should avoid waxing over:
- Peeling or Chipping Finishes Wax won’t fix underlying adhesion issues and will just peel off with the old finish.
- Oily or Greasy Surfaces If the surface is heavily coated in oil or grease that can’t be fully removed, wax won’t stick.
- Water-Damaged or Soft Wood Underneath If the wood itself is soft, rotted, or water-damaged, waxing will only mask the issue without solving it.
- Certain Modern Finishes Some highly durable or modern coatings may not be compatible with wax. Always test first.
Understanding Wax Durability and Maintenance
Wax finishes are beautiful and forgiving, but they aren’t as tough as some other finishes. Understanding how durable wax is and how to maintain it will help you keep your waxed pine looking its best for a long time. It’s important to have realistic expectations.
How Long Does Wax Last
The lifespan of a wax finish depends heavily on how the piece is used and cared for. On a decorative item that is rarely touched, a wax finish can last for years with just dusting. However, on a tabletop, a desk, or a chair that sees daily use, the wax can wear down much faster.
For frequently used items, you might need to reapply a coat of wax every 6-12 months. Less frequently used items might only need a re-wax every 2-3 years. Signs that it’s time to re-wax include the surface looking dull, feeling dry, or showing water spots that don’t buff out easily.
It’s not a permanent finish, but its easy reapplication makes it a practical choice.
Statistics on Furniture Finish Longevity
While specific statistics for wax finishes on pine are hard to pinpoint, general furniture finish durability studies offer insight. A study by the Furniture Industry Research Association indicated that traditional oil and wax finishes on wood furniture can require reapplication every 1-3 years depending on wear. In contrast, high-performance polyurethane finishes can last 5-10 years or more without reapplication, but they are harder to repair.
This highlights wax’s trade-off: easier maintenance and repair for a less permanent protective layer.
Tips for Protecting Your Waxed Pine
You can extend the life of your waxed pine finish by taking simple protective measures. These aren’t about making the wax indestructible, but about reducing wear and tear.
- Use Coasters and Trivets This is crucial for surfaces like tables. Always use coasters under drinks and trivets under hot dishes to prevent water rings and heat damage.
- Avoid Direct Sunlight Prolonged exposure to direct sunlight can cause any wood finish, including wax, to fade or degrade over time. Place your waxed furniture away from direct sunbeams if possible.
- Lift, Don’t Drag When moving furniture, always lift it rather than dragging it across the floor. Dragging can easily scuff the surface and wear down the wax quickly.
- Clean Up Spills Immediately As mentioned before, prompt cleanup of any spills is vital. The longer a liquid sits, the more likely it is to penetrate the wax layer.
Reapplying Wax for Touch-Ups
One of the best things about wax is how easy it is to touch up. If you notice a scuff mark, a dull spot, or a slight scratch, you don’t need to refinish the entire piece.
Simply take a clean cloth with a small amount of wax. Apply it directly to the affected area and gently rub it in. Then, buff the area until it matches the surrounding sheen.
For small scratches, the wax can sometimes fill them in and make them less visible.
If an area looks generally worn, you can do a quick re-wax of that section or the entire surface. Apply a thin coat over the whole piece and buff it thoroughly. This will refresh the protective layer and restore the shine.
It’s much simpler than sanding and refinishing, making ongoing maintenance very manageable.
Sample Scenario: A Worn Tabletop
Your pine dining table looks great most of the time, but the center where dishes are often placed has lost its shine and feels a bit dry. Instead of panicking, take some paste wax on a cloth. Apply it only to the worn center section.
Rub it in well with the grain, let it haze over for about 10 minutes, and then buff it until it shines. You might need to buff a little longer to blend the newly waxed area with the rest of the table. This quick touch-up restores the protection and beauty to the high-wear area without affecting the rest of the table.
Alternatives To Waxing Pine Wood
While waxing pine wood is a wonderful option, it’s not the only way to finish and protect it. Depending on your needs for durability, appearance, and ease of application, other finishes might be better suited. Exploring these alternatives helps you make the most informed decision for your specific project.
Each finish offers a unique look and level of protection.
Polyurethane Finishes
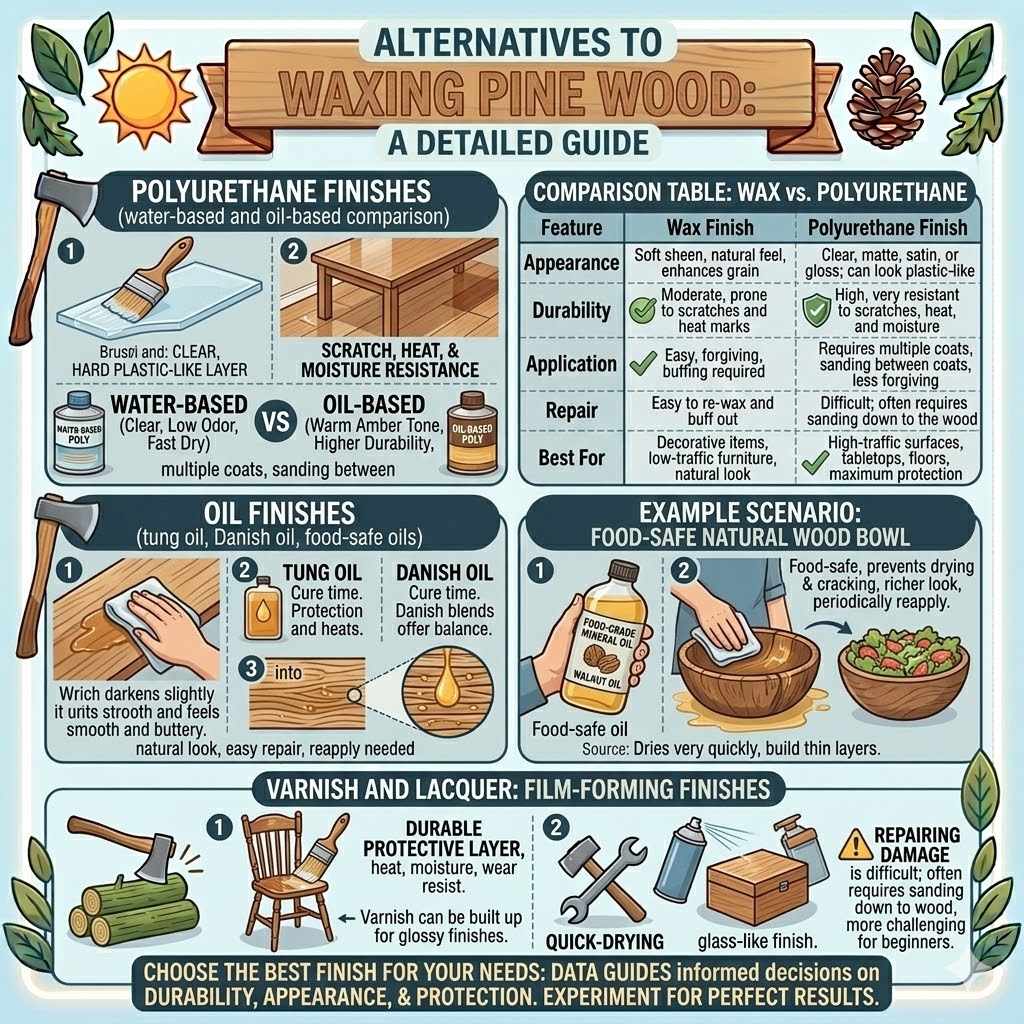
Polyurethane is a very popular and durable clear finish. It creates a hard, protective plastic-like layer over the wood. It’s excellent for high-traffic surfaces like tabletops, floors, and cabinets because it’s very resistant to scratches, heat, and moisture.
Polyurethane comes in water-based and oil-based varieties. Water-based polyurethane dries clear and has low odor, making it easier to use indoors. Oil-based polyurethane provides a slightly warmer, amber tone to the wood and is generally considered more durable, but it has a stronger smell and takes longer to dry.
Applying polyurethane typically involves several thin coats, with light sanding between coats for a smooth finish.
Comparison Table: Wax vs. Polyurethane
| Feature | Wax Finish | Polyurethane Finish |
|---|---|---|
| Appearance | Soft sheen, natural feel, enhances grain | Can be clear, matte, satin, or gloss; can look more “plastic-like” |
| Durability | Moderate, prone to scratches and heat marks | High, very resistant to scratches, heat, and moisture |
| Application | Easy, forgiving, buffing required | Requires multiple coats, sanding between coats, less forgiving |
| Repair | Easy to re-wax and buff out | Difficult; often requires sanding down to the wood |
| Best For | Decorative items, low-traffic furniture, natural look | High-traffic surfaces, tabletops, floors, maximum protection |
Oil Finishes
Oil finishes, like tung oil or Danish oil, soak into the wood to nourish and protect it. They create a very natural look and feel, enhancing the wood’s grain and color without creating a thick surface layer. Oil finishes are popular for their matte or satin appearance and their ability to make the wood feel smooth and buttery.
Applying oil is usually simple: wipe it on, let it soak in, and wipe off the excess. Like wax, oil finishes are easy to repair. If the surface gets scratched or worn, you can often just reapply oil to the affected area.
However, oil finishes are generally less protective against moisture and scratches than polyurethane, and some oils (like pure tung oil) can take a long time to cure fully. Danish oil is a blend that often cures faster and offers a good balance of protection and ease of use.
Example Scenario: Natural Wood Bowl
For a wooden salad bowl, an oil finish like food-grade mineral oil or walnut oil is often the best choice. These oils are safe for food contact and help prevent the wood from drying out and cracking. A few coats of oil will make the wood look richer and provide some protection against moisture from food.
Reapplication is needed periodically to keep the wood looking its best.
Varnish and Lacquer
Varnish and lacquer are film-forming finishes that create a durable, protective layer on the wood’s surface. They are available in various sheens, from matte to high gloss, and offer good protection against moisture, heat, and wear.
Varnish is generally more durable than lacquer and better suited for surfaces that face a lot of abuse. Lacquer dries very quickly and can be built up in thin layers, creating a glass-like finish. Both require careful application, typically involving multiple coats with sanding between each.
Unlike wax or oil, repairing scratches or damage on varnished or lacquered surfaces often means sanding down the affected area and reapplying the finish, which can be more challenging for beginners.
Frequently Asked Questions
Question: Can I wax pine wood that has been previously stained
Answer: Yes, you can wax pine wood that has been stained, as long as the stain is completely dry and cured. Apply the wax in thin coats and buff well to achieve a smooth, protective finish that enhances the stained color.
Question: Will waxing pine wood make it sticky
Answer: Waxing pine wood will not make it sticky if applied correctly. Applying a thin, even layer and buffing it thoroughly until a dry sheen appears is key. Too thick a coat or insufficient buffing can lead to a sticky surface.
Question: How often should I reapply wax to pine furniture
Answer: You should reapply wax to pine furniture when it starts to look dull, feels dry, or loses its protective sheen. This can range from every 6-12 months for high-use items to every 2-3 years for less-used pieces.
Question: Is wax a good protective finish for pine cutting boards
Answer: While wax can offer some protection, it is not the best primary finish for cutting boards that see a lot of water and food contact. Food-grade mineral oil or specialized cutting board waxes (often a beeswax and mineral oil blend) are better choices for regular maintenance.
Question: Can I use car wax on pine wood furniture
Answer: It’s generally not recommended to use car wax on pine wood furniture. Car waxes contain different additives and abrasives that are not formulated for wood and could potentially damage or discolor the finish.
Summary
Waxing pine wood is a great way to protect it and give it a beautiful, soft finish. You’ve learned that it’s a forgiving process, perfect for beginners. By preparing your wood well, applying thin coats of wax, and buffing it properly, you can achieve stunning results.
Regular dusting and quick spill cleanup will keep your waxed pine looking lovely for years. If the finish wears down, a simple re-waxing will restore its shine. You have the knowledge to confidently wax your pine projects!