Cedar Vs Treated Wood Fence: Proven Best Choice
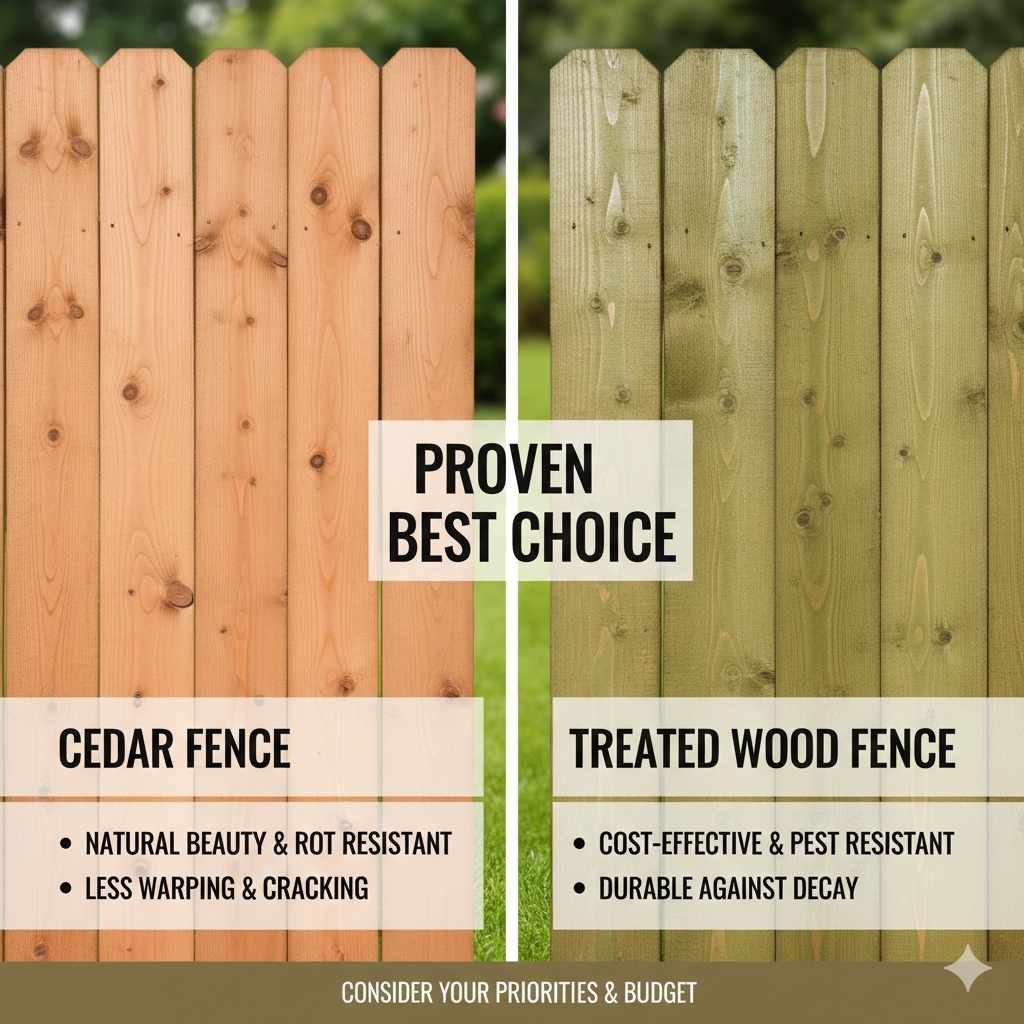
The best choice between and cedar vs treated wood fence centers purely on your budget, ideal look, and long-term goals. Generally, treated pine offers superior core longevity at a lower initial price, while cedar provides natural moisture resistance and beautiful aesthetics without chemical upkeep—making the decision highly personal.
As a fellow DIY enthusiast, I know standing at the lumber aisle comparing big slabs of wood can feel overwhelming. When planning a new fence, what seems like an easy choice—picking the right kind of lumber—quickly turns into a big decision. We walk this path every job: What will last longest? Which one looks better? Can my weekend schedule handle the maintenance? Choosing between cedar versus treated wood fence options sets the foundation for your entire boundary line for decades to come. Do not worry! We will break down the raw facts calmly and compare them side-by-side, sharing practical advice so you can confidently buy the perfect timber for your home project.
Understanding the Showdown: Cedar Vs Treated Wood Fence Grades
To make a fair comparison on cedars vs treated wood fencing requirements, let’s first get friendly with what exactly these materials are. They perform miles apart under the weather influence after installation.
What Exactly Is Pressure-Treated Lumber?
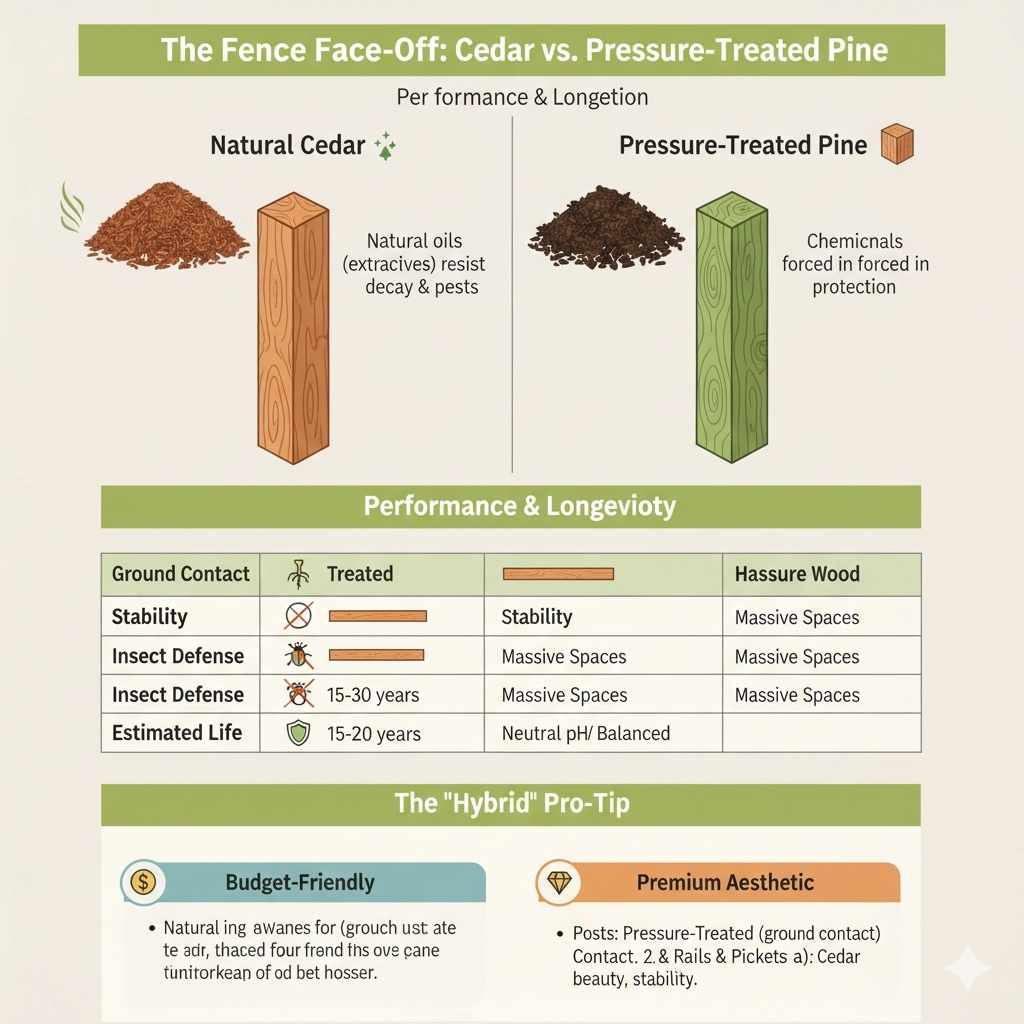
Pressure-treated wood, most commonly southern Yellow Pine in the residential and carpentry world, goes through a chemical forced-insertion process. This isn’t just spilled paint; specialized compounds containing things like Alkaline Copper Quaternary (ACQ) are forced deep into the cellular structure of the wood under high pressure.
This high chemical soak has one main goal: to make the wood rot-resistant, moisture-proof, and highly resistant to insect infestation (termites usually find treated wood very unpleasant work). Because it is frequently sourced from common, fast-growing pine forests, it remains one of the most budget-friendly lumber options available at any home center for foundational fence posts and rails.
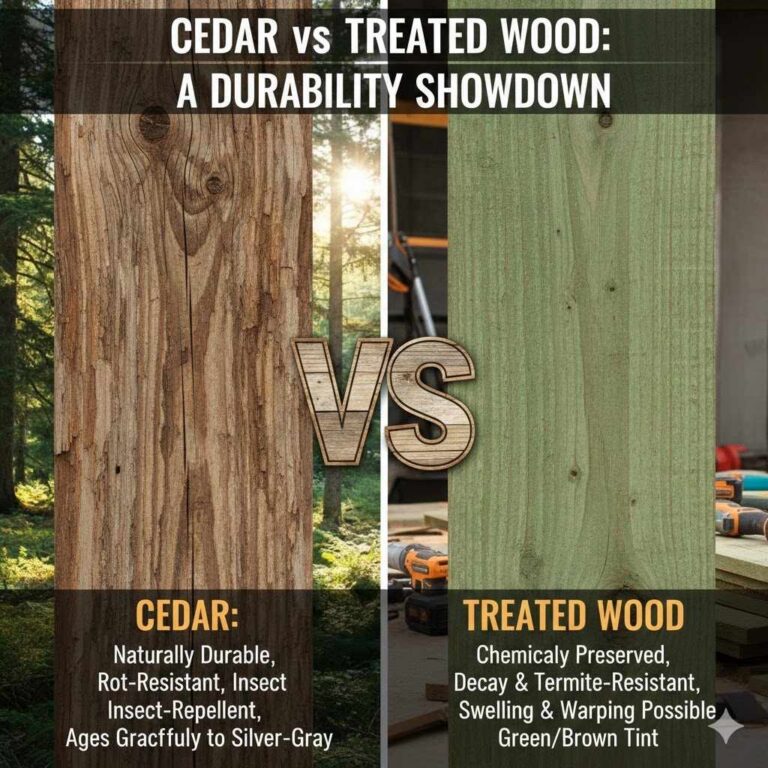
What Makes Cedar Wood Fence So Coveted?
Natural cedars, particularly Western Red Cedar, stand out for an attractive visual benefit coupled with very real, nature-given protection. These trees produce aromatic natural oils known as “extractives” or tannins.
These internal oils are the wood’s natural defense mechanism. They actively resist fungal growth, repel insects naturally (no chemical soaking necessary when we’re comparing the base product), and slow the inevitable drying and warping connected with sun exposure. While cedar is more lightweight than many other species, which speeds handling, it comes at a notably higher initial price tag.
Crucial Comparison Charts: Longevity, Aesthetics, and Cost
Comparing what you get for your money involves looking past how it looks the day you buy it. Durability against wear and what level of finishing work needed immediately versus ten years down the line dictates your true “best choice.” Let’s check the key areas where our two contenders really clash.
Longevity and Resistance Breakdown (The Structural Test)
When setting cornerstone fence posts, buyers mostly ask one crucial question: which material will require replacement posts or boards last?
If lifespan is King Rule Number One for your specific project, an initial investment into higher quality ground-contact graded treated lumber often pays dividends regarding sheer survival time right out of the gate:
| Factor | Pressure-Treated Pine | Solid Cedar Wood (Untreated) |
|---|---|---|
| Average Lifespan Potential | 15–40 Years (Varies by ground contact/climate grading) | 15-20 Years (Natural decay protection) |
| Rot and Decay Resistance | Excellent (Chemical application) | Very Good (Natural oils retain defense until expired) |
| Termite/Insect Resistance | Very Good (Chemical repellents work well) | Good (Oils dissuade soft interior attack) |
| Maintenance After Leaching/Weathering Exposure | Needs consistent staining a sealant every 2-3 years. | Can eventually weather and turn silvery grey or require similar staining/sealing. |
Remember that official specs from testing bodies matter—for engineered structural lumber insights, examining standards set forth by organizations like the U.S. Forest Products Laboratory can offer reassurance on durability guarantees when discussing wood-to-ground contact specifically.
Aesthetics: Color, Grain, and Appeal
If beauty stops passersby as often as function, cedar wins almost every time immediately after milling and installing a new project. Fence charm sets curb appeal, after all!
- Treated Wood Appearance: When first installed, treated wood typically has a visible greenish or brownish cast inherited from the pressure-treating solution. Over months, if left unfinished, this lightens dramatically and starts turning a uniform light soft grey, often leading to splitting/raising of the grain texture unevenly. Uniform color application requires immediate or swift finishing (staining/sealing).
- Cedar Aesthetic: This grain provides fantastic visual texture, ranging from light straw/blonde tints right up to rich, reddish-brown hues, depending naturally on the original cut grading. This richness is visible from Day One. Even when naturally weathering to silvery or dark grey over decades outdoors untreated, the process remains more uniform and stately looking than soft yellows graying out on standard pine.
Initial Cost vs. Total Cost of Ownership (The Math)
This gap is perhaps the most noticeable difference on day one at the building supply store. Price research done across different US geological zones usually shows this clear divide:
Cheaper Initial Buy: Treated lumber is consistently several dollars and dimes cheaper per linear foot or essential gate structure element compared to cedar of similar strength dimensions.
The Cost Catch: The added care needed can close that gap sooner than you think. If you clean cedar after setting and lightly coat oil-based exterior stain annually (easy to do), and treat your new pine fence requires multiple heavy coats with expensive opaque exterior stain upfront just to match aesthetic quality, the long-lead investment might favor cedar slightly over 25 years, depending upon local labor rates for the eventual re-sealing process, which pine often requires sooner.
DIY Skill Required: Ease of Working With Each Material
As a homeowner figuring things out on the weekend, tool compatibility and material splitting while driving anchors or using fasteners become very real obstacles. I have seen overly ambitious weekends paused because a piece decided to severely warp overnight!
Working with Pressure-Treated Pine in DIY Scenarios
Treated pine is tough! This strength is a pro structurally but a genuine con when cutting or nailing the final picket into place.
Driving the Nail: Treated wood shrinks and settles as it completely dries a few months post-purchase, sometimes causing severe warping right next to holding fasteners we secured when wet. Drive galvanized screws smoothly; avoid standard steel as chemical reactions encourage rust bleed when using wrong nails.
Tool Tip: Due to the dense nature and corrosive aspects of the chemicals often included used (especially ACQ or CBA), always use tools designed for pressure-treated wood or ensure protective shielding. Invest in carbide-tipped blades for your circular saw if you’re cutting hundreds of pickets to keep blades sharp and effective throughout the job site marathon.
Breezing Through Boards with Cedar
Cedar is lighter weight overall, easier to carry up the ladder, and much more rewarding right off the table saw or even hand-snipped when trimming difficult angles.
Softness Advantage: Drilling is sometimes recommended even for smaller fasteners with cedar when using softer varieties to prevent checking (tiny cracks appearing near the hole) where the woods fibers surround brittle hardware that exerts force.
Fastener Choice: Cedar handles standard external decking screws very poorly structurally as time passes unless the screws are specific exterior grade, solid stainless steel, or high-grade polymer coated hardware guaranteed against excessive tannin reactivity. It’s wise to splurge on the best quality deck rated screws here across the board for ultimate holding strength and beautiful results.
Crucial Considerations for Your Fence Environment
No two backyards exist in a true vacuum. We need to tailor our preferred wood based on unique surroundings to ensure truly lasting value—that’s what smart craftsmanship is about.
Moisture and Climate Compatibility
Climates vary in challenging wood usage dramatically based on regional weather expectations across the beautiful stretches of the United States terrain:
Wet/Humid Zones: In regions known for high, year-round humidity and soil saturation (like many coastal South Eastern USA locations), Pressure-Treated lumber designed explicitly for “ground contact” application rises to the superior position simply because its engineered resistance slightly edges out pine’s organic tendency to wick moisture under perpetual atmospheric pressure. Do not skimp on purchasing correct G-treated grade posts here.
Dry/Arid to Moderate Climates: Well-draining soil areas allow cedar significant wiggle room. When installed in less oppressive damp conditions, cedar’s beautiful grain resists simple drying stresses related to evaporation exceptionally well—often better than inadequately sealed treated counterparts. Many professionals turn to Cedar in inland, semi-arid climates that still see seasonal torrential rain given the lighter structural profile of the wood. Check the typical moisture-resistant certifications if researching specific USDA zones, perhaps reviewing municipal guidance like that provided by specialized regional extensions if operating in heavily subsidized areas.
Child Protection and Safety Factor
Safety stands above cost or convenience when creating perimeter structures meant to protect family and pets. This usually brings serious health questions directed at the chemical preservatives.
A common sticking point neighbors mention about cedar versus treated wood fence for play areas relates to young children placing their mouths on or near the raw lumber frequently used on a project (rail surface or pickets).
The Treated Timber Question: Newer formulations of pressure treatments (mentioned previously—ACQ being very common replacing older arsenic-containing methods known as CCA which is widely banned for residential installs anyway and shouldn’t ever be near a project unless dealing seriously older properties) pose significantly lower documented hazards when set deep into fence posts. However, prolonged, dedicated chewing on pressure-treated rails near the bottom suggests it may wise to place naturally finished or cedar rails at pedestrian access points close to lawn edges for peace of mind.
Pure Cedar Solution: By using naturally repellent cedar, people who choose this route have Zero concerns about chemical leaching for play purposes. They can be certain any visual cues near mouthy toddlers come from naturally derived tannins and simply rinse off with the rain. Safety here leads many parents firmly to the natural option where wood fabrication reaches sensitive locations.
Step-by-Step Checklist: Selecting Your Best Pick
Okay, Mentor! You’ve outlined the differences clearly, but even that comparative overview creates some crossroads. Use the following steps to solidify which choice—cedar versus treated wood fence—is definitively your right choice and start work efficiently.
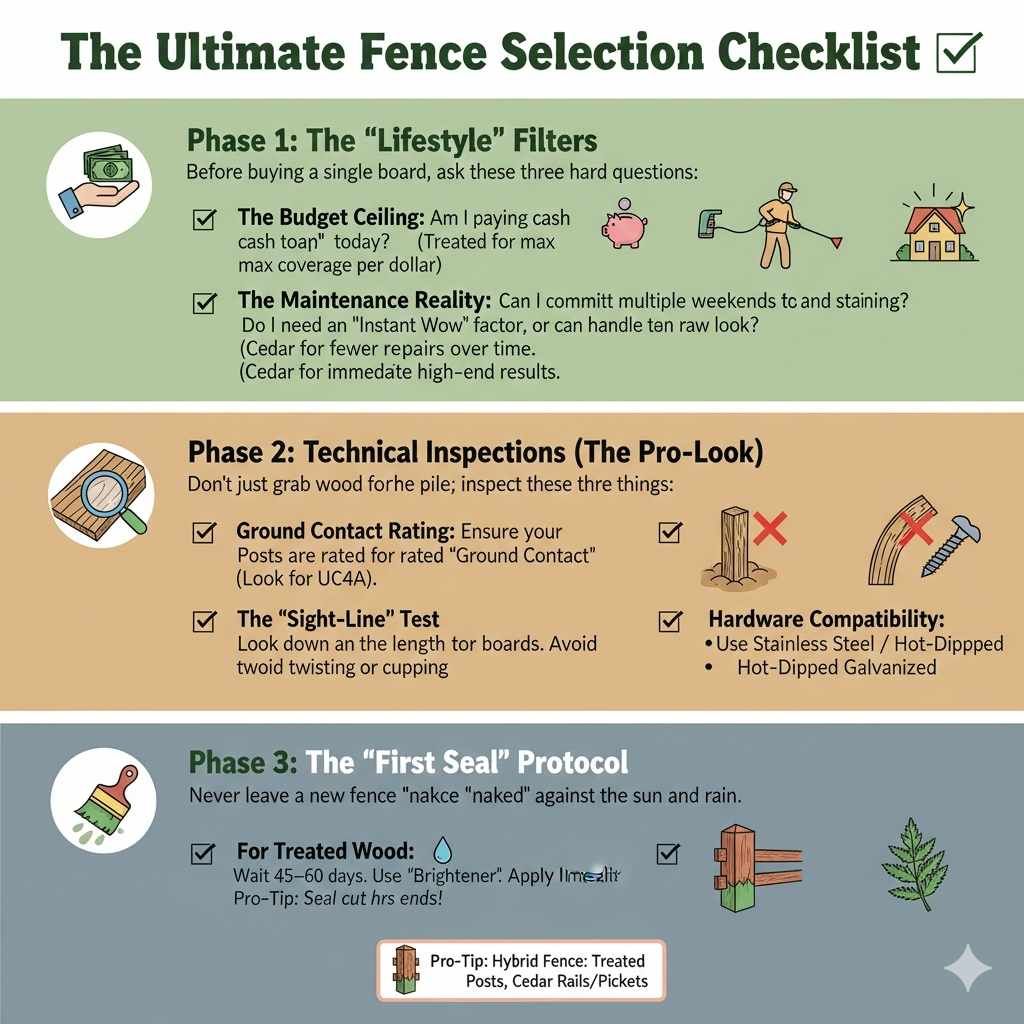
Phase 1: Setting Your Primary Fence Goal Filters
Before pricing anything, lock down how you truly want the fence to interact with your lifestyle. Put these questions forward honestly:
- What is my Hard Budget Ceiling Today?: Be definitive. Are you paying cash today, or financing the upfront outlay? Treated wood often allows for a much bigger yard enclosure budget on the launch day due to cheaper prices per square foot installed.
- What Maintenance Endurance Level Am I Able to Commit To?: Realistically estimate how many Saturdays you can dedicate annually to pressure washing the graying effect off, tightening sagging rails, or simply cleaning wood where moisture builds up on treated or cedar alike. Staining may take a full non-consecutive weekend regardless of wood—account for heavy setup/takedown time.
- Must My Fence Have ‘Instant Wow’ Curb Appeal?: Zero pressure! If seeing that raw lumber sit for six months until you get stain budgeted doesn’t bother you (because the grey blend won’t bother you), save the money. Choosing cedar prioritizes a high-level, immediate, upscale reveal that rarely degrades much over time compared raw treated materials.
Phase 2: Decoding Treatment and Grading Visuals
Remember well, the treatment dictates performance, not just the genus species:
- Posts vs. Nails: Assess Ground Contact Grade: Regardless chosen route if you plan longevity (which all woodworkers always pursue)—the core fence structures (posts that hold all upward vertical tension) must be suitable for life where moisture lives. For almost any fence, the very sturdy Wood Protection Users’ website states they classify retention levels using categories; ensuring your buried and structural timbers fall comfortably into high end protection grades is essential to future structural performance (See: CCA updates and modern treatment standards on recognized safety documentation for ground contact vs above ground applications).
- Grain Check for Warping (Mostly on Treated): Before agreeing to load the beams and posts, pick ones that sit flat already! You must actively look through the stack, slightly twisting lumber diagonally to stop future, premature cupping warp as the material equalizes moisture in your specific local weather systems when laid flat prior to construction commencing on site.
- Select Fastening Hardware Mindfully: If going heavily Cedar, remember only hot-dipped galvanized or full stainless is allowed! If selecting treated (easier chemically if using high stainless fastening), consider if cheaper construction screws with thick, rust proof external coating rated highly will handle necessary job site pressure variations where structure loading requires less precise setting maneuvers than are possible with cedar or softer material.
Phase 3: Initial Sealing Guidelines (Applies to Both for Maximum Life)
No sane mentor allows a new picket line simply stand naked against the elements! Even naturally resistant wood needs help shielding against UV damage accelerating structural breakdown.
For Treated Wood: Let it weather for about 45–60 days (depending upon how wet spring felt post-install). Use a surface “brightener and cleaner” labeled safe for pressure-treated products, scrub lightly, firmly allow to fully dry 48–72 hrs according to product sheet demands, then apply 2 high-quality exterior solid or semi see-through oil or latex stains recommended often by reputable building sites—use lighter initial pigmentation you would actually prefer seeing on the mature wood ten years from now! This prevents it from going gray too fast.
For Cedar Posts/Pickets / Framing Rails: Immediately apply either clear waterproofing sealer or a light Cedar tone translucent finish (like cedar itself!) to achieve maximum preservation for these natural chemicals now. Seal after cutting ends one or two times thoroughly for deep penetration before construction starts assembling—this prevents water wicking up post joints into upright posts.
Frequently Asked Questions for the Intermediate Wood Project Planner
Because woodworking can raise small questions, here are fast, low-jargon responses based on what clients frequently ask our shop near project kickoff.
Q1: Can I stain pressure-treated wood the year after I install it just like cedar?
A: Yes, definitely! You must allow any major amount of external moisture forced into the fresh-cut wood to evaporate naturally first; this typically means waiting at least 2 or 3 full months after installation (often longer if rain persists severely). Improperly trying to stain soaking wet chemicals risks peeling failure within a season indoors so patience prevents project disaster via wasted sealer supplies.
Q2: Is treated pine glue required or necessary for joints in the fence structure?
A: Under normal circumstances for standard fencing runs, standard galvanized fence structural hardware (lag bolts near bracing joints/rails) keeps the fence secure for decades without needing complex woodglue. Good structure is built on robust fastener count per joint, not glue dependency particularly where movement from thermal swapping is constant for heavy lumber rails spanning distances wider than six feet—save the specialized polyurethane glue applications unless building detailed heavy framing around a small gate attachment system only.
Q3: Won’t the sap bleed (weeping) from cedar drip down my fence panels?
A: Yes, the reddish-amber substance, the famous natural essential oil, can sometimes leach out initially from cedar rails, mainly if that cedar element had intense sap density or moisture levels were high during installation. This usually washes away onto the ground without marking most pavers or hard concrete too negatively later. If you stain/seal cedar immediately upon installation (recommended), this bleed often cures right into the new protective topcoat rather than evaporating cleanly and staining external things nearby.
Q4: Are my grass trimmers going going to chip off the chemicals surrounding the bases of treated posts?
A: Concerns like this often mean we apply a buffer around the support structure post-project completion. If frequent landscaping equipment worries you around buried posts or close to the ground fence base touching grass, skip sharp blades immediately near treated zones, or conversely: put a heavy strip-edging along the garden / fence line perimeter so implements cleanly hit heavy PVC edging liner rather than vibrating equipment against often slightly chemically treated soft lower post section, maintaining appearance and minimizing debris spray where your kid often interacts.
Q5: Does cedar wood change color even if permanently sealed on all sides?
A: No wood is shielded permanently from all environment effects, my DIY friend! No matter how expensive your seal coating solution might be claimed (even marine/booth spraying), some fading of the pigment will occur over a 10/15-year span. Sun exposure inevitably affects visible pigment hues. However, unlike raw treated or naturally weathered materials, cedar should hold substantially more of that desirable, uniform richness longer. Plan small touch-ups down the road to refresh high-visibility elements seasonally.
Q6: Which fence wood selection is inherently louder (does it creak or tick more due to wood movement)?
A: Believe it or not, Cedar often transmits exterior noise slightly differently based upon its generally lighter overall density compared to heavy, moisture-laden treated pine. However, the amount to which a new fence will eventually make auditory ‘noises’ (especially creaking and sticking noises during humid expansion or severe cold contraction) falls more heavily on POST HOUSING & SETTLEMENT than the actual wood species applied to picket rails themselves. Secure your posts deeply using strong anchoring concrete sets, give a modest initial fence wiggle test while drying/packing below ground, and minimize large horizontal spanning distances without intermediate perpendicular support if absolute noise suppression matters deeply.
Conclusion: Making the Final Decision as Your Project Mentor Guide
My woodworking students, the hunt ends here for the one ‘better’ option between cedar versus treated wood fence; because after removing fear of unknowing, the real best choice becomes abundantly clear via simple honest metrics aligned perfectly just for your build!
If your primary focus screams Budget Longevity First at All Costs while weathering minor aesthetic compromises, you march toward treating facilities confidently for robust, chemically-backed ground connection capabilities for your main posts and rails, supplemented by strong yearly seal coatings upon completion to gain maximum benefit return from today’s price reduction.
If what drives your building pride lies in Heirloom Appearance, Natural Resistance, Superior Building Work Ease, and that premium upfront texture is worth the sacrifice today to lower the long-term maintenance upkeep cycles, then budget slightly above your starting projections for a phenomenal cedar boundary marker. You will enjoy constructing its panels using wonderfully workable light lumber which smells faintly awesome after heavy rain—there is value in that satisfaction indeed.
Trust your needs list against the facts shared here. Start cutting, wear your dust mask consistently (you need this habit whether trimming arsenic out or cedar oils!), fasten religiously, shield your cut ends when installed, and rejoice in planning a beautiful new boundary that will stand strongly beside your family for countless perfect weekends forward! Happy building.