DIY Cutting Board Ideas: Craft Your Own Kitchen Masterpiece
Creating a DIY cutting board involves selecting quality wood, cutting it to size, and sanding it smooth. Finish with food-safe oil for longevity.
Making your own cutting board is a rewarding project that enhances your kitchen with a personal touch. Choose hardwoods like maple, walnut, or cherry for durability and aesthetic appeal. Measure and cut the wood to your desired dimensions, ensuring a safe and functional size.
Sand the board meticulously to achieve a smooth, splinter-free surface. Finally, apply multiple coats of food-safe mineral oil or beeswax to protect and seal the wood. This DIY task is not only practical but also a creative way to customize your kitchen tools. Enjoy the satisfaction of using a cutting board crafted with your own hands.
Introduction To DIY Cutting Boards
Homemade kitchenware adds a personal touch. It gives you a unique piece. DIY cutting boards are fun to make. You can choose the wood type. You can pick the size and shape. Homemade boards can match your kitchen. They make great gifts for friends. Making a cutting board is a rewarding project.
You save money by making your own board. It can last for years. You can make it from strong wood. Crafting helps you learn new skills. You get a sense of pride. You have control over quality. You can customize it to your needs. It’s an eco-friendly option.
Choosing The Right Materials
Maple is a strong wood. It has a smooth surface. Walnut has a dark color. It looks very elegant. Cherry wood has a warm tone. It gives a rich look. Bamboo is eco-friendly. It is also strong and durable. Oak wood has a rough texture. It lasts a long time.
Plastic boards are cheap. They are also easy to clean. Glass cutting boards look sleek. They can dull knives quickly. Bamboo boards are lightweight. They are also eco-friendly. Silicone cutting boards are flexible. They are easy to store.
Designing Your Cutting Board
Classic styles use simple, clean lines. Wood grain patterns are natural and consistent. Modern styles can be bold and unique. They often use mixed materials. Think about your kitchen’s look. Choose a style that matches well.
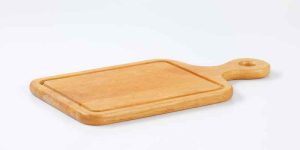
Add your initials to the cutting board. Use a wood burner for designs. Paint the edges for a pop of color. Try using different wood types. Mix light and dark woods for contrast. Add a handle for easier use. These small touches make it unique.
Essential Tools And Safety Equipment
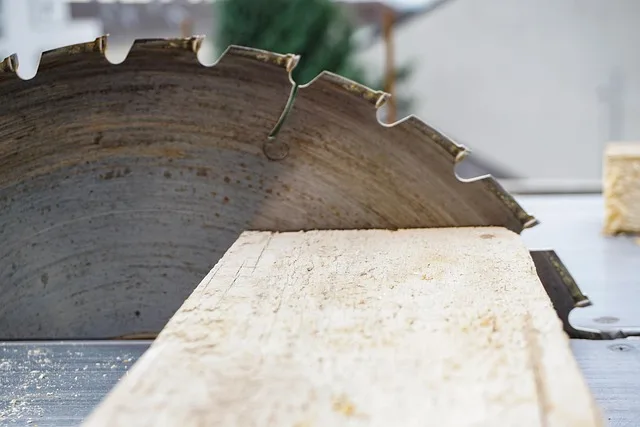
A saw is needed to cut wood. A sander will smooth the board. Clamps hold the wood steady. A measuring tape ensures accurate cuts. A pencil marks the lines to cut. A drill makes holes in the wood. Sandpaper finishes the wood surface.
Wear safety goggles to protect your eyes. Use ear protection to avoid loud noise. Gloves guard your hands from cuts. A dust mask protects your lungs. An apron keeps your clothes clean. Always work in a well-lit area. Keep a first aid kit nearby.
Step-by-step Creation Process
Choose a hardwood like maple or walnut. Cut the wood to desired size. Make sure the wood is dry. Remove any nails or screws. Check for cracks or defects. Smooth the wood with a hand plane.
Mark the cutting lines with a pencil. Use a saw to cut along the lines. Cut slowly to avoid mistakes. Shape the edges with a jigsaw. Round the corners for safety. Check that all sides are even.
Start with coarse sandpaper. Sand all surfaces evenly. Move to finer sandpaper for a smooth finish. Wipe away dust with a cloth. Apply food-safe oil to the wood. Let the oil soak in overnight. Repeat the oiling process as needed.
Decorative Techniques To Embellish
Pyrography means wood burning. Use a special pen tool. Draw designs on the cutting board. Trace outlines and create patterns. Use different tips for detail. Always work in a well-ventilated area. Practice on scrap wood first.
Food-safe dyes are safe for cutting boards. Choose colors that complement your kitchen. Apply with a brush or sponge. Let the dye dry completely. Always use non-toxic dyes. Apply a food-safe sealant after coloring. This protects the board and the design.
Maintaining Your DIY Cutting Board
Wash your cutting board after each use. Use warm water and mild soap. Scrub with a soft sponge or cloth. Rinse thoroughly with clean water. Dry it immediately with a towel. Never soak the board in water. Avoid using harsh chemicals or bleach. You can use a vinegar solution for deep cleaning. Make a solution of one part vinegar and four parts water.
Oiling the board keeps it from drying out. Use food-grade mineral oil for best results. Apply oil with a clean cloth. Rub the oil into the wood. Let it soak for a few hours. Wipe off any excess oil. Repeat this process once a month. This keeps the wood in good condition. Prevent cracks and splits by regular oiling.
Advanced Projects For Experienced Crafters
Creating complex designs can be fun. Use templates for intricate patterns. Try geometric shapes or animal motifs. Always measure twice before cutting. Sand the edges for smoothness. Apply food-safe oil for a finished look.
Mix wood with resin for unique boards. Combine metals for a modern touch. Use different wood types for color contrast. Ensure all materials are food-safe. Glue pieces together securely. Let the glue dry completely before use.
Gift Ideas And Selling Your Craft
Personalized cutting boards make great gifts. Add names or special dates. Use wood burning tools for engraving. Paint designs for a unique touch. Wrap the board in nice paper. Add a ribbon for a special presentation. Your friends will love it!
Start with a plan. Decide your target audience. Make high-quality boards. Use good wood materials. Take clear photos of your boards. Post on social media. Join craft fairs. Offer custom designs. Keep your prices fair. Provide excellent customer service. Grow your brand step by step.
Conclusion: The Joy Of DIY Crafting
Creating a DIY cutting board brings immense satisfaction and a personal touch to your kitchen. Each handcrafted piece showcases your creativity and craftsmanship.
The Satisfaction Of Using Your Own Creation
Making a cutting board feels great. You put in the work. You see the result. The wood is smooth and strong. Each cut is perfect. You know every inch of it. Cooking becomes more fun. Meals taste better. Your hands made it. Friends and family notice. They admire your skill. They want one too. You feel proud.
Inspiring Others To Start DIY Projects
Share your cutting board story. Show photos of your work. Explain the steps you took. Talk about the tools used. Help others start their own projects. Many people love to learn. They just need a push. Your project can be that push. Guide them with simple tips. Offer to help if needed. Build a community of makers. Everyone will feel joy.
Frequently Asked Questions
What Kind Of Wood Is Best For Cutting Boards?
Hardwoods like maple, walnut, and cherry are best for cutting boards. They are durable, non-porous, and gentle on knives.
How Do You Make A Homemade Cutting Board?
To make a homemade cutting board, choose hardwood, cut to size, sand edges, and apply food-safe oil.
How Do You Cure A Homemade Cutting Board?
To cure a homemade cutting board, apply food-grade mineral oil. Let it soak overnight. Wipe off excess oil. Repeat monthly.
How Do You Prepare Raw Wood For A Cutting Board?
Sand the raw wood to remove rough spots. Clean the surface with a damp cloth. Dry completely. Apply food-safe mineral oil. Let the oil soak in, then wipe off excess.
Conclusion
Creating your own cutting board is both rewarding and practical. You gain a unique, personalized kitchen tool. Plus, it’s a fun, hands-on project. With these simple steps, anyone can craft a beautiful cutting board. Start your DIY journey today and enhance your cooking experience.
Happy crafting!