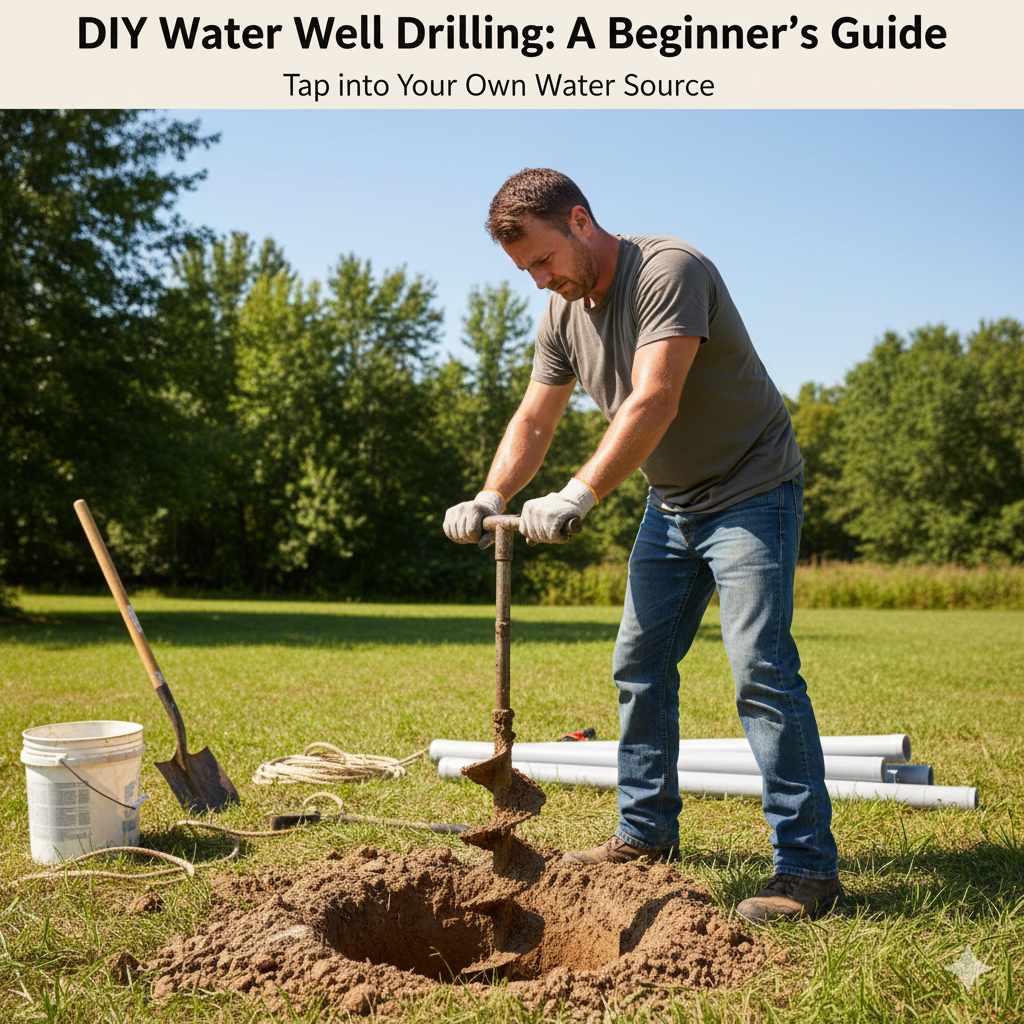
DIY Water Well Drilling: A Beginner’s Guide
Thinking about tackling DIY Water Well Drilling: What to Know First can seem tough! It’s popular for people who want their own water supply, but it also has challenges. Getting started can be tricky because you need to learn about different types of wells, the right tools, and local rules. Don’t worry, though. This guide will make it easy! We will go step-by-step so you can learn what you need to know and avoid common mistakes. Prepare to explore everything you should consider before you start your project.
Before You Begin: The Basics of Well Drilling
Before you even think about grabbing a shovel, it’s vital to learn the basics. Water wells can seem like a mystery, but they are just holes in the ground that lead to a water source. There are different types of wells, like dug wells, driven wells, and drilled wells. Each type has pros and cons. You need to pick the right one for your land and water needs. Knowing about local soil types, water tables, and any local permits is also very important. Ignoring these things can lead to problems, so it’s best to be prepared.
Types of Water Wells
Let’s look at the different types of water wells to help you explore your options. Each has its own way of getting water, and each suits different situations. Knowing about them will help you make a good choice for your needs. This can affect how much your project costs, how easy it is to set up, and how much water you get. Choosing the right well type is a key step when you get started.
Dug Wells: These wells are made by digging a wide hole, usually by hand or with machinery. They are typically shallow, reaching depths of less than 50 feet. They collect water that has filtered through the soil. Dug wells are simple and cheap to build, but they have a few downsides. They can be more easily contaminated by surface runoff and tend to dry up during dry periods. They are best suited for areas with a high water table and where the water is near the surface.
For example, imagine a family living in a rural area wanting a water source. They research different well types. They discover that a dug well is the simplest and most affordable option. They know they have to keep it clean and away from contaminants.
Driven Wells: These wells use a pipe with a screen on the end that is driven into the ground. A driving tool or a sledgehammer is used to hammer the pipe into the earth. They work best in areas with sandy or soft soil. They’re quick to set up and less costly than other well types, but they are generally shallow and only get a small amount of water. Also, the water can be cloudy because of how it is installed.
A homeowner living on the coast needs a water source for irrigation. They find out that their property has sandy soil, making it ideal for a driven well. They decide to try it because it is cheap and they can do it themselves.
Drilled Wells: This method involves using a drill to bore a hole deep into the ground. They can go hundreds of feet deep and get clean water from deeper underground sources. Drilled wells can provide lots of water for a long time. They’re more expensive and take more skill to install. They are perfect when you need a good amount of water and have different soil types on your property.
A farmer in a dry region needs a reliable source of water for their crops and livestock. They choose a drilled well. This ensures a consistent supply of water, even during dry periods. This helps their farm thrive.
Water Table and Soil Analysis
Before you start digging, you must check the water table level. This is where the underground water begins. The water table’s depth changes based on rain, the season, and how the land slopes. You also need to know the soil type on your land. Soil can vary from clay to sand, and this will tell you what kind of well you can make. You should also check for underground rocks or any layers of hard soil that could make digging harder. Knowing all this helps you choose the right well type and what equipment you will need.
- Water Table Depth: Knowing how deep the water table is will help you find where to drill. If the water table is shallow, you can use a simpler method to reach the water. If it is deep, you might need a drilled well. Check the local government to get information on your region’s water table. This will give you an idea of where to start.
- Soil Composition: The soil type affects how easy it will be to drill and what kind of well you can build. Sandy soils drain well and are easier to drill. Clay soils can be tricky and may need special drilling equipment. The soil type also influences the well’s stability and how much water it can hold.
- Local Regulations and Permits: Before you start, contact your local government to learn about permits and rules. Well drilling is often regulated to ensure that wells are built safely and that the water supply is protected. Ignoring these rules can lead to fines, project delays, or even the need to redo the entire project.
Water Quality Considerations
The water’s quality is just as important as the quantity. The water you get from your well will be used for drinking, cooking, and washing, so it must be clean and safe. This means exploring the potential for contamination from things like bacteria, chemicals, and minerals. Before you start, think about what might get into the water and what tests you will need. This helps you get safe, clean water that you and your family can enjoy. When exploring the best DIY Water Well Drilling: What to Know First options, water quality is key.
Potential Contaminants: Think about things that could make your water unsafe. These include bacteria from animal waste, chemicals from farming, and minerals from the soil. You should also think about human-made chemicals and any nearby industries that may impact the water.
For example, if you live near a farm, your well water might have pesticides or fertilizers. If you live near an old industrial area, you might find heavy metals.
- Water Testing: Regular water testing is a must. A water test will tell you about any problems, like bacteria, chemicals, or too much iron. You should test your water at least once a year. After a well is built or repaired, you should test it. Water tests help you get safe, clean drinking water for your family.
- Water Treatment Options: If your water test shows problems, you can fix them using water treatment systems. These systems can remove bacteria, chemicals, and minerals that make the water unsafe. Options include filtration systems, water softeners, and UV sterilizers. The best choice depends on what problems are in your water.
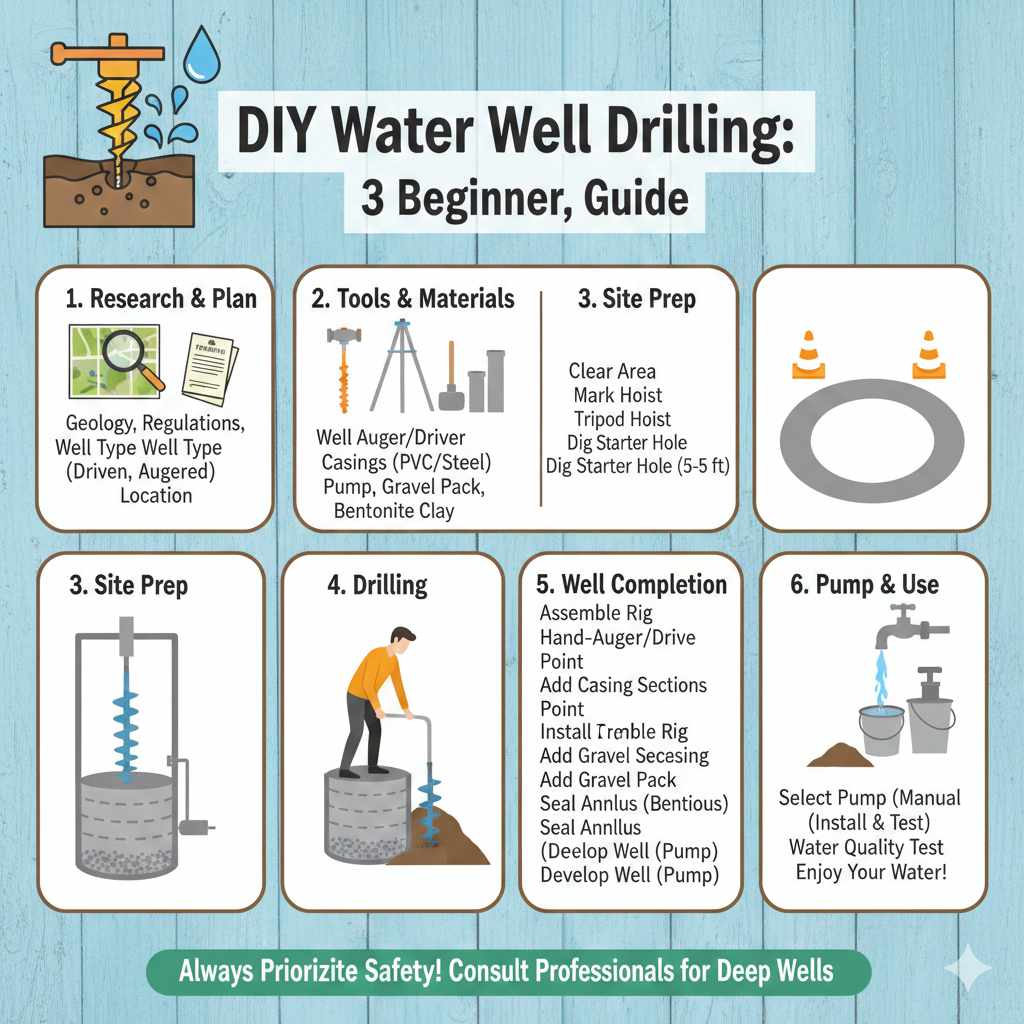
Planning and Preparing for DIY Drilling
Getting ready for DIY Water Well Drilling: What to Know First means more than just grabbing a shovel. Planning and prep are key. You will need to check the local area and do some research. You’ll need to know what you need before you start digging. This means having the right equipment and the knowledge to use it. Proper preparation helps you avoid problems later and makes your project easier. By taking the time to plan, you can avoid mistakes and stay on track.
Assessing Your Site
Now, let’s explore your site before you begin drilling. You need to consider several things. Think about the location of your well, making sure it’s far away from things that could cause contamination, like septic systems or farms. Check the land to make sure it is level and easy to work with. Take a look at the area to avoid any underground utilities, like power lines or gas pipes, and make sure you can get to the well for repairs and maintenance. Taking these steps protects the water source and makes sure your well is working well for years.
- Location Considerations: Pick a spot that is far from possible pollution sources. This includes septic systems, animal waste, and areas where chemicals might be used. It is also important to choose a spot that is easy to access for drilling and maintenance. You should consider the slope of the land to make sure that water flows away from the well.
- Utility Line Location: Before you dig, contact your local utility companies to find out where underground pipes and wires are. Hitting a utility line is dangerous and can lead to costly repairs. Use a utility locator service, which will mark all underground lines. This is a vital safety measure.
- Soil Testing for Drilling: Soil testing helps you understand what you are working with. Testing helps you select the right drilling method and equipment. You can do a simple visual inspection of the soil or send a sample to a lab for more detailed analysis. Testing will help you anticipate any challenges and prepare for them.
Gathering Your Tools and Equipment
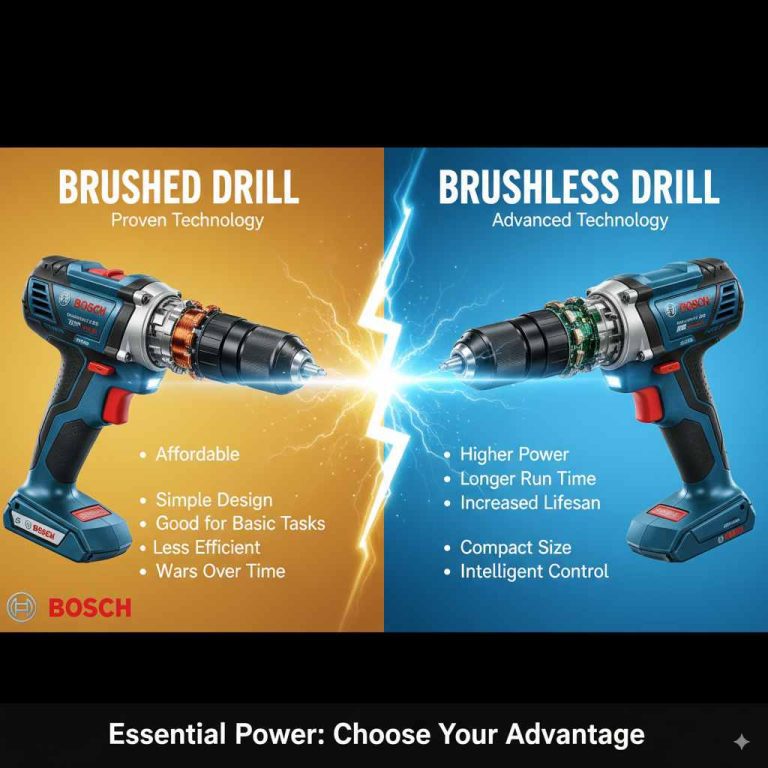
Having the correct tools and equipment is an important part of DIY Water Well Drilling: What to Know First. What you need will depend on the type of well you are building, but there are some essential items you will need. You will need drilling equipment like a drill rig, auger, or hand tools. Safety gear is just as important. You will need safety glasses, gloves, and a hard hat to protect yourself. Make sure you have all the tools you need before you start, so you can do the job safely and efficiently.
- Drilling Equipment: The kind of equipment you will need depends on the kind of well you are making. A drill rig is often used for deeper, drilled wells. Hand augers can be used for shallow wells. You might also need a drilling bit, casing, and well screen.
- Safety Gear: Always put safety first. You will need safety glasses to protect your eyes, gloves to protect your hands, and a hard hat to protect your head. Also, have boots and work clothes. Wear ear protection if the drilling makes loud noise.
- Well Casing and Screen: The well casing is a pipe that lines the drilled hole. It prevents the sides from collapsing and keeps out dirt and contaminants. The well screen is placed at the bottom of the well. It keeps sand and other particles from entering the well while letting water come in.
Understanding Well Construction Techniques
You should understand how to build a well to make sure it will last. Once you have made your plan, you must know how to drill the hole, install the casing, and set up the well screen. You must know how to deal with the soil, how to ensure the well is sealed from surface contamination, and how to develop the well to get the best water flow. You will also learn about the importance of backfilling and how to protect the area around your well. Following these steps helps build a safe and working well.
Drilling the Hole: You must drill the hole straight and to the right depth. Use the right drill bit for the soil type. Remove soil debris from the hole as you drill. Keep the hole stable so it does not collapse.
For example, if you are using an auger, you will turn it to remove soil. If you are using a drill rig, you will use a drilling bit to dig into the ground.
- Installing the Casing and Screen: The casing keeps the well walls from collapsing and prevents contaminants from getting in. Lower the casing into the drilled hole. At the bottom, place the well screen. The screen filters the water and stops sand and dirt from entering.
- Sealing and Development: You should make sure that the well is sealed at the top. This keeps out surface water and other contaminants. After the casing and screen are set, it’s time to develop the well. This involves removing the water from the well to get rid of any dirt or sand that might have built up during drilling. It helps to increase water flow.
The DIY Drilling Process: Step-by-Step
Ready to get your hands dirty? Let’s explore the process of DIY Water Well Drilling: What to Know First step-by-step. Remember, each project is different, but following these steps can help you get started. You need to plan, select your site, and prepare the area for drilling. Once you have a clear plan, you can begin the drilling process. You will set up your equipment and start digging, following safety measures. Once the hole is ready, you will install the well casing and screen. Finally, you will seal, develop, and test your well to make sure it is working right.
Step 1: Site Preparation and Drilling Start
Begin by clearing the area where you plan to drill. Make sure there is enough space to work. Level the ground and put in safety measures like barriers to keep people away. Now you’re ready to start drilling. You’ll need to set up your equipment, following all safety rules. You will drill straight down. The speed and method will depend on the soil type. Clear away soil as you go. Stay focused and work steadily. Following these steps helps make sure your well is strong and produces clean water.
- Clearing the Area: Remove anything that might get in the way. Clear away brush, rocks, and any debris from the drilling site. Make sure there is room for the drilling rig or equipment. Create a safe space to work.
- Setting Up Your Drill: Put the drill in place, making sure it is stable and level. Check all safety devices, like emergency shut-off switches. Make sure all connections are tight and secure. Start slowly and steadily.
- Initiating the Drilling Process: Begin drilling. Watch the drill’s progress and the soil it removes. Stay steady and follow the plan. Keep an eye out for any problems. If you find any, stop immediately and check the equipment.
Step 2: Installing Casing and Screen
After you drill the well, you need to install the casing and screen. This protects the well. It keeps out dirt, sand, and other materials. It helps to keep the well strong. You will lower the casing into the hole, making sure it goes straight down. You will then set the well screen at the bottom. This lets water in while keeping out sand and gravel. If you take this step, you will have a good well.
- Lowering the Casing: Carefully put the casing into the well. Make sure the casing is centered in the hole. Use a level to make sure the casing is straight. If it is not straight, it might cause problems later.
- Placing the Well Screen: Put the well screen at the bottom of the casing. The screen filters the water as it enters the well. Make sure the screen is correctly placed. Secure the screen to the casing. This step stops unwanted material from going into the well.
- Grouting and Sealing: Seal the space between the casing and the hole. This keeps out surface water and contaminants. Use a grout mix and follow the manufacturer’s directions. This step protects the well from outside contamination and increases the water quality.
Step 3: Developing and Testing Your Well
Once the casing and screen are set, it’s time to develop and test your well. Developing the well removes any dirt or sediment that got into the well during drilling. This helps improve the water flow. After development, test the water to make sure it is safe to drink. This is key for getting safe, clean water. Testing gives you confidence in your well.
- Well Development Techniques: Use various methods to develop a well. Pumping the well repeatedly can remove fine sand. Another way is air surging. This forces air into the well to remove any debris.
- Water Testing Procedures: Take a water sample for testing. Send it to a certified lab to check for bacteria, chemicals, and other contaminants. Follow all directions from the lab to make sure the water samples are correct.
- Addressing Issues: If the water test finds problems, you need to make changes. You might need to install a filtration system or shock the well to kill bacteria. Get advice from a professional well driller or water quality expert to make sure the water is safe.
Maintenance and Troubleshooting
Once you finish DIY Water Well Drilling: What to Know First, you will need to keep it in good condition. Regular care and quick problem solving will make your well last for years. You must do regular inspections, and clean or repair the well. You can find common problems, like a drop in water pressure or changes in the water’s taste. Taking steps to keep your well will help make sure you have a reliable water supply.
Regular Well Inspections
Regular inspections are important for keeping your well in good shape. Do this at least once a year. Look at the well casing, well cap, and the area around the well. Look for any damage, like cracks or rust. Also, make sure that the well is sealed so that nothing can get in. Checking the well will help you find problems early. This helps to prevent major problems and costly repairs.
- Visual Inspection: Inspect the well casing and the surrounding area. Check for any cracks, damage, or wear. See if the ground around the well is settling or if there are any signs of erosion. Look for any debris or things that might contaminate the well.
- Equipment Checks: Inspect the well pump, pressure tank, and other equipment. Make sure all the parts are in good condition. Look for leaks, and make sure everything is working properly. If any part seems damaged, fix it.
- Water Testing Frequency: Test your water yearly. This tells you if the water is safe to drink. Test the water more often if there are any changes in the water’s taste, smell, or color. Early detection is crucial to prevent problems.
Common Well Problems
Wells can have some problems. Knowing these issues will help you fix them and keep your water supply going. Problems include a drop in water pressure, changes in water taste or color, or the pump not working. Fixing these problems quickly is important. It ensures that the well functions properly and keeps your water safe.
- Low Water Pressure: If the water pressure drops, it may be a problem with the pump, the well screen, or the water level. Inspect the pump for any issues, and clean or replace the well screen if needed. Check the water level. A low water level means there is not enough water in the well.
- Changes in Water Quality: Any change in taste, smell, or color may mean a problem in the water. Test the water right away to find the source. You might need to shock the well to kill bacteria or install a filtration system to remove chemicals or minerals.
- Pump Failures: A pump may stop working because of several reasons, such as electrical problems, pump wear, or well damage. If the pump stops working, check the electrical connections and the pump’s components. Repair or replace the pump as needed.
Troubleshooting and Repair Tips
You can solve some issues. If you have low water pressure, inspect the pump and look for leaks in the pipes. If the water tastes or smells strange, test the water. If the pump does not work, check the power and the connections. If you cannot solve the issue, it is best to ask a professional. Knowing what to do when problems appear helps you keep your well running.
- Diagnosing Issues: Identify the problem by looking at the symptoms. If the water pressure is low, look for leaks. If the water smells bad, test the water. If the pump is not running, check the power supply. Pinpointing the issue helps you take the right steps to fix it.
- DIY Repair Procedures: If you find a simple problem, like a loose wire or a clogged filter, you may fix it yourself. Read instructions carefully and follow safety precautions. For bigger problems, it is best to get help from a professional.
- When to Call a Professional: If you cannot fix the issue or if it seems complicated, hire a professional. A professional has the knowledge and equipment to solve complex well problems. They can also make sure all repairs follow safety standards and local regulations.
Frequently Asked Questions
Question: How deep should I drill my water well?
Answer: The depth of a water well depends on your location and the local water table. You should find out how deep the water table is in your area, and the best way to do that is to check with local experts.
Question: What is a well screen, and why is it important?
Answer: A well screen is a filter that keeps sand, gravel, and other particles from getting into the well. It is important because it protects your pump and helps to provide clear water.
Question: How often should I test my well water?
Answer: Test your well water at least once a year. Test it more often if you notice changes in the water’s taste, smell, or color. If you have any concerns about water quality, you should test it.
Question: What should I do if my well runs dry?
Answer: If your well runs dry, you may need to deepen the well, install a new pump, or find an alternative water source. It is important to contact a well specialist to check your well.
Question: What permits do I need to drill a water well?
Answer: Permits are often needed to drill a water well. You should contact your local government to get information about the permits and requirements in your area.
Final Thoughts
DIY Water Well Drilling: What to Know First may seem hard at the start, but with some research, planning, and hard work, you can create your own water source. First, explore the kind of well you want. Think about the area and the soil type before you begin. Plan your project carefully. Gather all the tools and safety gear. The most important parts are site prep, drilling, installing the casing and screen, and developing and testing your well. Then, always check and maintain your well, fixing any issues promptly. This guide will get you going on your project. If you are prepared, you can create a reliable water source that you can depend on. Take it one step at a time, and enjoy the satisfaction of getting your own water.