How to Remove Water Stains from Wood (White vs Dark Fixes)
Most white water rings are surface problems: moisture trapped in the finish responds to heat, mild abrasion, or oil, with no sanding needed. A dark stain is different. Water carrying metal residue has gotten through cracks in the finish into the wood, which takes oxalic acid after the finish is stripped. This guide covers 9 methods for both stain types, plus veneer and antique rules.
If your table has scratches or cloudy haze instead of a ring, our furniture finish repair guide covers those separately. For a deeper look at the iron method on heat and cup rings, see how to get rings out of wood.
Quick Answer
For white rings, dab on mayonnaise or non-gel toothpaste and let it sit, or pass a warm iron over a cloth for 20 to 30 seconds. For dark stains that have soaked into the wood, try #0000 steel wool with mineral oil first, or, for dark stains that have soaked in, strip the finish and use oxalic acid wood bleach. Always test on a hidden spot first, and use gentler heat-only methods on veneer.
Gathering Your Arsenal: Tools and Supplies
Best Dark Stain Remover Pick |
|
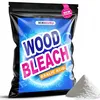 |
xixisusu Oxalic Acid Wood Bleach, 1 lb ($16.59) Oxalic acid powder is the wood bleach type Method 9 below calls for on dark water stains, and the one item in this guide you will not find in a kitchen drawer.
|
As an Amazon Associate we earn from qualifying purchases.
Before tackling the stain, gather what you need. For white rings, most of these items are already in your home; the oxalic acid and safety gear are only for dark stains.
Essential Household Items
- Soft, clean cloths (microfiber is ideal)
- Cotton balls or swabs
- Paper towels
Cleaning and Repair Solutions
- Mayonnaise (full-fat is best)
- Toothpaste (white, non-gel variety)
- Baking soda
- White vinegar and olive oil (1:1 ratio)
- Petroleum jelly
- Rubbing alcohol (isopropyl alcohol)
- Furniture polish or wax
- Iron and a thin cloth (like a pillowcase or tea towel)
- Hair dryer
- Steel wool (very fine grade, #0000)
- Mineral oil or lemon oil (for deep stains)
- Wood filler or stain pen (for severe cases, though we aim to avoid this)
- Oxalic acid wood bleach, gloves, and goggles (dark stains only)
Understanding Wood Water Stains
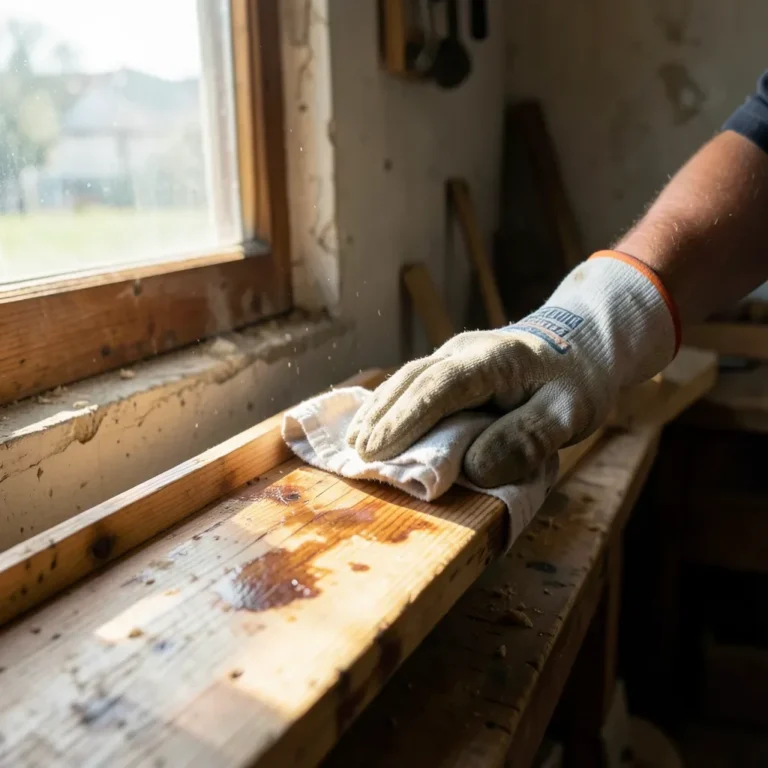
A water stain on wood is discoloration caused by moisture trapped in or under the finish. White rings sit in the top coating; dark stains have moved through it into the wood fibers. The type tells you how deep the problem goes and which method will actually work.
White Rings: Surface Trouble
These pale circles or cloudy patches mean water or heat only affected the top layer of finish, like wax or lacquer. The moisture hasn’t reached the wood itself, so these are the easiest to fix, usually with the four white-ring methods below.
Dark Stains: Deeper Issues
Dark stains are brown or black. According to Popular Woodworking, they are caused by water and metal residue getting through cracks in the finish and into the wood. That is why the white-ring fixes below do nothing for them: those fixes work on the finish, and this stain is in the wood. Dark stains need oxalic acid wood bleach, usually after the finish is removed.
📊 Finishes that fully coat wood slow moisture exchange between the air and the wood and greatly reduce the swelling and shrinking that causes deeper damage, Source: Oregon State University Extension, “Wood and Moisture Relationships” (EM-8600)
📊 White marks are milky and come from moisture creating voids in the finish; dark marks are brown or black and come from water and metal residue reaching the wood. Source: Popular Woodworking, “How to Remove Watermarks”
| What you see | Where the damage is | What it needs |
|---|---|---|
| Milky white ring or haze | In the finish layer | Heat, mild abrasion, or oil (Methods 1 to 6) |
| Brown or black stain | In the wood, through finish cracks | Often finish removal first, then oxalic acid (Method 9) |
| Faint dark shadow | Shallow, near the surface | Baking soda paste or steel wool and oil (Methods 7 and 8), then step up if needed |
How Do You Know What Finish You Have?
You do not need to name the finish exactly, but it changes the heat methods. This Old House contractor Tom Silva said the iron trick would probably work on oil-based or lacquer finishes but he did not think it would work on a water-based finish. If you are not sure what is on the table, start with the hair dryer in Method 6, which is gentler than an iron, and test every method on a hidden spot before touching the stain.

Effortless Fixes for White Water Rings
White water rings are the most common wood stain, and the easiest to tackle. These six methods work by gently lifting trapped moisture or re-sealing the finish. Test any method on a hidden spot first.
Method 1: The Mayonnaise Magic
The oils in full-fat mayonnaise displace the moisture trapped in the finish.
- Clean the area: Wipe the stained area with a damp cloth, then dry thoroughly.
- Apply mayonnaise: Dab a generous amount over the white ring, covering it completely.
- Let it sit: Leave it for 30 minutes to an hour, or overnight for stubborn marks.
- Wipe and buff: Wipe away with a clean cloth, then dry and buff until it shines.
Method 2: Toothpaste’s Gentle Abrasion
White, non-gel toothpaste is a mild abrasive that buffs away the top layer of finish where moisture is trapped.
- Mix if needed: For extra gentleness, mix in a 1:1 ratio with baking soda.
- Apply to the stain: Rub a small amount onto the ring with a soft cloth or finger. Don’t press hard.
- Rub in circles: Work the toothpaste in small circular motions for 30 to 60 seconds, no longer.
- Wipe clean: Wipe with a damp cloth, then dry and polish.
Method 3: The Iron and Cloth Trick
Gentle heat evaporates trapped moisture. This works best on oil-based or lacquer finishes, on a water-based polyurethane finish, skip to Method 6 (hair dryer) instead, which uses less concentrated heat.
- Empty the iron: Make sure it’s completely dry, no steam.
- Set to low heat: Lowest setting, steam off.
- Place the cloth: Lay a dry cloth (pillowcase or tea towel) over the stain as a barrier.
- Briefly apply heat: Pass the iron over the cloth for 20 to 30 seconds in circular motions. Don’t let it sit still.
- Check and repeat: Lift the cloth and check. Repeat a few times if it’s improving.
Method 4: Rubbing Alcohol’s Drying Power
Rubbing alcohol dries out trapped moisture. Best for less severe white rings.
- Test first: Dab a hidden spot. If color comes off on the cotton or the finish turns tacky, stop and use another method.
- Dampen a cotton ball: Lightly dampen it with rubbing alcohol and don’t soak it.
- Gentle wipe: Rub the stained area, working from the outside in.
- Wipe and dry: Immediately wipe with a clean, dry cloth.
- Assess and repeat: Repeat carefully if needed, always wiping dry right after.
Method 5: Vinegar and Olive Oil
Mixed in equal parts, white vinegar breaks down the cloudy residue while olive oil replaces and blends the finish back in, it should re-blend rather than just mask the ring.
- Mix the solution: Combine equal parts white vinegar and olive oil in a small bowl.
- Apply with the grain: Dip a soft cloth in the mixture and rub gently along the wood grain, not across it.
- Check often: Wipe and check progress every 30 seconds, stop as soon as the ring fades.
- Buff dry: Wipe off any excess oil with a clean, dry cloth and buff to restore shine.
Method 6: Hair Dryer Heat (Gentler Alternative to an Iron)
A hair dryer delivers less concentrated heat than an iron, which makes it the safer choice for delicate or water-based finishes and for veneer.
- Set to medium heat: Avoid the highest setting.
- Hold at a distance: Keep the dryer about 6 inches from the surface.
- Move steadily: Sweep back and forth over the ring and never hold it in one spot. Popular Woodworking advises keeping the finish no hotter than is comfortable to touch.
- Check every 30 seconds: Stop as soon as the ring lightens, then buff with a dry cloth.
Important Note: Always test any cleaning method on an inconspicuous area of the table first to ensure it doesn’t damage the finish.
| Method | Stain Type | Difficulty | Materials Needed | Effectiveness |
|---|---|---|---|---|
| Mayonnaise | White rings (surface) | Easy | Mayonnaise, cloth | ⭐⭐⭐⭐, works on fresh and old white rings |
| Toothpaste (non-gel) | White rings (light) | Easy | White toothpaste, soft cloth | ⭐⭐⭐, good for light surface marks |
| Iron + cloth | White rings (moisture in finish) | Easy | Iron, clean cloth | ⭐⭐⭐⭐⭐, highly effective for heat/moisture rings, oil/lacquer finishes only |
| Rubbing alcohol | White rings, cloudiness | Easy | Isopropyl alcohol, cloth | ⭐⭐⭐, dries moisture quickly |
| Vinegar + olive oil | White rings | Easy | White vinegar, olive oil | ⭐⭐⭐⭐, re-blends finish, not just masks it |
| Hair dryer | White rings, delicate finishes | Easy | Hair dryer | ⭐⭐⭐, gentler than an iron, safe for veneer |
| Baking soda paste | Mild dark stains | Easy | Baking soda, water | ⭐⭐⭐, gentle abrasive for surface dark spots |
| Steel wool + oil | Deeper dark stains | Moderate | 0000 steel wool, mineral oil | ⭐⭐⭐⭐, penetrates finish for stubborn stains |
| Wood bleach (oxalic acid) | Severe dark stains | Advanced | Wood bleach, gloves, brush | ⭐⭐⭐⭐⭐, strongest option for deep stains |
Tackling Darker Water Stains on Wood
Dark water stains are in the wood, not just the finish. These need a more intensive approach, but are often still salvageable without refinishing the entire table.
Method 7: Baking Soda Paste for Mild Dark Stains
Like toothpaste, baking soda provides gentle abrasion, useful if the dark stain isn’t too deep.
- Create a paste: Mix baking soda with a few drops of water into a thick paste.
- Apply to the stain: Dab it onto the dark stain with a soft cloth.
- Gentle scrubbing: Rub very gently in a circular motion, don’t oversaturate the wood.
- Wipe and dry: After a minute or two, wipe away with a damp cloth, then a dry one.
- Repeat if necessary: Follow up with a light coat of furniture polish.
Method 8: Steel Wool and Oil for Deeper Penetration
Very fine #0000 steel wool gently abrades the stained wood, combined with oil to protect the surrounding finish.
- Protect surrounding areas: Mask off delicate details with painter’s tape if needed.
- Use #0000 steel wool: Any coarser grade can scratch the wood.
- Lubricate the area: Apply mineral oil, lemon oil, or furniture polish to the spot and the steel wool.
- Gentle, directional rubbing: Rub with the wood grain only, with very light pressure.
- Wipe and check: Frequently wipe residue away and check, you’re lifting the stain, not removing the finish.
- Assess and refine: Once the stain fades, wipe clean and reapply a bit of oil to restore sheen.
For more information on wood finishing and care, see our full wood finishing guide.
Method 9: Wood Bleach (For Severe Stains)
Dark stains from water and metal residue respond to oxalic acid wood bleach, which Popular Woodworking says is different from household bleach. It is the last resort here, because the finish usually has to come off first and the spot has to be refinished afterward.
- Safety first: Wear gloves and goggles and do not create airborne dust. Popular Woodworking warns that oxalic acid is toxic and can cause severe skin and respiratory problems.
- Remove the finish: Strip the finish from the stained area first (see how to remove finish from wood) so the bleach can reach the wood.
- Mix the solution: Popular Woodworking suggests one ounce of crystals to one quart of warm water, or a saturated solution. Follow your product label if it differs.
- Apply to the stain only: Brush it on the stained area and let it dry completely, which can take hours.
- Wash the residue off: Never brush dry crystals off the surface, because they are toxic to breathe. Wash the residue away with water, following the product’s own cleanup steps.
- Dry and refinish: Let the wood dry fully, sand lightly if needed, then re-stain and refinish the spot to match the rest of the table.
The treated area will be lighter than the surrounding wood. If a dark stain covers a large area, the section on professional help below may be the better route.
Veneer and Antique Tables: What to Do Differently
Veneer and antique furniture need gentler handling than solid wood, the same methods above can cause new damage if you skip these adjustments.
Veneer: Heat Only, No Sanding
Veneer is a thin wood layer glued to a substrate. Too much heat or moisture can pop the glue line and cause bubbling, and steel wool or sanding can cut straight through the thin layer, something solid wood can tolerate but veneer can’t. Stick to Method 6 (hair dryer) at medium heat and short passes, and skip steel wool and heavy sanding entirely. Dark stains on veneer are a job for a restorer in most cases, because stripping the finish and bleaching both risk the thin top layer. For white stains specifically, see our guide to removing white water stains from wood veneer.
Antiques and Heirlooms: When to Stop
If the table is a valuable antique or heirloom, stop before sanding, bleaching, or using steel wool, any of these can visibly reduce its value. Try the gentlest methods first (mayonnaise, hair dryer, vinegar and olive oil) and if the stain doesn’t respond, call a professional restorer rather than escalating on your own.
📊 Professional water stain or veneer spot repair typically runs $200 to $500, while full antique table refinishing runs $800 to $1,500 depending on size and wood type, Source: The Pricer, Wood Furniture Restoration Cost Guide
“I don’t think this would work if you used a water-based finish. But your oil bases or your lacquer base would probably work pretty good.”
Preventing Future Water Stains on Your Wood Table
The best way to deal with water stains is to prevent them. A little proactive care goes a long way.
1. Always Use Coasters!
The simplest, most effective step. Invest in a good set and make it a habit for everyone in the household for drinks, mugs, and condensation-prone glassware.
2. Use Trivets and Placemats
Hot dishes or pots can damage wood finishes the same way water does. Use trivets or hot pads and placemats for meals.
3. Wipe Up Spills Immediately
Don’t let spills linger. Grab a soft cloth as soon as any liquid hits the table, then dry the area completely.
4. Control Humidity and Vent Placement
Keep tables away from AC vents, heating vents, and windows where condensation forms. Swings in humidity make wood expand and contract, which stresses the finish and makes it more prone to staining.
5. Regular Cleaning and Conditioning
Dust regularly with a soft, dry cloth, and use a wood cleaner or conditioner periodically. This keeps the protective finish intact and more resistant to moisture, rewaxing roughly every six months is a good baseline for well-used tables.
6. Consider a Protective Finish
If the finish is old or worn, consider a more durable, water-resistant top coat: polyurethane, varnish, or a hard wax oil finish.

When to Call a Professional
Most water stains respond to the DIY methods above. Call a professional restorer if your table is a valuable antique, has a complex or hand-applied finish, or the stains are extremely deep and widespread, a pro can assess the damage without risking further harm. Expect $200 to $500 for a targeted spot repair, or $800 to $1,500+ for full refinishing.
FAQ: Your Top Wood Water Stain Questions Answered
Will toothpaste damage my wood table finish?
No, not if used gently. White, non-gel toothpaste is a very mild abrasive that’s generally safe for most finished wood surfaces. Always test in an inconspicuous area first and avoid aggressive scrubbing or gel formulas.
How long should I leave mayonnaise on a water stain?
For minor white rings, 30 minutes to an hour is usually enough. For stubborn stains, leave it several hours or overnight. The oils need time to displace the trapped moisture in the finish.
How do you remove old, dried water stains that have set into the wood?
It depends on the color. An old white ring is still a finish problem, so the same heat, abrasion, or oil methods can work. An old dark stain is in the wood and usually needs the finish stripped and oxalic acid wood bleach (Method 9); steel wool with mineral oil (Method 8) can help with shallow dark marks.
Do these methods work on unfinished or raw wood?
Most of these methods target the finish layer, not raw wood, since white rings only form under a coating. On unfinished wood, water soaks straight in and usually needs light sanding and a fresh coat of finish rather than mayonnaise or toothpaste.
What’s the difference between a white and a dark water stain?
White marks are milky and come from moisture creating voids in the finish. Dark marks are brown or black and come from water and metal residue reaching the wood, which takes oxalic acid rather than the surface methods.
Can I use household bleach on a water stain?
No, not for water stains. Popular Woodworking says dark water marks call for oxalic acid wood bleach, which is distinct from household bleach. Use gloves and goggles and follow the product label.
My table has a lot of water stains. Should I refinish it?
If you have numerous deep stains or extensive damage, refinishing the entire table is often more effective than spot-treating each one. This is a bigger DIY project, or a job for a professional restorer, typically running $800 to $1,500 for a full table.
How can I prevent rings from forming on my table?
Use coasters for drinks and trivets for hot items, wipe up spills immediately, and keep the table away from AC vents and windows where humidity swings are largest. Regular cleaning and conditioning keeps the finish protected.
Enjoy Your Beautiful, Stain-Free Table
Look at the stain first: a milky white ring is a finish problem you can usually fix with household items, while a brown or black stain is in the wood and needs stronger treatment. Start with the gentlest method that fits the stain and the finish.
Test in an inconspicuous area first, go easier on veneer and antiques, and follow up with coasters and regular conditioning so the next spill doesn’t leave a mark.
Sponsored / affiliate links. As an Amazon Associate I earn from qualifying purchases. I may earn additional commission from eligible campaigns.