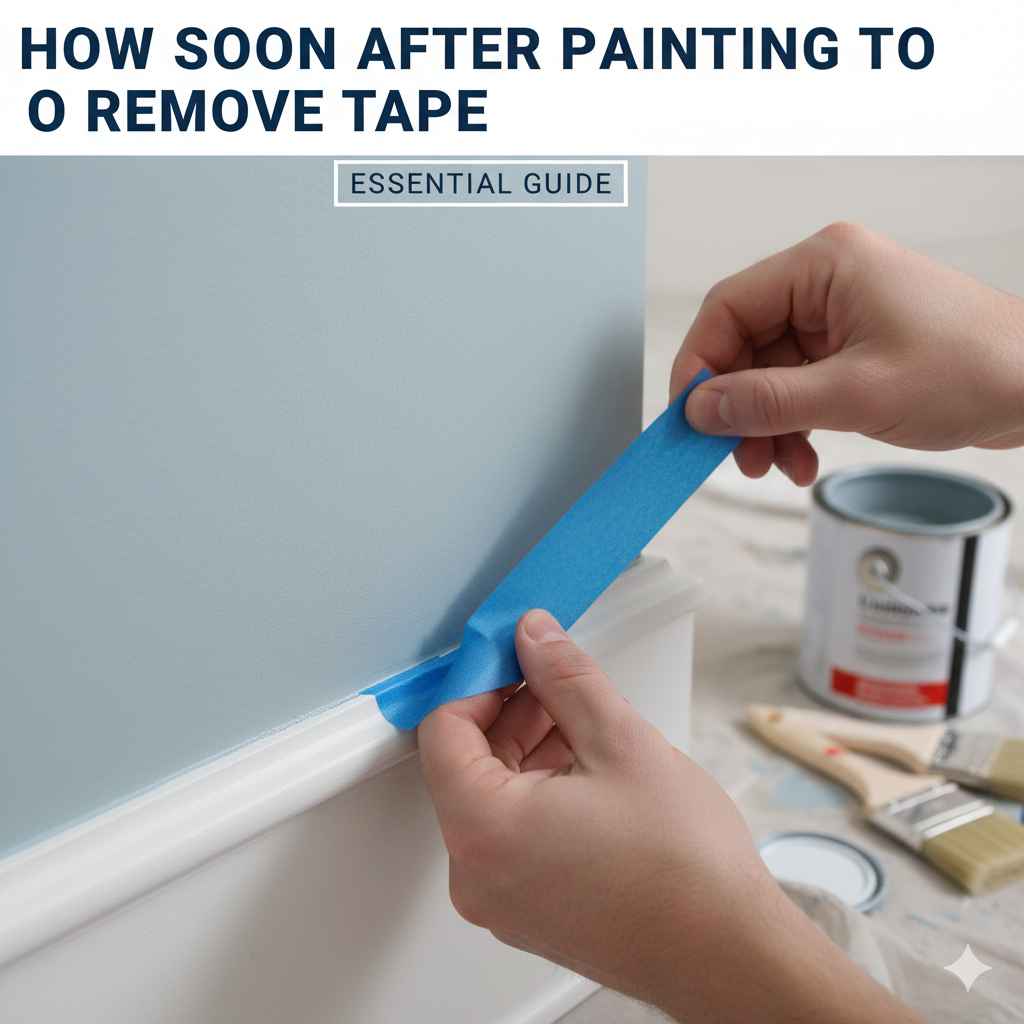
How Soon After Painting To Remove Tape: Essential Guide
For clean paint lines, remove painter’s tape while the paint is still wet to slightly tacky, typically within 1 to 2 hours of application, depending on paint type and conditions. Yanking tape too soon can cause smudging, while waiting too long makes it stick and peel paint. Timing is everything!
Hey there, fellow DIYers and home improvers! Md Meraj here, your go-to woodworking and DIY mentor. Ever painted a room, meticulously applied painter’s tape along the trim, and then ended up with a jagged, messy line where the paint meets the tape? It’s a common frustration that can turn a satisfying project into a head-scratcher. Getting that perfectly crisp edge between two colors or between a painted wall and trim can feel like a magic trick. But don’t worry, it’s not about having a magic wand; it’s about knowing the simple, yet crucial, timing for removing painter’s tape.
This guide is designed to take the guesswork out of this common painting conundrum. We’ll break down exactly when and how to pull that tape for the best possible results, whether you’re painting a whole room, a piece of furniture, or just touching up a scuff mark. Get ready to say goodbye to sticky messes and hello to beautifully sharp lines!
Why Timing Matters: The Art of Tape Removal
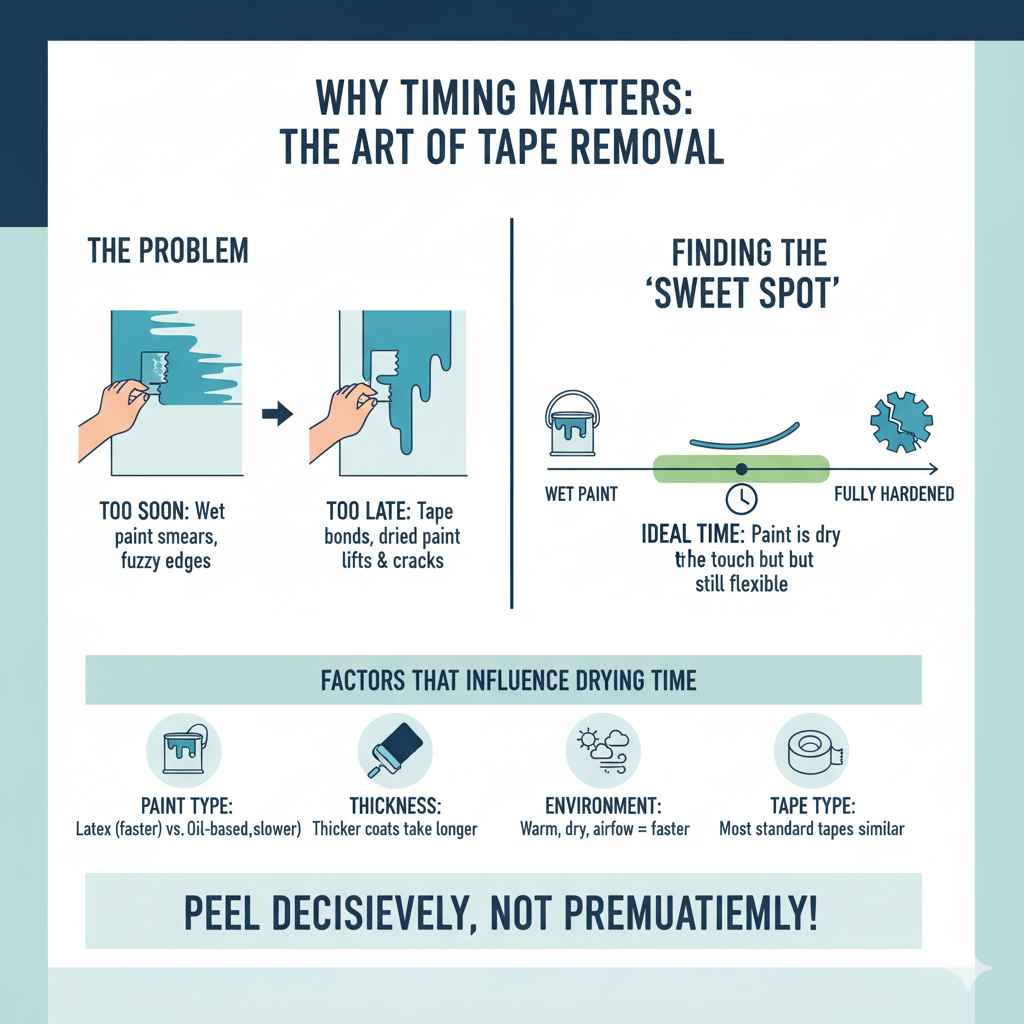
The moment you peel away painter’s tape is critical. Too soon, and you risk smearing wet paint, creating fuzzy edges. Too late, and the tape can bond with the paint, lifting dried color and leaving behind frustratingly uneven lines that require patching and repainting. It’s a bit like pulling off a bandage – you want to do it decisively but carefully.
Several factors influence the ideal time to remove tape:
- Paint Type: Different paints dry at different rates. Latex (water-based) paints generally dry faster than oil-based paints.
- Paint Thickness: A thick coat of paint will take longer to dry than a thin one.
- Environmental Conditions: Temperature, humidity, and airflow all play a role. Warmer, drier conditions with good airflow speed up drying.
- Type of Tape: While most standard painter’s tapes behave similarly, specialized tapes might have slightly different properties.
Understanding these variables helps you gauge the best moment. Our goal is to get the tape off when the paint is no longer liquid but hasn’t fully hardened to the point of becoming brittle or overly bonded. This “sweet spot” is often when the paint is still slightly tacky to the touch but won’t transfer to your finger or the tape itself.
When to Pull: The “Dry Enough” Rule
The most reliable indicator for removing painter’s tape is the state of the paint. You’re looking for the paint to be dry to the touch but still slightly pliable. This usually means the paint is no longer glossy and wet, but it hasn’t cured 100%.
The “Tacky but Not Sticky” Test
Gently touch an area of paint away from the tape line. Does your finger come away with wet paint? If so, it’s too soon. Does your finger come away clean, but the paint feels a little soft or “set”? That’s likely the perfect time. It should feel tacky, like a worn-out sticker, rather than sticky like honey or gooey.
General Timeframes (Use as a Guideline!)
While the “touch test” is best, here are some general timeframes that often work for common water-based (latex) paints under typical conditions:
| Paint Type (Common Water-Based/Latex) | Typical Dry to Touch Time (Approximate) | Ideal Tape Removal Window |
|---|---|---|
| Standard Interior Latex Paint | 30 minutes to 1 hour | 1 to 2 hours after the last coat/touch-up |
| Satin or Eggshell Finish Latex | 45 minutes to 1.5 hours | 1.5 to 3 hours after the last coat/touch-up |
| Flat Finish Latex | 20 to 45 minutes | 45 minutes to 1.5 hours after the last coat/touch-up |
| Oil-Based Paint (Less Common for Walls) | 6 to 8 hours (often overnight is best) | After 12-24 hours (if absolutely necessary, but ideally none if avoiding issues) |
Important Note: These are just estimates! Always perform the touch test. If you’re using a specialty paint (like a high-gloss enamel or a quick-drying formula), check the manufacturer’s instructions on the can. For more on paint types and drying, you might find helpful information from resources like Sherwin-Williams’ painting guides, which offer insights into paint properties.
The Best Method for Removing Tape
It’s not just about when you remove the tape, but how. A gentle, consistent technique goes a long way in ensuring those perfect lines.
Step-by-Step Tape Removal: Your Blueprint to Clean Lines
- Prepare Your Tools: Have a utility knife or a sharp blade handy, just in case. You might also want a trash bag or a place to put the used tape.
- Score the Line (Optional but Recommended): If the paint is a little firmer, use the edge of your utility knife to gently score along the very edge of the tape where it meets the freshly painted surface. This breaks any potential bond the paint might have formed around the tape’s edge. Be careful not to cut too deep or into the surface below.
- Pull at an Angle: Grab a corner of the tape. With one hand, hold the surface steady. With the other hand, pull the tape back slowly and steadily at a 45-degree angle away from the freshly painted area.
- Maintain Tension: Keep a consistent, gentle tension on the tape as you pull. Avoid jerking or pulling it straight up, as this can cause the paint to tear or lift unevenly.
- Work in Sections: For longer runs of tape, pull about 6-12 inches at a time, then reassess. This allows you to manage the process and ensure you’re not pulling too fast.
- Address Any Bleeds Immediately: If you notice any minor paint bleeds (where paint seeped under the tape), you can often fix them with a very fine-tip brush and a bit of the trim color. For more significant issues, you might need a small amount of patching compound after the paint is fully cured.
- Clean Up: Roll up the used tape as you go to keep your work area tidy.
A good quality painter’s tape, like those from brands such as 3M or FrogTape, is designed for clean removal. Investing in decent tape can save you a lot of headache and touch-up work!
What If I Waited Too Long?
This is a situation many of us have faced! The tape has been on for hours, maybe even overnight, and now you’re worried about what will happen when you pull it.
Dealing with Stubborn Tape
If you’ve waited too long, the paint has likely fully cured and adhered to the tape.
- Test a Small Area: Try pulling a small corner first. If it lifts cleanly without taking paint, proceed with caution.
- Score More Aggressively (Carefully!): You may need to score the paint line more thoroughly with a utility knife. Be extremely careful not to damage the underlying surface. Think of it as a precise cut along the tape’s edge.
- Use a Hair Dryer: Gently warm the tape with a hairdryer on a low setting from a distance. The heat can soften the adhesive and sometimes the paint, making removal easier. Don’t overheat, as this can damage paint or warp surfaces.
- Slow and Steady Wins the Race: Pull the tape back very slowly, at a sharp angle, and in tiny increments if necessary. If you feel resistance or see paint lifting, stop, score again, and try a different angle or a slower pull.
- Repairing the Damage: If paint does lift, don’t despair. Let the area dry completely. Then, use a fine-grit sandpaper to smooth any rough edges. Apply a thin layer of spackling or joint compound to fill any gouges, let it dry, sand it smooth, prime, and then carefully repaint the affected area using a small artist’s brush for precision.
When to Consider Leaving the Tape
In rare cases, if the tape has been on for a very long time (days) and the paint is severely bonded, trying to remove it might cause more damage than leaving it. If this happens, you might need to consider painting over the tape line with the new color, effectively sealing it down, and then scoring and removing it once that new layer has dried sufficiently. This isn’t ideal but can be a salvage operation.
What If I Pull Too Soon?
Pulling tape when the paint is still very wet is another common pitfall. The result is usually a sad, smudged line.
Salvaging Wet Paint Mishaps
If you pull the tape too soon and get smudges:
- Stop Pulling Immediately: Don’t make it worse.
- Assess the Damage: Is it a minor smudge or a major tear?
- For Minor Smudges: If the rest of the paint is still wet and tacky, you might be able to carefully feather the edges with a clean, damp (not wet) paintbrush or a foam brush. This requires a very light touch.
- For More Significant Smudges: The best approach is often to wait for the paint to dry completely. Then, carefully scrape away any excess paint blobs with a plastic scraper or putty knife. Lightly sand the area smooth and then touch it up with a fine brush using the trim color (or the wall color, depending on what you’re trying to correct).
- Consider a “Reveal” Method: Sometimes, if you catch it very early, you can use a utility knife to lightly score the edge just before the smudge, and then carefully pull the tape at an angle. This can help prevent the wet paint from tearing further.
Patience is key here. Trying to fix wet paint smudges while they are still wet can often lead to a bigger mess. Sometimes, letting it dry and then repairing is the cleaner solution.
Choosing the Right Painter’s Tape
Not all painter’s tape is created equal. Using the right type can significantly impact your results. Reputable brands invest in research and development that leads to tapes with specific adhesion levels and edge-sealing properties. For general interior painting, look for “multi-surface” or “delicate surface” tapes if your surfaces are particularly sensitive (like wallpaper or freshly painted walls that haven’t fully cured). Higher-quality tapes often have a molecular-level edge that helps prevent paint bleed.
Types of Painter’s Tape
| Tape Type | Adhesion Level | Best For | Considerations |
|---|---|---|---|
| Blue Tape (Standard) | Medium | General purpose on walls, trim, glass. Good for multiple coats and most standard paints. | Can sometimes leave residue on delicate surfaces if left on too long. |
| Green Tape (Sensitive Surfaces) | Low | Delicate surfaces like wallpaper, freshly painted walls (less than 24 hours old), varnished wood. | May not provide a strong enough seal for multiple coats or porous surfaces, leading to bleed. |
| Purple/Pink Tape (High Performance/Specialty) | Medium to High | Difficult surfaces, multiple coats, longer project durations, demanding finishes. Often features advanced edge-sealing technology. | Can be more expensive. Ensure compatibility with your paint and surface. |
| Yellow Tape (Exterior) | Medium to High | Outdoor projects, rougher surfaces, environments with higher humidity or temperature fluctuations. | Designed to withstand outdoor conditions. |
When in doubt, always check the product packaging for the manufacturer’s recommended use and drying time guidelines. For more detailed information on tape functionalities, resources from manufacturers like Jotun can offer useful insights into selecting the best tape for your specific project needs.
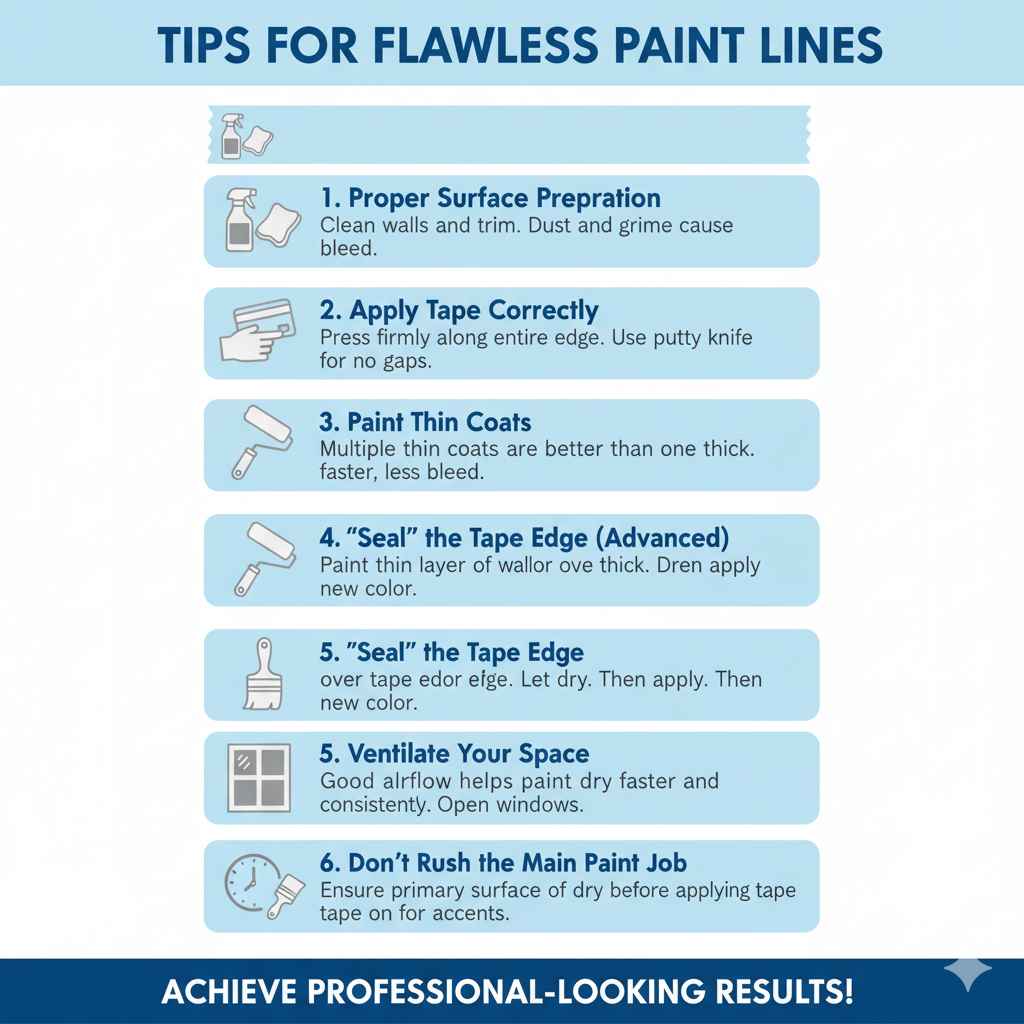
Tips for Flawless Paint Lines
Beyond just timing and tape, a few extra steps can elevate your paint lines from good to great!
- Proper Surface Preparation: Clean walls and trim are essential. Dust and grime can interfere with tape adhesion and result in bleed.
- Apply Tape Correctly: Press the tape down firmly along the entire edge. Use a putty knife, a credit card, or even your fingernail to ensure there are no gaps where paint can seep underneath.
- Paint Thin Coats: Multiple thin coats of paint are almost always better than one thick, gloppy coat. Thin coats dry faster and are less likely to bleed under the tape.
- “Seal” the Tape Edge (Advanced Technique): After applying your tape, paint a very thin layer of the main wall color (the color under where the tape is) along the tape’s edge. Let this dry completely. Then, apply your new color. When you remove the tape, this “seal” prevents the new color from bleeding under. This is a common technique used by professionals for critical lines.
- Ventilate Your Space: Good airflow helps paint dry faster and more consistently. Open windows or use fans (but avoid pointing fans directly at wet paint, as this can cause uneven drying or drips).
- Don’t Rush the Main Paint Job: Ensure your primary painted surface is dry enough before applying tape for accent colors or trim.
Frequently Asked Questions (FAQ)
Q1: Is it always best to remove tape while the paint is still wet?
Not necessarily wet, but slightly tacky. Removing it when the paint is still wet can cause smudging. Leaving it too long until it’s bone dry can cause it to peel away with the paint. The sweet spot is when it’s dry to the touch but still has a slight give.
Q2: How do I know if I waited too long to remove the tape?
If you try to peel it and feel significant resistance, or if you see paint cracking or lifting with the tape, you’ve likely waited too long. It’s often best to stop and evaluate the situation, possibly scoring the line more carefully.
Q3: What is the best way to fix paint that bled under the tape?
Once the paint is fully dry, you can gently sand the uneven edge smooth, then use a very fine artist’s brush to carefully touch up the affected area with the correct color. For larger bleeds, you might need a small amount of spackle, followed by sanding, priming, and repainting.
Q4: Can I use regular masking tape instead of painter’s tape?
It’s not recommended. Regular masking tape is often much stickier and designed for more permanent bonding (like sealing packages), not for clean removal from painted surfaces. It’s highly likely to peel paint or leave behind a sticky residue.
Q5: How long can painter’s tape be left on a wall?
For most standard painter’s tapes, leaving them on for 24 hours is generally the maximum recommended time. Some specialty tapes might be rated for longer, but it’s always best to check the packaging. The longer it stays on, the higher the risk of it bonding too strongly or leaving residue.
Q6: Does humidity affect how soon I can remove tape?
Yes, absolutely. High humidity slows down the drying process considerably. If it’s very humid, the paint will take longer to reach that “tacky but not sticky” stage, so you’ll need to wait longer before removing the tape compared to a dry day.
Q7: What if the paint is glossy? How does that affect tape removal?
Glossy finishes can sometimes create a stronger bond with the tape over time as they cure. It’s still crucial to remove the tape when it’s dry to the touch. For glossy surfaces, a more thorough scoring of the edge with a utility knife might be necessary before pulling, as the paint film is often harder and less flexible.