How To Bevel Wood By Hand: Marking, Planing & Avoiding Tearout
To bevel wood by hand, mark the angle with a sliding bevel gauge and a marking knife, then remove the waste with a block plane or chisel, working with the grain in light passes rather than trying to cut the full angle at once. A “bevel” is any angled edge cut at other than 90° – a 45° bevel across a corner is usually called a chamfer, but the layout and cutting technique are identical either way. The real skill isn’t the tool, it’s reading grain direction and checking your angle as you go, which is what most guides skip entirely. If you are choosing between hand tools and power tools, our guide to the best way to bevel wood compares all the methods side by side.
Essential Tools For Hand Beveling
Best Block Plane For Hand-Beveling
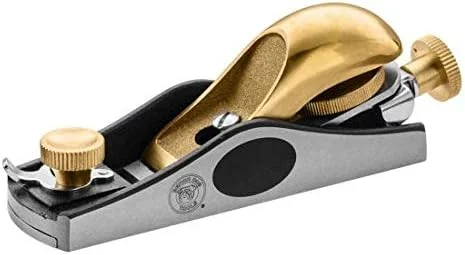 |
Rockler Bench Dog No. 60-1/2 Low-Angle Block Plane – $119.99 A low-angle plane’s shallower cutting angle shears end grain and bevel edges cleaner than a standard bench plane, exactly the cut this guide’s technique relies on.
|
A short, specific tool list covers nearly every hand-beveling job:
- Sliding bevel gauge: Unlike a fixed try square, a sliding bevel locks at any angle, letting you transfer an exact angle from a drawing, a mating part, or a protractor directly onto your workpiece.
- Marking knife: A knife line severs wood fibers cleanly, giving you a crisp registration line a chisel or plane blade can register against – a pencil line is too fuzzy for this.
- Block plane or bench plane: A low-angle block plane is the most common choice for beveling since its shallow cutting angle shears cleanly across end grain and diagonal grain alike.
- Chisel: Best for short bevels, stopped bevels that don’t run the full length of a piece, or fine-tuning a plane cut in a corner the plane sole can’t reach.
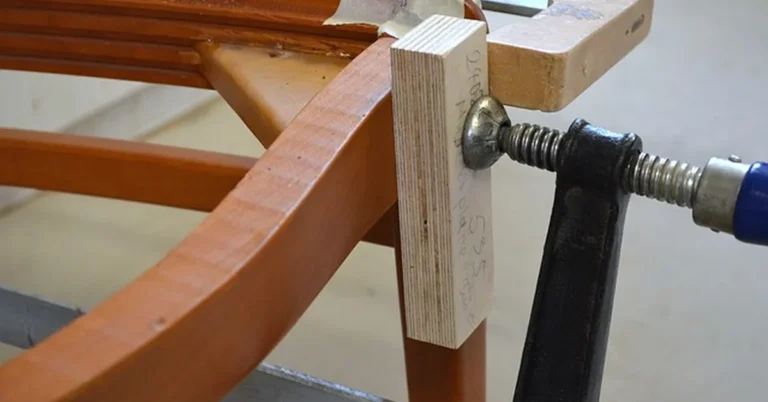
- Clamps or a vise: The workpiece has to stay dead still – any movement mid-cut is what turns a clean bevel into a gouged one.
Marking The Bevel Accurately
Set your sliding bevel to the target angle against a protractor, an existing part, or a full-size drawing, then lock the wing screw. Register the gauge’s stock against the reference face of your workpiece and scribe the angle across the edge with a marking knife, not a pencil – the knife line gives your plane or chisel a physical groove to register against, which a graphite line can’t do. On a board wide enough to bevel from both faces, mark the line on both sides so you can work in from each face and meet in the middle; this is the single biggest thing that prevents blowout on the far edge, which a pencil-only, one-side-only approach almost guarantees on anything but the softest, straightest-grained wood.
Planing The Bevel
Identify grain direction before you make a single pass – run your fingers along the edge, or look at the exposed grain lines on the face, to find which direction planes “downhill” without digging in. Planing against the grain is the single most common cause of tearout on a bevel, since the angled cut already exposes more end grain and diagonal grain than a flat face cut does. Start with the plane’s blade retracted to take a light shaving, and register the sole of the plane against your knife line rather than eyeballing the angle freehand. Work in thin, even passes rather than trying to remove the whole waste in one aggressive cut – a bevel that’s planed too aggressively tends to go past the line or wander out of flat. Check your progress often by sighting down the length of the bevel: a consistent, flat reflection means you’re tracking true, while a hump or hollow means you’re planing unevenly and need to adjust pressure.
Chiseling A Bevel
A chisel suits short bevels, stopped bevels, or cleanup in corners a plane’s sole can’t reach. Take thin paring cuts with the bevel of the chisel riding against the wood rather than trying to remove the full depth in one push – a chisel forced through too much material at once tends to split ahead of the edge instead of shearing cleanly. Work with the grain here too, and pare toward the knife line from both directions on a wide bevel rather than pushing straight through from one edge, which again reduces the risk of the far edge splintering out.
Cutting A Bevel With A Hand Saw
For a full-length bevel cut rather than a planed edge, clamp the workpiece and saw just outside your marked knife line, leaving a small margin to clean up with a plane or chisel afterward – sawing exactly to the line and expecting a finished surface rarely works with a hand saw. A coping saw or a fine-tooth back saw with a shooting board or angled guide block gives the most consistent result; freehand sawing an angle across a long edge is where most uneven bevels actually come from.
Common Mistakes And How To Avoid Them
- Planing against the grain: causes tearout right at the angled edge where it’s most visible. Always check grain direction before the first pass, not after you see the damage.
- Marking with pencil instead of a knife: a graphite line has no registration groove for a blade to follow, so the cut can wander off the intended angle.
- Working from one face only on a wide board: concentrates all the risk of blowout on the far edge. Mark and work from both faces toward the middle whenever the stock is thick enough to allow it.
- Removing too much material per pass: whether with a plane or a chisel, an aggressive cut is what pushes a bevel past the line or splits the wood ahead of the edge. Thin, repeated passes stay controllable.
- Never checking the angle mid-cut: re-check against your sliding bevel gauge periodically rather than only at the very end, when a wrong angle means starting over.
Frequently Asked Questions
How Do You Cut A Bevel Without A Table Saw?
Mark the angle with a sliding bevel gauge and a marking knife, then remove the waste with a hand plane, chisel, or hand saw. Clamp the workpiece securely and work in thin passes, checking the angle periodically against the bevel gauge.
What’s The Difference Between A Bevel And A Chamfer?
A chamfer is specifically a 45-degree cut across a corner; a bevel can be any angle and often runs across the full width or length of an edge. The marking and cutting technique is identical either way.
Why Does My Hand-Planed Bevel Tear Out?
Tearout on a bevel almost always means you’re planing against the grain direction, which is easier to miss on an angled cut than a flat face since more end grain is exposed. Check grain direction before the first pass and reverse direction if you see tearout starting.
Can You Bevel Wood With Just A Chisel?
Yes, for short or stopped bevels. Take thin paring cuts with the grain rather than forcing the chisel through the full depth at once, which is what causes splitting ahead of the edge.
Conclusion
Hand-beveling comes down to three habits most guides skip: knife-line marking instead of pencil, checking grain direction before every pass, and working thin cuts from both faces on wide stock instead of forcing one aggressive pass. Get those three right and the specific tool – block plane, chisel, or hand saw – matters much less than which technique you follow with it.
Sponsored / affiliate links. As an Amazon Associate I earn from qualifying purchases. I may earn additional commission from eligible campaigns.