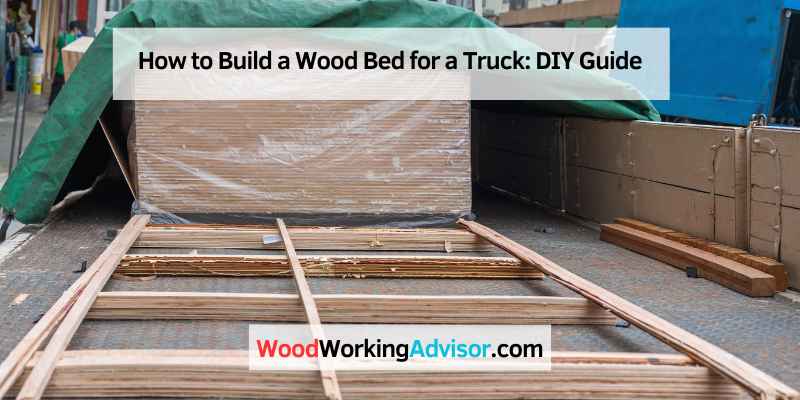
How to Build a Wood Bed for a Truck: DIY Guide
To build a wood bed for a truck, select a wood type such as ash or hickory and follow step-by-step instructions for constructing the bed frame, attaching cross supports and decking boards, and adding side panels for security and stability. If you’re looking for an affordable and customizable option for your truck bed, building one out of wood may be the perfect DIY project.
Not only can you save money compared to purchasing a pre-made metal or plastic bed, but you can also choose the type of wood and finish that best suits your personal style. We’ll provide tips and resources for building a wood bed for your truck, including recommended wood types, step-by-step instructions, and ideas for securing cargo while on the road.
Selecting The Wood
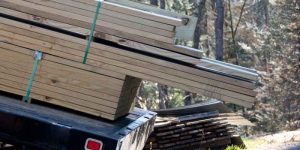
To build a wooden bed for a truck, choosing the right wood is crucial. Pine would be the cheapest option, but Ash or Hickory could be better choices for quality wood without breaking the bank. Proper tie-downs and securing techniques should also be considered for safe transport.
When building a wood bed for a truck, one of the critical decisions you will have to make is choosing the right type of wood. The wrong choice of wood could lead to the bed cracking or rotting over time, causing an unnecessary headache. In this guide, we’ll help you make an informed decision by outlining the best types of wood and the factors to consider when choosing wood for a truck bed.
Best types of wood for a truck bed
There are several types of wood to choose from, each with its unique characteristics. Here are some of the most popular types of wood for building a truck bed:
| Wood Type | Advantages | Disadvantages |
|---|---|---|
| Ash | Durable, strong, resistant to rot and insects, attractive grain pattern | Expensive |
| Hickory | Durable, strong, resistant to rot and insects, attractive grain pattern | Expensive |
| Oak | Durable, strong, attractive grain pattern | Expensive, prone to splitting and cracking |
| Maple | Durable, resistant to scratches and dings, attractive grain pattern | Expensive |
| Pine | Low cost, readily available | Soft wood, prone to scratches and dents, not as durable as hardwoods |
Factors to consider when choosing wood for a truck bed
Now that you know the best types of wood, let’s explore the critical factors to consider when choosing the right wood for your truck bed:
Strength: Your truck bed needs to be strong enough to carry heavy loads without cracking or bending. Hardwoods such as ash, hickory, oak and maple are stronger and more durable than softwoods like pine.
Resistance to Elements: Your truck bed will be exposed to the elements such as rain, sun, and extreme temperatures. Choose wood that can withstand these elements without rotting or cracking. Hardwoods are more resistant to rot and insects than softwoods.
Appearance: You want your truck bed to look great. Consider the wood grain, color, and texture. Hardwoods typically have a more attractive grain and texture than softwoods.
Cost: The cost of the wood you choose will determine how much you spend on your truck bed. Hardwoods are typically more expensive than softwoods, so consider your budget when making your choice.
Weight: The weight of the wood will affect the overall weight of your truck. Hardwoods are typically denser and heavier than softwoods, so keep this in mind when choosing your wood.
In conclusion, selecting the right type of wood is critical to building a sturdy and durable truck bed. Consider the factors outlined above and choose the best wood that fits your budget and needs. With careful planning and proper maintenance, you can enjoy your DIY wood truck bed for years to come.
Removing The Old Bed From The Truck
To build a wood bed for a truck, the old bed must first be removed carefully. Once the old bed has been taken off, the next steps include selecting the right wood for the new bed, preparing the wood, securing the frame, adding cross supports, and adding decking boards.
o Build a Wood Bed for a Truck – Removing the Old Bed from the Truck
Before starting on your journey of building a new wood bed for your truck, you need to clear the path by removing the old bed. Doing this step efficiently is crucial to continue with the next steps. This process can be made easy with the right tools and equipment, which we will discuss in the following section.
Necessary Tools and Equipment
– Socket set
– Wrench set
– Screwdrivers – Phillips and flathead
– Prybar
– Hammer
– Sawhorses
– Step stool or ladder
– Gloves and safety glasses
Step-by-Step Process for Removing the Old Bed
1. Remove the tailgate.
– Open the tailgate and locate the bolts on either side of the hinges.
– Use a socket set to remove the bolts and take off the tailgate.
2. Disconnect the taillights.
– Unplug the wiring harness of the taillights attached to the truck bed.
– Remove the taillight assemblies from the bed.
3. Remove the bolts that hold the bed in place.
– Lift the truck bed by positioning the sawhorses or the step stool beneath it.
– Locate the bolts that attach the bed to the truck frame and unscrew them using a wrench set.
– Take out the bed slowly from the truck frame by gently nudging it towards the rear end.
4. Loosen any other attached hardware.
– Check the underside of the bed before fully taking it out of the truck.
– Look for any additional cables, wires, or hoses that may be connected to the bed and carefully release them using pliers or screwdrivers.
– Make sure to secure these components to avoid any damage or disconnection.
By following these simple steps, you can successfully remove the old bed from the truck and prepare for the next step. Remember to use proper safety equipment and handle the tools cautiously to avoid any injuries. Stay tuned for the next section on ‘Building the Wood Bed for Your Truck.’
Preparing The Wood
When building a wood bed for a truck, selecting the right wood is crucial for ensuring its durability and longevity. For a cost-effective option that doesn’t compromise quality, Ash or Hickory is recommended. Securely tying down furniture or stacked items with ratchet straps or cargo nets is also necessary for safe transportation.
If you own or have access to a truck, building a wood bed is a great way to add functionality and a touch of style. In this post, we will focus on the first step of building a wood bed for a truck: preparing the wood. This step involves two key processes: torching the wood to bring out the grain and finishing the underside of the wood for added durability and protection.
Torching The Wood To Bring Out The Grain
Torching the wood is an optional step, but it can add a unique and rustic look to your truck bed. To torch the wood, lightly run a propane torch along the surface of the wood, moving the flame in the direction of the wood grain. The goal is to darken and char the wood, which will bring out the natural grain patterns and give it a distinctive look. Be sure to wear protective goggles and gloves while torching the wood and keep a fire extinguisher handy in case of any accidents.
Finishing The Underside Of The Wood
Once you have torched the wood to your desired level of darkness, it’s time to finish the underside of the wood. This step will ensure that your wood bed is protected from moisture and the elements. First, sand the underside of the wood to remove any rough spots or splinters. Then, apply a coat of sealant or marine-grade varnish to the underside of the wood. This will help prevent warping, rotting, and splitting due to exposure to moisture.
In conclusion, preparing the wood is a crucial step in building a wood bed for your truck. By torching the wood and finishing the underside, you can achieve a rustic and unique look while also ensuring the durability and longevity of your wood bed. Stay tuned for the next steps in building your own wood truck bed!
Building The Truck Bed Frame
Building a truck bed frame using wood is a cost-effective and practical solution. Selecting the right type of wood, securing it with supports and side panels, and adding tie-down hooks are the key steps in creating a sturdy and reliable truck bed frame.
Building the Truck Bed Frame is a critical step in constructing a wooden truck bed. The frame is the foundation of the bed and supports the decking boards, making it sturdy and durable. Creating the frame involves several steps that should be followed carefully to ensure the bed lasts for years. In this section, we’ll discuss how to create the frame, adding cross supports, installing the decking boards, and attaching the sides.
Creating the Frame
To create the frame of your wood truck bed, you’ll need to measure the dimensions of your truck bed to ensure your frame fits properly. Once measured, you’ll cut the wood to size for the frame sides. Next, you’ll need to attach the frame sides together using either screws or bolts, depending on personal preference.
Adding Cross Supports
Cross supports are the horizontal pieces of wood that span the width of the frame, adding support and stability to the bed. They’re typically added at 12-16 inch intervals, depending on the size of the frame. To attach cross supports, measure the distance between the frame sides and cut the wood to size. Then, drill pilot holes for the screws and secure the cross supports to the frame sides.
Installing the Decking Boards
The decking boards are the top layer of your truck bed and are what the cargo will rest on. To install the decking boards, measure and cut them to size, ensuring they fit snugly on the frame. Then, attach them to the frame using screws or bolts. You can choose to either space the boards out or install them flush together, depending on your preference.
Attaching the Sides
The sides of the truck bed can be added once the frame is built, cross supports are installed, and decking boards are attached. The sides provide extra support and help keep cargo in place. To attach the sides, measure and cut the wood to size, ensuring it fits between the front and rear panels of the bed. Then, drill pilot holes and attach the sides to the frame and decking boards using screws or bolts.
In conclusion, creating a sturdy and durable wooden truck bed takes time and effort. Building the Truck Bed Frame is a crucial step in ensuring the bed lasts a long time without structural issues. By following the steps outlined in this section, you can build a truck bed that’s not only functional but also aesthetically pleasing and durable.
Building The Cab Protection Wall
Learn how to build a wood bed for your truck with ease by following simple guidelines. Choosing a better wood option, such as Ash or Hickory, can keep costs low while maintaining the quality of wood. Securely strap your items down and use multiple ratchet straps to keep them in place while transporting in the truck bed.
If you are looking to build a wood bed for your truck, it is essential to have a cab protection wall to ensure that your cargo stays in place. The cab protection wall is a vertical structure that separates the truck bed from the cabin area. It also provides a surface to attach tie-downs and cargo retainers to keep your loads secure.
Designing the Wall
Before cutting and installing the wall, it is crucial to design and plan it correctly. Determine the exact height and width of the wall, as well as the thickness of the wood. Identify the materials required for the wall such as wood planks and screws, and make sure they are of high quality to withstand the weight of your cargo.
Cutting and Installing the Wall
Once you have your design and materials, the next step is to cut and install the wall. Measure the distance between the bed rails and the back of the cab to create a precise fit. Use a saw to cut the wood planks according to the measurements.
After cutting the wood, install the vertical planks against the back of the cab, ensuring a secure fit with screws. It’s essential to make sure the wall is square to the bed and sitting parallel to the sides. Add horizontal support to the wall to make it more rigid.
Before you finish, test the wall’s sturdy connection four times by using ropes on the wall and then shaking the truck bed. If the wall sways or shows any sign of moving, consider adding more support.
Conclusion
Building the cab protection wall is critical to secure loads in your truck bed and ensure that the cargo remains safe during transportation. Proper design, measurements, and installation are crucial to achieve a perfect fit. By following the steps we’ve outlined for designing, cutting, and installing the wall, you can create a sturdy and reliable cab protection wall.
Sealing And Securing The Truck Bed
When building a wood bed for a truck, it’s important to consider how to seal and secure it properly. One option is to use Ash or Hickory wood, which are affordable yet good quality. To secure items in the truck bed, use multiple ratchet straps and tie-down anchors or a cargo net.
Sealing and securing the truck bed is necessary to protect the wood bed from weather elements and to ensure that your cargo stays in place during transit. Applying a sealant to protect the wood is an essential step in sealing the truck bed. Use a waterproof sealant and apply it evenly to the entire surface of the wood bed, including the edges and corners.
This will protect the wood from moisture, sun exposure, and prevent it from cracking or warping over time. It is important to apply multiple coats of sealant to ensure complete protection. Let the sealant dry completely before proceeding to the next step.
Installing tie-down anchors for securing cargo is crucial to prevent the cargo from sliding or shifting during transit. Tie-down anchors can be attached to the wood bed using bolts and washers or can be built-in during the construction of the wood bed. It is recommended to install at least four tie-down anchors near the corners of the truck bed to keep the cargo in place. Secure the tie-down anchors with bolts and washers to ensure they are firmly attached to the wood bed and can withstand the weight of the cargo. Additionally, you can use ratchet straps or bungee cords to secure the cargo to the tie-down anchors.
In conclusion, sealing and securing the truck bed is crucial to protect the wood bed and prevent the cargo from moving during transit. Applying a waterproof sealant and installing tie-down anchors will ensure the longevity of your wood bed and prevent damage to your cargo. By taking these steps, you can enjoy a durable and reliable wood bed for your truck.
Frequently Asked Questions On How To Build A Wood Bed For A Truck
What Kind Of Wood Should I Use For A Truck Bed?
For a low-cost option for a truck bed, Pine is the cheapest but lacks aesthetics. For a better option without compromising quality, we recommend using Ash or Hickory wood.
How Do You Tie-down Furniture In A Pickup Truck?
To tie-down furniture in a pickup truck, securely strap your items down using ratchet straps connected to the bullrings or tie-down anchors in your truck bed. For large items, use multiple straps, and consider using a cargo net to secure stacked items.
What Years Did Trucks Have Wood Beds?
Trucks had wood beds from the early 1900s to the 1940s, before metal beds became more common.
Will Stuff Fly Out Of Truck Bed?
Stuff can fly out of a truck bed depending on several factors such as the weight and solidity of the luggage and the wind speed of the truck. To prevent this from happening, it is recommended to securely strap down the items or use a cargo net to secure the load.
Conclusion
Overall, building a wood bed for your truck can be a fun and rewarding DIY project. You have plenty of wood options to choose from, with Ash and Hickory being recommended for low cost and high quality. It’s important to securely tie down any cargo in your new wood truck bed using ratchet straps or a cargo net.
With these tips and instructions from various sources, you can get started on building your own unique and practical wood bed for your truck.