How to Easily Change a Skilsaw Blade: Quick and Effective Steps
To change a Skilsaw blade, follow these steps:
1. Unplug the saw from the power source.
2. Release the blade guard and remove the screws holding the old blade.
(20 words) A Skilsaw is a popular power tool used for cutting various materials. Over time, the blade may become dull or need replacement due to wear and tear.
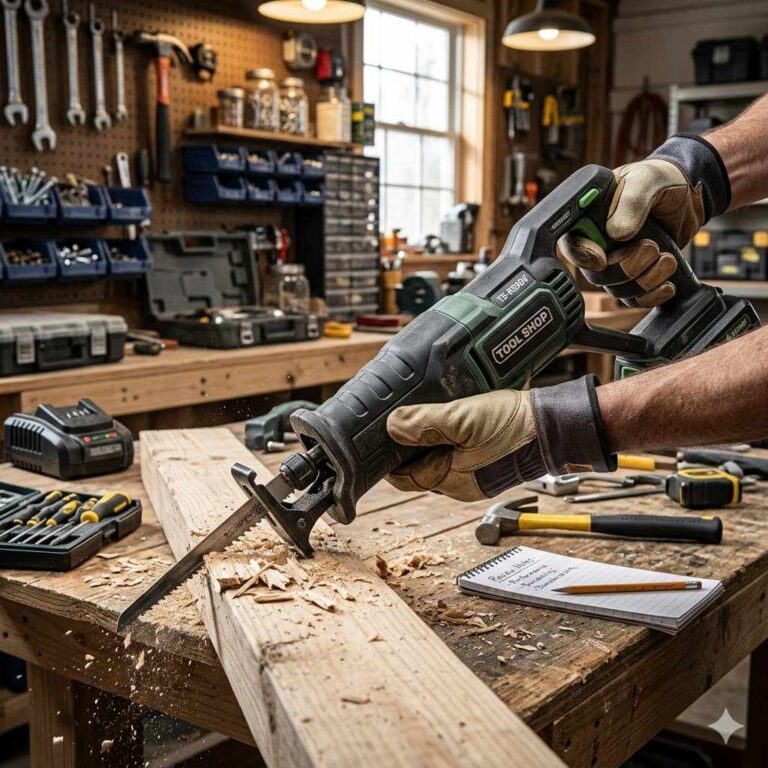
Changing the blade on a Skilsaw is a straightforward process that can be done quickly and easily. By following a few simple steps, you can ensure your saw is always ready for the next task. We will walk you through the process of changing a Skilsaw blade, allowing you to continue working efficiently and effectively. (120 words)
Preparing For Blade Change
Changing the blade on your Skilsaw is an essential maintenance task that ensures optimal performance and safety. By following a few simple steps, you can efficiently swap out the old blade with a new one. In this article, we will guide you through the process of preparing for a blade change, from ensuring safety first to gathering the necessary tools.
Ensuring Safety First
When it comes to handling power tools, safety should always be the top priority. Before you begin changing the blade on your Skilsaw, make sure to take the following precautions:
- Disconnect the saw from the power source to prevent accidental start-up.
- Wear protective gloves to shield your hands from potential cuts or injuries.
- Securely clamp your Skilsaw to a stable work surface to minimize movement while changing the blade.
- Inspect the area around your workbench for any obstructions or hazards that could interfere with the blade-changing process.
Gathering The Necessary Tools
Before diving into the blade change, it is essential to gather the required tools to streamline the process. The following table summarizes the necessary tools you will need:
| Tools | Description |
|---|---|
| Wrench | A manual wrench is used to loosen and tighten the blade’s arbor nut. |
| Replacement Blade | A high-quality replacement blade that matches the specifications of your Skilsaw model. |
| Safety Glasses | Protective gear that shields your eyes from any debris or particles that may be generated during the blade change. |
| Dust Mask | A dust mask is recommended to prevent inhalation of fine dust particles during the blade change process. |
By ensuring safety and gathering the necessary tools before changing the blade on your Skilsaw, you are setting the stage for a smooth and efficient process. In the next section, we will guide you through the step-by-step instructions for changing the blade, so stay tuned!
Step-by-step Blade Change Process
Changing the blade on your Skilsaw is a simple and essential maintenance task that ensures the saw’s optimal performance. Whether you are a beginner or experienced user, knowing how to change a Skilsaw blade safely and efficiently is key to hassle-free woodworking projects. In this guide, we will walk you through the step-by-step process of blade replacement to help you get the job done smoothly.
Unplugging The Skilsaw
Before starting the blade change process, always prioritize safety by unplugging the Skilsaw from the power source. This prevents any accidental activation and potential injuries during the procedure.
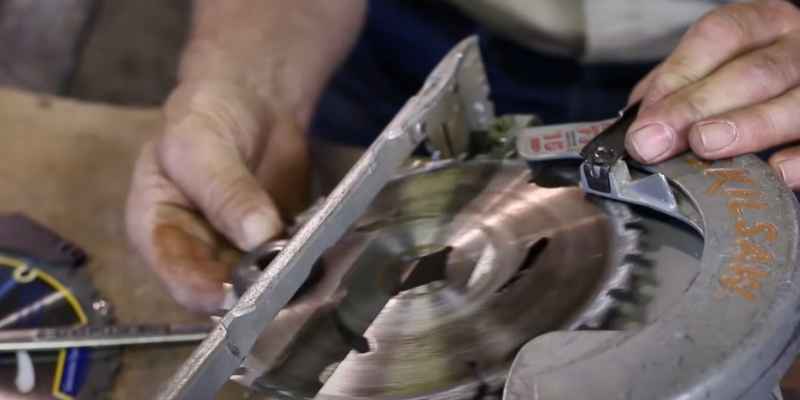
Removing The Old Blade
To remove the old blade, you need to locate the blade release mechanism, usually positioned on the upper part of the saw near the blade housing. Follow these steps:
- Using a wrench or a blade wrench, turn the blade nut counterclockwise to loosen it.
- Once loosened, carefully remove the blade nut and any washers or shims that may be present.
- Gently slide the old blade out of the saw, taking care not to touch the teeth or the sharp edges.
- Place the old blade on a safe surface or, better yet, dispose of it properly.
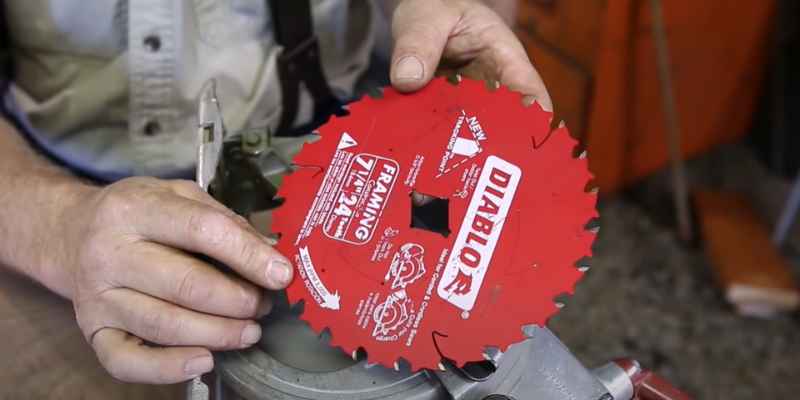
Installing The New Blade
Now that you have successfully removed the old blade, it’s time to install the new one. Follow these steps:
- Ensure that the new blade matches the specifications recommended for your Skilsaw model.
- Align the center hole of the new blade with the arbor on the saw.
- Slide the blade onto the arbor, making sure the teeth face in the direction of rotation.
- Reinstall any washers or shims that were previously removed, ensuring the blade sits securely.
Securing The Blade In Place
Properly securing the blade is crucial for safe and accurate cutting. Follow these steps to secure the new blade:
- Hold the blade against the arbor while tightening the blade nut clockwise with a wrench or blade wrench.
- Ensure the blade is centered and seated correctly on the arbor.
- Tighten the blade nut firmly, but be cautious not to overtighten, as it can cause damage.
Once you have completed the steps outlined above, give the blade a gentle tug to ensure it is securely in place. Your Skilsaw is now ready for use with the freshly installed blade. Remember, safety is paramount, so always wear appropriate safety gear when operating any power tool.

Testing The New Blade
Learn how to easily change the blade on your Skilsaw with our step-by-step guide. Say goodbye to inefficient cuts and hello to improved precision by testing out the new blade yourself.
Plugging In The Skilsaw
Before conducting a test cut, ensure the Skilsaw is securely plugged in to avoid interruptions during the test.
Conducting A Test Cut
Once the Skilsaw is plugged in and ready, conduct a test cut on a scrap piece of wood to ensure the new blade is properly installed and functions correctly.
Maintenance Tips
To change a Skilsaw blade, start by unplugging the tool for safety. Then, using a wrench, loosen the blade bolt and carefully remove the old blade. After that, place the new blade in position and tighten the bolt securely. Finally, reattach the blade guard and test the saw before use.
Maintaining your Skilsaw blade is essential for ensuring optimal performance and longevity. By following these maintenance tips, you can extend the life of your Skilsaw and keep it cutting smoothly.
Cleaning The Skilsaw
Regularly cleaning your Skilsaw is a crucial part of its maintenance. Over time, dust, debris, and resin can accumulate on the blade and affect its performance. To clean your Skilsaw:
- Disconnect the Skilsaw from the power source and remove the blade.
- Using a brush or compressed air, remove any sawdust and debris from the blade and the housing.
- For stubborn residue or resin buildup, you can use a blade cleaning solution. Apply the solution to a cloth or brush and gently scrub the blade.
- Once cleaned, thoroughly dry the blade before reinstalling it in the Skilsaw.
Regularly inspecting the blade of your Skilsaw is crucial for identifying any signs of wear or damage. By catching issues early on, you can prevent accidents and ensure precise cutting. Here’s how:
- Before each use, visually inspect the blade for any chips, cracks, or missing teeth. If you notice any damage, it’s important to replace the blade immediately.
- Check the blade for warping or bending. A warped blade can lead to uneven cuts and potential kickback.
- Ensure the blade is securely tightened to the saw’s arbor. A loose blade can result in inaccurate cutting and pose a safety hazard.
- Regularly sharpen the blade to maintain its cutting efficiency. Follow the manufacturer’s guidelines for sharpening or consider taking it to a professional if you’re unsure.
By incorporating these maintenance tips into your regular Skilsaw blade care routine, you can ensure optimal performance and prolong the life of your tool. Remember to always prioritize safety by following proper procedures and using the appropriate protective gear when handling power tools.
Frequently Asked Questions On How To Change A Skilsaw Blade
How Do I Change The Blade On My Skil Circular Saw?
To change the blade on your Skil circular saw, follow these steps:
1. Unplug the saw.
2. Press and hold the blade lock button.
3. Use a wrench to loosen the arbor nut.
4. Remove the old blade and replace it with the new one.
5. Tightly secure the arbor nut.
6. Plug in the saw and you’re ready to go.
How Do You Change A Blade On A Saw Saw?
To change a blade on a saw saw:
1. Unplug the saw saw for safety.
2. Locate the blade release button or lever.
3. Press the release button or flip the lever to release the blade.
4. Remove the old blade and carefully insert the new one.
5. Secure the blade in place and ensure it is properly aligned before using the saw again.
Which Way Does A Skill Saw Blade Go On?
The skill saw blade goes on with the teeth facing forward and the rotation arrow pointing in the direction of rotation. This ensures optimal performance and safety.
How Do You Change A Skil Jigsaw Blade?
To change a Skil jigsaw blade, follow these steps:
1. Unplug the jigsaw.
2. Locate the blade release button or lever near the blade.
3. Press or pull the release button or lever to release the current blade.
4. Insert the new blade into the blade holder, making sure it locks securely.
5. Test the blade by wiggling it gently.
Conclusion
Changing a Skilsaw blade is a simple yet crucial maintenance task that every user should be familiar with to ensure safety and efficient performance. By following the step-by-step process outlined in this guide, you can confidently handle this DIY project.
Remember to prioritize safety and read the manufacturer’s instructions carefully for an optimal experience.