How to Change Ryobi Circular Saw Blade: A Step-by-Step Guide
To change the Ryobi circular saw blade, follow these steps: disengage the saw, remove the battery, and use the arbor lock to loosen and replace the blade.
Understanding Your Ryobi Circular Saw
When it comes to understanding your Ryobi circular saw, it is essential to familiarize yourself with the basics of this powerful tool. The Ryobi circular saw model is known for its durability, precision, and versatility, making it a popular choice among DIY enthusiasts and professionals alike. In this article, we will delve into the important features and mechanisms of the Ryobi circular saw that every user should know.
Basics Of The Ryobi Circular Saw Model
The Ryobi circular saw model is designed with efficiency and ease of use in mind. Here are some key aspects to consider:
- The Power Source: The Ryobi circular saw can be powered by either a corded or cordless option, giving users the flexibility to choose the best option for their needs. A corded saw provides continuous power, ideal for longer projects, while a cordless saw offers portability and convenience.
- The Blade: Understanding the blade of your Ryobi circular saw is crucial for achieving accurate and clean cuts. It is essential to select the appropriate blade type for different materials and applications. Ryobi circular saw blades come in various sizes, ranging from 5-1/2 inches to 7-1/4 inches. The blade size determines the maximum cutting depth, so be sure to choose the right one for your project.
- The Cutting Capacity: One of the advantages of the Ryobi circular saw is its impressive cutting capacity. With adjustable depth settings, users can easily customize the cutting depth according to their needs. The cutting capacity can vary depending on the model, so it is essential to refer to the user manual for specific measurements.
- The Beveling Function: The beveling function allows users to make angled cuts, adding versatility to the Ryobi circular saw. By tilting the base plate, you can achieve precise bevel cuts at various angles, commonly ranging from 0 to 45 degrees. This feature is particularly useful for tasks such as chamfering edges or creating miter joints.
- The Grip and Handling: Ryobi circular saws typically have an ergonomic design that prioritizes comfort and control. The handle is strategically positioned for a secure grip, reducing hand fatigue during prolonged use. Additionally, some models may have auxiliary handles or rubberized grips for enhanced stability and maneuverability.
Essential Safety Features And Mechanisms
When operating any power tool, safety should always be the top priority. The Ryobi circular saw incorporates several safety features and mechanisms to ensure a secure working environment. Here are a few key elements to be aware of:
- Blade Guard: The blade guard is a crucial safety component that covers the majority of the blade, limiting exposure and protecting users from accidental contact. It automatically retracts when the blade is engaged with the material, minimizing the risk of injuries.
- Electric Brake: The electric brake is another important safety feature of the Ryobi circular saw. It stops the blade within seconds of releasing the trigger, reducing the risk of accidental cutting and allowing for quicker blade changes.
- Spindle Lock: The spindle lock is a mechanism that immobilizes the blade, making it easier and safer to change. It prevents the blade from spinning during the replacement process, minimizing the risk of injuries caused by a moving blade.
- Trigger Lock: The trigger lock helps prevent accidental activation of the saw. By engaging the lock, users can secure the trigger in the off position, ensuring the saw remains idle when not in use.
- Anti-Kickback Mechanism: Some models of the Ryobi circular saw feature an anti-kickback mechanism. This safety feature helps prevent kickback, which occurs when the blade binds or stalls, causing the saw to kick back towards the user. The anti-kickback mechanism reduces the chances of accidents and ensures smoother cutting operations.
Understanding these essential safety features and mechanisms of the Ryobi circular saw is vital for responsible and secure usage. Always follow the manufacturer’s instructions and adhere to proper safety precautions when operating the saw.
Preparing For Blade Replacement
When it comes to maintaining your power tools, one important task is to regularly change their blades. A dull or damaged blade can affect the performance and safety of your Ryobi circular saw, so it’s crucial to know how to change it properly. In this blog post, we’ll guide you through the process of replacing the blade on your Ryobi circular saw, starting with the necessary preparations.
Gathering Necessary Tools And Materials
Before you begin the blade replacement process, it’s important to gather all the tools and materials you’ll need. This ensures that you won’t have to interrupt the process to search for missing items.
- New circular saw blade compatible with your Ryobi model
- Protective gloves
- Protective eyewear
- Workbench or sturdy surface
- Hex wrench or screwdriver (depending on your Ryobi model)
- Blade removal tool (optional but recommended)
Once you have these tools and materials ready, you can proceed with the blade replacement process smoothly.
Power Source Disconnection And Safety Checks
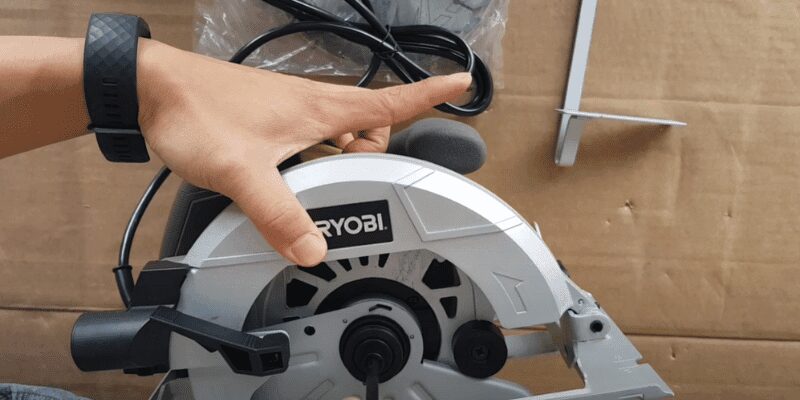
Before performing any maintenance task on your power tools, it’s crucial to ensure your safety. Start by disconnecting the power source to your Ryobi circular saw. Unplug the cord if it’s plugged into a power outlet or remove the battery if you’re using a cordless model.
Once you’ve disconnected the power source, make sure to conduct safety checks to prevent any accidental start-ups. Double-check that the power switch is in the “off” position and the blade has come to a complete stop. Inspect the surrounding area for any obstructions or potential hazards that may interfere with the blade replacement process.
Remember, safety should always be your top priority. By following these safety measures, you can ensure a secure working environment while replacing the blade on your Ryobi circular saw.
Accessing The Saw Blade
Changing the blade on your Ryobi circular saw is a straightforward process that requires a few simple steps. In this section, we will guide you through the process of accessing the saw blade, including how to lock the blade and secure the saw, as well as methods to remove the blade guard.
Locking The Blade And Securing The Saw
Before you start changing the blade on your Ryobi circular saw, it is crucial to ensure the saw is securely locked and the blade is properly secured. This will help prevent any accidents or injuries during the process.
- Unplug the saw: Begin by disconnecting the power cord from the electrical outlet to ensure the saw is not accidentally turned on while you’re working on it.
- Engage the lock: Locate the blade lock button near the blade housing. Press and hold the lock button to engage it and prevent the blade from spinning.
- Secure the saw: Place the circular saw on a stable work surface, such as a workbench or sawhorse, ensuring it is well-supported and won’t tip over while you’re working on it.
Methods To Remove The Blade Guard
Once you have locked the blade and secured the saw, you can now proceed to remove the blade guard. The blade guard protects you from contact with the blade during operation and needs to be temporarily removed to access the saw blade.
Here are two common methods to remove the blade guard:
Method 1: Lever Mechanism
Some Ryobi circular saw models come with a lever mechanism to release the blade guard. Follow these steps to remove the blade guard:
- Locate the lever: Look for a lever or switch near the blade guard that is designed to release it.
- Press the lever: Depress the lever or switch, which will disengage the blade guard from its locked position.
- Hold the lever: Keep the lever pressed or switched to keep the blade guard in the open position. This will allow you to access the saw blade.
Method 2: Screw Mechanism
For circular saws that do not have a lever mechanism, you may need to use a screwdriver to remove the blade guard. Follow these steps:
- Locate the screws: Look for the screws holding the blade guard in place. They are typically located near the blade housing.
- Loosen the screws: Use an appropriate screwdriver to loosen the screws holding the blade guard. Be careful not to remove the screws entirely – you only need to loosen them enough to free the guard.
- Remove the guard: Once the screws are loose, carefully lift or slide the blade guard away from the blade housing and set it aside.
With the blade guard removed, you now have full access to the saw blade and can proceed to replace it with a new one.
Removing And Replacing The Blade
Removing and replacing the blade on your Ryobi circular saw is a simple process that can be completed in just a few steps. Whether you need to change the blade due to wear and tear or you want to switch to a different type of blade for a specific project, this guide will walk you through the process.
[step-by-step Blade Removal Process]
To remove the blade from your Ryobi circular saw, follow these steps:
- Ensure the saw is unplugged or the battery is removed to prevent any accidents.
- Locate the blade lock button on the upper part of the saw’s motor housing.
- Press and hold the blade lock button firmly to prevent the blade from spinning.
- Rotate the blade until the lock engages and keeps the blade from turning.
- Use a wrench to loosen the arbor nut that secures the blade to the saw.
- Remove the arbor nut and the outer washer.
- Slowly pull the old blade out from the spindle.
It’s important to handle the blade with care, as the teeth can be sharp and pose a risk of injury. Once the old blade is removed, you’re ready to install a new one.
[Tips for Aligning And Installing The New Blade]
When installing a new blade on your Ryobi circular saw, keep these tips in mind:
- Check the new blade for any damage or defects before installation. Replace it if needed.
- Make sure the new blade is aligned with the spindle and that the teeth are facing in the correct direction.
- Place the outer washer back onto the spindle, followed by the arbor nut.
- Tighten the arbor nut securely with a wrench, ensuring the blade is held firmly in place.
It’s important to note that overtightening the arbor nut can cause damage to the blade or the saw. Use enough force to keep the blade secure but avoid excessive tightening.
Once the new blade is properly installed and secured, you can plug in the saw or reinsert the battery, and you’re ready to make precise and clean cuts with your Ryobi circular saw.
Aftercare And Maintenance Tips
Once you have successfully changed the blade on your Ryobi circular saw, it’s important to follow some aftercare and maintenance tips to ensure the longevity and optimum performance of your tool. In this section, we will discuss how to test the new blade installation and provide you with the best practices for maintaining your Ryobi saw.
Testing The New Blade Installation
Before you start using your Ryobi circular saw with the new blade, it’s crucial to test the installation to ensure everything is in proper working order. Here are the steps to follow:
- Disconnect the power: Always prioritize your safety. Disconnect the power source or remove the battery from the saw before performing any tests or maintenance.
- Inspect the blade: Check if the new blade is securely fastened and properly aligned with the saw. Look for any signs of damage or irregularities that may affect its performance.
- Perform a dry run: With the power still disconnected, turn on the saw and let the blade spin freely for a few seconds. This will help ensure the blade is running smoothly and not causing any unusual vibrations or noises.
- Check for blade wobble: A wobbling blade can lead to inaccurate cuts and potential hazards. Inspect the blade’s stability by running it at full speed while observing from a safe distance. If you notice any excessive wobbling, stop using the saw immediately and recheck the installation.
- Perform test cuts: After confirming the blade’s stability, make a few test cuts on a scrap piece of material to gauge the cutting accuracy and smoothness. Observe the quality of the cuts and make any necessary adjustments before tackling your actual projects.
Best Practices For Maintaining Your Ryobi Saw
Maintaining your Ryobi circular saw properly will not only prolong its lifespan but also ensure consistent and reliable operation. Here are some best practices that you should keep in mind:
- Clean the saw after each use: Sawdust and debris can accumulate over time and affect the saw’s performance. Using a clean cloth or brush, wipe down the saw and blade after every use to remove any residue.
- Regularly lubricate moving parts: Lubrication is essential for the smooth operation of your saw. Follow the manufacturer’s guidelines and apply oil or grease to the necessary moving parts, such as the blade arbor, blade guard, and adjusting mechanisms.
- Store the saw in a dry and secure place: Moisture and dust can cause corrosion and damage to your saw. Store it in a dry area, preferably in a protective case or bag, to prevent any environmental harm.
- Inspect the power cord or battery: Regularly check the condition of the power cord or battery pack. Look for any signs of fraying, damage, or loose connections. If you notice any issues, have them repaired or replaced by a qualified professional.
By following these aftercare and maintenance tips, you can ensure that your Ryobi circular saw remains in optimal condition, providing you with precise and reliable cuts for all your woodworking projects. Remember, a well-maintained tool is a safe and efficient tool.
Frequently Asked Questions For How To Change Ryobi Circular Saw Blade
How Do I Change The Blade On My Ryobi Circular Saw?
To change the blade on your Ryobi circular saw, start by unplugging the tool and removing the battery if it is cordless. Loosen the blade guard and use a wrench to loosen the arbor nut. Remove the old blade and replace it with a new one, making sure the teeth are facing forward.
Tighten the arbor nut and reattach the blade guard.
How Often Should I Change The Blade On My Ryobi Circular Saw?
The frequency of blade changes for your Ryobi circular saw depends on how often you use the tool and the type of materials you cut. If you notice the blade is becoming dull or is not cutting smoothly, it’s time for a blade change.
As a general guideline, aim to change the blade every 6 to 12 months for regular use.
What Size Blade Do I Need For My Ryobi Circular Saw?
The size of the blade you need for your Ryobi circular saw depends on the model you have. Most Ryobi circular saws typically use 7 1/4-inch blades, but it’s important to check your saw’s manual or the blade specifications to ensure you are using the correct size.
Using the wrong size blade can lead to inefficient cuts and potential safety hazards.
Can I Use Different Brands Of Blades On My Ryobi Circular Saw?
Yes, you can use different brands of blades on your Ryobi circular saw as long as they are compatible with the saw’s specifications. When selecting a blade, ensure that it is the correct size, has the appropriate tooth configuration for the material you intend to cut, and fits securely on the saw’s arbor.
It’s also recommended to choose high-quality blades for better performance and longevity.
Conclusion
To conclude, changing the blade on your Ryobi circular saw is a simple yet crucial task that every DIY enthusiast should master. By following the step-by-step instructions provided in this blog post, you can confidently replace the blade and ensure optimal performance for your saw.
Remember to prioritize safety by using the recommended tools and techniques. Now, you can effortlessly tackle your woodworking projects with a sharp and efficient circular saw. Happy sawing!