How To Cut 120 Degree Angle On A Miter Saw? [Easy Way To Do]
You may need to cut different angles depending on your work variance. You can cut any (0 to 180 °s) angles with a miter saw. It is common to rotate the meter according to the size prescribed for each angle cut. Are you worried about cutting a 120-degree angle on a miter saw? Well, now, you are getting a great idea about it.
Everyone wants to get the easy techniques for an accurate cut on a miter saw. But many of you don’t know the formulas. And they have to endure the hassle. The advanced miter saw techniques are not complicated. You can do it properly by following my guidance.
In this article, you will know how to cut a 120-° angle on a miter saw. After reading it, you will be able to do your project efficiently.
6 Easy Steps To Cut 120 Degree Angle On A Miter Saw: The Magic Formula
You Should know all about it for easy working with a miter saw. For a 120-° angle cut, you need two cuts. In a few steps, I described how you could do it only. Let’s get started by reading the accessible methods.
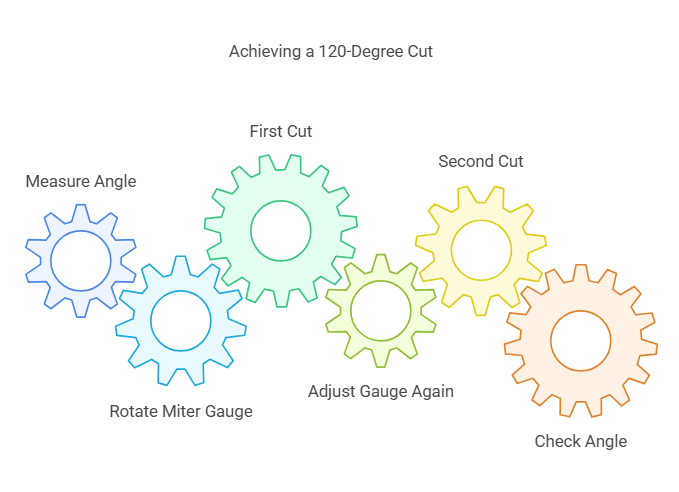
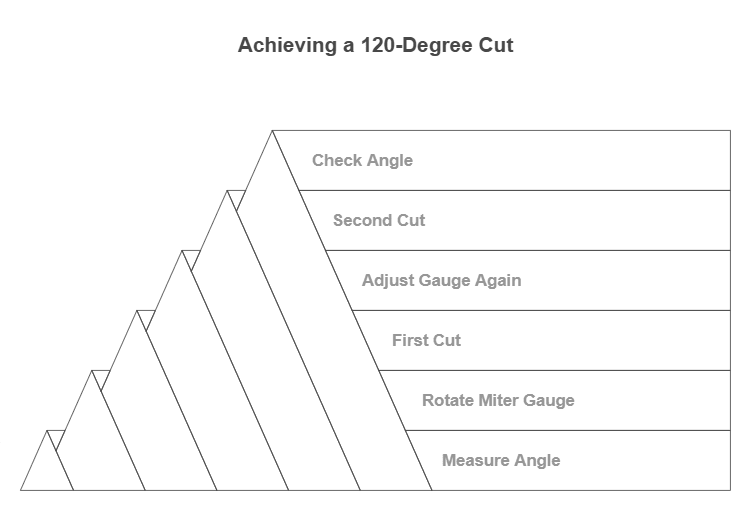
Step 1: Measuring The Angle ° Of The Miter Saw
You need two 60-° cuts to make a 120-° angle cut. To cut 60 °s, you need to know the formulas of the miter saw. Can you set a miter gauge and cut at an angle of 60 °s?
If you know two simple formulas, you don’t have to worry about it. Try to understand the below section, and I will explain it in the next:
Formula – 1:
90 ° = 0 °
85 ° = 5 °
80 ° = 10 °
75 ° = 15 °
70 ° = 20 °
65 ° = 25 °
60 ° = 30 °
55 ° = 35 °
50 ° = 40 °
45 ° = 45 °
Explanation:
If you want a 90-° cut, you must set the miter gauge to a 0-° angle. Again, if you wish for an 85-° cut, you have to set the miter gauge to a 5-° angle. In the same way, if you want an 80/60/50 ° cut, you have to set the miter gauge 10/30/40 ° angle. At last, for a 45-° reap, set the angle at 45 °.
Then you need to set a 30-° angle in the meter gauge for a 60-° cut. Remember the setting of a 30 ° angle for a 60 ° cut.
Formula-2:
For a 90 ° or greater cut, you can calculate the angle:
130 °/2 = 65 °; 90 – 65 = 25 °
120 °/2 = 60 °; 90 – 60 = 30 °
110 °/2 = 55 °; 90 – 55 = 35 °
100 °/2 = 50 °; 90 – 50 = 40 °
Explanation:
If you need a 130 ° cut, divide 130 by 2 and subtract the result from 90 ° and determine the angle. Just like for the 120/110/100 °, the determination of the angle is shown. Then your desired cut was found to have a final 30 ° angle of 120 °s.
Step 2: Rotate The Miter Gauge To The Certain °s
The miter gauge can be set to any ° by rotating it. You know that you have to turn the indicator to 30 °s to cut 60 °s. Carefully place it to the exact °. Now your miter saw is fully ready to cut.
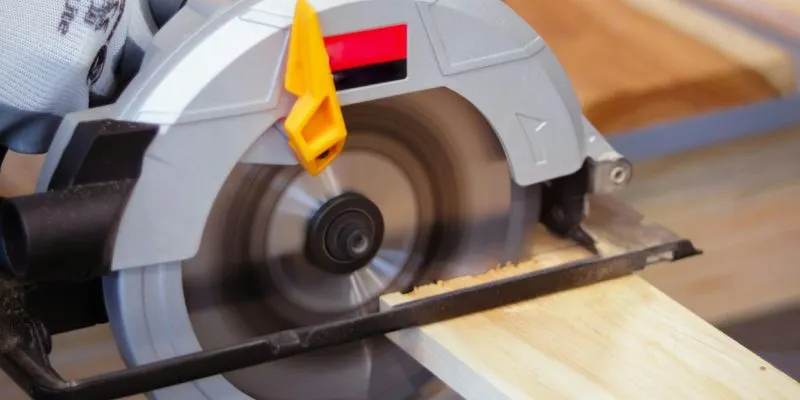
Step 3: Make Your First Cut Accurately
Now, perfectly set the wood or plywood or whatever you want to cut on the miter saw. It is ready to cut 60 °s. Cut with the miter saw and measure the angle with a geometrical tool or an angle finder.
See, you can cut accurately. If the slightest measurement goes back and forth, try again, it is not a complicated task. Finally, your first 60 ° cut is ready.
Step 4: Again Rotate The Miter Gauge To The New Certain Degrees
You have to rotate the miter gauge for your second cut. Now set the 30 ° angle from the opposite side for the 80 ° angle again. Because, to capture the cut angle of the two parts, you have to change the side in this way and turn the meter gauge. When the assignment is done after two cuts, you will understand why the side-by-side angle has been done.
Step 5: Make Your Second Cut Accurately
You have to cut the second in the same way as the first cut. However, one thing to keep in mind is that the thing should be fixed on the opposite side during the second cut so that an angle is created correctly.
Now, you can measure the angle with a geometrical tool. See, you can cut accurately. If the slightest measurement goes back and forth, try again, it is not a complicated task. Finally, your second 60 ° cut is ready.
Step 6: Check The Desire Angle Cut
Now, you have two 60 ° cuts. Place the two cuts properly to check their appearance. To test the angle °, you can use the angle finder tool trend DAR200 or something else. If the angle is okay, you can use glue or screws to join the two. Now your desired angle cut 120 is ready.
7 Tips And Tricks To Control A Miter Saw Safely: You Should Follow
Cutting with a miter saw is a great challenge when you don’t know the magic strategies. After learning everything about it, you should follow some tips and tricks which make your project easy and comfortable. To control it safely, the tips and tricks are given below:
1. Protractor Using:
To know the exact cut, any measuring tool is essential to use. You have to use an angle finder tool for the measurement. The protractor tool will get the job done effortlessly. This is an excellent tool for making a good cut. Its transparent glass is perfect for this measurement. You can use any alternative, but this is the best. Any °s ( o to 180) measurements are possible with the tool.
2. Calculation Drafting:
You have to calculate the miter saw angle °. For this, you have to follow the calculus method. To make the calculation correct, you can make a draft on a paper. It is a great trick to avoid the miscalculation of the measurements.
3. Keeping Hands Safely:
You have to handle the whole work of the miter saw with your hands. So your hand can go into the danger zone of the blade at any time. Because your focus and attention will be on the work full time, while you are working with the miter saw, keep your hands out of the area of the miter blade. The blade is so dangerous. So, you should keep your hands safely.
4. Combination Blade Using:
You can use a combined blade for a better result. Using a combined blade in your miter saw is a good trick. Though it depends on your working demand, you can use it in time. Before using it, you have to learn to use it properly.
5. Keeping Miter Saw Area Clean:
After using the meter a few times, the area will fill with debris. These can be a source of annoyance to you at work. If you clean these and start working, you will be able to focus on the work freshly. You can follow the trick also.
6. Checking For The Damages:
At any time, various problems can occur in the miter. If so, check immediately to see if anything has been damaged. This is an essential task because it is dangerous to work on damaged miters.
7. Secure Adjustment:
Before starting your work, check the adjustment of the miter saw perfectly. A secure adjustment is an excellent thing for you. So, check the adjustment ideally while you are working.
5 Mistakes Should Be Ignored While Cutting 120 Degree Angle On A Miter Saw
It is usual for everyone to make mistakes when working for the first time. Some common mistakes can avoid many hassles if you know about them. Let’s see the faults and try to ignore them while cutting the desired cuts:
1. Miscalculation The Angle:
The first time you determine the angle °, you may feel the problem because you have to take some time to calculate and find out what ° you need to set the miter gauge. However, due to carelessness, you can miscalculate. Because of this mistake, you can make an inaccurate cut. This is the most considerable level of error in this job.
To avoid it, you should read more and more and follow my guidance correctly. And then, by practicing more, you can do the project flawlessly.
2. Not Using Of Angle Finder Tool:
Whether or not your cut is correct can only be properly determined with the angle finder tool. If you do not use it, it will be a big mistake to check the accuracy of your cut. But as an alternative, you can use any other tool. It is a big mistake to measure the cut without using any tool.
3. Inaccurate Setting Of The Miter Gauge:
The inaccuracy of the miter gauge setting is a big mistake. Because if you can’t set the miter correctly on the angle °, you can’t make the correct cut. However, if you know the proper meter gauge setting but an error on the side of determining the angle °, the chances of making a mistake will increase. So, try to understand the whole guidance and start working.
4. No Checking The Alignment:
It is a careless mistake not to check whether the angle is correct before or after the cut. Check the alignment after cutting. If the cut is not the exact shape, try to find your mistake. Then try to avoid that mistake and cut it properly. This is how you will be successful in your project.
5. Not Checking Adjustment:
You should check all adjustments before starting work. If you make a mistake in adjusting something, the meter may not work correctly. To work safely, you should check if the blade is installed correctly, whether the power connection is provided accurately, etc.
Related Questions:
How Do You Cut An Angle Greater Than 60 °s On A Miter Saw?
An angle of 90 ° or less is called an acute angle. 90 °s or less, whatever the angle is, divide by 2. For example, you want to make an angle of 60 °s. So, you have to divide the 60 °s by 2. That means, 60 °s/2 = 30. Now, you have to set the miter saw to 30 °s. This is how you make the angle cut of greater than 60 °s and less than 90 °s.
If the angle is 91 or more, 2 formulas get the same answer. And the angles are called obtuse angles.
Formula:
First, 180 – angle = x; x/2 = angle for the miter saw
Second, Angle/2 = x; 90 – x = angle for the miter saw
How Do You Cut An Extreme Angle On A Miter Saw?
If you want to cut an extreme angle, you should know the bottom formula.
Cut Scale:
Miter Scale: 0 5 10 15 20 22.5 25 30 35 40 45
Angle Cut: 45 50 55 60 65 67.5 70 75 80 85 90
If you want a 90 ° cut, you have to set the miter gauge 45 ° angle. Again, if you want an 85 ° cut, you have to set the miter gauge 40 ° angle. In the same way, if you wish to do an 80/60/50 ° cut, you have to set the miter gauge 35/15/5 ° angle. In this way, you have to cut an extreme angle on a miter saw.
How Do You Set The Angles On A Miter Saw?
For a perfect setting on a miter saw, you have to follow the method given below:
90 ° = 0 °; 85 ° = 5 °
80 ° = 10 °; 75 ° = 15 °
70 ° = 20 °; 65 ° = 25 °
60 ° = 30 °; 55 ° = 35 °
50 ° = 40 °; 45 ° = 45 °
The Standard has to set the miter gauge to the desired angle. Rotate the gauge and find the exact degree you get by the method.
How To Cut Acute Angles On Miter Saw?
To cut acute angles on a miter saw:
- Adjust the miter saw to the desired angle, ensuring it’s less than 90 degrees.
- Secure the workpiece.
- Make the cut following safety guidelines.
What Is The Most Common Angle For A Miter Cut?
The most common angle for a miter cut is 45 °s. The carpenters commonly use the cut. Because the 90 ° angle cut is the common and most used angle cut. The maximum cut is made with a scale of 90. You have to make the two 45 ° miter scale cuts to cut. That’s why 45 ° is the most common angle for a miter cut.
What Tool Do You Use To Measure Angles?
A protractor is a primary tool to measure angles. You can use the tools to measure the angle from 0 ° to 180 °s. So, it is the most useful for cutting on your miter saw. But there are also alternative tools you can use. Use the one which is comfortable and convenient for you.
It is not essential which angle finder you use. A proper and accurate cut is the main thing for you. That’s why you should use the one which is enough for accurate measurement.
How Do You Cut Any Angle On Your Miter Saw?
You can make two kinds of angle cuts. They are acute angles and obtuse angles. The methods for two cuts are given below:
Acute Angles (90 or less):
90 °s or less, whatever the angle is, divide by 2. For example, you want to make an angle of 60 °s. So, you have to divide the 60 °s by 2. That means, 60 °s/2 = 30. Now, you have to set the miter saw to 30 °s. This is the way you make the angle cut of 90 or less.
Obtuse Angles (90 or greater):
If the angle is 91 or more, two formulas get the same answer.
Formula:
First, 180 – angle = x; x/2 = angle for the miter saw
Second, Angle/2 = x; 90 – x = angle for the miter saw
For example, you want to make an angle of 110 °s. So,
First, 180 –110 = 70; 70/2 = 35 (angle for miter saw)
Second, 110/2 = 55; 90 – 55 = 35 (angle for miter saw)
Conclusion:
You may face a problem with the calculation for the first cut. But trust me, by following my strategies correctly, you can make the proper cut. The process is not so complicated. By practicing more, you can achieve the system.
I hope now you are getting a clear idea of how to cut 120 ° angle on a miter saw. Go ahead and gather the new experience. Don’t hesitate to comment below if you have any queries about your new observation.