
How To Use A Sliding Miter Saw? [Beginner Guide]
The sliding miter saw is one of the most popular tools worldwide. Using a sliding miter saw is not a piece of cake for beginners. There are some tricks and tips on using a sliding miter saw. Without a doubt, the miter saw is one of the most used power tools in the workshop. It’s also an excellent woodworking tool for beginners.
Also, This saw has an incredibly versatile range of applications, from making minor cuts to trimming boards to cutting large pieces of wood down to size. If you’re looking for precision cuts on wood, a sliding miter saw is the best tool for the job.
In this post, We’ll take a look at using a sliding miter saw, including the basics of operation and some tips and tricks about this saw. So, if you are a complete beginner carpenter, read on for what you need to know about using a sliding miter saw.
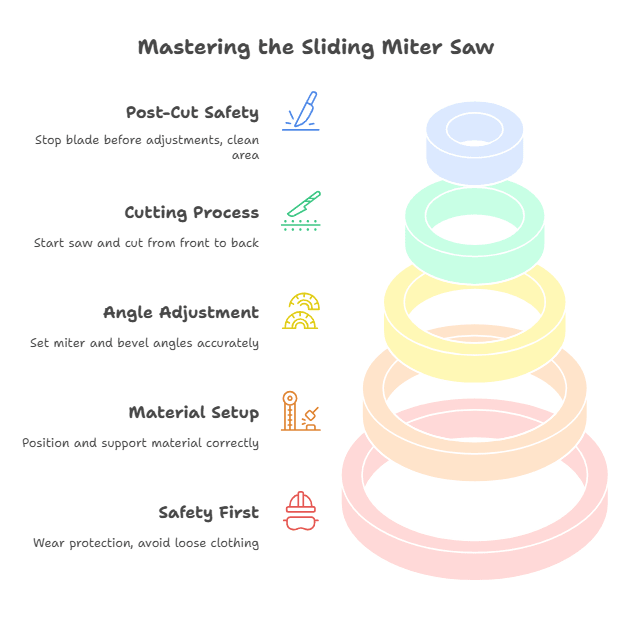
11 Steps To Use A Sliding Miter Saw For Cutting Materials
Before we get started, it’s important to point out that there are different miter saws on the market. But below, we’ll be focusing specifically on sliding miter saws. The below steps are suitable for both left and right-handed users.
Step 1: Wear Protection And Avoid Loose Clothing
Let me remind you to take safety precautions before you use a miter saw. Follow these safety precautions to keep yourself safe:
The first step is to make sure you’re wearing the proper safety gear. When operating any type of saw, it’s essential to wear eye protection. Secondly, you should avoid loose clothing, as it can get caught in the saw blade. Thirdly, if you have long hair, tie it back before beginning.
In addition to eye protection, you need to consider the below few additional security criteria:
- Hand gloves;
- Dust mask;
- and ear protection.
You have a powerful motor that rotates with a sharp blade. So you must be careful about yourself while using this tool. Using these saws can be dangerous if you lose concentration.
Step 2: Position The Material
Next, you’ll need to position the material you’re going to be cutting. If you’re working with a large piece of wood, it’s best to clamp it down. Hence, it doesn’t move while you’re chopping. You can hold smaller pieces in place by hand.
Position the material so that the area you want to cut faces the saw blade. Before cutting the material, make sure it is squarely positioned.
Step 3: Adjust The Miter And Bevel Angle
First, unlock the miter gauge and then slide it to the angle you wish to make a basic miter cut. Most saws allow you to miter both ways, so double-check the cutting angle before starting the blade.
Make sure you don’t inadvertently turn on the saw while moving the blade into position. Some individuals unplug their saw when making these changes, mainly if the adjustment knobs are located at the rear of the tool.
Detents are standard angles on most miter gauges. The saw is automatically locked in place when these detents are activated. Basically, at 0°, 22.5°, 31.6°, and 45°, detents occur frequently. If you want a different angle, simply slide the arrow to the required position and secure the table to prevent it from shifting during the cut.
When making a bevel cut, set the miter gauge to 0° and unlock the bevel gauge. Most saws feature detents to assist in determining common angles. The most popular angles are 0°, 33.9°, and 45°, but your saw may contain extra detents. The lock works the same way as the miter gauge; you may use it to adjust intermediate detents.
Step 4: Support Longer Pieces With A Stand
If you’re working with longer pieces of material, it’s crucial to have a stand to support the pieces. Otherwise, you risk the material slipping or falling while you’re working, which could cause serious injury.
Most stands have wheels, so you can quickly move them around your workspace. Some also have built-in clamps to keep your material in place while working. When choosing a stand, make sure it’s compatible with the size and weight of your miter saw.
Step 5: Adjust The Blade
Now it’s time to adjust the blade on the saw. The edge should be set at a 45-degree angle for most cuts. However, you may need to change the blade depending on the type of cut.
To adjust the blade, loosen the knob or lever on the side of the saw. Then, rotate the blade at the desired angle and tighten the knob or lever securely in place.
Step 6: Start The Saw
You’re now ready to start cutting with the blade at the correct angle. Squeeze the trigger and let the blade reach full speed to start the saw. Then, slowly lower the blade into the material.
Step 7: Bring The Blade And Cut
It’s straightforward to cut with a miter saw if it doesn’t slide. Allow the saw to spin up to full speed. Lower the blade until it meets the wood. Continue lowering the blade until you finish cutting, keeping the saw spinning at a high RPM.
For a clean cut, it’s essential to keep the saw moving at a consistent speed. Don’t force the blade through the material as this can cause it to bind and kick back.
Once you have finished cutting, stop the blade entirely first. Then let it rise again. A few of these pieces of equipment, like a blade brake, quickly stop the blade.
Step 8: Cut From Front To Back
When cutting, always start at the front of the material and move towards the back. But most people overlook: always cut from front to back with a sliding miter saw. It works in matches with the blade’s spine that assists you in pushing against the fence.
Cutting in the opposite direction begins to force the material backward. It also serves to push the blade back. This will help ensure a clean, consistent cut.
Step 9: Keep Your Free Hand Safely While Cutting
When cutting, always keep your free hand safely to the side and out of the way of the blade. Never place your hand behind the material you’re chopping as this could result in serious injury when the blade kicks back.
Step 10: Completely Stop The Blade Before Making Adjustments
Before making any adjustments to the blade, always let the saw come to a complete stop. Then, first, disconnect the power and wait for the blade to stop completely before starting the next task. This will help prevent serious injury.
Step 11: Clean Up The Area
Once the cut is complete, it’s time to clean up. Use a brush or vacuum to remove any sawdust from the area. If you’re working with a large piece of wood, you may also need to remove the clamps.
And that’s it! You’ve now successfully used a sliding miter saw to make a precision cut. With a bit of practice, you’ll be able to master this saw and use it for all your carpentry needs.
4 Useful Tricks To Use A Sliding Miter Saw for Beginners
If you are a beginner, it is best to practice on some scrap wood before attempting to cut your project piece. This will help you get a feel for how the saw works and give you a chance to perfect your technique. Here are some tips and tricks to help you get the most from your sliding miter saw. So, let’s get started without delay.
Trick 1: Make Identical Cuts with A Block
If you’re building wood stuff in your home, shop, or on the job site, it’s almost unavoidable that you’ll need to make repeated cuts.
You place the sizing on the sliding miter saw, press a block to the sliding miter saw stand at the same length you’ll be cutting many times, and then produce as numerous slices as required.
Trick 2: Put A Laser
The laser on most miter saws illuminates a narrow line on the workpiece where the blade will cut the wood precisely.
Using a laser can cut faster, providing a safe, quick-cutting method. Because you don’t have to touch the marked line you’ve drawn with the blade to ensure it’s on the spot.
If you have an older sliding miter or saw with no laser? You may purchase a laser shield from your local store or online shops. It’s simple to install: simply remove the nut that secures the blade and replace it by following the laser guide. Now your miter saw has acquired a laser beam.
Trick 3: Install A Supporting Fence For Cutting Small Pieces
Whenever you cut small pieces with your miter saw, you must equip it with a supporting fence. The supporting fence will prevent the small cut-off from returning to the blade.
Then, lift the blade off the cut after it has come to rest. Because removing the knife from the cut while it’s still in a hurry might cause the blade to catch and throw out minor cuts, you must be careful to avoid this situation.
Trick 4: Upgrade Your Saw Blade
The standard blade with most miter saws is an all-purpose, general-purpose blade. They are not the ideal blade for making precision cuts.
Instead, you should buy and install a high-quality miter saw blade explicitly designed for the type of wood or material you’ll be cutting. If you’re unsure which blade to get, ask the staff at your local hardware store or do some research online.
Tips To Use Sliding Miter Saw Without Any Danger
When using a sliding miter saw, it is crucial to be aware of the risks that come with it. The blade on a sliding miter saw is very sharp and can cause serious injury if not used properly. To avoid these dangers, it is essential to follow the safety tips.
- Keep Your Hands Off From The Blade
When using a sliding miter saw, permanently preserve your hand out from the blade. If the blade comes in contact with your hand, your hand may be cut off. For this, you can wear hand gloves. Always try to wear gloves when using the sliding miter saw. This will help protect your hands from the blade.
On the other hand, you may also use a push stick. This will help save your hand from the miter saw blade and assemble the cut correctly.
- Do Not Raise The Blade Until It Is Completely Closed
Always wait for the blade to turn off entirely before lifting it on a sliding meter. Never move it until it is completely closed. If you do, it could be a kickback to the saw. So safety is the priority over accuracy. Try to handle it smoothly by applying all the techniques you know.
- Lower The Blade And Keep It Unplugged
When not using the blade, always place the blade on a sliding miter down and unplug. Because if you have a child in your workplace, they can be involved in an accident. If you lower the blade, it will help prevent accidents. By following these tips, you can avoid accidents when using a sliding miter saw.
If you follow these safety tips, you will be able to use your sliding miter saw without incident. However, if you have an accident, seek medical help immediately.
Related Questions:
What To Do Pull Or Push The Sliding Miter Saw?
Remember to push the sliding miter constantly and never pull. This will help keep the blade from sticking and prevent the saw from kicking from behind. However, you can always use a fence when cutting with a sliding miter saw. This will help keep the blade perpendicular to the workpiece and prevent the saw from kickback.
How Do You Make A Miter Saw Cut Accurately?
To make your saw cut accurately, you should follow some steps. First, you need to set the saw blade to the correct angle. Then make sure that the workpiece is firmly clamped in place. If your workpiece is firmly in place, align your Sliding Miter Saw blade to the mark on the workpiece.
Now, you can start the saw and guide it along the workpiece. With a bit of practice, you’ll be able to make accurate miter saw cuts easily. Just follow these steps and be sure to read the manufacturer’s safety instructions before using the saw.
Are Sliding Miter Saw Cuts Accurately?
Sliding miter saw cuts are usually more accurate than cuts made with a standard miter saw. Because the blade can move forward and backward, which helps keep the blade perpendicular to the workpiece. If you need to make an extremely accurate cut, you may use a clamp to help hold the workpiece in place.
How Do You Set The Angles On A Sliding Miter Saw?
To set the angles on a sliding miter saw, you will first need to identify the marks for the different angles. Most miter saws have markings for 0°, 22.5°, 31.6°, and 45° degrees. Once you know where these marks are, you can align the blade mark with the saw’s base and set the blade at the desired angle.
How Long Can A 12-inch Sliding Miter Saw Cut?
A sliding miter will determine the size of the saw blade and how long it can cut. Also, it depends on how sharp your sliding miter saw blade is and how long it will take to cut.
Typically, a 12-inch sliding miter saw can cut for about 2-3 minutes. Besides, the 12-inch sliding miter saw can trim up to 2x4s and 4x4s. It is also suitable for cutting deck boards, baseboards, and trim.
Why Is Your Sliding Miter Saw Not Cutting Straight?
There are several reasons why you can’t cut your sliding miter saw straight. First, you need to check if the blade is dull. When the blade is worn, it will need to be replaced. Second, see if the fence is square of the blade. If the fence is not square of the blade, it needs to be adjusted.
Third, make sure the workpiece is blade square. When the workpiece is not square with the blade, it needs to be repositioned. Finally, make sure the saw is set up correctly. Sometimes if the saw is not set up correctly, it will need to be adjusted.
How Do You Square A Sliding Miter Saw?
First, you need to loosen them. Next, you’ll need to make sure the saw is unplugged. Locate the bevel adjustment knob and turn it until the edge is 0 degrees. With the blade at 0 degrees, you can now adjust the miter adjustment knob to square the blade.
Final Verdict:
I’ve discussed in detail how to use a sliding miter saw safely. A miter saw is the best option for wood cutting work. You can follow the tricks mentioned above to get better results if you are new.
One thing you should remember before using it, you must follow the manufacturer’s instructions. By doing this, you can reduce harm and sudden injury. Make a precise cut with a sliding miter saw by following tips and tricks.