How to Cut a Straight Line With Circular Saw: Expert Tips
To cut a straight line with a circular saw, use a saw guide to ensure a precise cut. Place the guide across the board you’re cutting, align the saw blade with the cut line, and slide the straight edge of the guide against the saw shoe.
This method will help you achieve straight and accurate cuts. Cutting a straight line with a circular saw is a fundamental skill for any woodworker or DIY enthusiast. Whether you’re working on a carpentry project or making simple home improvements, knowing how to make precise cuts is essential.
Using a circular saw allows you to create straight cuts efficiently, and with the right technique, you can achieve professional-looking results. We’ll explore the best practices and techniques for cutting straight lines with a circular saw, providing you with the knowledge and confidence to tackle your next woodworking project.
Essential Tools For Precise Cuts
When it comes to cutting straight lines with a circular saw, having the right tools is essential. With the proper equipment, you can achieve accurate and precise cuts every time. In this section, we will discuss the essential tools you need to ensure your cuts are straight and clean.
Selecting The Right Circular Saw
Choosing the right circular saw is the first step towards making straight cuts. Consider the following factors when selecting a circular saw:
- Blade Size: The blade size determines the depth of cut. Choose a blade size that suits the thickness of the material you will be cutting.
- Power: Opt for a circular saw with sufficient power to handle the materials you will be working with. Higher-powered saws are better suited for cutting through thick or dense materials.
- Ergonomics: Look for a circular saw that feels comfortable in your hand and has easy-to-use controls. A well-designed saw will allow you to maintain control and accuracy during cuts.
Blades And Accessories
The choice of blade and accessories can greatly impact the quality of your cuts. Consider the following factors when selecting blades and accessories:
- Blade Type: Different blades are designed for specific materials. Choose a blade that is suitable for the material you will be cutting, such as wood, metal, or plastic.
- Tooth Count: The number of teeth on the blade affects the smoothness of the cut. More teeth generally result in a finer cut, while fewer teeth are better for rough cuts.
- Blade Quality: Invest in high-quality blades that are sharp and durable. A dull or low-quality blade can result in jagged cuts and can be dangerous to work with.
- Accessories: Consider using accessories such as rip fences, straight edges, or speed squares to help guide your cuts and ensure straight lines.
By selecting the right circular saw and using the appropriate blades and accessories, you can achieve precise and straight cuts with ease. Remember to always prioritize safety and follow proper cutting techniques to avoid accidents.
Preparing Your Workspace
To ensure a successful and safe operation when using a circular saw, it is crucial to prepare your workspace properly. This involves securing the material, clearing obstructions, and setting up the necessary tools for a precise and efficient cutting process.
Securing The Material
Prior to making any cuts with a circular saw, it’s essential to secure the material you’ll be working with. This can be achieved by using clamps to firmly hold the material in place, preventing any potential movement during the cutting process. Additionally, using sawhorses or a stable workbench can provide a secure surface for the material, further enhancing stability and safety.
Clearing Obstructions
Before initiating the cutting process, it’s important to clear the workspace of any potential obstructions. This includes removing debris, ensuring there are no nearby objects that could interfere with the saw or the material being cut, and creating a clear path for the saw to move smoothly along the designated cutting line.
Marking For Perfection
For a perfect straight cut with a circular saw, ensure precise marking on the workpiece using a straight edge or speed square. Align the saw blade with the cut line and proceed with a steady, controlled cut. Using a saw guide can also help maintain accuracy and achieve professional results.
Drawing The Cut Line
Before making any cuts with your circular saw, it’s crucial to draw a straight line on the material you’re cutting. This line will serve as a guide for the saw blade, ensuring that your cut is precise and straight. To draw a straight line, use a measuring tape and a straight edge, such as a ruler or a speed square. Place the straight edge on the material and use the measuring tape to mark the location of the cut line. Then, draw a straight line along the edge of the straight edge with a pencil. Make sure the line is dark enough to be visible during the cutting process.
Double-checking Measurements
After drawing the cut line, it’s important to double-check your measurements to ensure that the line is in the correct location. Use a measuring tape to measure the distance from the edge of the material to the cut line at multiple points along the line. If the measurements are not consistent, adjust the line accordingly. Double-checking your measurements will help you avoid making a crooked cut with your circular saw.
Marking for perfection is crucial when it comes to making straight cuts with a circular saw. Taking the time to draw a straight line and double-check your measurements will ensure that your cut is precise and accurate. In addition to these steps, you can also use a saw guide to keep your saw blade on track. A saw guide is a straight edge that you can clamp onto the material to guide the saw blade along the cut line. This will help you make a straight cut even if you’re not confident in your ability to keep the saw blade on track. By following these steps and taking your time, you can make perfect straight cuts with your circular saw every time.
Straight Edge Guides
Learn how to cut a straight line with a circular saw using these helpful straight edge guides. Whether you’re a DIY enthusiast or a professional, these guides will ensure precision and accuracy in your cuts, making your projects a breeze.
Say goodbye to crooked lines and hello to perfectly straight cuts with these handy tools.
Types Of Straight Edges
There are various types of straight edges that can be used as a guide to cut a straight line with a circular saw. Some of the commonly used types of straight edges include:
- Wooden boards
- Metal rulers
- Straight aluminum extrusions
- Clamp-on straight edges
Setting Up A Guide
To set up a straight edge guide, you will need to follow these simple steps:
- Choose a straight edge that is longer than the cut you want to make.
- Place the straight edge on the workpiece, aligning it with the cut line.
- Clamp the straight edge securely to the workpiece, ensuring that it does not move during the cutting process.
- Adjust the depth of the saw blade to match the thickness of the workpiece.
- Align the saw blade with the cut line.
- Start the saw and guide it along the straight edge, making sure to keep the saw base plate firmly against the straight edge.
Using a straight edge guide is a simple and effective way to cut a straight line with a circular saw. By following the steps mentioned above, you can achieve straight, accurate cuts every time. Whether you are a DIY enthusiast or a professional woodworker, a straight edge guide is an essential tool that should be a part of your toolkit.
The Art Of The Cut
When it comes to cutting a straight line with a circular saw, positioning the saw correctly is crucial. Before starting the cut, ensure that the saw is aligned with the cut line. To do this, you can use various methods such as using a rip fence, a straight edge, a speed square, or a Kreg Accu-Cut guide.
Using A Rip Fence
A rip fence is a device that helps guide the saw along the desired cutting path. It is typically attached to the base of the saw and can be adjusted to the desired distance from the blade. To use a rip fence, simply align it with the cut line, ensuring that it runs parallel to the blade. This will help maintain a straight and accurate cut.
Using A Straight Edge
If you don’t have a rip fence, you can use a straight edge as a guide. A straight edge can be a long, straight board or a metal ruler. Place the straight edge along the cut line, ensuring it is firmly secured. Then, run the saw along the edge of the straight edge, using it as a guide to maintain a straight cut.
Using A Speed Square
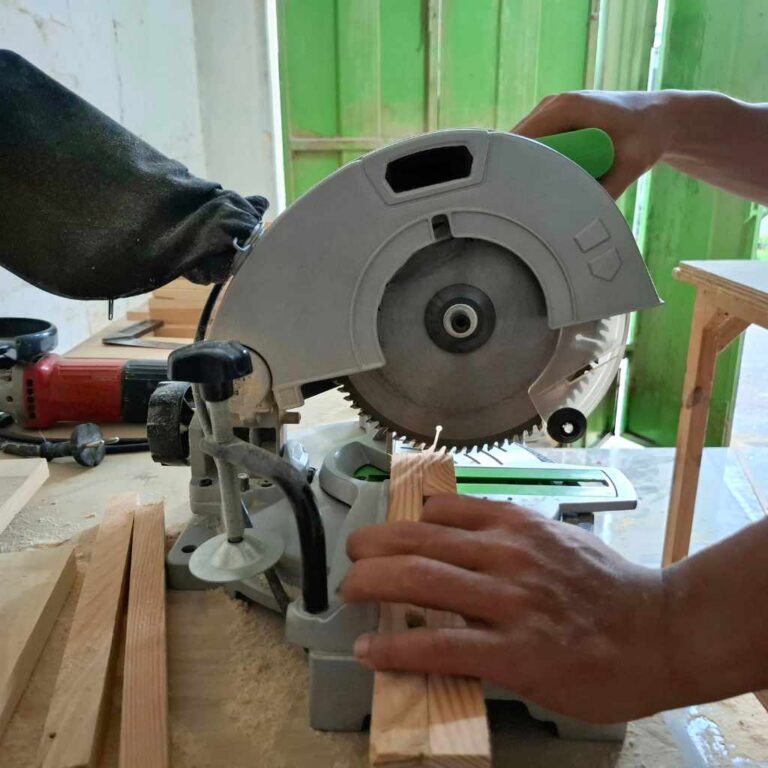
A speed square is a versatile tool that can be used for various woodworking tasks, including cutting straight lines with a circular saw. To use a speed square, position it across the board you’re cutting, with its lip hanging over the edge. Align the blade with the cut line and slide the straight edge of the speed square against the saw shoe. This will help keep the saw on track and ensure a straight cut.
Using A Kreg Accu-cut Guide
If you want to achieve precise and repeatable straight cuts, a Kreg Accu-Cut guide can be a valuable tool. This guide system attaches to your circular saw and provides a track for the saw to follow. Simply align the guide with the cut line, secure it in place, and run the saw along the track. The guide will ensure a straight and accurate cut every time.
Once you have positioned the saw correctly, it’s time to start the cut. Remember to always start slowly and gradually increase the speed as you progress. This will help maintain control and accuracy throughout the cut.
As you begin the cut, aim to shave away about half of the cut line. It may seem counterintuitive, but starting close to the line allows you to stay on track and make adjustments if needed. Your goal is to remove one side of the pencil mark while keeping the other side intact.
Throughout the cut, keep a close eye on the cut line and make sure the saw stays aligned with it. If you notice any deviations, adjust the position of the saw accordingly to maintain a straight path.
Remember to always prioritize safety when using a circular saw. Wear appropriate protective gear, such as safety glasses and gloves, and ensure that the workpiece is properly secured before making any cuts.
By mastering the art of the cut and following these techniques, you’ll be able to cut straight lines with a circular saw like a pro. Practice makes perfect, so don’t be discouraged if it takes some time to achieve the desired results. With patience and precision, you’ll soon be creating clean and accurate cuts for your woodworking projects.
Guided Cutting Techniques
When using a circular saw, mastering guided cutting techniques is essential for achieving straight and precise cuts. Guided cutting methods like using a rip fence and speed square can help you maintain accuracy throughout your woodworking projects.
Using A Rip Fence
A rip fence serves as a guide to keep your cuts straight and consistent. It helps you maintain a uniform distance between the blade and the edge of the material, ensuring precise cuts every time.
Speed Square Method
The Speed Square method is another effective technique for cutting straight lines with a circular saw. By placing the speed square against the material and aligning the saw blade with the cut line, you can achieve accurate cuts quickly and easily.
Freehand Mastery
Learn the art of freehand mastery and cut a straight line with a circular saw effortlessly. By using a saw guide, such as a speed square, you can align the blade with the cut line and ensure a precise cut every time.
Say goodbye to uneven cuts and hello to professional-quality results.
Aligning By Eye
Aligning the circular saw blade by eye can be challenging but with practice, it can lead to accurate cuts. Ensure the blade is parallel to the cutting line.
Keeping The Blade On Track
Using a saw guide helps keep the blade on track for straight cuts. Place a speed square on the board to guide the saw shoe along the cutting line.
Mastering the art of cutting a straight line freehand with a circular saw requires precision and practice. By following some key techniques, you can improve your cutting accuracy and efficiency.
- Practice cutting along a scrap piece of wood to develop a steady hand.
- Ensure the blade is sharp to prevent splintering and jagged edges.
- Mark the cutting line clearly with a pencil for guidance.
Using a straight edge or speed square can assist in maintaining a straight cutting path. Remember to start the cut slowly and adjust as needed to stay on track.
Troubleshooting Common Issues
To cut a straight line with a circular saw, use a saw guide to ensure the tool cuts in a straight path. Place a speed square across the board you’re cutting, align the blade with the cut line, and slide the straight edge of the speed square against the saw shoe for precise cuts.
Correcting A Drifting Cut
When the circular saw drifts off course, it can be frustrating. Here are some steps to help you correct a drifting cut:
- Check Blade Alignment: Ensure the blade is parallel to the cutting line.
- Secure Your Workpiece: Use clamps or a saw guide to prevent movement.
- Adjust Cutting Speed: Slow down to maintain control over the cut.
When The Saw Strays
If your circular saw strays from the intended path, try these troubleshooting tips:
- Inspect Blade Sharpness: A dull blade can cause wandering cuts.
- Use a Guide: Employ a straight edge or fence to guide the saw along the desired line.
- Practice Proper Technique: Keep a steady hand and maintain focus while cutting.
Advanced Tips And Tricks
Learn how to cut a straight line with a circular saw using these advanced tips and tricks. Utilize a saw guide, like a speed square or straight edge, for a perfectly straight cut. Master the technique with sharp pencil lines and a slow, steady hand for precise results.
Cutting Wider Boards
When cutting wider boards with a circular saw, ensure the board is fully supported along its length to prevent bending and ensure a straight cut.
Supporting Long Cuts
For long cuts, use sawhorses or a workbench to support the material and keep it level, allowing for precise and straight cuts.
Safety First
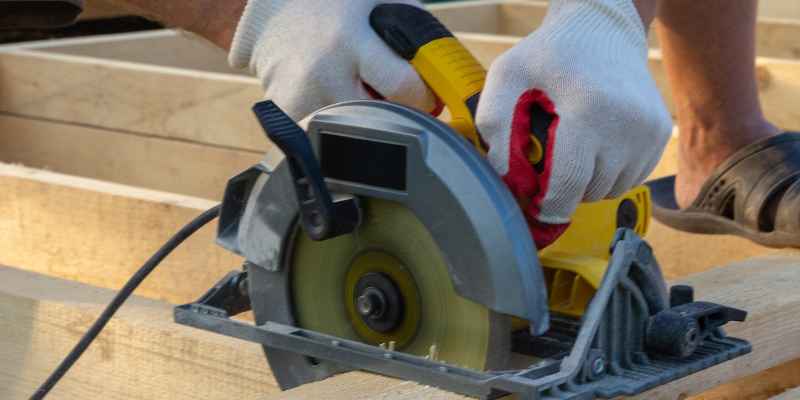
When it comes to using a circular saw, safety should always be your top priority. Whether you’re a seasoned pro or a DIY enthusiast, it’s crucial to follow proper handling techniques and wear the necessary protective gear. By taking these precautions, you can ensure a safe and accident-free cutting experience.
Proper Handling
Properly handling a circular saw is essential to prevent accidents and ensure accurate cuts. Here are some tips to keep in mind:
- Always hold the saw with both hands, maintaining a firm grip on the handle and the auxiliary handle if available. This will provide better control and stability during the cutting process.
- Position yourself in a stable stance with your feet shoulder-width apart. This will help you maintain balance and control while operating the saw.
- Before starting the saw, make sure the blade guard is in place and functioning properly. The blade guard helps protect your hands and fingers from accidental contact with the spinning blade.
- When making the cut, keep the saw’s base plate flat and firmly pressed against the material you’re cutting. This will help maintain stability and ensure a straight line.
- Always let the blade come to a complete stop before setting the saw down. This will prevent accidental cuts or injuries when handling the tool.
Protective Gear
Wearing the appropriate protective gear is essential when using a circular saw. Here are the must-have items to keep you safe:
- Safety goggles or glasses: These will protect your eyes from flying debris, wood chips, or dust that may be generated during the cutting process.
- Ear protection: Circular saws can be loud, so wearing earplugs or earmuffs will help protect your hearing from prolonged exposure to the noise.
- Dust mask: To protect your respiratory system from inhaling dust particles, wear a dust mask or respirator.
- Gloves: Use gloves with a good grip to protect your hands and enhance control while handling the saw.
- Protective clothing: Wear long sleeves and pants to protect your skin from any potential contact with the saw or flying debris.
By following these safety guidelines and using the proper protective gear, you can confidently cut a straight line with a circular saw while minimizing the risk of accidents or injuries. Remember, safety should always come first!
Maintenance For Consistency
To ensure a straight line with a circular saw, regular maintenance is crucial. Keep the blade sharp, the base plate clean, and the guide aligned for consistent cuts. Check the saw’s alignment and make adjustments as needed to maintain accuracy.
Blade Care
To cut straight lines with a circular saw, it is crucial to keep the blade in good condition. A dull or damaged blade can cause the saw to veer off course, resulting in uneven cuts. Make sure to inspect the blade before each use and replace it if necessary. Additionally, clean the blade regularly to prevent buildup of sawdust and debris, which can also affect the saw’s accuracy.
Saw Calibration
Another important factor in achieving consistent straight cuts is calibrating the saw properly. This involves adjusting the saw’s settings to ensure that the blade is perpendicular to the base plate. Use a square to check the angle and make any necessary adjustments before making your cut. It is recommended to calibrate your saw before each use to ensure accuracy.
Additional Tips
In addition to proper blade care and saw calibration, there are a few other tips to keep in mind when cutting a straight line with a circular saw. First, use a saw guide to ensure the tool cuts in a straight path. Place a speed square across the board you’re cutting, with its lip hanging over the edge. Get your blade aligned with the cut line and slide the straight edge of the speed square against the saw shoe. Second, start your cut slowly and gradually work your way into the material. Finally, always keep your eyes on the cut line and follow it closely to maintain accuracy.
By following these tips and properly maintaining your saw, you can achieve consistent and precise straight cuts with your circular saw.
Taking Your Skills Further
Learn how to cut a straight line with a circular saw by using a saw guide to ensure a precise cut. Simply place a speed square across the board, align the blade with the cut line, and slide the straight edge of the speed square against the saw shoe for accurate results.
Building A Saw Guide
A saw guide is a simple but effective tool that can help you make straight cuts with your circular saw. You can build one by attaching a straight piece of wood to the bottom of your saw’s base plate. This will act as a guide that you can run along the edge of your material to ensure a straight cut.
To build a saw guide, start by measuring the distance from the edge of your saw’s base plate to the edge of the blade. Cut a piece of wood to this length and attach it to the base plate using screws or clamps. Make sure the wood is straight and secure before using it to guide your saw.
Practice Makes Perfect
Cutting a straight line with a circular saw takes practice, so don’t be discouraged if your first few cuts aren’t perfect. It’s important to start with a sharp blade and to keep your saw level as you cut. Remember to use your saw guide or another straight edge as a guide to help you stay on track.
As you practice, pay attention to the sound of your saw and the way it feels as you make a cut. You’ll start to develop a feel for the tool and will be able to make more precise cuts over time. With patience and practice, you’ll be able to cut straight lines with your circular saw like a pro.

Frequently Asked Questions
How To Make Perfect Straight Cuts With A Circular Saw?
To make perfect straight cuts with a circular saw, follow these steps: 1. Use a saw guide to ensure a straight path. 2. Place a speed square on the board you’re cutting, aligning the blade with the cut line. 3. Slide the straight edge of the speed square against the saw shoe.
4. Start the cut slowly, shaving away half of the line at a time. 5. Keep your eyes on the cut line and let the saw do the work. These guidelines will help you achieve precise and straight cuts with your circular saw.
What Is The Best Way To Cut A Straight Line?
The best way to cut a straight line is to use a saw guide. Place a speed square across the board you’re cutting, align the blade with the cut line, and slide the straight edge of the speed square against the saw shoe.
This will ensure that the saw cuts in a straight path.
How Do You Line Up A Cut With A Circular Saw?
To line up a cut with a circular saw, use a saw guide for a straight path. Place a speed square across the board, align the blade with the cut line, and slide the square against the saw shoe. This ensures a precise cut.
What Is The Best Tool To Cut Straight Lines In Wood?
The best tool to cut straight lines in wood is a circular saw. To ensure a precise cut, use a saw guide like a speed square or a straightedge. Place the guide over the board and align the blade with the cut line.
Slide the guide against the saw shoe and start cutting slowly. Always watch the cut line.
Conclusion
Cutting a straight line with a circular saw is achievable by using the right techniques and tools. By employing a saw guide, speed square, or straight edge, you can ensure precise cuts. It’s crucial to start slowly and keep the cut line in focus for accurate results.
Additionally, using a sharp pencil line and going slow until the blade is fully engaged can further enhance the straight cutting process. Mastering these methods will help you achieve professional-level straight cuts with a circular saw.