How to Cut Formica Countertops: Blade Direction, No-Chip Method
Cutting Formica comes down to which form you’re working with: a bare laminate sheet under 1/16″ thick can be scored with a utility knife and snapped, but a finished countertop (laminate already bonded to particleboard or MDF) needs a power saw — a knife won’t cut deep enough.
Getting the blade orientation wrong is the single biggest cause of chipped edges, and it’s different for a circular saw (cut with the decorative side face-down) versus a jigsaw (use a reverse-tooth, down-cut blade instead). This guide covers both cutting methods, the exact blade specs that prevent chipping, and how to cut an opening for a sink or range in a countertop that’s already installed.
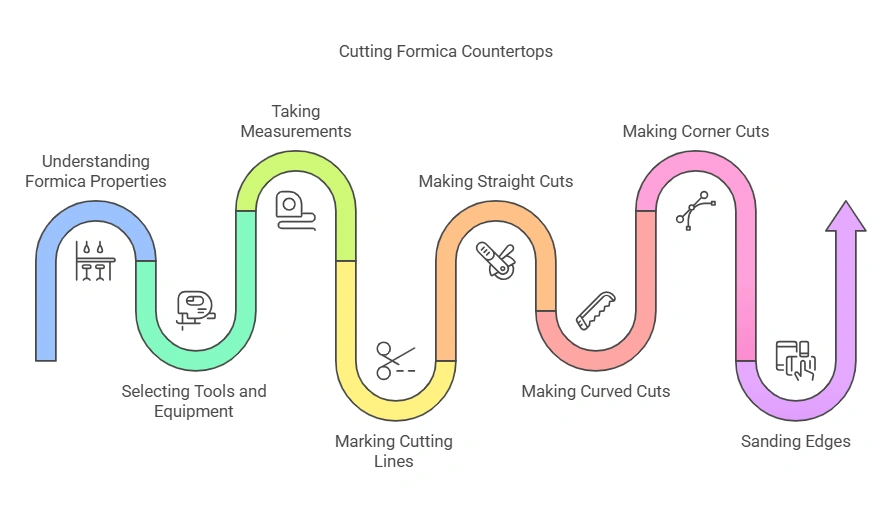
Understanding The Properties Of Formica
Formica countertops are popular for their durability and affordability. If you need to cut Formica, follow these guidelines carefully to ensure a precise and clean result.
The Durability And Versatility Of Formica Countertops
Formica countertops are a popular choice for many homeowners due to their durability and versatility. Whether you want a sleek and modern aesthetic or a more traditional look, Formica surfaces can deliver. Understanding the properties of Formica is crucial in order to cut these countertops effectively.
Let’s delve into the key aspects that make Formica a reliable and adaptable material for your kitchen or bathroom surfaces.
The Durability Of Formica Countertops:
- Formica is known for its exceptional durability, making it an ideal choice for high-traffic areas like kitchens.
- It is resistant to scratches, stains, and heat, providing a long-lasting solution for busy households.
- The impact and moisture resistance of Formica ensure that it can withstand daily wear and tear without losing its aesthetic appeal.
The Versatility Of Formica Countertops:
- Formica offers a wide range of colors, patterns, and finishes, allowing homeowners to find the perfect style to match their design vision.
- With Formica, you can achieve the look of premium materials like granite or marble at a more affordable price.
- It can be easily shaped and cut to create custom countertops, backsplashes, or even furniture pieces.
How Different Types Of Formica Affect Cutting Techniques:
- Standard Formica: Regular Formica is relatively easy to cut with standard woodworking tools like circular saws or jigsaws. It is a popular choice for DIY enthusiasts and professionals alike.
- Solid Color Formica: When working with solid color Formica, you can use a scoring knife to create score lines along the cutting path. This technique enables you to achieve cleaner and more precise cuts, minimizing chip-out.
- Textured or Patterned Formica: Textured or patterned Formica requires extra attention when cutting. It is recommended to use a jig saw with a fine-toothed blade to minimize chipping or tearing of the surface.
Understanding the properties of Formica helps you make informed decisions when cutting these countertops. Whether you’re a seasoned DIYer or a professional installer, knowing the durability and versatility of Formica enables you to approach your project with confidence and achieve stunning results.

Essential Tools And Equipment For Cutting Formica Countertops
Discover the essential tools and equipment needed to cut Formica countertops effectively. Learn the best techniques and tips to ensure a clean and precise cut for your project.
Choosing The Right Saw For The Job
When it comes to cutting Formica countertops, choosing the right saw is essential for achieving clean and precise cuts. Here are some options to consider:
- Circular Saw: Use a carbide-tipped blade with 60-100 teeth per inch (TPI), ideally with a Triple Chip Grind (TCG) tooth profile designed to shear brittle laminate cleanly instead of tearing it. A standard 24-tooth wood-framing blade will chip the surface badly.
- Jigsaw: If you need to make curved cuts or intricate shapes on Formica countertops, a jigsaw is your go-to tool. Its reciprocating blade moves up and down rapidly, allowing you to maneuver around corners and curves.
- Router: Using a router with a special laminate-cutting bit is another effective method for cutting Formica countertops. Routers can create smooth and precise cuts, especially for trimming edges and cutting patterns.
- Table Saw: A table saw provides stability and accuracy, making it ideal for cutting long and straight sections of Formica. Its adjustable fence ensures consistent cuts without any wobbling.
Remember, regardless of the saw you choose, make sure it has a sharp blade and is suitable for cutting laminate materials like Formica.
The Importance Of Safety Gear During The Cutting Process
Safety should always be your top priority when working with power tools and cutting Formica countertops. To protect yourself and minimize the risk of accidents, it is crucial to wear the appropriate safety gear. Here are the essentials:
- Safety Glasses: Shield your eyes from flying debris by wearing safety glasses. Even a minute particle can cause severe eye injuries.
- Dust Mask: Cutting Formica generates dust and tiny particles that can be harmful when inhaled. A dust mask will help prevent respiratory issues caused by breathing in these particles.
- Ear Protection: Power tools can create loud noises that can damage your hearing over time. Use earmuffs or earplugs to protect your ears from excessive noise levels.
- Work Gloves: Invest in a good pair of work gloves to protect your hands from cuts and abrasions. They will provide a better grip on tools and minimize the risk of accidents.
- Protective Clothing: Wear long-sleeved shirts and long pants to protect your skin. Additionally, avoid loose clothing that can get entangled in the saw.
Remember, safety gear is not an option but a necessity when working with power tools. Always prioritize your well-being and take precautions to minimize any potential hazards.

Best Formica Cutting Tools Pick
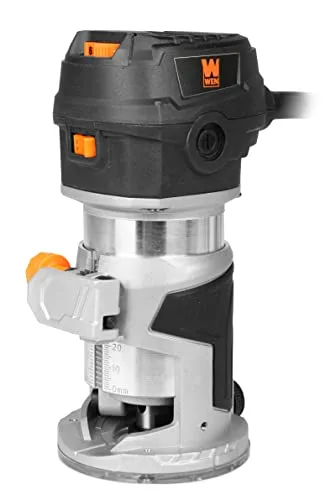
WEN RT1460 Laminate Trim Router
Best for: trimming overhangs and corners to a clean, exact edge
Why we picked it: a dedicated laminate trimmer is lighter and more precise for edge work than a full-size router
Main drawback: not meant for the initial rough cuts — pair it with a circular saw or jigsaw
Check Price on Amazon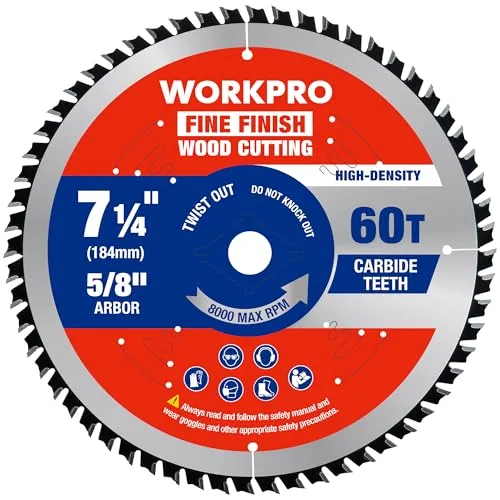
60T Fine Finish Blade
The 60-100 TPI carbide blade that prevents chipping on straight cuts.
Check Price →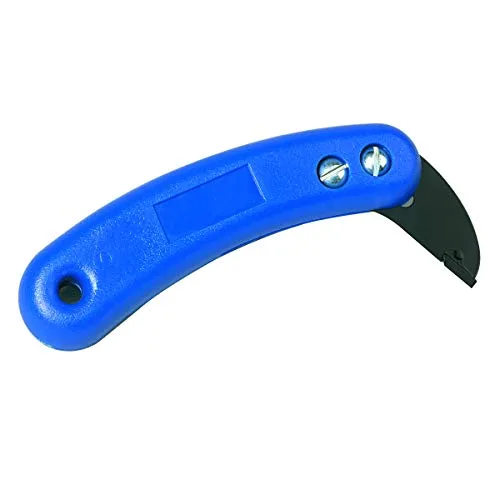
Carbide Laminate Scorer
For the score-and-snap method on bare laminate sheet before it’s glued down.
Check Price →
Iron-On Edge Banding
Covers the raw cut edge left on the substrate side after trimming.
Check Price →Taking Accurate Measurements
Accurate measurements are crucial when cutting formica countertops. Follow these guidelines for precise results.
When it comes to cutting Formica countertops, one of the first and most crucial steps is taking accurate measurements. By ensuring precise measurements, you can save time, money, and avoid any cutting errors. Here are the key points to consider when determining the dimensions of your countertop:
Measure the length and width of the area where the countertop will be installed using a measuring tape:
- Measure the length of the straight sections and any rounded or angled corners that you need to accommodate.
- Measure the width, keeping in mind any gaps or spaces where appliances or fixtures will be placed.
Account for overhangs and edges:
- Decide the desired overhang for your countertop, typically 1 inch or less, and measure accordingly.
- Take into consideration any edges, such as bullnose or beveled edges, that may add to the overall dimensions.
Make precise markings on the Formica sheet:
- Transfer your measurements onto the Formica sheet, ensuring accurate alignment with any patterns or designs.
- Double-check your measurements before making any cuts to avoid costly mistakes.
Prepare for the possibility of cutting mistakes:
- Always purchase extra material to account for any errors or miscalculations.
- Consider consulting with a professional or utilizing online resources for more advanced cutting techniques.
Remember, accuracy is key when it comes to taking measurements for your Formica countertops. By following these guidelines and double-checking your calculations, you can ensure a smooth and successful cutting process. Now that you have determined the dimensions, it’s time to move on to the next step: cutting the Formica sheet.
Marking The Cutting Lines
Learn how to effectively cut Formica countertops by marking the cutting lines accurately. Follow these essential steps to ensure a precise and successful cutting process.
One important step in cutting Formica countertops is marking the cutting lines accurately. This ensures a precise and clean cut. Here are the recommended methods for marking the cutting lines on the Formica:
- Using a pencil or marker: Before beginning the cutting process, use a pencil or marker to mark the cutting lines on the Formica. This will serve as a guide and help you stay on track while cutting.
- Ensuring precision with a straight edge or template: To achieve accurate markings, use a straight edge or a template along the cutting lines. This will help maintain the straightness of the lines and ensure a professional-looking result.
- Straight edge method: Position a straight edge, such as a ruler or level, along the desired cutting line. Hold it firmly in place and use a pencil or marker to trace the line along the edge of the straight edge. Repeat this process for all the necessary cutting lines.
- Template method: If you require specific shapes or curves, creating a template can be beneficial. Make a template out of cardboard or another suitable material that matches the desired shape. Place the template on the Formica and secure it in place. Trace along the edges of the template with a pencil or marker to mark the cutting lines accurately.
- Double-check for precision: After marking the cutting lines, take a moment to double-check their accuracy. Ensure that the lines are straight and match your desired measurements. This step is crucial to avoid errors and ensure the perfect fit of your Formica countertops.
Remember, precision in marking the cutting lines is vital to achieving a professional and seamless finished product. Taking the time to mark the lines accurately will greatly contribute to a successful cutting process.
Score-And-Snap Method For A Bare Formica Sheet
If you’re cutting a raw laminate sheet before it’s glued to a substrate — not a finished countertop — you can skip the power saw for straight cuts. Score the back of the sheet with a sharp utility knife or a dedicated laminate scorer, guided by a clamped metal straightedge, going over the line 2-3 times to create a deep groove. Line the score up with the edge of a table, then snap the sheet downward like a sheet of drywall. Always cut your piece about an inch oversized on each edge so you have room to trim to final size.
This method only works on thin decorative laminate on its own — once it’s bonded to particleboard or MDF as a finished countertop, the substrate is too thick to snap and you’ll need one of the power-tool methods below.
Preventing Chip-Out: Blade Direction And Orientation
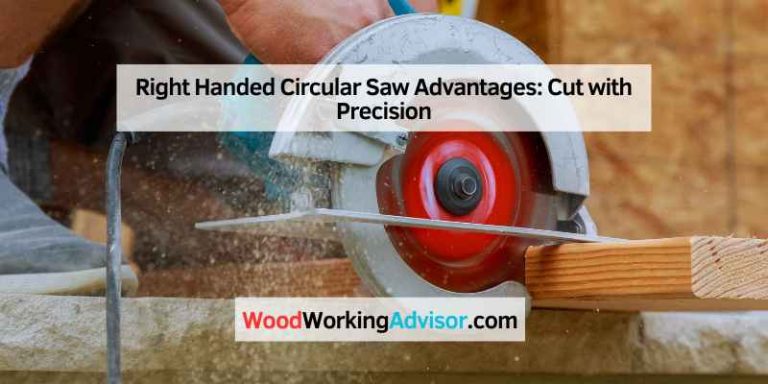
Most chipped edges come from cutting with the blade moving the wrong direction through the decorative layer, and the fix is different depending on your tool. With a circular saw, the blade teeth exit upward through the material — so cut with the countertop’s decorative side facing down. Any chipping happens on the hidden underside instead of the visible face.
With a jigsaw, the fix is a different blade, not a different orientation: use a reverse-tooth (down-cut) jigsaw blade, which cuts on the downstroke instead of the upstroke. A standard upward-cutting jigsaw blade will tear and crack the decorative layer on top. Running a strip of masking tape along the cutting line before you cut, with either tool, also reduces surface chipping.
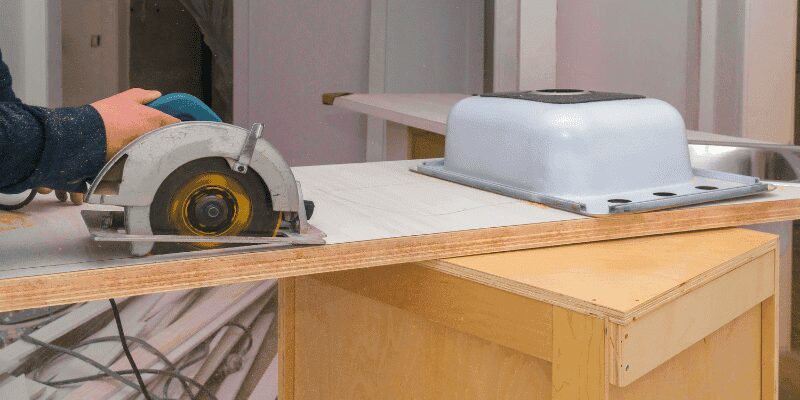
Straight Cuts With A Circular Saw
Cutting formica countertops with a circular saw requires precise straight cuts. Follow these steps for a clean and professional finish.
Setting The Appropriate Blade Depth And Angle
When it comes to cutting Formica countertops straight with a circular saw, it is essential to set the blade depth and angle correctly. Follow these steps to ensure precise and clean cuts:
- Begin by adjusting the blade depth. Mark the desired depth on a piece of scrap wood and use it as a guide to set the blade depth. The blade should extend slightly below the surface of the Formica to prevent chipping.
- To set the angle, first, loosen the bevel adjustment on the circular saw. Then, align the saw’s base against a square or straightedge, ensuring it is perpendicular to the cutting line.
- Once the base is properly aligned, tighten the bevel adjustment to secure the angle. Double-check the angle with a square to ensure accuracy.
Remember, setting the appropriate blade depth and angle is crucial for achieving precise and professional-looking cuts.
Properly Guiding The Saw Along The Cutting Line
To achieve straight cuts when cutting Formica countertops with a circular saw, it’s essential to guide the saw properly along the cutting line. Follow these tips to ensure accuracy and minimize mistakes:
- Before starting the cut, position the circular saw at the edge of the countertop, aligning the blade with the cutting line. Make sure the saw’s base is flat and parallel to the surface.
- Firmly grip the saw handles with both hands and ensure a stable stance. Maintain a balanced posture to have better control during the cutting process.
- As you start cutting, maintain a steady and consistent pace. Push the saw forward, allowing the blade to smoothly penetrate the Formica.
- To guide the saw along the cutting line, focus on the front of the saw’s base. Keep your eyes on the cutting line and follow it closely, adjusting your hand and arm movements accordingly.
- Apply even pressure on the saw, but avoid forcing it. Let the blade do the work, exerting controlled downward pressure to maintain stability.
- Be cautious when nearing the end of the cut to prevent any sudden movements. Complete the cut smoothly by maintaining a steady pace until the blade has fully exited the countertop.
By properly guiding the circular saw along the cutting line, you can achieve clean and precise straight cuts on your Formica countertop. Remember to practice patience and maintain focus throughout the cutting process.
Curved Cuts With A Jigsaw
Cutting formica countertops can be easily done with a jigsaw, allowing for precise curved cuts. Ensure accuracy by following these steps for efficient and professional-looking results.
Using A Template To Guide The Jigsaw Along Curved Edges
Cutting curved edges on Formica countertops can be a tricky task, but with the right techniques and tools, you can achieve professional-looking results. One effective method involves using a template to guide your jigsaw along the curved lines. This allows for more precision and control, ensuring that your cuts are clean and accurate.
Here’s how to do it:
- Start by creating a template of the desired curved edge on a piece of cardboard or plywood. Make sure the template is an exact match to the curve you want to cut on the Formica countertop.
- Place the template on top of the Formica surface and secure it in place using clamps or double-sided tape. This will prevent the template from shifting during the cutting process.
- Next, attach a fine-toothed jigsaw blade suitable for cutting Formica onto your jigsaw. Ensure that the blade is securely tightened before proceeding.
- Position the jigsaw’s base plate against the edge of the countertop, aligning it with the curve of the template. Hold the tool firmly and turn it on.
- Slowly guide the jigsaw along the curved edge, following the template as closely as possible. Take your time and maintain a steady pace to ensure smooth and accurate cuts.
- To avoid any damage to the Formica surface, ensure that the jigsaw blade is only cutting through the laminate layer and not the underlying substrate.
- Continue cutting along the entire curved edge, keeping the jigsaw’s base plate in close contact with the template. Take breaks if needed to maintain control and accuracy.
- Once the cutting is complete, detach the template from the Formica countertop and inspect the cut edge for any rough spots or imperfections.
By using a template to guide your jigsaw along curved edges, you can achieve the precise cuts needed for installing Formica countertops. Remember to always prioritize safety, follow manufacturer guidelines, and practice on scrap material before working on your actual countertop.
With patience and practice, you’ll be able to master the art of cutting curved Formica countertops with a jigsaw.
Techniques For Maintaining Control And Accuracy While Cutting
When it comes to cutting Formica countertops, maintaining control and accuracy is key to achieving professional-looking results. Here are some techniques to help you stay on track:
- Use clamps or double-sided tape to secure the countertop firmly in place, preventing any movement or shifting during the cutting process.
- Begin each cut with a steady hand and a slow, controlled motion. Rushing can lead to mistakes and uneven cuts.
- Maintain a comfortable stance and position yourself in a way that provides a clear view of the cutting line. This will help you guide the tool accurately.
- Keep the jigsaw’s base plate in constant contact with the countertop surface. This minimizes vibrations and ensures smoother cuts.
- Use both hands to grip the jigsaw firmly, promoting stability and reducing the risk of accidental slips or deviations from the cutting line.
- Opt for jigsaw blades specifically designed for cutting laminate materials. These blades typically have fine teeth and provide cleaner cuts.
- Take breaks during the cutting process to prevent the jigsaw from overheating. This will also give you a chance to double-check your progress and make any necessary adjustments.
- Consider using a straight edge or a piece of scrap material as a guide for long, straight cuts. This can help you maintain a consistent cutting line.
- Finally, always wear appropriate safety gear, including goggles and ear protection, to safeguard yourself from any potential hazards.
By employing these techniques, you can ensure greater control and accuracy while cutting Formica countertops. Remember to practice patience and precision, and don’t be afraid to make adjustments along the way. With time and experience, you’ll become more proficient in cutting Formica with confidence.
Making Corner Cuts With A Router
Learn the art of cutting formica countertops with a router to achieve precise corner cuts. Discover step-by-step instructions and tips for a seamless finish.
Cutting corner edges on Formica countertops with a router requires precision and careful maneuvering. This technique ensures clean and professional-looking results. Here’s how to do it:
Preparing The Router Bit And Depth For Corner Cuts:
- Select a router bit suitable for Formica countertops, such as a straight bit or a flush trim bit.
- Ensure the router bit is sharp and in good condition for smooth cuts.
- Set the bit depth to match the thickness of the countertop. Refer to the manufacturer’s guidelines or measure the thickness with a caliper.
Maneuvering The Router Smoothly Around Corners:
- Secure the countertop in a stable position to prevent movement during the cutting process.
- Start by positioning the router at one end of the corner, perpendicular to the edge.
- With a firm grip on the router, activate the tool and gradually guide it along the path of the corner, following the direction of the cut.
- Maintain a consistent speed and apply even pressure to achieve clean, precise cuts.
- To prevent chipping or tear-out around the corner, consider using a guide or backing board.
- Take your time when maneuvering the router around the corners, ensuring smooth and controlled movements.
- Repeat the process for each corner, adjusting the position and orientation of the router accordingly.
Remember, practice makes perfect, so take your time to master the technique of cutting corner edges with a router. With patience and attention to detail, you can achieve professional-looking results with your Formica countertops!
Cutting A Sink Or Range Cutout In An Installed Countertop
Cutting an opening in a countertop that’s already installed is a different job from trimming a sheet to size, since you’re removing a piece from the middle rather than the edge. Trace the cutout using the appliance’s or sink’s own template (most ranges and drop-in sinks include one), then drill a starter hole large enough for a jigsaw blade at each interior corner of the traced line — this prevents the stress cracks that form if you try to turn a sharp corner mid-cut.
Support the cutout piece from underneath with screwed-in scrap wood or painter’s tape across the top before finishing the last cut — an unsupported piece can snap off early and tear the laminate along the edge you’re keeping. Cut just inside your line and sand to the exact fit, the same margin-for-error approach used for edge cuts.
Sanding And Smoothing The Edges
To cut Formica countertops effectively, it is crucial to master the art of sanding and smoothing the edges. This process ensures a clean and polished finish, giving your countertops a professional look.
When it comes to cutting Formica countertops, achieving smooth and polished edges is essential for a professional finish. Sanding and smoothing the edges of Formica countertops not only enhances their appearance but also ensures safety and durability. In this section, we will explore two techniques to accomplish this: using sandpaper or files to remove rough edges and achieving a smooth and polished finish.
Using Sandpaper Or Files To Remove Rough Edges:
- Start by equipping yourself with the necessary tools. You will need sandpaper or a file (depending on your preference), protective goggles, and gloves.
- Carefully inspect the edges of the Formica countertop after cutting to identify any rough or uneven areas.
- Use sandpaper or a file to gently smooth the rough edges. Begin with a coarse-grit sandpaper or file and gradually transition to a finer grit as you progress.
- Move the sandpaper or file in a back-and-forth motion along the edges, applying even pressure to remove any uneven areas. Ensure that you maintain a consistent angle throughout the process.
- Check the edges periodically to assess your progress. Continue sanding or filing until the edges are smooth and free from any saw marks or roughness.
- To further refine the edges, use a finer-grit sandpaper or file. This step helps achieve a polished and professional finish.
Achieving a smooth and polished finish:
- Once the rough edges have been addressed, it’s time to focus on achieving a smooth and polished finish.
- Transition to a fine-grit sandpaper and gently sand the edges in the same back-and-forth motion, ensuring you cover the entire surface of the countertop edges.
- Regularly check the edges for any remaining imperfections. If necessary, switch to an even finer-grit sandpaper to achieve a flawless finish.
- After sanding, clean the countertop edges thoroughly to remove any dust or debris. A damp cloth or sponge can be used for this purpose.
- Apply a laminate or woodworking polish to the edges to enhance their appearance and protect the Formica surface.
By following these steps and techniques, you can effectively sand and smooth the edges of Formica countertops, resulting in a polished finish that is both visually appealing and durable. Remember to take your time, exercise caution, and prioritize safety throughout the process.

Applying Edge Banding For A Professional Look
Achieve a professional appearance for your Formica countertops by applying edge banding. This simple process will give your countertops a polished finish that will enhance the overall look of your kitchen or bathroom. Follow these steps for a flawless result.
Formica countertops are a popular choice for their durability and versatility. However, when it comes to achieving a professional look, applying edge banding is a crucial step. Edge banding not only enhances the aesthetic appeal of your countertop but also provides protection against moisture and impact.
In this section, we will explore the process of selecting the appropriate edge banding material and the techniques for applying and trimming it.
Selecting The Appropriate Edge Banding Material
When selecting the edge banding material for your Formica countertop, consider the following options:
- PVC edge banding: This type of edge banding is cost-effective and available in a wide range of colors and finishes.
- Wood veneer edge banding: If you prefer a more natural look, wood veneer edge banding is a great choice. It offers a variety of wood species and can be stained or painted to match your countertop.
- Melamine edge banding: Melamine edge banding is known for its durability and resistance to moisture and abrasion. It is available in a range of colors and patterns.
Remember to choose an edge banding material that complements the color and design of your Formica countertop for a seamless and professional finish.
Techniques For Applying And Trimming Edge Banding
Applying edge banding requires precision and attention to detail. Follow these techniques to achieve a flawless result:
- Prepare the surface: Before applying the edge banding, ensure that the countertop edge is clean, dry, and free of any dust or debris. This will ensure proper adhesion.
- Apply the adhesive: Depending on the type of edge banding material, you may need to apply a specific adhesive. Follow the manufacturer’s instructions to apply the adhesive evenly along the edge of the countertop.
- Attach the edge banding: Carefully align the edge banding with the countertop edge, starting from one end and applying pressure to ensure a secure bond. Use a roller or block to smooth out any air bubbles or wrinkles.
- Trim the excess: Once the edge banding is firmly in place, use a trimmer or sharp utility knife to trim off the excess material. Take your time and make sure the cut is clean and even.
- Finishing touches: After trimming, use a file or sandpaper to smooth the edge of the banding for a polished look. You can also use a heat gun to activate the adhesive and ensure a stronger bond.
By following these techniques, you can achieve a professional and seamless edge banding for your Formica countertop. Remember to take your time and be meticulous in each step for the best results.
Removing Dust And Debris
To cut Formica countertops effectively, start by removing dust and debris from the surface for smooth and accurate cuts. Ensure a clean working area for precise measurements and a seamless installation process.
After cutting Formica countertops, it’s essential to remove any dust and debris to ensure a clean and smooth surface. Follow these steps to effectively eliminate the mess:
- Vacuuming or sweeping away excess sawdust:
To get rid of the larger sawdust particles, use a vacuum cleaner with a brush attachment or sweep the countertop surface with a broom. This will prevent the dust from settling back onto the Formica.
- Wiping down the surface with a damp cloth:
Next, dampen a cloth with water and gently wipe the entire countertop surface. Ensure that you remove any remaining particles and debris from the cuts.
- Inspecting for leftover dust or debris:
Carefully examine the countertop for any missed debris or dust. Pay close attention to the edges and corners, as these are common areas for residue accumulation.
- Repeat the cleaning process if necessary:
If you locate any lingering dust or debris, repeat the vacuuming or sweeping step followed by wiping the surface with a damp cloth. This will guarantee a thorough clean and prepare the countertop for further work.
By removing dust and debris after cutting Formica countertops, you’ll achieve a pristine surface ready for installation or any additional finishing touches.
Proper Care And Maintenance Tips
Learn how to cut Formica countertops with these proper care and maintenance tips. Follow these guidelines for a flawless cutting process and ensure the longevity of your countertops.
To ensure the longevity and pristine appearance of your Formica countertops, it is essential to follow proper care and maintenance practices. By implementing these tips, you can keep your countertops looking brand new for years to come.
Using Non-Abrasive Cleaners To Avoid Scratching
- It is crucial to select non-abrasive cleaners when cleaning your Formica countertops. Abrasive cleaners can leave scratches and damage the surface.
- Consider using mild dish soap and warm water for daily cleaning. This gentle solution will effectively remove dirt and grime without causing any harm.
- For tougher stains or spills, you can use a mixture of baking soda and water. Apply the paste to the stain and gently scrub with a soft cloth or sponge. Rinse thoroughly afterward.
- Avoid using scouring pads, steel wool, or abrasive cleaning tools that can scratch the surface. Opt for soft, non-abrasive materials instead.
Taking Precautions To Prevent Heat Damage
- Formica countertops can withstand moderate heat, but it is crucial to take precautions to prevent heat damage.
- Always use trivets or hot pads when placing hot pots, pans, or dishes directly on the countertop. The direct contact with high temperatures can cause discoloration or even melt the Formica surface.
- If you need to place a hot item on the countertop, use a thick, heat-resistant mat or a wooden cutting board as a protective barrier.
- Avoid placing hot appliances such as coffee makers or toasters directly on the countertop. Use a heat-resistant pad or move them to a designated area away from the surface.
- Regularly check for any signs of heat damage, such as bubbling or discoloration. If you notice any issues, contact a professional for repair or replacement.
By following these proper care and maintenance tips, you can ensure that your Formica countertops remain in excellent condition for years to come. Regular cleaning with non-abrasive materials and taking precautions to prevent heat damage will help preserve their beauty and functionality.
Frequently Asked Questions Of How To Cut Formica Countertops
What Is The Best Tool To Cut Formica With?
The best tool for cutting Formica is a laminate trimmer or a circular saw with a carbide-tipped blade.
How Do You Cut Formica Without Chipping?
To cut Formica without chipping, use a high-quality circular saw with a fine-toothed blade designed for laminate materials.
What Is The Best Saw Blade To Cut Formica Countertops?
The best saw blade for cutting Formica countertops is a fine-toothed carbide blade. It provides precise and clean cuts.
How Do You Cut A Laminate Benchtop Without Chipping?
To cut a laminate benchtop without chipping, follow these steps:
1. Use a sharp utility knife or laminate scorer to score the line you wish to cut.
2. Apply masking tape along the cutting line to reduce chipping.
3. Use a jigsaw with a fine-toothed blade for a clean cut.
4. Move the jigsaw slowly and smoothly along the scored line to avoid chipping the laminate.
Should I Reverse My Circular Saw Blade To Cut Formica?
No — flip the material instead. A circular saw blade cuts upward through the material, so place the decorative side face down so any chipping happens on the hidden underside, not the visible face.
Can You Cut A Hole In An Already-Installed Formica Countertop For A Range Or Sink?
Yes. Trace the cutout with the appliance’s template, drill starter holes at each interior corner to prevent stress cracks, support the cutout piece from underneath, and cut just inside the line with a jigsaw.
Conclusion
Cutting Formica countertops doesn’t have to be a daunting task. With the right tools, preparation, and method, you can achieve professional-looking results. Remember to measure twice and cut once to ensure accuracy. Take your time and be patient when working with the material, as rushing can lead to mistakes and uneven edges.
Safety is paramount, so always wear protective gear and use caution when operating power tools. Don’t forget to support the countertop properly and use a guide to ensure straight cuts. Whether you’re installing a new countertop or making modifications, following these tips and techniques will help you achieve a precise and clean cut.
So roll up your sleeves, gather your tools, and tackle your Formica countertop project with confidence. Happy cutting!