How to Cut Plywood With a Jigsaw Without Splintering: Expert Techniques for Clean Cuts
To cut plywood with a jigsaw without splintering, use a fine-toothed blade and apply masking tape over the cut line to prevent tear-out. Here is a concise guide to help you achieve clean cuts without splintering.
Precision and accuracy are essential when cutting plywood with a jigsaw. However, the blade’s aggressive teeth can cause the wood to splinter and create a rough edge. To avoid this, make sure to use a fine-toothed blade specifically designed for clean cuts.
Applying masking tape over the cut line will also provide support and protection from tear-out. By following these methods, you can ensure a smooth and splinter-free cut when using a jigsaw on plywood. Read on to learn more about the techniques and steps involved in achieving clean cuts without splintering.
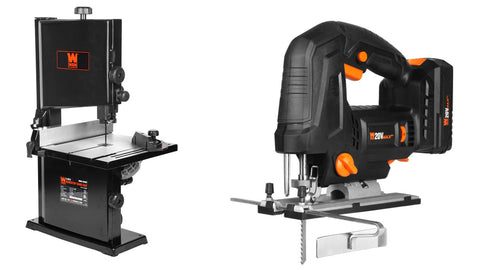
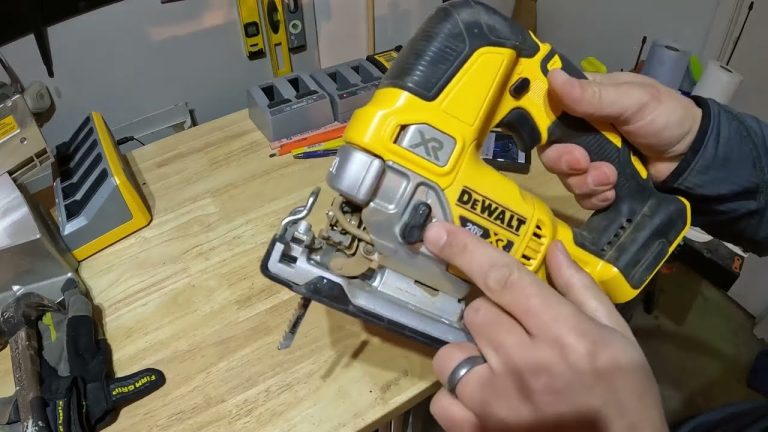
Selecting The Right Jigsaw Blade For Clean Cuts
Learn how to achieve clean cuts when cutting plywood with a jigsaw by selecting the right jigsaw blade. Find out the tips and tricks to prevent splintering and ensure precise results in your woodworking projects.
When it comes to cutting plywood with a jigsaw, selecting the right blade is crucial for achieving clean and smooth cuts. The type of blade you choose will determine the quality of your cuts and the overall finish of your project.
Here are the different types of jigsaw blades available:
- T-shank Blades: These blades have a T-shaped shank that easily fits into the jigsaw’s holder. They are the most common type of blade and are suitable for most cutting tasks, including plywood. T-shank blades come in various tooth configurations, such as fine, medium, and coarse, allowing you to choose the right one based on the thickness of the plywood and the desired finish.
- U-shank Blades: U-shank blades have a U-shaped shank that requires a blade clamp to hold them in place. Although they are less common than T-shank blades, they are compatible with certain jigsaw models. U-shank blades also come in different tooth configurations, offering versatility for cutting plywood.
- Scroll Blades: These blades have fine teeth and are specifically designed for intricate and curved cuts. While they may not be the best choice for straight cuts in plywood, they are ideal for detailed work and cutting curves.
- Downcut Blades: Also known as reverse-cut blades, downcut blades pull material down toward the jigsaw’s base, resulting in minimal splintering. They are excellent for cutting plywood that has a delicate top surface that tends to splinter easily.
- Progressive-Tooth Blades: These blades have varying tooth sizes along their length, allowing for fast and smooth cuts. With progressive-tooth blades, you can quickly rough-cut plywood, reducing the risk of splintering.
Now that you know the different types of jigsaw blades available, let’s discuss how to choose the appropriate blade for cutting plywood:
- Consider the Tooth Count: The number of teeth on the blade affects cutting speed and finish quality. A higher tooth count blade will provide a smoother cut, whereas a lower tooth count blade will cut faster but leave a slightly rougher edge. For plywood, a blade with more teeth is recommended to minimize splintering.
- Blade Material: Jigsaw blades are made from different materials, such as high-speed steel (HSS), high carbon steel (HCS), bimetal, and carbide-tipped. Carbide-tipped blades are known for their durability and ability to resist wear, making them ideal for cutting plywood.
- Blade Length: The length of the blade should be chosen based on the thickness of the plywood you are cutting. Ensure that the blade is long enough to penetrate the entire thickness without causing damage or splintering.
Remember these features while selecting a jigsaw blade for clean cuts in plywood. The right blade choice will not only save you time and effort but also ensure that your cuts are precise and splinter-free. Happy cutting!

Preparing The Plywood For Cutting
Learn how to prepare plywood for cutting with a jigsaw without splintering. Follow these simple steps to ensure clean and precise cuts every time, without any damage to the plywood edges.
Cleaning The Plywood Surface
- Before cutting plywood with a jigsaw, it is essential to clean the surface properly. A clean surface reduces the risk of splintering and ensures a smoother cut.
- Use a clean, lint-free cloth or a damp sponge to wipe away any dirt, dust, or debris from the plywood surface. This step helps in achieving a clean, precise cut without any obstructions.
Marking The Cutting Line Properly
Accurately marking the cutting line plays a crucial role in cutting plywood without splintering. Here’s how to do it:
- Measure and mark the desired dimensions on the plywood using a tape measure and a pencil.
- Use a straightedge or a guide to ensure a straight cutting line. Place the straightedge along the marked line, securing it with clamps or weights if necessary.
- Going slow and steady, run the pencil along the straightedge, applying enough pressure to leave a visible mark on the plywood. Double-check the line to ensure accuracy.
Securing The Plywood To Prevent Movement
To prevent the plywood from moving during the cutting process, it is essential to secure it properly. Here are some effective techniques:
- Place the plywood on a stable work surface, ensuring it is fully supported. A workbench or sawhorses can provide a sturdy surface.
- Using clamps, secure the plywood to the work surface. Position the clamps strategically along the edges, ensuring a tight grip without interfering with the cutting line.
- If clamps are not available, weights can be used to hold down the plywood. Secure heavy objects like bricks or sandbags on the corners and edges to prevent movement.
Remember, following these steps will help you achieve cleaner and more precise cuts without splintering the plywood. Taking the time to clean the surface, mark the cutting line accurately, and secure the plywood will result in a successful jigsaw cutting experience.
So, let’s get started with your next woodworking project!

Techniques To Minimize Splintering
Learn how to cut plywood with a jigsaw without splintering using effective techniques that minimize damage. Achieve clean and smooth cuts by following these steps to ensure a flawless finish.
Cutting plywood with a jigsaw can be a daunting task, especially when you want to avoid splintering and achieve clean, precise cuts. Luckily, there are techniques you can employ to minimize splintering and ensure a successful result. Here are some strategies to consider:
Slow And Steady Cutting:
- Take your time: Cutting too quickly can cause the jigsaw blade to grab the wood, leading to splintering. To prevent this, maintain a slow and steady cutting speed.
- Use the appropriate blade: Opt for a fine-toothed blade specifically designed for plywood. This type of blade tends to produce cleaner cuts with reduced splintering.
- Allow the blade to do the cutting: Avoid applying excessive downward pressure on the jigsaw as it can lead to more splintering. Instead, let the blade do the work by guiding the jigsaw along the intended cutting line.
Using A Zero-Clearance Insert:
- Attach a zero-clearance insert: A zero-clearance insert is a thin strip of material that fits snugly around the jigsaw blade, providing support to the wood fibers and minimizing splintering. Install one on your jigsaw for improved results.
- Create your own zero-clearance insert: If you don’t have a commercial zero-clearance insert, you can make one by cutting a piece of plywood or hardboard to fit around the blade. This DIY approach can be just as effective in reducing splintering.
Applying Masking Tape To The Cutting Line:
- Prepare the plywood: Prior to cutting, apply masking tape along the intended cutting line on the surface of the plywood. This helps to keep the fibers intact and minimizes the chances of splintering during the cutting process.
- Ensure secure adhesion: Make sure the masking tape adheres firmly to the plywood to provide better protection against splintering.
- Cut through the tape: Use the jigsaw to cut through both the masking tape and the plywood simultaneously. This technique reduces the likelihood of splintering, resulting in cleaner cuts.
By incorporating these techniques, you can significantly minimize splintering when cutting plywood with a jigsaw. Remember to cut slowly and steadily, use a zero-clearance insert, and apply masking tape to the cutting line for optimal results.
Adjusting The Jigsaw Settings For Precise Cuts
Learn how to cut plywood with a jigsaw without splintering by adjusting the settings of your tool for more precise cuts. Mastering this technique will help you achieve smoother and cleaner results in your woodworking projects.
When it comes to cutting plywood with a jigsaw, getting precise cuts is crucial to achieving professional and clean results. By adjusting the settings on your jigsaw, you can minimize splintering and ensure accuracy. Here are some tips to help you optimize your jigsaw settings for precise cuts:
Optimal Speed Settings For Different Types Of Plywood:
- Plywood with a thinner veneer requires a slower speed setting to avoid chipping or splintering. Set your jigsaw to a lower speed to achieve cleaner cuts on thin plywood.
- Thicker plywood can tolerate higher speed settings. Increase the speed on your jigsaw when cutting thicker plywood for efficient and smoother cuts.
- Experiment with different speed settings to find the optimum speed for the specific plywood you’re working with. Remember that different brands and grades of plywood may require slight adjustments.
Adjusting The Orbital Action For Better Control:
- Orbital action refers to the blade’s movement in an elliptical or orbital motion while cutting. This feature helps to clear away debris and reduces friction during the cutting process.
- If you’re experiencing excessive splintering, try reducing the orbital action on your jigsaw. Lower orbital settings create smaller elliptical motions, minimizing the chance of splintering.
- When cutting thicker plywood, increasing the orbital action can help clear debris away more efficiently. Select a higher orbital setting on your jigsaw to improve control and reduce the risk of splintering.
Using A Guide To Ensure Straight Cuts:
- To maintain straight and accurate cuts, consider using a guide or straight edge. This can be especially helpful when cutting long or detailed lines on plywood.
- Attach a straight edge or clamps to the plywood to serve as a guide for your jigsaw. This will help keep the blade on track and prevent unwanted veering or wandering.
- Take your time and follow the guide closely, ensuring that each cut is precise and aligned. This extra step will significantly reduce the chance of splintering and ensure clean cuts every time.
Remember, adjusting the speed settings, orbital action, and using a guide are essential steps in achieving precise cuts with a jigsaw. Take the time to experiment and find the optimal settings for the specific plywood you are working with. With these adjustments, you’ll be able to minimize splintering and achieve professional-looking results in your woodworking projects.
Cutting Techniques For Different Shapes And Angles
Discover the best cutting techniques for plywood shapes and angles to prevent splintering. Learn how to use a jigsaw effectively and achieve clean, precise cuts without any damage.
Cutting plywood with a jigsaw can be a tricky task, especially if you want to avoid splintering. But with the right techniques, you can achieve clean, precise cuts on different shapes and angles. In this section, we will explore the cutting techniques for straight cuts, curved cuts, and bevel cuts.
Let’s dive in!
Straight Cuts:
- When making straight cuts with a jigsaw, it’s essential to use the appropriate blade. Opt for a fine-toothed blade with at least 10 teeth per inch, which will minimize splintering.
- To ensure a straight cut, use a straightedge or a guide. Clamp it securely to the plywood, aligning it with your desired cut line.
- Start the jigsaw and slowly guide it along the straightedge, applying gentle pressure. Let the blade do the cutting and avoid forcing the jigsaw forward.
- If the plywood is too large to cut with a single pass, make multiple shallow cuts, gradually deepening them until you reach the desired depth.
Curved Cuts:
- For curved cuts, use a narrow blade with fine teeth for greater precision. Blades with 14-20 teeth per inch work well for most plywood thicknesses.
- Before beginning the cut, mark the desired curve on the plywood using a pencil or a template. You can create templates by tracing the curve onto a piece of cardboard or hardboard.
- Start the jigsaw and carefully guide it along the marked curve, moving at a steady pace. Allow the blade to do the cutting and avoid forcing the jigsaw through the plywood.
- To make tight curves, drill a small hole at the edge of the curve before starting the jigsaw. Insert the jigsaw blade into the hole and proceed with the cut.
Bevel Cuts:
- Bevel cuts involve cutting plywood at an angle, which adds an extra level of complexity. Use a bevel gauge or a protractor to measure and mark the desired angle accurately.
- Select a blade suitable for bevel cuts, such as a scroll-cutting blade or a specialized bevel-cutting blade.
- Secure the plywood firmly, ensuring it won’t move during the cut. Place it at the appropriate angle on your work surface or use clamps to hold it in place.
- Start the jigsaw and carefully guide it along the marked bevel line, paying close attention to both the angle and the curve if applicable. Take your time and maintain a steady hand for a clean, accurate cut.
Remember, practice makes perfect when it comes to cutting plywood with a jigsaw. Don’t be discouraged if your initial attempts aren’t flawless. With time and experience, you will become more proficient in handling different shapes and angles. Happy cutting!
Sanding And Finishing The Cut Edges
To avoid splintering when cutting plywood with a jigsaw, it’s essential to sand and finish the cut edges. This ensures a smooth and polished finish, making the edges visually appealing and protecting against roughness or splintering. By following this step, you can achieve clean and professional-looking results in your woodworking projects.
When it comes to cutting plywood with a jigsaw, one of the biggest challenges is avoiding splintering on the cut edges. However, with the right techniques, you can achieve smooth and clean edges on your plywood cuts. In this section, we will discuss sanding and finishing techniques to ensure that your plywood cuts look professional and polished.
Sanding Techniques For Smooth Edges:
- Start by using a medium-grit sandpaper (around 120 to 150 grit) to remove any rough or jagged edges on the plywood.
- Hold the sandpaper at a slight angle and gently move it back and forth along the cut edge. This will help to smooth out any imperfections.
- Gradually switch to a finer-grit sandpaper (around 220 grit) to further refine the surface and achieve a smoother finish.
- Remember to maintain consistent pressure and keep the sandpaper moving to avoid creating uneven spots.
Applying Edge Banding For A Polished Look:
- Edge banding is a great way to cover the exposed edges of plywood and give them a finished appearance.
- Measure the length of the cut edges and cut the edge banding material accordingly.
- Apply a thin layer of adhesive to both the plywood edge and the backside of the edge banding.
- Carefully align the edge banding with the plywood edge and press firmly to ensure good adhesion.
- Use a roller or a block of wood to apply even pressure and remove any air bubbles or wrinkles.
Finishing Options For Plywood Cuts:
- Paint: Apply a primer to the plywood edges before painting to enhance adhesion. Use a high-quality paint and apply multiple thin coats for a smooth and even finish.
- Stain: If you prefer a more natural look, you can use wood stain to enhance the beauty of the plywood. Apply the stain with a brush or rag, following the manufacturer’s instructions.
- Varnish or sealant: To protect the plywood edges and add a layer of durability, consider applying a clear varnish or sealant. Ensure that the plywood is clean and dry before applying the product.
By employing these sanding and finishing techniques, you can achieve clean and professional-looking edges on your plywood cuts. Whether you’re working on furniture, cabinets, or any other DIY project, paying attention to the details will set your work apart and give it that polished touch.
Safety Measures To Follow While Using A Jigsaw
To cut plywood with a jigsaw without splintering, it is important to follow safety measures. Ensure proper blade selection, use a cutting guide, secure the material firmly, wear protective gear, maintain a steady hand, and use controlled speed for clean cuts and reduced splintering.
When it comes to using a jigsaw to cut plywood, it is important to prioritize your safety. By following proper safety measures, you can ensure a successful and accident-free woodworking experience. Let’s explore the essential precautions to take:
Wearing Protective Gear:
- Safety goggles: Protect your eyes from flying debris and wood chips by wearing safety goggles.
- Ear protection: The loud noise produced by the jigsaw can be harmful to your hearing, so wearing ear protection is crucial.
- Dust mask: Prevent inhaling sawdust by using a dust mask, especially if you are working in an enclosed space or for an extended period.
Securing The Workpiece Properly:
- Clamping the plywood: Securely clamp the plywood to a workbench or sawhorses to prevent it from moving while cutting.
- Use workpiece supports: Use additional supports, such as sawhorses or a roller stand, to provide stability and prevent the plywood from sagging or splitting during the cutting process.
Using A Dust Extractor For A Clean Work Environment:
- Connect a dust extractor: Attach a dust extractor to your jigsaw to effectively remove sawdust and keep your workspace clean.
- Position the dust extractor hose properly: Make sure the hose is positioned near the cutting area to capture the maximum amount of sawdust.
- Regularly empty the dust extractor: Empty the dust extractor as needed to maintain optimal suction and prevent clogging.
By following these safety measures, you can protect yourself and create a safer work environment while using a jigsaw to cut plywood. Remember, safety should always be your top priority.
Maintaining The Jigsaw For Efficient Performance
Learn the best techniques for cutting plywood with a jigsaw without splintering to ensure efficient performance. Discover helpful tips and tricks to achieve clean and smooth cuts with your jigsaw, minimizing splintering and maximizing precision.
To ensure efficient and precise cutting of plywood with a jigsaw, it’s essential to maintain the tool properly. By following these maintenance tips, you can keep your jigsaw in top condition for the best results:
Cleaning The Jigsaw After Use:
- Remove any sawdust and debris from the jigsaw using a soft brush or compressed air.
- Wipe down the exterior surfaces of the jigsaw with a clean, dry cloth to remove any remaining dust or dirt.
- Pay particular attention to the blade area, making sure to clean out any lodged sawdust or residue that may affect performance.
Lubricating The Moving Parts:
- Apply a small amount of lubricating oil to the moving parts of the jigsaw, including the blade guide and the blade mounting mechanism.
- Make sure to use a lubricant that is specifically designed for power tools.
- Regular lubrication will help to reduce friction, extend the life of the moving parts, and ensure smooth operation.
Checking And Replacing Worn-Out Parts:
- Regularly inspect the jigsaw for any signs of wear or damage, including the blade, blade clamp, and shoe.
- If the blade is dull or worn out, replace it with a new one to ensure clean and precise cuts.
- Check the blade clamp for tightness and replace it if necessary to prevent any blade slippage during operation.
- Examine the shoe for any signs of wear or deformation, and replace it if needed to maintain stability during cutting.
By consistently following these maintenance practices, you can keep your jigsaw in optimal condition, ensuring efficient and splinter-free plywood cutting. Remember, a well-maintained tool will not only prolong its lifespan but also contribute to the quality of your woodworking projects.

Frequently Asked Questions For How To Cut Plywood With A Jigsaw Without Splintering
How Do You Jigsaw Plywood Without Splintering?
To jigsaw plywood without splintering, follow these tips:
1. Choose a fine-toothed blade for smoother cuts.
2. Apply masking tape along the cut line to minimize splintering.
3. Cut slowly and steadily, letting the blade do the work.
4. Support the plywood with a sacrificial backing to reduce splintering.
How Do You Keep Thin Plywood From Splintering When Cutting?
To prevent splintering when cutting thin plywood:
1. Use a sharp blade to ensure clean and smooth cuts.
2. Apply masking tape on both sides of the plywood along the cutting line.
3. Cut with slow and steady pressure to minimize splintering.
4. Consider using a fine-toothed blade or a specialized plywood-cutting blade for better results.
Can I Use A Jigsaw To Cut Plywood?
Yes, you can use a jigsaw to cut plywood. It is a suitable tool for precision cutting.
What Is The Best Jigsaw Blade For Clean Cut Plywood?
The best jigsaw blade for clean cut plywood is one with fine teeth and a high TPI (tooth per inch) count.
Conclusion
To conclude, cutting plywood with a jigsaw without splintering can be achieved by following a few key techniques. By selecting the correct blade with fine teeth and using masking tape to minimize splintering, you can greatly improve the quality of your cuts.
Taking the time to mark your cut line precisely and cutting at a slow and steady pace will also help in achieving cleaner edges. Ensuring proper support for the plywood and using a zero-clearance insert in your jigsaw will further reduce splintering and tear-out.
Finally, sanding the edges of the cut plywood can help to smooth out any remaining roughness. By implementing these strategies, you can confidently cut plywood with a jigsaw and achieve professional-looking results without the frustration of splintering. So, go ahead, grab your jigsaw, and tackle your next plywood project with ease!